How To Set Up A Red-Eared Slider Tank? [Start to Finish]
This post was created with help from AI tools and carefully reviewed by a human (Muntaseer Rahman). For more on how we use AI on this site, check out our Editorial Policy.
Picture this: You excitedly bring home your new red-eared slider, place it in a basic tank, and… it stares at you, unimpressed.
What gives?
Well, these little guys are more high-maintenance than they look!
From the perfect water temperature to the ultimate basking setup, there’s a lot to consider.
But don’t panic—this guide will show you exactly how to create a tank setup your turtle will love (and actually thrive in).

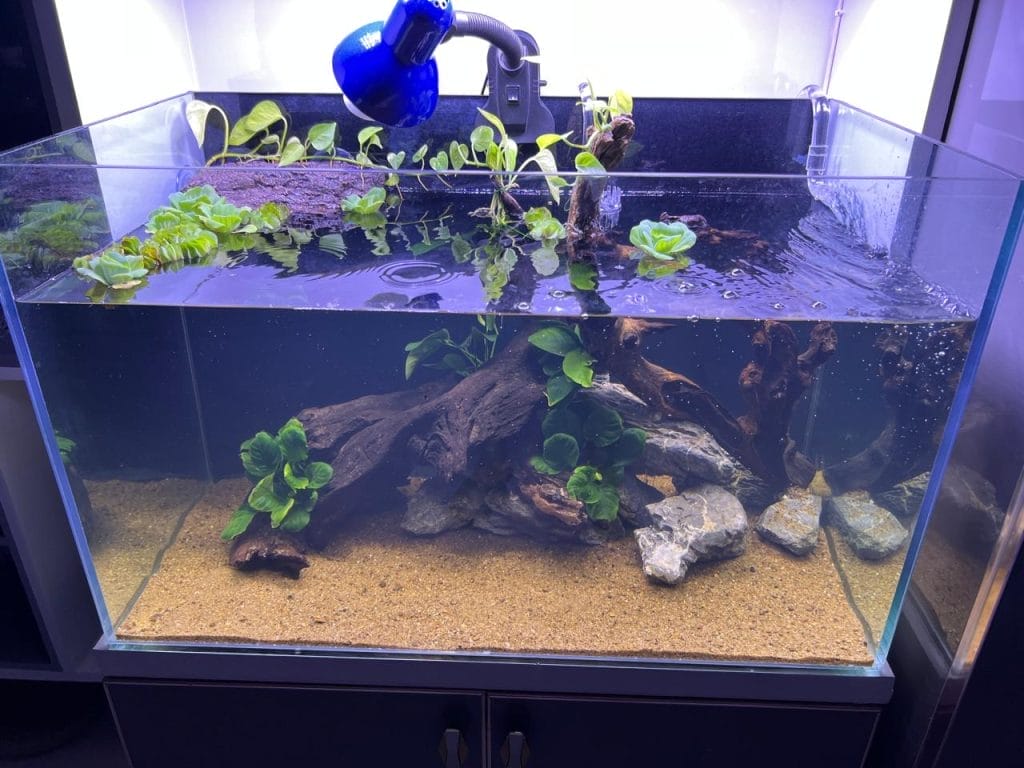
Step 1: Choosing the Right Tank For Red Eared Sliders
Your red-eared slider is going to grow. A lot. That cute little hatchling? It’ll soon be the size of a dinner plate.
And here’s the thing most new turtle owners don’t realize: buying too small now means buying again in 6-12 months. Ask me how I know.
How Big Should the Tank Be?
The bigger, the better! But here’s a realistic guide based on actual turtle growth:
| Turtle Size | Minimum Tank Size | Ideal Tank Size | Dimensions (L x W x H) |
|---|---|---|---|
| Hatchling (under 2 inches) | 20 gallons | 40 gallons | 24″ x 12″ x 16″ |
| Juvenile (2-4 inches) | 40 gallons | 55 gallons | 36″ x 18″ x 20″ |
| Young Adult (4-6 inches) | 55 gallons | 75 gallons | 48″ x 18″ x 21″ |
| Adult (6-8 inches) | 75 gallons | 90-120 gallons | 48″ x 24″ x 24″ |
| Large Adult (8-12 inches) | 100 gallons | 125+ gallons | 72″ x 18″ x 24″ |
The golden rule: 10 gallons of water per inch of shell length. But honestly? Go bigger if you can.
Why Tank Dimensions Matter More Than Gallons
Here’s what most guides won’t tell you: a 40-gallon “breeder” tank (36″ x 18″ x 16″) is WAY better than a tall 40-gallon tank (20″ x 20″ x 24″).
Why? Because red-eared sliders are swimmers, not divers. They need:
- Length over height – They swim horizontally, not up and down
- Wide floor space – More room to explore and exercise
- Shallow enough to reach the surface easily – Even strong swimmers get tired
I made this mistake with my first turtle. Got a tall, narrow tank because it “looked cool.” My slider spent most of his time sitting at the bottom looking miserable. Switched to a longer tank, and suddenly he was zooming around like a mini submarine.
Glass vs. Plastic: The Real Comparison
| Feature | Glass Aquarium | Plastic Stock Tank | Acrylic Tank |
|---|---|---|---|
| Price | $$-$$$ | $ | $$$-$$$$ |
| Durability | Very durable, won’t scratch easily | Durable but scratches easily | Scratch-prone but lighter |
| Weight | Very heavy when filled | Lighter than glass | Lightest option |
| Clarity | Crystal clear forever | Can become cloudy | Clear but scratches show |
| Best For | Living room displays | Garage/basement setups | Custom builds |
My recommendation: If it’s going in your living space, get glass. If it’s in a basement or garage, save money with a plastic stock tank.
Budget Breakdown: What You’ll Actually Spend
Let’s be real about costs:
Budget Setup (40-gallon for juvenile):
- 40-gallon tank: $50-80
- Basic stand: $60-100
- Total: $110-180
Mid-Range Setup (75-gallon for adult):
- 75-gallon tank: $100-200
- Sturdy stand: $150-250
- Total: $250-450
Premium Setup (120-gallon for large adult):
- 120-gallon tank: $300-600
- Heavy-duty stand: $300-500
- Total: $600-1,100
Don’t forget: you still need filters, lights, heaters, and decor on top of this!
The Upgrade Trap (And How to Avoid It)
Here’s the truth bomb: Most people buy a small tank for their baby turtle, then upgrade 2-3 times as it grows.
The math:
- Starter 20-gallon: $40
- Upgrade to 40-gallon: $80
- Final upgrade to 75-gallon: $150
- Total spent: $270
Or you could just buy the 75-gallon from day one for $150 and skip the hassle.
I learned this the expensive way. Upgraded three times in two years. Don’t be like past me.
Tank Shape: Long Beats Tall Every Time
Look for tanks that are:
- At least 4 feet long for adults (the longer, the better)
- 18-24 inches wide minimum
- Not super tall – 20-24 inches height is plenty
Think “swimming pool” not “diving well.”
Future-Proofing Your Setup
Buy for the turtle you’ll have in 2 years, not the turtle you have today.
Red-eared sliders can live 30+ years. That hatchling will be full-grown in 3-5 years. If you’re committed to keeping your turtle, invest in the right-sized tank now.
Your wallet (and your turtle) will thank you later.
Common Tank Size Mistakes to Avoid
- Buying a “starter tank” – There’s no such thing. Just buy the adult size.
- Prioritizing height over length – Turtles don’t climb invisible walls.
- Thinking “they’ll adapt” – Small tanks = stressed, unhealthy turtles.
- Ignoring stand quality – A 75-gallon tank weighs 850+ pounds when filled. Cheap stands collapse.
Tank Stand Requirements
This is serious: a filled 75-gallon tank weighs about 850 pounds. A 120-gallon? Over 1,200 pounds.
Your stand needs to:
- Be rated for MORE than your tank’s full weight
- Sit on a level floor (check with a level tool)
- Have a solid, flat top with no gaps
- Be made of water-resistant material
I once used a regular bookshelf. It bowed within a week. Nearly had a disaster. Don’t cheap out on the stand.
Quick Decision Guide
If your turtle is currently:
- Under 3 inches: Get at least a 40-gallon (plan to upgrade to 75-gallon in a year)
- 3-6 inches: Get a 75-gallon minimum
- Over 6 inches: Go for 100+ gallons, seriously
If you’re buying for the long term:
Just get the 75-120 gallon now and be done with it. Your future self will high-five you.
Step 2: Picking the Best Location For Red Eared Slider Tank
Your turtle’s home should be in a safe, stable spot. Pick the wrong place, and you’ll deal with constant water spills, temperature swings, and algae outbreaks.
Avoid These Bad Spots
- Next to a window – Direct sunlight will overheat the tank fast.
- Near vents or drafts – Sudden temperature changes can stress your turtle.
- On a wobbly surface – A full tank is heavy. Make sure it’s on a solid stand.
- Hard-to-reach corners – You’ll need access for cleaning and maintenance.
Best Locations
- A quiet, low-traffic area – Turtles like to watch but don’t want constant chaos.
- Near an outlet – You’ll need power for the filter, heater, and lights.
- A space with room to grow – Baby turtles get big fast!
Personal Experience: My Rookie Mistake
I once set up my turtle’s tank right by a sunny window. It looked great… until I came home to a turtle paddling in a sauna. Lesson learned—shade is your friend!
Pick a smart spot now, and you’ll avoid a lot of headaches later.
This Hilarious Turtle Book Might Know Your Pet Better Than You Do

Let’s be real—most turtle care guides feel like reading a textbook written by a sleep-deprived zookeeper.
This one’s not that.
Told from the snarky point of view of a grumpy, judgmental turtle, 21 Turtle Truths You’ll Never Read in a Care Guide is packed with sarcasm, sass, and surprisingly useful insights.
And hey—you don’t have to commit to the whole thing just yet.
Grab 2 free truths from the ebook and get a taste of what your turtle really thinks about your setup, your food choices, and that weird plastic palm tree.
It’s funny, it’s honest, and if you’ve ever owned a turtle who glares at you like you’re the problem—you’ll feel seen.
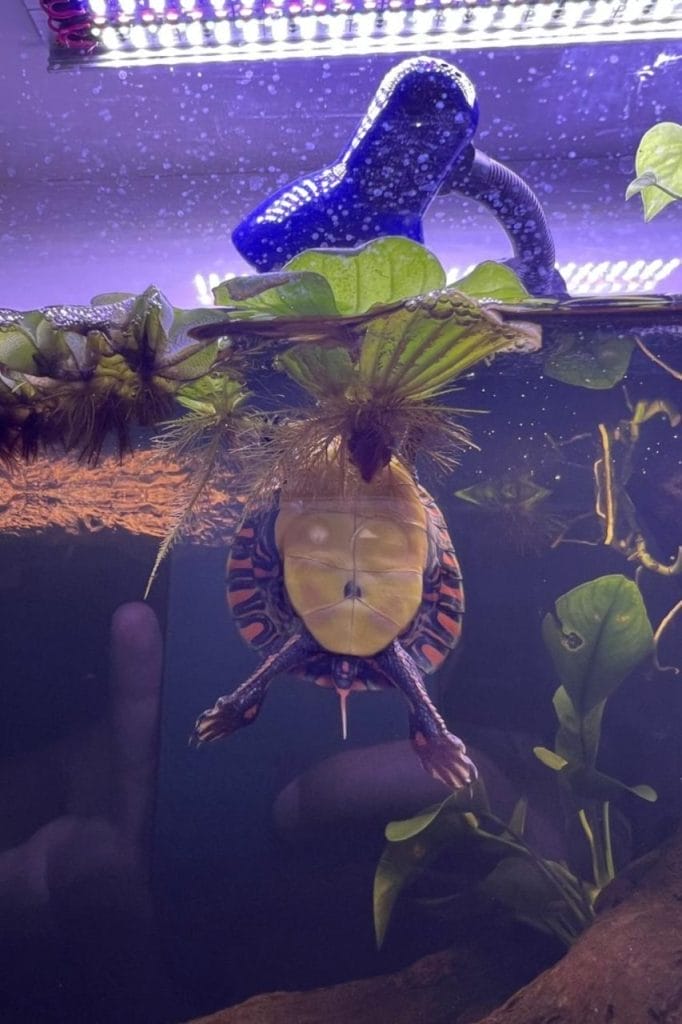
Step 3: Setting Up the Water Area for red eared sliders
Red-eared sliders love to swim. A proper water setup keeps them happy and healthy. Let’s make sure your turtle’s new home is clean, deep, and safe.
How Much Water Do They Need?
- At least twice the length of their shell in depth
- Enough space to swim freely without touching the bottom
- More water = Easier to maintain
I once tried a shallow setup for my turtle, and he just sat there, unimpressed. Lesson learned—deeper is better!
Use the Right Water
Tap water contains chlorine, which isn’t great for turtles. Use:
- Dechlorinated water – Let it sit for 24 hours or use a dechlorinator
- Warm, stable temperature – Around 75-80°F

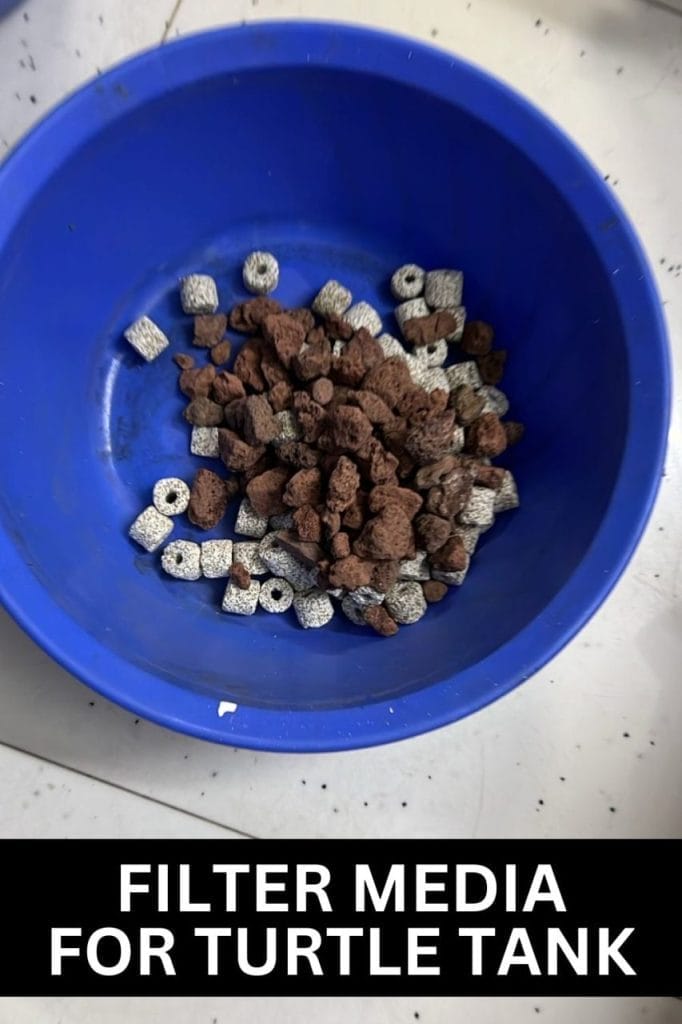
Filtration: Because Turtles Are Messy
Turtles poop. A lot. You need a strong filter to keep the water clean.
- Canister filters – Best for big tanks, super powerful
- Submersible filters – Good for smaller setups but need frequent cleaning
- Hang-on-back filters – Okay for medium tanks but not ideal
I once skipped a filter, thinking I could clean it myself. Bad idea. The water smelled awful within days. Never again.
Struggling to choose the right filter? Our detailed review of the 7 best filters for turtle tanks covers everything you need to know.
Water Flow & Safety
- Make sure the filter flow isn’t too strong (turtles like swimming, not fighting currents)
- Keep the water deep but with easy exits (ramps, rocks, or docks)
- Check water levels daily—evaporation can mess things up fast
Weekly Water Maintenance
- Partial water change (25-50%) every week
- Remove uneaten food daily
- Test the water for ammonia and pH levels (optional but helpful)
A good water setup means a happy, active turtle. Get this step right, and your slider will be zooming around like a tiny aquatic rocket.

Step 4: Creating a Basking Spot red eared sliders
Turtles love to bask. It keeps them warm, dry, and healthy. Without a good basking spot, they can get sick. So, let’s build the perfect one!
Why Do They Need a Basking Spot?
- Helps regulate body temperature
- Prevents shell rot and infections
- Aids digestion after meals
- Boosts their mood (yes, turtles have moods!)
What Makes a Good Basking Spot?
Your turtle’s basking area should be:
✔ Easy to climb – No struggling or flipping over
✔ Sturdy – Won’t sink or tip over
✔ Dry – Fully out of the water
✔ Warm – Heated to 85-90°F
Want to dive deeper into basking? Read our complete guide on turtle basking: everything you need to know.

Basking Dock Options
| Type | Pros | Cons |
|---|---|---|
| Floating Dock | Easy to install, adjustable | May sink with heavy turtles |
| Large Rocks | Natural look, stable | Can be hard to clean |
| DIY Platform | Customizable | Requires effort to build |
I once used a smooth log for my turtle, but she refused to climb it. Turns out, she hated how it wobbled. I switched to a floating dock, and she practically lived on it!
Heating the Basking Spot
A warm basking area is key. You’ll need:
- A heat lamp (keeps it around 85-90°F)
- UVB light (prevents shell disease)
- A thermometer (because guessing is risky)
I learned the hard way that a weak heat lamp doesn’t cut it. My turtle barely basked until I upgraded to a stronger one. Now she stretches out like she’s sunbathing in Hawaii.
Final Tips for placing the basking dock
- Place it where they feel safe (not too exposed)
- Make sure it dries completely between basking sessions
- Check for signs they’re using it (if not, adjust height or temp)
A happy turtle = a happy basking spot. Get it right, and they’ll spend hours soaking up the warmth!

Step 5: Setting Up the Heating and Lighting for red eared slider tank
Red-eared sliders love warmth. Without proper heat and light, they get sick fast. Think of them as little sunbathers who need their daily dose of sunshine—except we provide it artificially.
Why Heating and Lighting Matter
- Keeps them active and happy
- Helps with digestion
- Prevents shell problems
- Supports healthy bone growth
I once skipped a UVB bulb for a few weeks. My turtle got sluggish and his shell looked weird. Lesson learned!
Confused about which basking lights to buy? Check out Turtle Basking Lights 101: The Simple Setup Every Beginner Needs.

Basking Area Setup
Turtles need a dry, warm spot to soak up heat. Here’s what they need:
| Element | Ideal Setup |
|---|---|
| Basking Spot Temp | 85-90°F |
| Basking Bulb Type | Heat lamp or ceramic heater |
| Position | Above the basking area, secured tightly |
Make sure the basking spot is easy to reach. If your turtle struggles to climb, adjust it.
Water Temperature
Sliders are tough, but they hate cold water. Keep it 75-80°F for adults and 78-82°F for babies. A submersible aquarium heater does the trick.
Pro Tip: Buy a heater with a guard. Turtles are curious and might burn themselves!
Temperature mistakes can seriously harm your turtle. Learn about the one temperature mistake that could be harming your pet turtle.
UVB Lighting: The Game Changer
UVB light is non-negotiable. It keeps their bones strong and prevents shell rot. Without it, they develop soft shells and serious health problems.
| Light Type | Why It’s Important |
|---|---|
| UVB Bulb (5.0-10.0 strength) | Helps process calcium |
| UVA Light | Encourages activity and appetite |
Place the UVB bulb 12 inches above the basking area and replace it every 6-12 months (even if it still glows).
Day and Night Cycle
Turtles need a regular day-night cycle. Keep lights on for 10-12 hours a day, then turn them off at night.
Pro Tip: Use a timer! I once forgot to turn off the light for two days—poor guy was probably wondering if the sun exploded.
Final Check
- Heat lamp working? ✅
- UVB bulb in place? ✅
- Water temp stable? ✅
Once everything is set, watch your turtle enjoy his mini beach vacation. They’ll thank you in their own adorable, slow-moving way!

Step 6: Adding Substrate and Decorations to red eared slider tank
This is where you make the tank feel like home! A good setup keeps your turtle happy and makes cleaning easier for you.
But here’s the thing nobody tells beginners: substrate is optional. And sometimes? It’s more trouble than it’s worth.
Substrate: To Use or Not to Use?
The Great Substrate Debate divides turtle owners into two camps: “bare bottom forever” vs. “natural is better.”
Let me break down each option with the ugly truth nobody mentions in product reviews.
Bare Bottom (No Substrate)
| Pros | Cons |
|---|---|
| Easiest to clean – just siphon and wipe | Looks sterile and boring |
| No choking hazards | Turtles may slip more on glass |
| Filter stays cleaner longer | No natural digging behavior |
| Can spot health issues immediately (poop color, etc.) | Can’t grow live plants |
Verdict: Best for beginners, lazy people (me), and anyone who values convenience over aesthetics.
Want to see how other turtle owners handle substrate decisions? Browse 11 creative turtle habitat designs showcasing different approaches.
Large River Rocks (2-3 inches diameter)
| Pros | Cons |
|---|---|
| Natural look, turtles love exploring them | Debris gets trapped between rocks |
| Can’t be swallowed | Heavy to remove for cleaning |
| Good for beneficial bacteria | You’ll need to scrub each rock individually |
| Provides texture and grip | Expensive to fill a large tank |
Maintenance reality: Plan to remove and scrub these every 2-3 weeks. It’s a workout.
Verdict: Great if you want a natural look and don’t mind the extra cleaning.
Sand
| Pros | Cons |
|---|---|
| Looks amazing (like a real riverbed) | Can clog filters fast |
| Turtles can dig and forage naturally | Very hard to clean poop from |
| Soft on their feet | Creates cloudy water if disturbed |
| Plants can root in it | Needs specialty sand (not play sand!) |
What actually happens: Your turtle poops. It settles into the sand. You try to vacuum it. Sand goes everywhere. Water gets cloudy. You regret your choices.
Verdict: Only for experienced keepers who enjoy maintenance challenges.
Aquarium Gravel (AVOID!)
| Why It’s Dangerous |
|---|
| Small enough to swallow |
| Causes impaction (blockage in digestive system) |
| Can get stuck in their throat |
| Turtles will 100% try to eat it |
I started with gravel because it looked pretty. Within two days, I caught my turtle chomping on pieces like they were candy. Immediately switched to bare bottom.
Verdict: Just don’t. Not worth the vet bill.
My Personal Recommendation?
Start with bare bottom. See how you like the maintenance routine. If you want to add substrate later, go with large river rocks.
You can always add rocks. You can’t always undo an intestinal blockage.
Now for the fun part – making your turtle’s home interesting!
Essential Decorations (Not Optional)
1. Basking Platform
This isn’t decor – it’s life support. Your turtle NEEDS a dry spot.
Options:
- Floating docks ($20-40) – Easy, adjustable, but may sink with heavy turtles
- Stacked slate rocks ($15-30) – Natural, stable, customizable
- DIY platforms (Free-$20) – Egg crate + zip ties = budget basking spot
- Magnetic platforms ($30-60) – Stick to tank walls, adjustable height
I’ve tried them all. Floating docks are easiest, but large turtles flip them. Stacked rocks look best and last forever.
2. Hiding Spots
Even social turtles need privacy. Add at least one hiding cave.
- Terracotta pots ($5-10) – Cheap, natural, easy to clean
- Rock caves ($15-40) – Look great, heavy (won’t float)
- PVC pipe sections (Free-$5) – Ugly but functional
- Driftwood arches ($20-50) – Natural, creates multiple hiding spots
Pro tip: Make sure any hide is big enough for your full-grown turtle, not your current baby.
3. Plants (Live vs. Fake)
Plants give your turtle enrichment and improve water quality. But there’s a catch.
Live Plants:
- Best choices: Anubias, Java fern, water lettuce, duckweed
- Benefits: Filters water, turtles can nibble them, looks amazing
- Reality check: Your turtle will probably destroy them
My turtle treated live plants like an all-you-can-eat salad bar. Lasted about 3 days.
Thinking about adding live plants? Read the truth about live plants in turtle tanks before making your decision.
Fake Plants:
- Best choices: Silk plants (not plastic – too sharp)
- Benefits: Never die, easy to clean, safe
- Downside: Don’t help water quality
Compromise: Use hardy live plants like Anubias (attach to rocks, not substrate) and accept they’ll get nibbled.
Optional But Fun Decorations
Floating Logs or Cork Bark ($10-25)
- Turtles love climbing on these
- Provides extra basking spots
- Looks natural
Background Poster ($5-15)
- Hides cords and wall behind tank
- Makes tank look bigger
- Easy way to improve aesthetics
Smooth River Stones ($10-30 for a bag)
- Add visual interest
- Turtles push them around (enrichment!)
- Easy to clean
Ping-Pong Balls (Literally $2)
- Sounds dumb, but turtles love chasing them
- Free entertainment
- Wash them weekly
My turtle is obsessed with his ping-pong ball. He pushes it around for hours. Best $2 I ever spent.
Looking for more creative ideas? Browse our collection of 11 turtle habitat design ideas that will make you rethink space.
Decorations to Avoid (Safety First!)
- Sharp or jagged items – Can scratch shells or cut skin
- Small objects – Choking hazards (anything smaller than their head)
- Painted decorations – Paint can leach toxins into water
- Metal decorations – Can rust and poison the water
- Soft plastic plants – Turtles will eat them and get sick
- Glass decorations – Can break and create sharp edges
Decoration Placement Strategy
Don’t just throw stuff in randomly. Think about flow:
- Back of tank: Taller decorations, hiding spots
- Middle: Open swimming space (this is key!)
- Front: Low decorations so you can see your turtle
- Basking area: Keep it uncluttered and easily accessible
Leave at least 60% of the tank as open swimming space. Turtles need room to zoom.
Real-World Decoration Costs
Minimal Setup:
- DIY basking platform: $10
- One hide: $8
- Fake plant: $5
Total: ~$25
Nice Setup:
- Floating dock: $35
- Two rock hides: $30
- Mix of live and fake plants: $25
- Background poster: $10
- River stones: $15
Total: ~$115
Premium Setup:
- Magnetic platform: $50
- Custom rock arrangement: $60
- Live planted setup: $50
- Driftwood: $40
- Professional background: $25
Total: ~$225
My Golden Rule for Decorations
If it makes cleaning harder, it’s not worth it.
I used to have a heavily decorated tank with tons of little ornaments. Looked cool for about a week. Then I realized I was spending 2 hours cleaning around every little piece.
Now? Bare bottom, one big rock pile for basking, a hide, and a floating log. Takes 15 minutes to clean. My turtle is just as happy.
Keep it simple, keep it functional, and keep it clean. That’s the secret.
For more decoration inspiration, explore our 11 turtle habitat design ideas or learn how to create stunning setups with recycled materials.

Decorations: Functional & Fun
Turtles need more than just water. Here’s what works best:
- Basking Platform – A must-have! Floating docks, stacked rocks, or driftwood work great.
- Plants – Live or fake, they add hiding spots. (Avoid plastic ones with sharp edges.)
- Hides & Caves – Give your turtle a place to chill when they need some alone time.
- Floating Objects – Helps keep them entertained! Try a floating log or a ping-pong ball.

What to Avoid?
- Sharp decorations (can scratch their shells).
- Small, loose items (they will try to eat everything).
- Heavy rocks that aren’t stable (a falling rock = a hurt turtle).
Keep it simple. A cluttered tank is hard to clean. Choose decorations that make your turtle’s life better, not just prettier. Want an easy life? Go bare bottom. Want a natural look? Big rocks and plants are your best bet.

Step 7: Water Maintenance and Filtration for red eared slider tank
Turtles are adorable. But let’s be honest—they are also filthy.
Without proper filtration and water maintenance, your tank will turn into a swamp. And trust me, no one wants a stinky, green soup sitting in their living room.
Why Clean Water Matters
- Dirty water can make your turtle sick (shell rot, respiratory infections, yikes!).
- Smelly tanks attract bugs and algae.
- Clean water means less scrubbing for you.
The Best Type of Filter
Not all filters can handle turtle mess. Get one that’s rated for at least 2-3 times your tank size.
| Filter Type | Pros | Cons |
|---|---|---|
| Canister | Powerful, quiet, and great for big tanks | Pricey and takes time to set up |
| Internal | Easy to install, good for small tanks | Needs frequent cleaning, less powerful |
| Hang-on-Back | Affordable, decent for medium tanks | Can struggle with heavy turtle waste |
If you ask me, canister filters are the way to go. They save time and keep the water crystal clear.
How Often Should You Change the Water?
Turtles poop a lot. Even the best filter won’t catch everything.
Follow this simple schedule:
- Daily – Remove uneaten food and visible waste.
- Weekly – Change 25-50% of the water.
- Monthly – Deep clean the filter and scrub algae.
Quick Tips for Water Quality
- Use a water conditioner to remove chlorine from tap water.
- Check water temperature (should be 75-80°F).
- Test water parameters (pH should be 6.5-7.5, ammonia and nitrites should be zero).
Keeping the water clean might seem like a chore. But trust me, a little effort now saves you from dealing with a swamp monster later.
If your tank already has odor issues, check out 9 gross reasons your turtle tank stinks and how to fix them fast.

Step 8: red eared slider Feeding and Tank Enrichment
Red-eared sliders are fun eaters. They’ll beg for food like tiny, wet puppies. But don’t let those hungry eyes fool you—they need a balanced diet, not whatever you’re eating!
And here’s the kicker: most new turtle owners overfeed. I did it. You’ll probably do it too. But let me help you avoid turning your turtle into a chunky little potato.
What to Feed Your Slider (The Complete Guide)
Turtles are omnivores, but their diet changes dramatically as they age. Baby turtles are basically carnivores. Adult turtles? Mostly vegetarians.
| Age | Protein (Pellets, Insects, Fish) | Vegetables (Leafy Greens, Aquatic Plants) | Feeding Frequency |
|---|---|---|---|
| Hatchlings (0-1 year) | 70% | 30% | Daily, small portions |
| Juveniles (1-3 years) | 50% | 50% | Daily to every other day |
| Young Adults (3-5 years) | 40% | 60% | Every other day |
| Adults (5+ years) | 25-30% | 70-75% | 2-3 times per week |
Here’s what nobody tells you: If you keep feeding an adult turtle like it’s still a baby, it’ll get fat, sick, and die early. Harsh, but true.
Best Commercial Turtle Pellets (Ranked)
Not all pellets are equal. Some are junk food. Here are the good ones:
Top Tier:
- Mazuri Aquatic Turtle Diet ($15-25 for 12 oz) – Best nutrition, vet-recommended
- Rep-Cal Maintenance Formula ($10-18 for 7.5 oz) – Great protein-to-plant ratio
- Hikari Saki-Hikari Turtle ($12-20 for 7 oz) – High quality, reduces waste
Mid Tier (Decent):
- Zoo Med Natural Aquatic Turtle Food ($8-15 for 12 oz) – Good budget option
- Tetra ReptoMin ($7-12 for 10.5 oz) – Widely available, not bad
Avoid:
- Generic store brands (low nutrition, mostly filler)
- Pellets with artificial colors
- Anything with “treats” in the name as a main diet
How much to feed:
A portion the size of your turtle’s head, or what they can eat in 5 minutes.
I used to just dump pellets in daily. My turtle got chunky. His shell started pyramiding (a sign of overfeeding). Cut back to proper portions, and he slimmed down and got healthier.
Protein Options Beyond Pellets
Live and frozen foods add variety and enrichment:
Great Choices:
- Feeder fish (guppies, minnows) – $3-8 for a dozen, provides hunting enrichment
- Earthworms – $5-10 for a container, packed with nutrients
- Crickets – $5-10 for 50, gut-load them first for extra nutrition
- Shrimp (cooked, unseasoned) – $8-12 per pound, occasional treat
- Mealworms – $5-8 for 50, high fat so use sparingly
Occasional Treats:
- Bloodworms (freeze-dried or frozen) – $5-10 per container
- Krill – $6-12 per container
Safety note: Never feed wild-caught insects (pesticides) or raw meat from the grocery store (bacteria risk).
Vegetables Your Turtle Will Actually Eat
Adult turtles need greens. But they’re picky little jerks about it.
Top Vegetables (Nutritious & Usually Accepted):
- Red leaf lettuce – $2-3 per head, better than green leaf
- Dandelion greens – $3-5 per bunch (or free from your pesticide-free yard!)
- Collard greens – $2-4 per bunch, calcium-rich
- Turnip greens – $2-4 per bunch
- Mustard greens – $2-4 per bunch
- Water lettuce (live aquatic plant) – $5-10 for several plants, they’ll nibble it constantly
Occasional Veggies:
- Carrots (shredded) – Vitamin A boost
- Squash (cooked and cooled) – Soft texture, easy to eat
- Green beans (cooked) – Low-calorie filler
Foods to Avoid (Seriously, Don’t)
- Iceberg lettuce – Zero nutrition, basically crunchy water
- Spinach – Blocks calcium absorption (fine occasionally, but not a staple)
- Processed human food – No bread, cheese, crackers, or anything with salt/sugar
- Avocado – Toxic to turtles
- Rhubarb – Also toxic
- Raw meat – Bacterial contamination risk
- Dog or cat food – Wrong nutrient profile, too much fat
I once gave my turtle a piece of bread because he looked hungry. He loved it. Then he had diarrhea for two days. Lesson learned.
How to Get Picky Turtles to Eat Greens
Baby turtles often refuse vegetables. Here’s how to trick them:
- Wiggle it – Use feeding tongs to move the greens like they’re alive
- Mix with protein – Chop greens and mix with pellets
- Starve them a little – Skip one feeding, they’ll be less picky
- Try different types – Some turtles hate kale but love dandelion greens
- Float it – Some turtles prefer eating at the surface
Patience wins. It took 3 weeks to get my turtle eating greens regularly. Now he devours them.
Portion Sizes: The Visual Guide
For pellets:
- Size of turtle’s head = one meal
- Or: What they can eat in 5 minutes
For vegetables:
- A small handful for juveniles
- A large handful for adults
- Remove uneaten portions after 24 hours
For live food:
- 2-5 feeder fish per feeding
- 5-10 crickets
- 2-3 large earthworms
Pro tip: Feed in a separate container if possible. Keeps the tank cleaner and easier to control portions.
Feeding Schedule That Actually Works
Hatchlings (under 1 year):
- Feed daily
- Morning or early afternoon (when they’re active)
- Alternate between pellets and protein sources
Juveniles (1-3 years):
- Feed daily or every other day
- Mix protein and veggies every feeding
- Start increasing vegetable ratio
Adults (3+ years):
- Feed every 2-3 days
- Mostly vegetables with occasional protein
- Pellets 1-2 times per week max
Senior turtles (15+ years):
- Same as adults, but may eat less
- Monitor weight closely
Weekly Feeding Cost Reality Check
Budget Feeding (Adult Turtle):
- Pellets: $3/month
- Greens from grocery store: $8/month
- Total: ~$11/month or $132/year
Mid-Range Feeding:
- Premium pellets: $6/month
- Variety of greens: $15/month
- Occasional feeder fish: $8/month
- Total: ~$29/month or $348/year
Premium Feeding:
- Top-tier pellets: $8/month
- Organic greens variety: $25/month
- Live foods weekly: $15/month
- Supplements: $5/month
- Total: ~$53/month or $636/year
Feeding isn’t the expensive part of turtle ownership. But cheap food = expensive vet bills later.
Tank Enrichment: Keep Them Entertained
A bored turtle is a destructive turtle. They’ll try to climb out, rearrange everything, or just look miserable. Give them things to do!
Best Enrichment Ideas (Ranked by Effectiveness)
1. Live Feeder Fish ($3-8 per feeding)
- Let them hunt like in the wild
- Mental and physical exercise
- Use once or twice a month
2. Floating Logs or Cork ($10-25)
- They’ll climb, push, and explore
- Creates varied basking spots
- Rearrange weekly for novelty
3. Aquatic Plants to Nibble ($5-20)
- Water lettuce, duckweed, or anacharis
- Slow-release food source
- Keeps them busy foraging
4. Ping-Pong Balls ($2 for a pack)
- Sounds ridiculous, works amazingly
- Turtles push them around for hours
- Wash weekly to prevent algae
5. Rearrange Decorations (Free)
- Change layout every 2-3 weeks
- New environment = curious turtle
- Stimulates exploration
6. Frozen Treat Blocks (Free if you have ice cube trays)
- Freeze small pieces of shrimp or fish in water
- Toss in tank, let them work for it
- Great for hot days
7. Mirror Play (Use a small hand mirror, $3)
- Let them see their reflection for 5-10 minutes
- They’ll flare up and get excited
- Don’t overdo it (can stress them)
My turtle’s favorite? The ping-pong ball. He named it Greg. (Okay, I named it Greg, but he acts like he did.)
Signs You’re Overfeeding (Oops)
Watch for these red flags:
- Pyramiding – Shell scutes growing in lumpy pyramids (irreversible!)
- Fat rolls – Visible skin/fat bulging around legs when pulled in
- Floating problems – Can’t dive properly, always floating
- Refusing food – Not hungry because overfed yesterday
- Excessive algae – Leftover food feeding algae blooms
If you see any of these, cut back on portions immediately.
Signs You’re Underfeeding (Also Oops)
- Sunken eyes – Dehydration or malnutrition
- Thin limbs – Losing muscle mass
- Lethargic behavior – No energy to swim or bask
- Shell softening – Not getting enough calcium
If you see these, increase food and check your UVB lighting.
The Calcium & Vitamin Question
Do turtles need supplements?
Maybe. It depends.
- If you have proper UVB lighting + varied diet = Probably not
- If you feed only pellets + weak UVB = Yes, add calcium powder
Best supplements:
- Rep-Cal Calcium with D3 ($8-12) – Dust on food 2x per week for growing turtles
- Zoo Med Repti Calcium ($6-10) – Good backup option
How to use: Lightly dust greens or pellets. Don’t overdo it—too much calcium causes other problems.
Final Feeding Wisdom
- Feed less than you think you should. A slightly hungry turtle is a healthy turtle.
- Variety matters more than quantity. Mix up proteins and greens weekly.
- When in doubt, offer vegetables. You can’t really overfeed greens.
- Your turtle will beg like it’s starving even when it’s not. They’re manipulative little reptiles. Stay strong.
red eared slider tank Routine Maintenance
Turtles are messy. If you don’t stay on top of cleaning, your tank will turn into a swamp. A dirty tank means bad smells, sick turtles, and a lot more work in the long run. Here’s how to keep things fresh and clean without losing your mind.
Daily Tasks (Quick & Easy)
- Check the water temperature – Should be 75-80°F (a little warmer for hatchlings).
- Look for uneaten food – Remove leftovers before they rot.
- Skim out poop and debris – A simple net makes this easy.
- Make sure the filter is running – A clogged filter equals dirty water fast.
- Watch your turtle – Is it basking? Eating? Acting normal?
I once ignored my filter for a day, and my turtle tank smelled like a pond in July. Never again.
Weekly Tasks (Keep It Fresh)
- Partial water change – Remove 25-50% of the water and replace it with dechlorinated water.
- Scrub algae off glass and decorations – A magnetic tank scrubber is a lifesaver.
- Check the filter – Rinse the sponge or media if needed, but don’t overdo it.
- Clean the basking area – Turtles track water everywhere. A quick wipe keeps it from getting gross.
I once let algae build up for too long. My turtle looked at me like, “Really? This is how we live now?”
Monthly Tasks (Deep Clean Time)
| Task | Why It Matters |
|---|---|
| Deep clean the filter | Keeps water crystal clear |
| Scrub decorations | Algae and grime love hiding here |
| Check water quality | Test ammonia, nitrites, and nitrates |
| Inspect your turtle | Look for shell rot, injuries, or changes in behavior |
The first time I tested my water, I realized I had been slowly poisoning my turtle with high ammonia. Oops. Now, I check regularly.
Bonus Tips
- Feed your turtle in a separate container – Less mess in the tank.
- Use a turkey baster – Quick poop removal without disturbing the water.
- Invest in a strong filter – Saves time and effort in the long run.
- Set reminders – Life gets busy, and turtles won’t remind you to clean.
Keeping up with maintenance makes life easier. A clean tank means a happy turtle and no nasty smells in your home. Trust me, it’s worth it.

Monitoring Your red eared slider’s Health
Keeping an eye on your turtle’s health is key. They won’t bark or meow when something’s wrong, so you have to play detective. Here’s how to make sure your slider stays happy and healthy.
1. Watch Their Behavior
A healthy turtle is active and alert. If yours suddenly stops swimming, basking, or exploring, something might be off.
Signs of a happy turtle:
- Swims around regularly
- Basks under the heat lamp
- Shows interest in food
Red flags:
- Always hiding or staying in one spot
- Avoiding basking
- Acting sluggish or weak
2. Check Their Shell
Their shell is like a built-in armor. But even armor needs maintenance.
A healthy shell should be:
- Smooth, hard, and even
- Free of cracks or soft spots
- Clean, without algae buildup
Signs of trouble:
| Issue | What It Means |
|---|---|
| Soft shell | Not enough UVB or calcium |
| White patches | Possible fungus or rot |
| Cracks | Injury or poor diet |
If you notice anything weird, fix their UVB setup and diet, or visit a vet.

3. Look at Their Eyes and Nose
Turtles don’t get colds, but they can get respiratory infections. Their eyes and nose will give you clues.
Healthy signs:
- Clear, bright eyes
- No bubbling or discharge from the nose
Warning signs:
- Puffy or closed eyes
- Mucus or bubbles from the nose
- Constant sneezing or wheezing
If your turtle looks like it has the flu, it probably needs a vet visit.
4. Pay Attention to Eating Habits
A red-eared slider that refuses food is either full or feeling sick. If they suddenly stop eating, don’t ignore it.
What’s normal?
- Eating daily when young
- Eating every other day as adults
- Enjoying a mix of pellets, greens, and proteins
What’s not normal?
- Ignoring food for days
- Spitting food out
- Struggling to chew
Check the water temp, lighting, and food. If everything looks fine and they still won’t eat, they may need medical help.
5. Observe Their Swimming
Turtles are strong swimmers. If they’re struggling, something’s wrong.
Healthy swimming looks like:
- Smooth, steady movements
- Even balance in the water
Unhealthy swimming:
- Tilting to one side
- Floating oddly or sinking
- Struggling to stay upright
Swimming problems can mean a serious infection. If your turtle looks off-balance, don’t wait—get them checked out.
Frequently Asked Questions About Red-Eared Slider Tank Setup
How much does a full red-eared slider tank setup cost?
- Budget setup (40-gallon): $250-400 total
- Mid-range setup (75-gallon): $500-800 total
- Premium setup (120-gallon): $900-1,500+ total
This includes tank, stand, filter, heater, lights, basking dock, and basic decorations. Ongoing costs run about $30-60/month for food, electricity, and filter media.
Can I use a plastic storage bin as a turtle tank?
Yes! Large plastic storage bins (like Rubbermaid stock tanks) work great, especially for budget setups or temporary housing. Make sure it’s at least 40 gallons, BPA-free, and has smooth sides. Many experienced keepers prefer these for their durability and easy drainage.
Do red-eared sliders need a tank heater in winter?
Yes, in most cases. Water temperature should stay between 75-80°F year-round. Unless your home naturally maintains this temperature, you’ll need a submersible aquarium heater. For a 75-gallon tank, get a 200-300 watt heater with a protective guard.
How often should I clean my turtle’s tank?
- Daily: Remove uneaten food and visible waste
- Weekly: 25-50% water change, wipe algae from glass
- Monthly: Deep clean filter, scrub all decorations and basking area
With a strong filter rated for 2-3x your tank size, maintenance becomes much easier.
Can two red-eared sliders live in the same tank?
Possible, but complicated. They need significantly more space (add 50% more capacity per additional turtle), may fight over basking spots, and males can become aggressive during breeding season. If you’re a beginner, stick to one turtle per tank.
What’s the minimum tank size for an adult red-eared slider?
75 gallons absolute minimum, but 90-120 gallons is much better. Adult sliders reach 8-12 inches and need space to swim, dive, and exercise. Anything smaller leads to stress, aggression, and health problems.
For even more detailed tank setup guidance, check out how to create the perfect turtle tank while avoiding common mistakes.
Do I need a filter if I change the water frequently?
You still need a filter. Even with daily water changes, a filter provides biological filtration (breaks down waste) and maintains water quality between changes. Skipping the filter means spending 2+ hours daily maintaining water quality manually.
Can I put my turtle tank near a window for natural sunlight?
No! Direct sunlight causes massive temperature swings, explosive algae growth, and can overheat your turtle. UVB light from a proper bulb is more consistent and safer. Place tanks away from windows and use artificial UVB lighting instead.
How deep should the water be in a red-eared slider tank?
At least twice the length of your turtle’s shell in depth. For an 8-inch adult, that’s 16+ inches of water. Deeper is better for swimming and exercise, but make sure they can easily reach the surface and access their basking area.
What temperature should a red-eared slider tank be?
- Water: 75-80°F (use an aquarium heater)
- Basking spot: 85-90°F (use a heat lamp)
- Ambient air: 75-80°F
Use thermometers to monitor both water and basking temperatures. Temperature too low = sluggish, sick turtle. Too high = stressed turtle.
Can I use gravel or small rocks as substrate?
NO. Turtles will eat small gravel and rocks, causing intestinal blockages that require emergency surgery. If you want substrate, use only large river rocks (2-3+ inches diameter) that can’t fit in their mouth, or go bare-bottom.
How long do red-eared sliders live in captivity?
20-40 years with proper care, sometimes longer. This is a decades-long commitment. That baby turtle you buy today could still be around when you’re retiring. Plan accordingly.
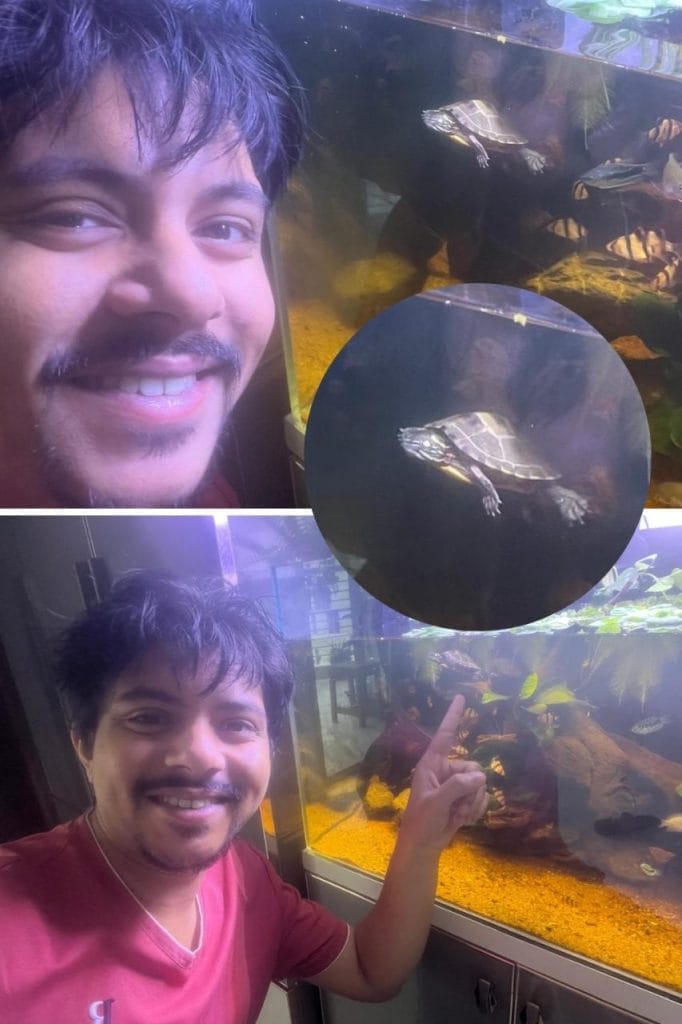
Do red-eared sliders recognize their owners?
Yes! They learn to recognize the person who feeds them and will swim to the front of the tank when you approach. They won’t cuddle like a dog, but they definitely know who you are. Some even respond to their names (or at least to the sound of the food container).
If you’re feeling adventurous and have outdoor space, consider building an outdoor turtle enclosure in 14 easy steps.

About Author
Muntaseer Rahman started keeping pet turtles back in 2013. He also owns the largest Turtle & Tortoise Facebook community in Bangladesh. These days he is mostly active on Facebook.