14 Easy Steps to Make an Outdoor Turtle Enclosure Even If You Know Nothing

This post was created with help from AI tools and carefully reviewed by a human (Muntaseer Rahman). For more on how we use AI on this site, check out our Editorial Policy.
Creating an outdoor turtle enclosure sounds like a daunting task—especially if you’re not exactly a DIY expert.
I’ve been there, staring at my backyard and wondering if I even had the tools (or the skills!) to make it happen.
The good news?
It’s way easier than it seems. With this simple step-by-step guide, you’ll go from clueless to confident turtle architect faster than you think.
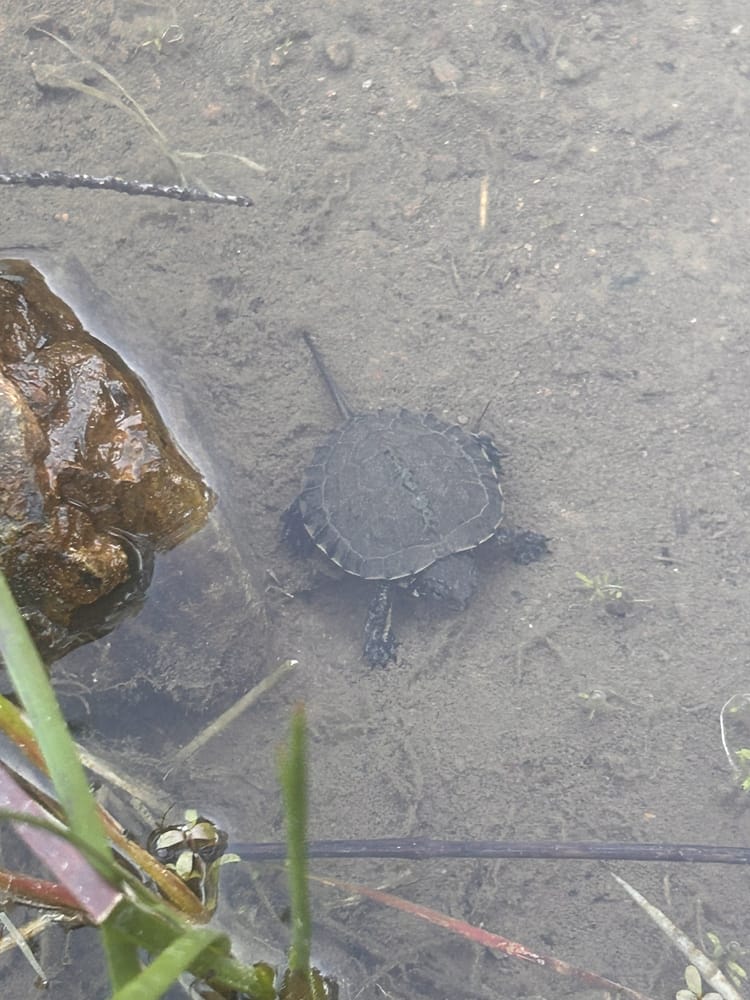
For aquatic turtles needing deeper water, an indoor turtle pond may be more suitable than a land-based outdoor enclosure.
Step 1: Choose the Right Spot
Picking the right spot is like choosing the best seat in a movie theater—comfort and safety are key. Your turtle deserves a VIP location.
Look for These Features:
- Sunshine: Turtles need sunlight to stay healthy. A spot with 6–8 hours of sunlight works well.
- Shade: They also need shade to cool off. No one wants to roast all day, not even turtles.
- Safety: Check for predators, like neighborhood cats or raccoons. Also, avoid flood-prone areas.
My Rookie Mistake
When I first built an enclosure, I picked a spot under a tree for constant shade. My turtle spent days trying to escape, looking for the sun. Lesson learned!
Pro Tip
Observe your yard throughout the day. Notice where the sun hits and how it moves. You want a balance of light and shade, like a turtle spa.
Once you nail the location, you’re off to a great start!
Step 2: Know Your Turtle’s Needs
Not all turtles are the same! Some love lounging on land, while others are all about the water. Knowing your turtle’s personality and species makes all the difference.
Land or Water?
Your turtle might be:
- Aquatic (loves swimming, needs a water feature).
- Semi-Aquatic (split time between water and land).
- Terrestrial (land lover, barely touches water).
How Big Are They?
The enclosure size depends on your turtle’s adult size.
- Small turtles (under 6 inches): A cozy space with room to roam.
- Medium to large turtles: Think big—like a turtle mansion!
What’s on the Menu?
Turtles snack differently:
- Herbivores: Love leafy greens and veggies.
- Carnivores: Bugs and protein-rich snacks are their jam.
- Omnivores: These eat everything, like your sibling at a buffet.
When I got my first turtle, I thought they all needed a pond. Spoiler: my terrestrial buddy wasn’t impressed. Lesson learned!
Make a list of your turtle’s needs before starting the enclosure. It’ll save you a lot of time (and turtle tantrums).
For species that need water features, see which turtle species thrive in outdoor ponds versus land-based enclosures.
This Hilarious Turtle Book Might Know Your Pet Better Than You Do
Let’s be real—most turtle care guides feel like reading a textbook written by a sleep-deprived zookeeper.
This one’s not that.
Told from the snarky point of view of a grumpy, judgmental turtle, 21 Turtle Truths You’ll Never Read in a Care Guide is packed with sarcasm, sass, and surprisingly useful insights.
And hey—you don’t have to commit to the whole thing just yet.
Grab 2 free truths from the ebook and get a taste of what your turtle really thinks about your setup, your food choices, and that weird plastic palm tree.
It’s funny, it’s honest, and if you’ve ever owned a turtle who glares at you like you’re the problem—you’ll feel seen.
Step 3: Gather Your Materials
Different turtles have different needs! Fully aquatic and semi-aquatic turtles require specific setups. Here’s a breakdown to make it super easy:
Materials for Fully Aquatic Turtles
These turtles love swimming and need water-focused habitats:
- Large water container or pond liner (my pick: 10x15 FT 20 Mil HDPE pond liner): The bigger, the better!
- Filter system: Keeps the water clean and healthy.
- Basking platform (my pick: floating basking platform): A floating dock or ramp for sunbathing.
- Aquatic plants: Duckweed or water lettuce for shade and snacks.
- Substrate (optional): Fine sand or smooth river rocks.
- Netting or fencing: Protects them and keeps predators out.
Tip: I once used a kiddie pool for my aquatic turtle. It worked like a charm and was super affordable!
Materials for Semi-Aquatic Turtles
Semi-aquatic turtles split their time between land and water:
- Wall material: Wood, bricks, or garden edging to create land zones.
- Water feature: Shallow pond or large water dish for soaking.
- Substrate: Mix of soil and sand for digging and burrowing.
- Hiding spots: Flowerpots, logs, or small caves.
- Plants: Both edible greens like dandelions and decorative ones.
- Flat basking rocks: A dry spot to soak up the sun.
- Netting or fencing: Same as for aquatic turtles.
Fun Fact: My semi-aquatic turtle loves hiding in a repurposed flowerpot. It’s her favorite chill spot!
Quick Shopping Tip
Many of these materials can double as supplies for both types of turtles, so start simple and build as needed. My advice? Don’t overthink it—turtles are low-maintenance when you’ve got the basics right!
Step 4: Plan the Size and Layout
Size matters, especially for turtles. A cramped enclosure isn’t fun for anyone. Think of it like this: would you want to live in a closet?
For Fully Aquatic Turtles
These turtles need a layout that’s mostly water with a small basking area.
Size Recommendations
- Small aquatic turtles: At least 10 gallons of water per inch of shell length.
- Large aquatic turtles: Start with 75–100 gallons or more.
- Bigger tanks = cleaner water and happier turtles!
Layout Tips
- Water Zone: Make it the main focus, with plenty of swimming space.
- Basking Platform: Floating docks or ramps near the top for sunbathing.
- Filtration System: Set it up for easy maintenance.
- Plants: Use floating plants like water hyacinth for shade and snacking.
My Experience
When I set up my aquatic turtle’s enclosure, I underestimated how much space he’d need to swim. Watching him paddle around in a bigger setup? Totally worth it.
For Semi-Aquatic Turtles
Semi-aquatic turtles need a mix of land and water.
Size Recommendations
- Small turtles (under 5 inches): At least 4 square feet, split between land and water.
- Larger turtles: Go for 50/50 water and land, with at least 8 square feet.
Layout Tips
- Land Zone: Use soil or sand for digging and lounging.
- Water Feature: A shallow pond or dish where they can soak.
- Hiding Spots: Add logs, plants, or flowerpots for shade.
- Basking Area: Place rocks or a dry platform in the sunniest spot.
My Experience
My semi-aquatic turtle, Shelly, once turned her soaking dish into a slip-n-slide! Having enough space for both land and water stopped her mischievous escapes.
Key Difference
Fully aquatic turtles need mostly water, while semi-aquatic turtles thrive with a balance of land and water zones. Adjust the layout to fit their unique habits, and you’re good to go!
Step 5: Build Secure Walls
The walls are your turtle’s first line of defense. Without strong walls, your turtle might turn into an escape artist—or worse, a snack for a predator.
Height Matters
Make sure the walls are tall enough! A good rule is at least 2-3 times your turtle’s length. My first enclosure had walls too short, and I spent an hour chasing my little guy in the garden. Lesson learned.
Digging-Proof Is a Must
Turtles are natural diggers.
Here’s how to prevent jailbreaks:
- Bury the walls at least 6 inches into the ground.
- Use materials like wood, concrete blocks, or metal mesh.
Pick Durable Materials
You don’t want your walls falling apart after the first rainstorm.
Great options include:
| Material | Pros | Cons |
|---|---|---|
| Wood | Easy to find, looks natural | Can rot over time |
| Cinder blocks | Super sturdy, predator-proof | Heavy and not very pretty |
| Wire mesh | Lets you see inside, lightweight | Turtles can sometimes climb it |
Turtle-Test It!
Once you’re done, place your turtle inside and watch. If it spends 15 minutes trying to escape, you’ll know what needs fixing.
When I made my first enclosure, I thought I’d nailed it. Nope—my turtle found a tiny gap and squeezed out. Now, I double-check every inch.
Building strong walls isn’t hard, but it’s the most important step for keeping your turtle safe and happy. Plus, no one wants to be the neighbor known for losing turtles.
Step 6: Add a Safe Cover
Turtles love the outdoors, but so do predators. A good cover keeps them safe from birds, raccoons, and curious neighborhood cats.
Why a Cover is Non-Negotiable
- Protects turtles from predators.
- Stops them from climbing out (yes, they’ll try).
- Keeps debris like falling leaves out of the enclosure.
I learned this the hard way. My first turtle enclosure had no cover, and a squirrel decided it was his buffet. Lesson learned.
Best Cover Options
Here’s what works well:
| Material | Pros | Cons |
|---|---|---|
| Wire mesh | Durable, predator-proof | Needs precise fitting |
| Plastic netting | Lightweight, easy to use | Not as strong as mesh |
| Wooden frames | Looks natural, sturdy | Heavy, may block sunlight |
Tips for a Great Cover
- Use materials with small gaps (less than 1 inch).
- Make it easy to remove for cleaning.
- Double-check the edges—no gaps!
Once I added a mesh cover, I felt like a turtle superhero. My little buddy could bask in peace, and I could relax knowing he was safe.
Step 7: Provide Sunbathing Areas
Turtles love a good sunbath. It’s like their version of a spa day. They need UVB light (my pick: Zoo Med ReptiSun 10.0) to stay healthy and keep their shells strong.
What Makes a Perfect Sunbathing Spot?
- Flat Rocks: These heat up nicely in the sun.
- Logs or Planks: Easy for turtles to climb and stretch out on.
- Dry and Safe: The spot should be out of reach of water and predators.
I once used an old patio tile as a basking spot, and my turtle acted like I’d built her a private resort.
Why Is UVB Important?
- Prevents soft shell disease (that’s bad news for turtles).
- Helps them absorb calcium.
- Keeps their little bodies working smoothly.
Pro Tip: Test the Temperature
You don’t want the sunbathing area to get too hot. Place your hand on the surface. If it feels too hot for you, it’s too hot for your turtle.
Think of it this way: If your turtle isn’t sunbathing, they’re missing out on life’s greatest joy. Give them a sunny spot they’ll never want to leave!
Step 8: Include Shade and Hiding Spots
Turtles love a little privacy. They need shade to stay cool and hidey holes to feel safe. Think of it as their “me-time” zone.
Why Shade and Hiding Spots Matter
- Turtles can overheat in direct sunlight.
- They get stressed without a place to hide.
- Hiding spots help them feel safe from predators (even if the “predator” is just you peeking in).
Easy Ideas for Shade
- Plants: Add tall, leafy ones for natural shade.
- Shelters: Use overturned flower pots or DIY a small wood hut.
- Tunnels: PVC pipes work like charm.
My Turtle’s Favorite Spot
When I built my turtle’s first enclosure, I used an old cardboard box as a temporary hide. She refused to leave it. Lesson learned—don’t overthink it!
Pro Tips
- Make sure hiding spots stay dry inside.
- Place them where your turtle feels tucked away but still accessible for you to check on them.
Creating these spots is easy and makes your turtle feel at home. Plus, who doesn’t love seeing them peek out like they’re in a tiny fortress?
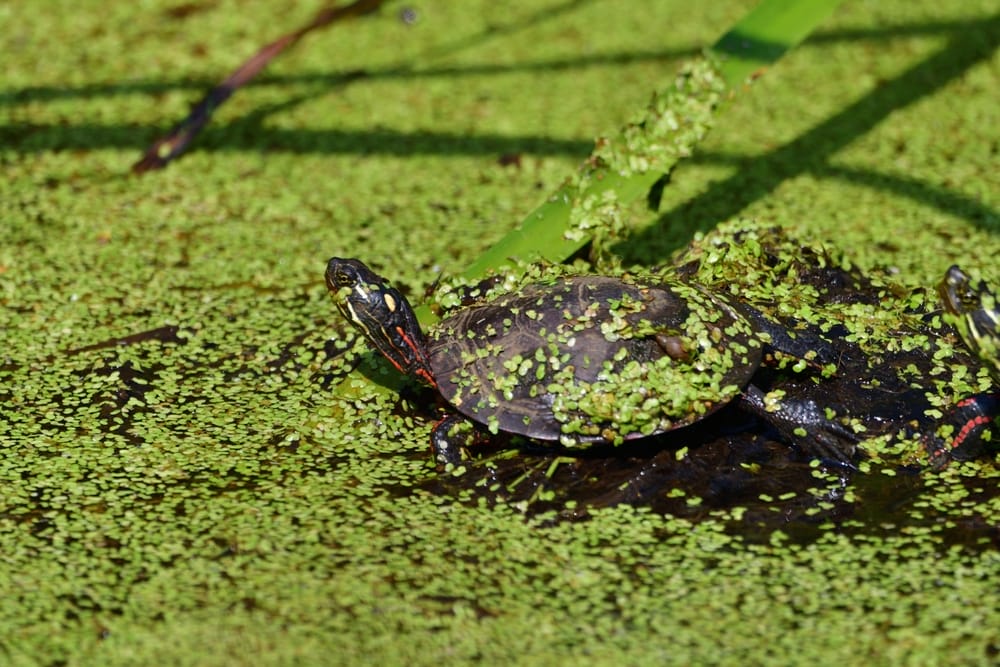
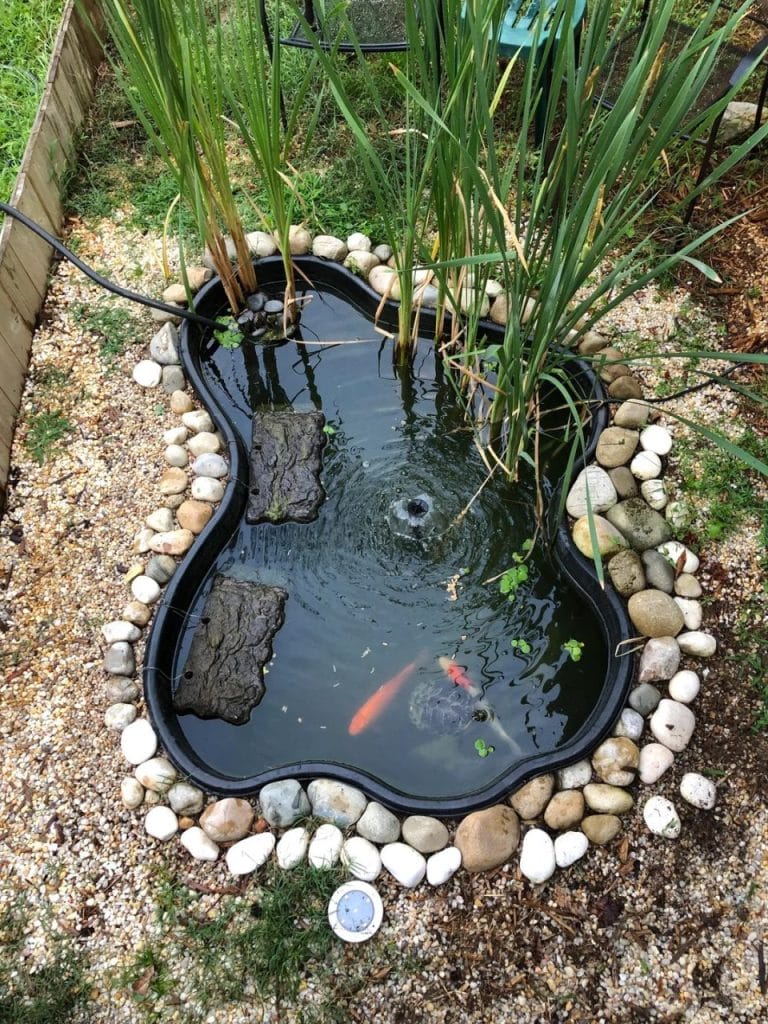
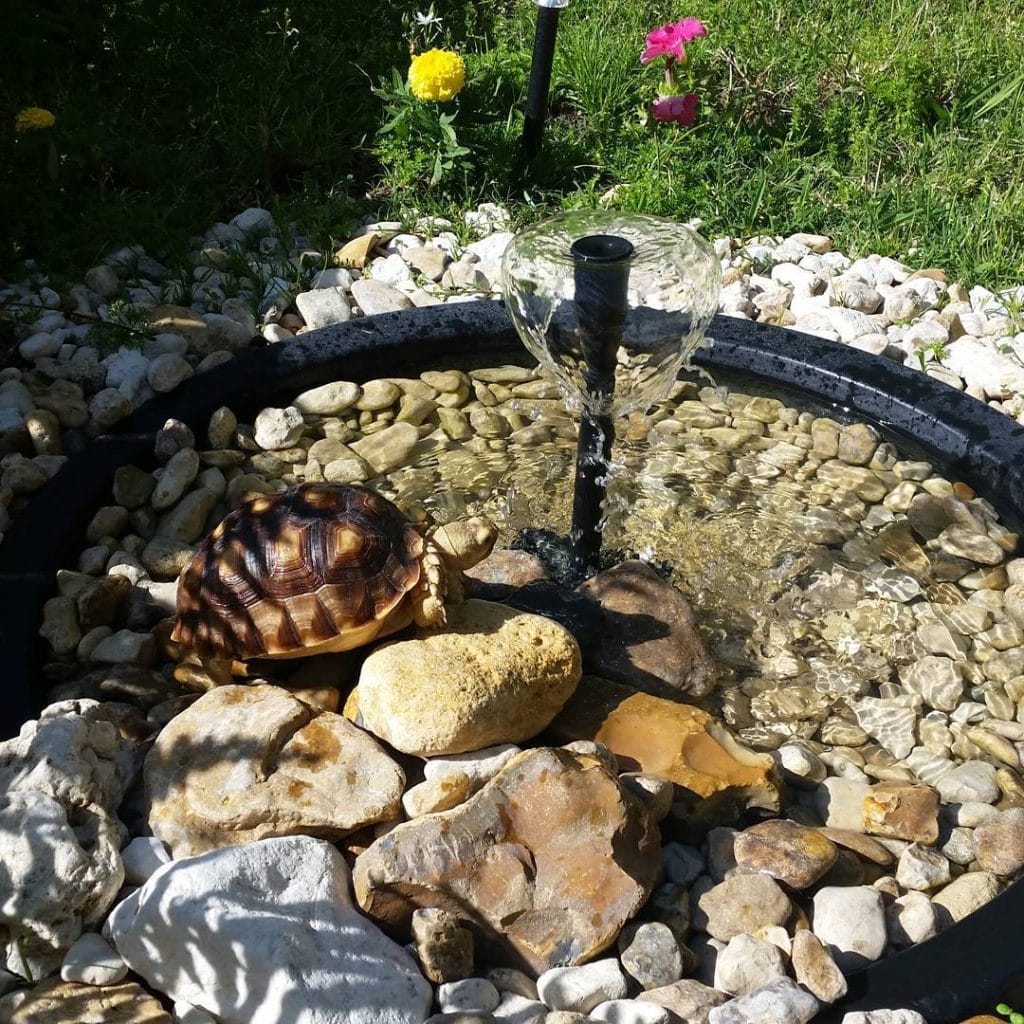
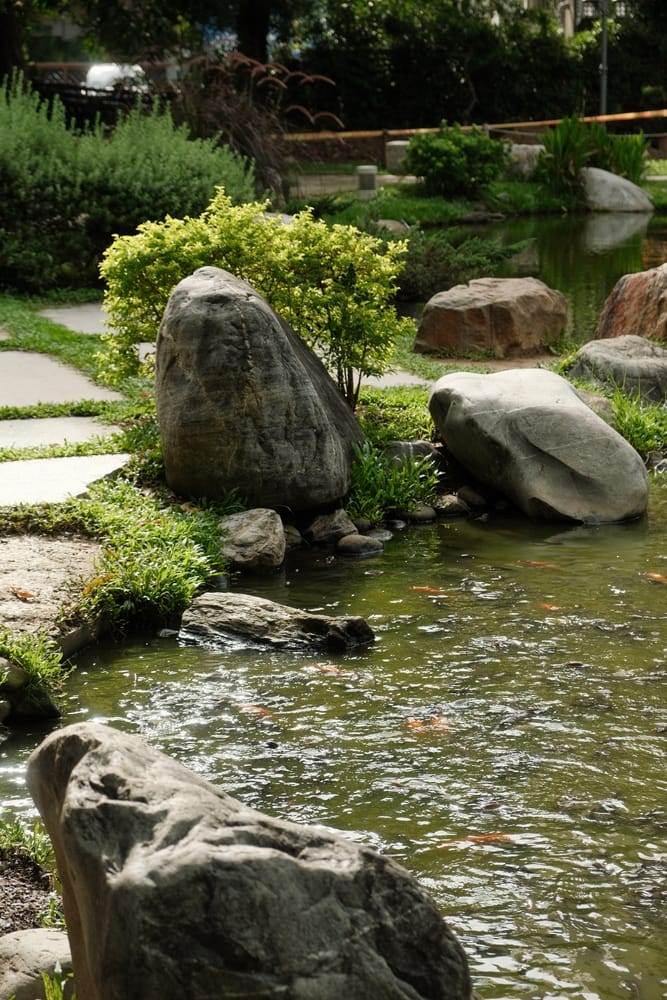
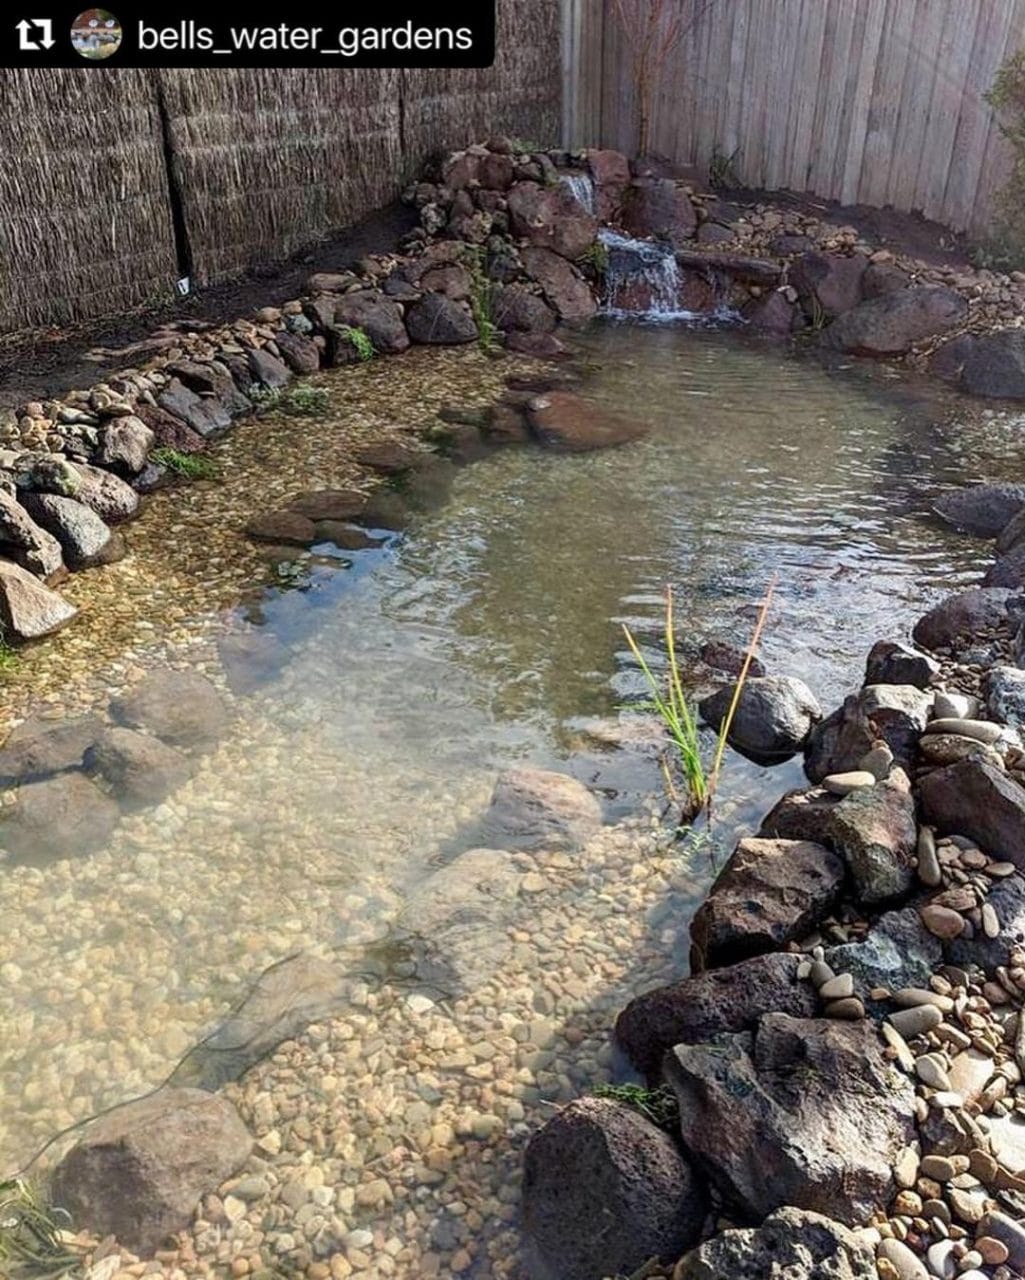
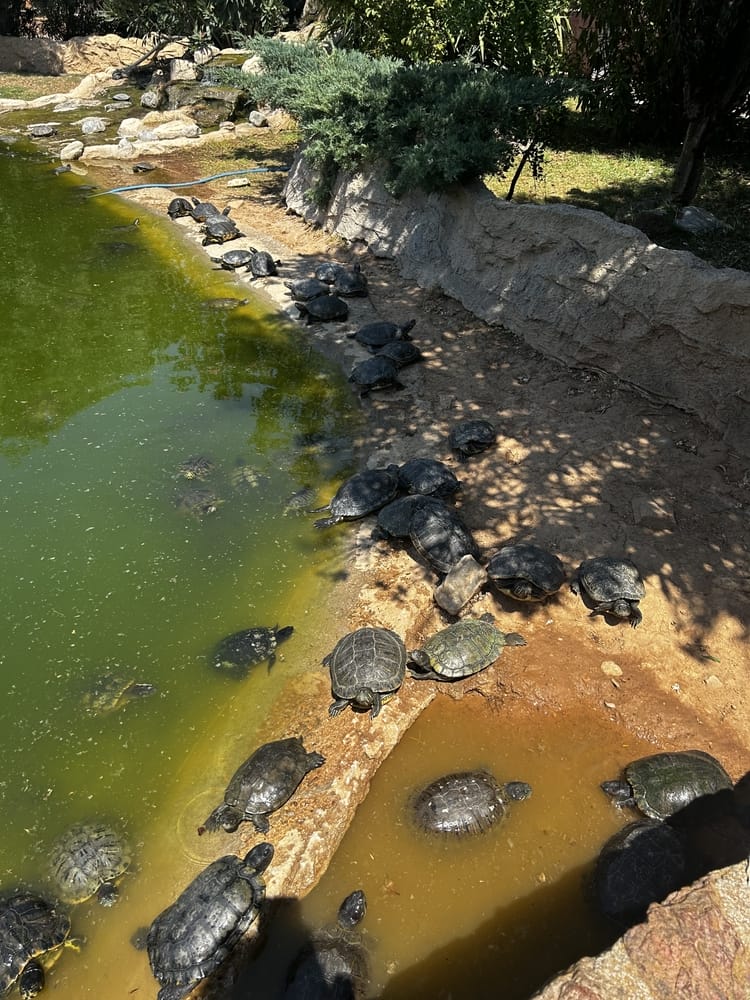
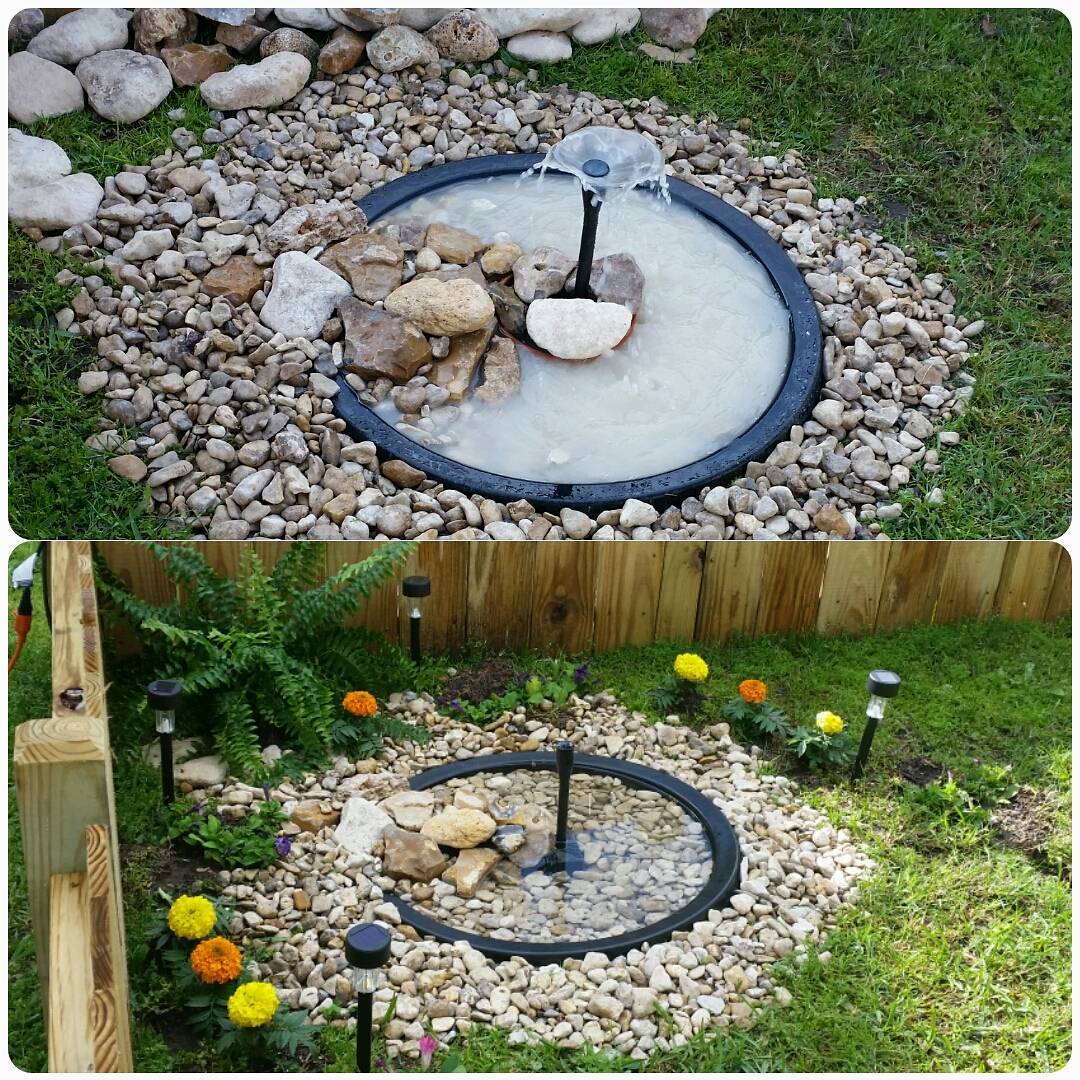
Step 9: Add Water Features
Turtles love water—it’s their happy place. Adding the right water feature can make your enclosure feel like a 5-star resort for your little friend. Don’t overthink it; you don’t need a fancy pond to get started.
Soak It Up: Water Dish or Pond?
Water Dish
- Great for beginners.
- Pick a shallow, sturdy dish.
- Easy to clean and replace.
Pond
- A dream come true for aquatic turtles.
- Use a kiddie pool or pre-made pond liner.
- Add a ramp so they can climb in and out.
I used an old baking dish when I started—it worked perfectly until I upgraded to a mini pond!
Keep It Clean
Turtles are messy, and dirty water isn’t healthy. Change the water regularly. If you’re using a pond, consider a small filter.
Safety First
Make sure the water isn’t too deep for terrestrial turtles. A couple of inches is plenty! I learned the hard way when my box turtle panicked in too much water.
For fully aquatic turtles needing larger water areas, skip the dish and build a complete outdoor turtle pond or budget-friendly kiddie pool setup instead.
Bonus Touch: Decorate the Water
- Add smooth rocks for a spa-like vibe.
- Place floating plants like water lettuce for shade.
Water features aren’t just practical—they’re a fun way to make your turtle enclosure look amazing! Plus, your turtle will adore it.
Step 10: Plant Turtle-Safe Vegetation
Turtles love having plants around. They’re not just decoration; they’re snacks, shade, and entertainment.
I once planted random flowers in my turtle’s pen and had to pull them out in a panic after realizing they were toxic. Learn from my mistake!
Plants Your Turtle Will Love
These are safe and yummy:
- Dandelions – They’re like candy for turtles.
- Clover – Turtles munch it like it’s a salad buffet.
- Collard Greens – Super healthy and easy to grow.
For comprehensive plant guidance including aquatic varieties, explore our complete list of 20 best turtle pond plants with safety notes and care instructions.
Plants for Shade and Comfort
Some plants aren’t for eating but give great cover:
- Hostas – Perfect for hiding.
- Ferns – Add a jungle vibe.
- Spider Plants – Tough and safe.
Avoid These Plants
These can make your turtle sick:
- Ivy
- Azaleas
- Buttercups
Pro Tips for Planting
- Go pesticide-free. Turtles don’t want chemical seasoning!
- Use pots if your plants get destroyed too fast.
- Rotate plants in and out to keep it fresh.
Adding safe plants makes your turtle’s enclosure feel like their natural habitat. Plus, it’s fun to watch them explore and snack.
Step 11: Keep the Ground Comfortable
Turtles spend a lot of time on the ground, so make it cozy for them!
What to Use for the Ground
Here are a few great options:
- Soft Soil: Easy for turtles to dig and roam.
- Sand: Perfect for some species, like box turtles.
- Mulch: Great for shade and moisture but avoid cedar or pine (they’re toxic!).
Avoid These
- Sharp Rocks: They can hurt your turtle’s shell or feet.
- Gravel: Turtles might swallow it.
- Chemical-Laden Soil: Keep it organic and safe.
My Own Turtle Drama
When I set up my first turtle enclosure, I made the mistake of using leftover garden stones. My turtle didn’t look happy and stopped moving around much. Switched to soft soil? Instant happy turtle!
Quick Tips
- Mix it up! Combine soil and sand for variety.
- Check your turtle’s species for specific ground preferences.
- Add a small damp area for digging or cooling off.
A comfy ground isn’t just about looks—it’s like picking the right mattress for your turtle. Keep it soft, safe, and fun!
Step 12: Secure the Enclosure
Let’s talk turtle-proofing. This is the part where you make sure your little Houdini can’t pull a disappearing act.
Check for Escape Routes
Turtles are surprisingly good climbers and diggers.
- Walls: Make sure they’re tall enough—think twice your turtle’s length.
- Gaps: Look for small holes where your turtle could sneak out. If you can fit your finger through, that’s a problem.
Test the Perimeter
I once thought my wall was escape-proof until my turtle, Tiny, taught me otherwise. He scaled a corner with ninja skills!
- Push on the walls to ensure they’re stable.
- Use a flat edge (like a ruler) to check for gaps at the base.
Dig-Proof the Ground
Turtles can dig faster than you’d expect.
- Bury chicken wire or a solid barrier a few inches deep.
- Use bricks or stones at the base for extra security.
Don’t Forget the Top
If predators like cats or raccoons are around, cover the enclosure.
- Use mesh or netting that lets sunlight in but keeps claws out.
- Make sure it’s secured so it won’t blow away.
A Quick Test
Before introducing your turtle, do a quick safety check:
- Try to “break out” like a turtle would.
- Check every angle—corners are sneaky spots.
When I got it right, Tiny spent hours exploring, instead of plotting his next escape. It felt like winning a game of wits.
Step 13: Create a Maintenance Plan
Your turtle’s enclosure isn’t a “set it and forget it” project. Regular care keeps your turtle happy and healthy. Trust me, skipping maintenance leads to grumpy turtles—and grumpy turtles sulk (true story).
What to Maintain Weekly
- Clean the water: Replace dirty water in dishes or ponds. Nobody likes stale soup!
- Check the walls and cover: Look for weak spots. My turtle Houdini found a loose spot once and disappeared for two days!
- Refresh food plants: Replace chewed-up or dead plants to keep the area lively.
Monthly Maintenance
- Rake the substrate: Stir up soil or sand to avoid compacted, smelly ground.
- Inspect for damage: Fix cracks, broken fences, or droopy covers.
Quick Tips for Efficiency
- Use a small pool net to scoop debris from water features.
- Keep spare turtle-safe plants handy for replacements.
- Create a checklist on your phone—trust me, it’s a lifesaver when you forget if you’ve done something!
Maintenance isn’t glamorous, but it’s key. Plus, you’ll bond with your turtle as you check on their little world. Mine always watches like a tiny supervisor.
If your enclosure includes water features, apply these 7 essential pond cleaning tips to your maintenance routine.
Step 14: Introduce Your Turtle
It’s time for the big moment—introducing your turtle to their new outdoor palace! Here’s how to do it right and keep things stress-free.
Go Slow and Steady
Turtles hate surprises. Gently place them in the enclosure and give them time to explore. Don’t hover too much—they need to feel safe.
I remember when I introduced my turtle, Sheldon, to his new setup. He froze for five minutes, then started sniffing every plant like a tiny inspector.
Check for Escapes
Before you leave them alone, make sure they’re not finding ways to escape. Watch their behavior for at least an hour.
Pro Tip:
- If they’re pacing the walls, it might mean they feel trapped or stressed. Add more hiding spots or distractions.
Keep an Eye on Their Mood
Turtles aren’t the most expressive creatures, but you’ll know they’re happy when they start basking, digging, or munching on plants.
When Sheldon finally climbed onto his basking rock, it was like he claimed the throne. I might’ve teared up a little.
Checklist for the First Day
- Water looks clean and accessible.
- No signs of digging near the walls.
- Your turtle isn’t stuck or panicking.
Remember, this is a new world for your turtle. Give them time, and soon they’ll be living their best turtle life.
Outdoor turtle pond setup guide infographic

For a printable version of this infographic, click here!

About Author
Muntaseer Rahman started keeping pet turtles back in 2013. He also owns the largest Turtle & Tortoise Facebook community in Bangladesh. These days he is mostly active on Facebook.