Ultimate Snapping Turtle Tank Setup Guide (Don’t Make These Mistakes!)
This post was created with help from AI tools and carefully reviewed by a human (Muntaseer Rahman). For more on how we use AI on this site, check out our Editorial Policy.
Snapping turtles might look tough, but trust me, they have standards. Set up their tank wrong, and they’ll let you know—usually with a mess, a stink, or a very grumpy attitude.
While snapping turtles have unique requirements, many core turtle tank principles apply across species—we’ll highlight what makes snappers different.
Whether you’re a first-time owner or looking to upgrade your setup, this guide covers everything you need for the perfect snapping turtle habitat (without the trial-and-error headaches).
Snapping Turtle Tank Setup Essentials
| Category | What You Need | Why It’s Important |
|---|---|---|
| Tank Size | – 40 gallons (baby) – 75 gallons (juvenile) – 120+ gallons (adult) | Turtles grow fast—start with a big tank to avoid upgrading too soon. |
| Filtration | – Canister filter (best) – Sponge filter (okay for small tanks) – Internal filter (temporary for babies) | Snapping turtles are messy; a strong filter keeps the water clean. |
| Heating | – Submersible water heater – Heater guard | Turtles need warm water (75-80°F) to stay healthy and active. |
| Basking Area | – Floating dock – Sturdy platform | Even aquatic turtles need a dry spot to bask. |
| Lighting | – UVB light (my pick: Zoo Med ReptiSun 10.0) – Heat lamp | Prevents shell and bone issues like metabolic bone disease. |
| Substrate | – Bare bottom (easiest to clean) – Sand (looks natural, but messy) – Large river rocks (safe, but harder to clean) | Avoid small gravel—it’s a choking hazard. |
| Decor & Hides | – Driftwood – PVC pipes – Large rocks | Turtles need places to hide and explore. |
| Food & Feeding | – Pellets (staple diet) – Live/frozen protein (worms, fish, shrimp) – Veggies (optional, but good for variety) | Helps maintain a balanced diet and keeps turtles active. |
| Cleaning Tools | – Water test kit – Gravel vacuum – Algae scrubber | Keeps the tank fresh and odor-free. |
Start with this setup, and you’ll have a happy, healthy snapping turtle!

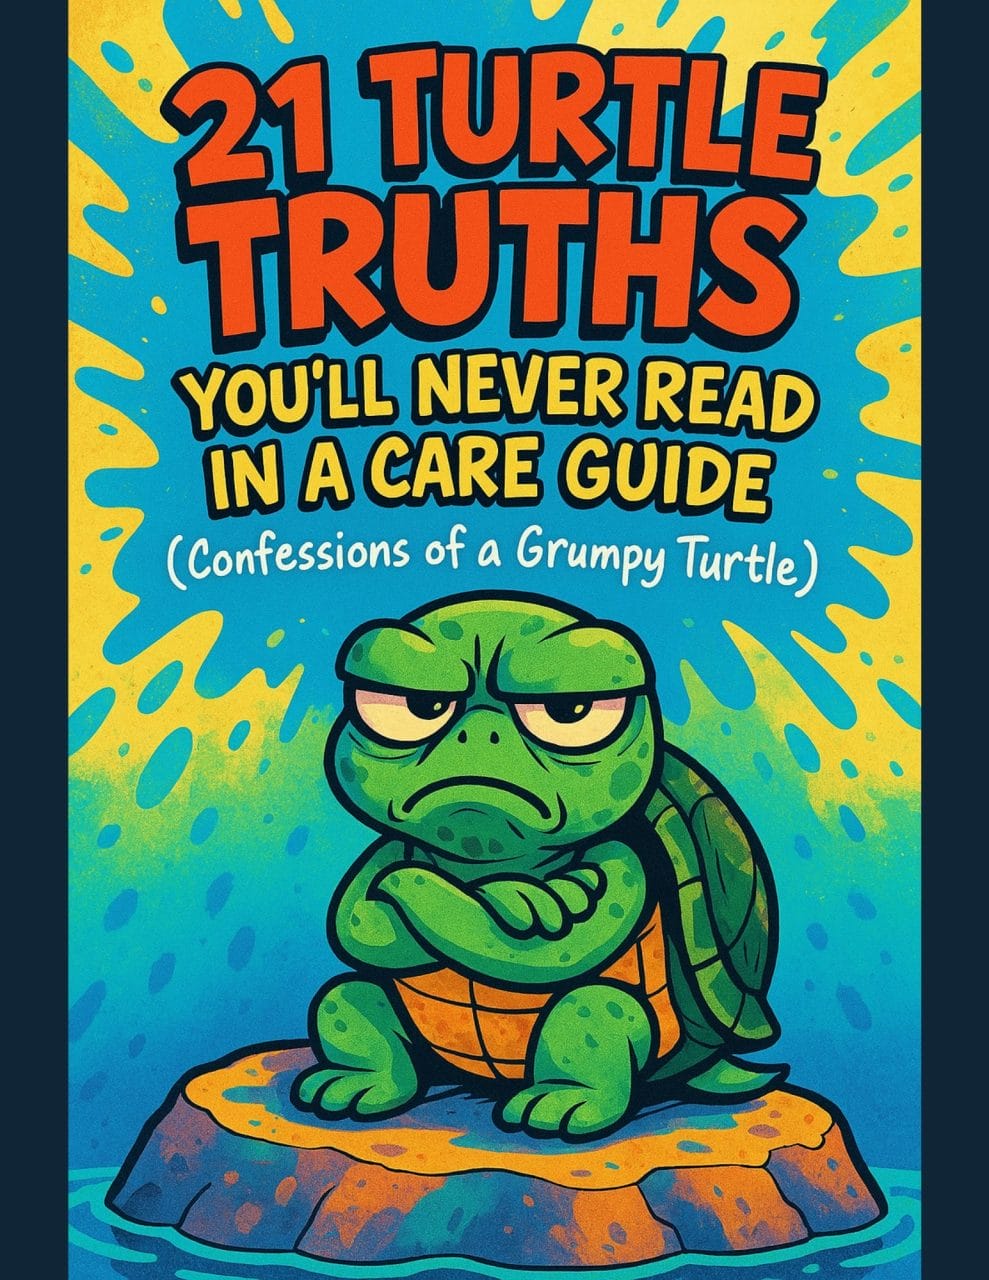
This Hilarious Turtle Book Might Know Your Pet Better Than You Do
Let’s be real—most turtle care guides feel like reading a textbook written by a sleep-deprived zookeeper.
This one’s not that.
Told from the snarky point of view of a grumpy, judgmental turtle, 21 Turtle Truths You’ll Never Read in a Care Guide is packed with sarcasm, sass, and surprisingly useful insights.
And hey—you don’t have to commit to the whole thing just yet.
Grab 2 free truths from the ebook and get a taste of what your turtle really thinks about your setup, your food choices, and that weird plastic palm tree.
It’s funny, it’s honest, and if you’ve ever owned a turtle who glares at you like you’re the problem—you’ll feel seen.
Step 1: Choosing the Right Tank for Snapping Turtles
Picking the right tank is the first big step. Get it wrong, and you’ll have a stressed-out, unhealthy turtle. Get it right, and your turtle will thrive.
Size Matters
Snapping turtles grow fast and get BIG. A tiny tank won’t cut it.
- Baby turtles (under 4 inches) → At least a 40-gallon tank.
- Juveniles (4-8 inches) → 40 to 75 gallons.
- Adults (8+ inches) → 100+ gallons, preferably a stock tank or pond.
Bigger is always better. A small tank = more cleaning, more stress, and a cramped turtle.
Glass Tank vs. Plastic Tub
Not all tanks are created equal. Here’s a quick breakdown:
| Option | Pros | Cons |
|---|---|---|
| Glass Tank | Looks nice, easy to see your turtle | Expensive, heavy, can crack |
| Plastic Tub | Cheap, lightweight, easy to clean | Not as pretty, harder to see inside |
| Stock Tank | Super durable, lots of space | Takes up a lot of room |
I started with a glass tank because I liked watching my turtle. But once he grew, I switched to a plastic tub. Best decision ever—cheaper and way easier to clean!
Depth and Space
Snapping turtles are bottom-walkers, not swimmers like sliders. They need water deep enough to submerge but not so deep they struggle.
A good rule: At least as deep as their shell is long but not too deep for babies. Give them plenty of space to move around.
Escape-Proofing is a Must
These guys are escape artists. If they can climb out, they will.
- Use a secure lid (especially for glass tanks).
- Keep decorations away from the edges (they’ll use them to climb out).
- If using a tub or stock tank, make sure the sides are high enough.
I once found my turtle chilling on my bedroom floor because I underestimated his climbing skills. Lesson learned.

Step 2: Water Requirements for Snapping Turtles
Snapping turtles spend most of their time in the water. That means getting their water setup right is a big deal. If you mess it up, your turtle could get sick—or worse.
How Much Water Do They Need?
- Juveniles: At least 10 gallons per inch of shell.
- Adults: A minimum of 75-100 gallons, but bigger is always better.
- The water should be deep enough for them to fully submerge but not so deep they struggle to reach the surface.
I once started with a 40-gallon tank for my young snapper. Within months, he outgrew it. Lesson learned: plan ahead!
Clean Water = Healthy Turtle
Dirty water can cause:
- Shell rot
- Respiratory infections
- Nasty smells (trust me, you don’t want that)
Water Quality Tips
| Factor | Ideal Range |
|---|---|
| Temperature | 75-80°F (24-27°C) |
| pH Level | 6.5 – 7.5 |
| Ammonia/Nitrites | 0 ppm (They are toxic!) |
Get a water testing kit. Don’t guess—bad water can turn deadly fast.
Do You Need a Water Filter?
Yes. 100% yes. Snapping turtles are messy eaters and poop a lot. A strong canister filter (my pick: Penn-Plax Cascade) keeps the water clean. I tried a weak filter once, and my tank turned into a swamp overnight. Never again.
Water Changes
- 25-50% water change every week
- Full tank cleaning once a month
- Remove uneaten food immediately
If your tank starts smelling like a swamp, it’s time for a water change.
Bonus Tip: Dechlorinate Your Water
Tap water contains chlorine, which is bad for turtles. Use a water conditioner (recommended: reptile water conditioner) before adding fresh water. It takes five seconds and keeps your turtle happy.
Get the water right, and your turtle will thrive. Get it wrong, and, well… let’s not go there.
Step 3: Filtration System for snapping turtles
Snapping turtles are messy eaters. They don’t just eat—they destroy food, spit it out, and leave bits floating everywhere. That means your tank water can get nasty fast.
A strong filter is non-negotiable. Without one, your tank will turn into a swamp, and not in a good way.
Why Do You Need a Good Filter?
- Snapping turtles poop a lot
- Leftover food quickly rots
- Dirty water leads to bad smells and sick turtles
- Less work for you (nobody likes scrubbing a tank daily)
I once thought I could get away with a small, cheap filter. Bad idea. My turtle turned the water into a brown soup within days. Lesson learned!
Best Filters for Snapping Turtles
There are three types of filters you’ll see:
| Filter Type | Pros | Cons |
|---|---|---|
| Canister Filters | Super powerful, handles turtle mess, long-lasting | Expensive, needs space |
| Internal Filters | Cheap, easy to install, works for small tanks | Clogs quickly, not strong enough for big tanks |
| Sponge Filters | Good for baby turtles, adds oxygen to water | Useless for large turtles, needs frequent cleaning |
For adult snapping turtles, a canister filter is the best option. It’s powerful enough to handle their mess without clogging every other day.
How to Keep Your Filter Running Smoothly
- Clean it regularly (but don’t overdo it—filters need some bacteria to work)
- Use a pre-filter sponge to catch large debris
- Check for clogs if water flow slows down
- Upgrade when needed (your turtle will grow, and so will its mess)
I used to ignore my filter for weeks. Big mistake. The water got cloudy, my turtle looked unhappy, and I had to do a full tank cleaning. Now, I check my filter weekly and clean it monthly. Life is easier.
Step 4: Heating & Temperature Control for Snapping Turtles
Snapping turtles may look tough, but they need the right temperature to stay healthy. Too cold, and they get sluggish. Too hot, and they get stressed. Let’s get it just right!
Ideal Temperatures
Here’s what you need to aim for:
| Area | Temperature |
|---|---|
| Water | 75-80°F (24-27°C) |
| Basking Spot | 85-90°F (29-32°C) |
Juveniles need the warmer end of the range. Adults can handle slightly cooler water.
Best Heating Options
- Submersible Aquarium Heater (recommended: submersible aquarium heater) – Great for keeping water warm.
- Basking Heat Lamp (my pick: heat lamp) – Essential for a dry, warm spot.
- Thermometer – Never guess. Always check!
I once tried skipping a thermometer, thinking I could “feel” the temperature. Big mistake. The water was way too cold, and my turtle stopped eating. Lesson learned!
Where to Place Heaters
- Submersible Heater – Near a water flow (like the filter) to spread heat evenly.
- Basking Lamp (my pick: Zoo Med PowerSun) – Over a dry rock or platform, but not too close.
Watch out for heater guards! Turtles are curious and might burn themselves on an exposed heater.
Common Mistakes to Avoid
- No heater at all – Snappers may survive cold temps, but they won’t thrive.
- Overheating the water – Warm is good, but a hot tank = a stressed turtle.
- No basking heat – They need to dry off and warm up. No basking = shell problems.
Quick Tip
Use two thermometers—one for water, one for the basking area. Cheap insurance for a happy turtle!
Want to keep your turtle happy and active? Keep that temperature just right!
step 5: Basking Area & UVB Lighting: Why Your Snapping Turtle Needs It
Most people think snapping turtles live underwater 24/7. Wrong! They need a dry spot to bask, soak up heat, and stay healthy.
I learned this the hard way with my first snapper. No basking area, no UVB light—just water. Guess what? He got sluggish, stopped eating, and looked miserable. Lesson learned.
Why Basking Is a Big Deal
Snapping turtles may not bask as much as other turtles, but they still need the option.
Here’s why:
- Temperature Control – Helps them warm up after a swim.
- Shell Health – Prevents shell rot and fungal infections.
- Better Digestion – Heat speeds up metabolism.
Setting Up the Perfect Basking Area
A good basking spot should be:
- Easy to Climb – Turtles are not gymnasts. No crazy ramps.
- Sturdy – They’re heavy and will knock over weak platforms.
- Fully Dry – Damp basking spots defeat the purpose.
Some great options:
| Basking Platform (my pick: floating basking platform) Type | Pros | Cons |
|---|---|---|
| Floating Dock | Easy to install, adjustable | Can sink under a heavy turtle |
| Large Flat Rocks | Natural look, stable | Can be hard to position |
| Driftwood | Adds a cool aesthetic | Might mold if untreated |
UVB Lighting: Non-Negotiable
No sunlight, no UVB. No UVB, big problems. Snapping turtles need UVB light to process calcium. Without it, they get weak bones, soft shells, and other health nightmares.
Best UVB setup:
- 5.0–10.0 UVB Bulb – Mimics natural sunlight.
- Position: 12–18 Inches Above – Any closer, and you might fry your turtle.
- Replace Every 6–12 Months – Even if it still “works,” UVB output fades.
Don’t Make These Mistakes
- Forgetting to turn it on (consistency is key).
- Using a regular light bulb (no UVB, no benefits).
- Placing the lamp too far (might as well not have one).
step 6: Substrate: To Use or Not to Use?
Snapping turtles are messy. Like, really messy. Choosing the right substrate (or skipping it altogether) can make your life a lot easier. Let’s break it down.
Bare-Bottom Tank: The Easy Choice
A bare-bottom tank is exactly what it sounds like—just water, no sand, no gravel. It might not look fancy, but it has some big perks.
Pros:
- Super easy to clean
- No risk of the turtle swallowing small rocks
- Water stays clearer longer
Cons:
- Can look a little plain
- Less natural for the turtle
- Some turtles might slip on the glass bottom
I once tried a bare-bottom tank, and wow—cleaning was a breeze! But my turtle, Spike, looked a little confused at first. He eventually got used to it, though.
Sand: Natural but Messy
Sand gives a tank a more natural look and lets the turtle dig around. But it’s not all fun and games.
Pros:
- Looks great
- Mimics a wild habitat
- Turtles love to dig in it
Cons:
- Can clog filters
- Harder to clean
- Might cause digestive issues if swallowed
I used sand once, and my filter hated me for it. I had to clean it constantly. Spike, on the other hand, loved it—so it was a tough call.
Gravel: A Big No-No
Some people add gravel because it looks nice. Huge mistake.
Why to Avoid It:
- Turtles can swallow small rocks, leading to serious health issues
- Traps food and waste, making water dirty fast
- Hard to clean without removing everything
I learned this the hard way when I found Spike chomping on a pebble. That was the last day I used gravel.
Large River Rocks: The Best of Both Worlds?
If you really want something at the bottom, large river rocks might be the way to go.
Pros:
- Too big to swallow
- Adds a natural look
- Turtles can push them around for fun
Cons:
- Can trap waste underneath
- Harder to clean around
- Need to be smoothed to avoid sharp edges
I tried these, and while they looked great, cleaning around them was a pain. I had to move them often to get the gunk out.
So, What’s the Best Option?
For most people, a bare-bottom tank is the easiest and safest choice. If you want a natural look, sand or river rocks can work, but be prepared for extra cleaning.
If your turtle is a rock-eater (like mine was), skip anything small enough to swallow. Your turtle’s safety is more important than aesthetics.
Would you go for a bare-bottom tank or add some natural elements?
Need more creative habitat ideas that work with different substrate choices? Browse our collection of 11 turtle habitat design ideas.
step 7: Tank Mates: Good Idea or Disaster?
Snapping turtles are not friendly roommates. They see most creatures as either food or competition. Adding tank mates is usually a disaster waiting to happen. But let’s break it down.
Can You Keep Them With Fish?
Short answer: Not really. They will hunt and eat most fish.
Some people try adding fast swimmers like tetras or guppies. They might survive for a while, but eventually, the turtle wins. If you’re okay with an occasional “disappearance,” go for it. Otherwise, it’s best to skip fish.
What About Other Turtles?
This depends on size and personality.
Two snapping turtles? Bad idea. They will fight for dominance.
Snapping turtle with a softshell or painted turtle? Still risky. Snappers have strong jaws and little patience. One wrong move, and you’ll have an injured (or missing) tank mate.
What Happens With Live Food?
Adding feeder fish, shrimp, or crayfish is fine, but don’t expect them to last long.
I once added a dozen minnows to my turtle’s tank. By morning, only two were left, hiding in the filter. A week later, they were gone too.
Live food can provide enrichment, but don’t get attached.
Safe Tank Mates (If Any)
If you really want something else in the tank, here are a few options:
| Tank Mate | Survival Rate | Notes |
|---|---|---|
| Large Plecos | Medium | Might outgrow danger, but still risky |
| Mystery Snails | High | Too hard to eat, but may get bullied |
| Large Rocks | 100% | The only truly safe tank mate |
step 8: Decorations & Hiding Spots
Snapping turtles might look like tough guys, but they love a good hiding spot. A well-decorated tank keeps them happy and stress-free. Plus, it makes your tank look awesome.
Why Hiding Spots Matter
- Turtles get stressed without places to hide.
- It helps them feel safe, especially when young.
- Less stress = a healthier, happier turtle.
I once had a snapping turtle that freaked out every time I walked by. After adding a few caves and logs, he chilled out completely. Lesson learned: privacy matters!
Best Decorations for Your Tank
| Decoration Type | Why It’s Good |
|---|---|
| Large Rocks | Great for climbing and hiding |
| Driftwood | Natural look, perfect for shade |
| Caves | Best for complete hiding |
| PVC Pipes | Cheap, easy hiding spot |
| Live Plants | Helps with water quality and looks great |
What to Avoid
- Sharp objects – Can injure your turtle.
- Small gravel – They might eat it (bad idea).
- Fake plants with rough edges – Can scratch their skin.
Pro Tip
Always place decorations so they won’t fall over. A big rock tipping onto your turtle? Not good.
A good hiding spot keeps your turtle happy, calm, and feeling at home. Think of it like decorating a cool bachelor pad—just for your reptile buddy!
step 9: Feeding Inside the Tank
Feeding your snapping turtle inside the tank seems easy, right? Just drop the food in and watch them go to town. But there’s a catch—leftover food can quickly turn your tank into a swampy mess.
The Problem with Tank Feeding
Snapping turtles are messy eaters. They tear up food, leave bits floating around, and don’t clean up after themselves (rude, right?).
Here’s what happens when you feed inside the tank:
- Uneaten food rots → Dirty water
- Filters clog faster → More maintenance for you
- Bad smells take over → Your room smells like a swamp
I made this mistake once. I thought, “How bad could it be?” A week later, my tank smelled like a forgotten fish market. Never again.
Ways to Minimize the Mess
If you must feed in the tank, try these tricks:
- Use feeding tongs – Less mess, more control
- Feed in a corner – Easier to clean up afterward
- Remove leftovers quickly – Don’t let them sit
The Better Option: Feeding in a Separate Tub
Want to keep your tank clean? Try feeding your turtle in a separate tub of water.
Why it works:
- Food mess stays out of the main tank
- Water stays cleaner, longer
- Less frequent filter cleaning
I switched to this method, and my turtle still eats like a beast—just without turning his home into a disaster zone.
What About Live Food?
Live fish, shrimp, or worms? That’s a different story. If you drop live prey in the tank, your turtle will hunt them down. Just be prepared—leftover body parts might still end up floating around.
Maintenance & Cleaning: Keep It Fresh, Keep It Fun
Cleaning your snapping turtle’s tank isn’t the most exciting chore, but trust me, it’s necessary. A dirty tank means a sick turtle. And a sick turtle means vet bills. Let’s keep things simple and stress-free.
How Often Should You Clean?
Here’s a quick guide so you don’t end up with swamp water:
Daily:
- Remove uneaten food (snapping turtles are messy eaters).
- Check for poop and scoop it out if you can.
Weekly:
- Partial water change (about 25-30%).
- Rinse filter media if needed (don’t kill the good bacteria).
Monthly:
- Deep clean the tank (but not a full water change—bad for bacteria balance).
- Scrub algae off walls and decorations.
The Right Tools for the Job
You don’t need fancy gadgets, just the right basics:
| Tool | Why You Need It |
|---|---|
| Gravel vacuum | Sucks up dirt without draining too much water |
| Algae scraper | Keeps tank walls clear (your turtle still wants to see you) |
| Water conditioner | Removes harmful chemicals from tap water |
| Bucket | Never use the same one for cleaning and turtle water |
Pro Tips for Easy Cleaning
- Feed in a separate container. Less food waste in the tank = less gunk to clean.
- Invest in a strong filter. A weak filter means you’ll be scrubbing more often.
- Use a turkey baster. Yes, really. It’s great for quick spot cleaning between water changes.
Signs Your Tank Needs Help
If you notice any of these, it’s time for an emergency cleanup:
- Water smells bad (your turtle’s home shouldn’t smell like a swamp).
- Cloudy water that doesn’t clear up after a day.
- Green slime takeover (algae is normal, but don’t let it win).
My Cleaning Fails (So You Don’t Repeat Them)
Once, I ignored my snapping turtle’s tank for too long. I thought, “Eh, it still looks fine.” Big mistake. Within a week, the water turned into a murky disaster, and my filter had given up on life. Now, I stick to my schedule, and my turtle is happier for it.
Bottom line? A clean tank means a happy, healthy turtle—and less work for you in the long run. Keep up with small cleanings, and you’ll never face a full-blown tank disaster.
Common Mistakes & How to Avoid Them
Setting up a snapping turtle tank isn’t just about dumping water in a tank and calling it a day. Trust me, I’ve made some of these mistakes myself. Let’s go over the biggest blunders so your turtle doesn’t suffer.
1. Skipping the Filter (or Using a Weak One)
Snapping turtles are messy eaters. Food scraps, poop, and who-knows-what-else will quickly turn the tank into a swamp.
Mistake: Using a weak filter or no filter at all.
Fix: Get a strong canister filter. It needs to handle at least 2–3 times the tank’s water volume per hour.
2. Ignoring Water Temperature
Too hot? Your turtle gets stressed. Too cold? It stops eating. I once had a turtle refuse food for a week because the water was too chilly.
| Ideal Temps | Water | Basking Spot |
|---|---|---|
| Baby Turtle | 75–80°F | 85–90°F |
| Adult Turtle | 70–75°F | 85–90°F |
Use a reliable water heater and a thermometer to keep things steady.
3. No UVB Light = Big Problems
Snapping turtles don’t bask much, but they still need UVB light for strong shells.
Mistake: Thinking they don’t need UVB since they’re mostly aquatic.
Fix: Get a 5.0–10.0 UVB bulb and replace it every 6 months. No UVB = soft shell and health issues.
4. Tank Too Small
Snapping turtles grow fast and need space. Keeping them in a tiny tank is like living in a closet.
Mistake: Using a 20-gallon tank for a turtle that will grow to 18 inches.
Fix: Start with at least a 55-gallon for a baby. A full-grown snapper? 150+ gallons or even an indoor pond.
5. Dangerous Substrate Choices
Small gravel looks nice but can be deadly if swallowed. Trust me, a turtle vet bill is NOT fun.
Safe Substrate Options:
- Bare bottom (easy to clean!)
- Large river rocks (too big to eat)
- Sand (if you don’t mind extra cleaning)
Avoid small gravel and sharp decorations.
6. Overfeeding & Dirty Water
Snappers love to eat, but overfeeding leads to obesity and dirty water. Once, I made the mistake of feeding mine daily—my filter nearly quit on me.
Fix: Feed juveniles every other day, adults 2–3 times a week. Remove uneaten food after 10 minutes.
7. Bad Tank Mates
Thinking of adding fish or other turtles? Bad idea. Snappers are predators, not friendly roommates.
Safe options? Pretty much nothing. Some keep them with fast fish, but there’s no guarantee they won’t become a snack.
8. Ignoring Water Changes
Even with a good filter, you must change the water. Dirty water = sick turtle.
Fix:
- Partial water change once a week (25–30%).
- Full tank clean once a month if needed.
- Use dechlorinated water to protect their skin.
Final Thoughts
Snapping turtles are tough, but their tank setup needs to be right. Avoid these mistakes, and you’ll have a happy, healthy turtle. Trust me, your turtle (and your nose) will thank you.

About Author
Muntaseer Rahman started keeping pet turtles back in 2013. He also owns the largest Turtle & Tortoise Facebook community in Bangladesh. These days he is mostly active on Facebook.