3 Free Crochet Turtle Christmas Ornament Patterns (Strawberry, Sunflower & Festive Tortoise)
This post was created with help from AI tools and carefully reviewed by a human (Muntaseer Rahman). For more on how we use AI on this site, check out our Editorial Policy.
Handmade ornaments hit different. They turn a Christmas tree from “thing you bought at a big-box store” into a little time capsule of stuff you actually made.
And if you crochet, you have a serious cheat code — your tree gets one-of-a-kind decorations that double as the world’s most personal gifts.
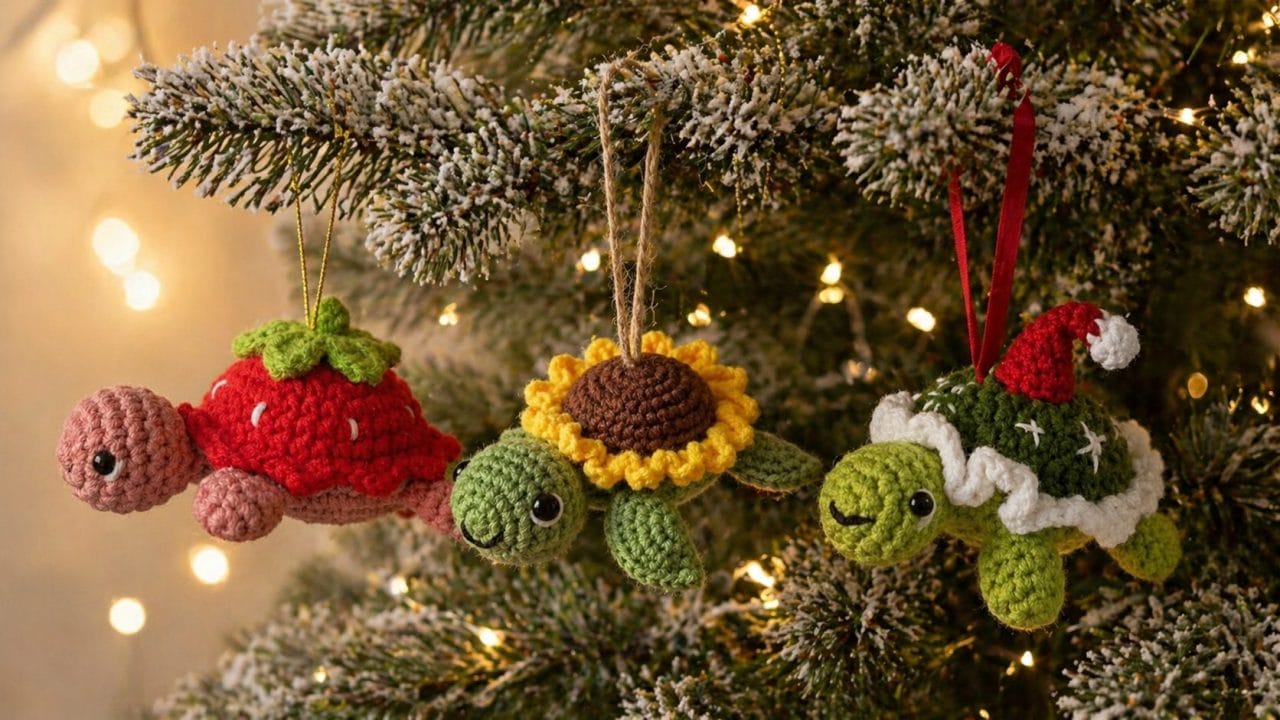
This roundup turns three of our most popular crochet turtle patterns into Christmas tree ornaments. You crochet the body you already love, then add one extra finishing step for the hanging loop. That’s it.
The best part? Each ornament uses a different loop material — gold thread, jute twine, and red velvet ribbon — so you end up with three visually distinct ornaments that look incredible together on the same tree.
Why crochet turtle ornaments are a perfect holiday project
Three reasons crochet turtles work better as ornaments than the usual baubles and stars:
- They weigh almost nothing. No drooping branches, no risk of cracking when they fall.
- They’re keepsakes. A handmade crochet ornament gets pulled out of the box every December for decades. Try saying that about a $4 plastic snowflake.
- They’re the easiest “I made this” gift you can give. Bundle one with a card and you’ve just out-thoughtful’d everyone in the office Secret Santa.
If you’ve never made a crochet ornament before, the trick most beginners miss is that the loop is its own little step — it’s not part of the original pattern. That’s why we’re handling it here, separately, for each turtle.
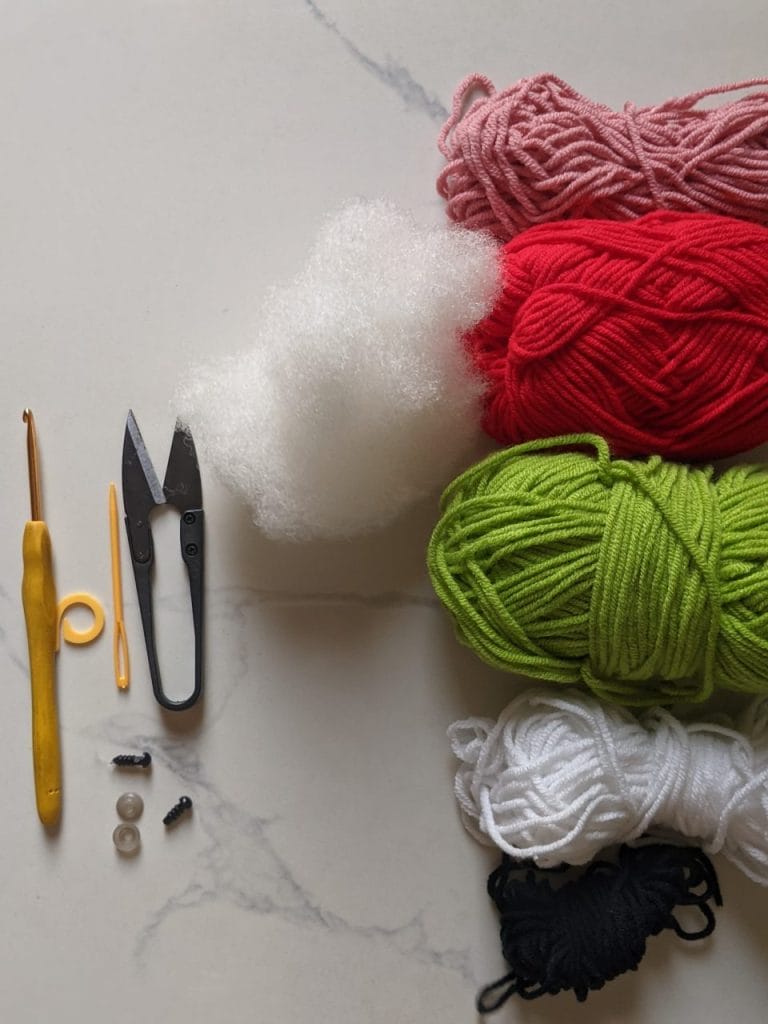
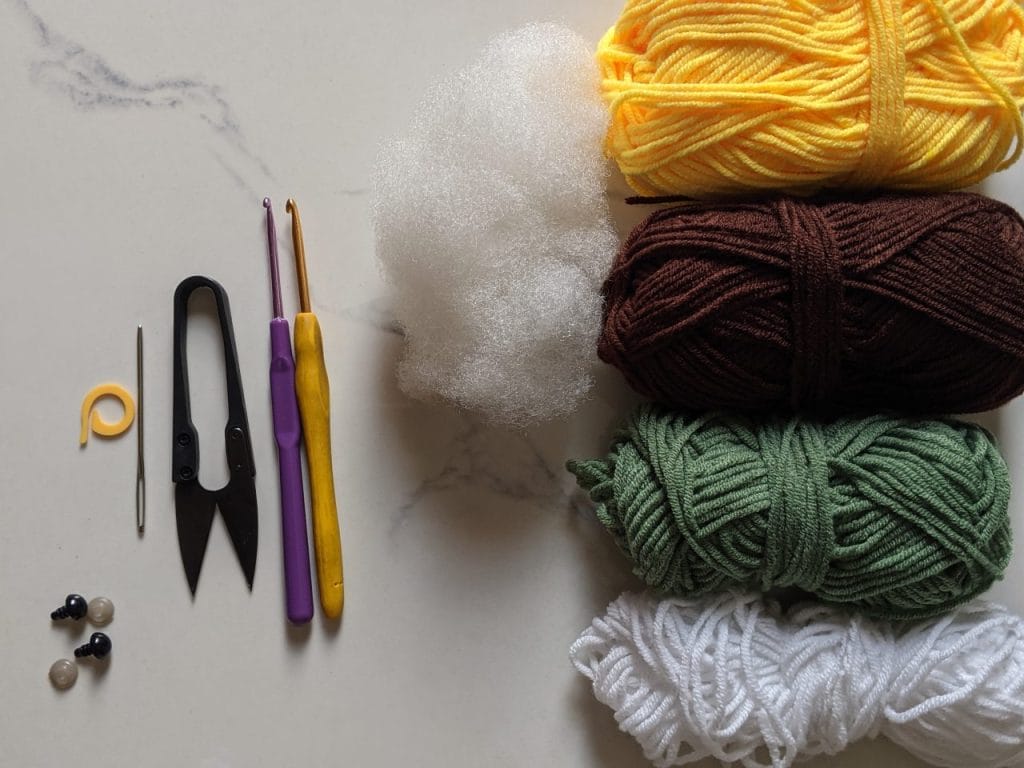
What you’ll need (shared materials)
The body of each ornament uses the same materials as the original pattern (linked in each section below). For the hanging loops, here’s what’s new:
| Ornament | Loop material | Where to buy |
|---|---|---|
| Strawberry turtle | Gold metallic embroidery thread (or thin gold cord) | Craft store, Amazon |
| Sunflower turtle | Natural jute twine (3 mm) | Garden center, craft store |
| Festive tortoise | Red velvet ribbon (1/4 inch wide) | Fabric store, Amazon |
You’ll also want a tapestry needle with an eye large enough to fit your loop material, plus scissors and (optional) a dot of fabric glue for securing knots.
Your Yarn Stash Called. It Wants to Be a Turtle.
Look, you could spend another weekend scrolling Pinterest for the “perfect” turtle pattern.
Or you could grab one that’s already perfect.
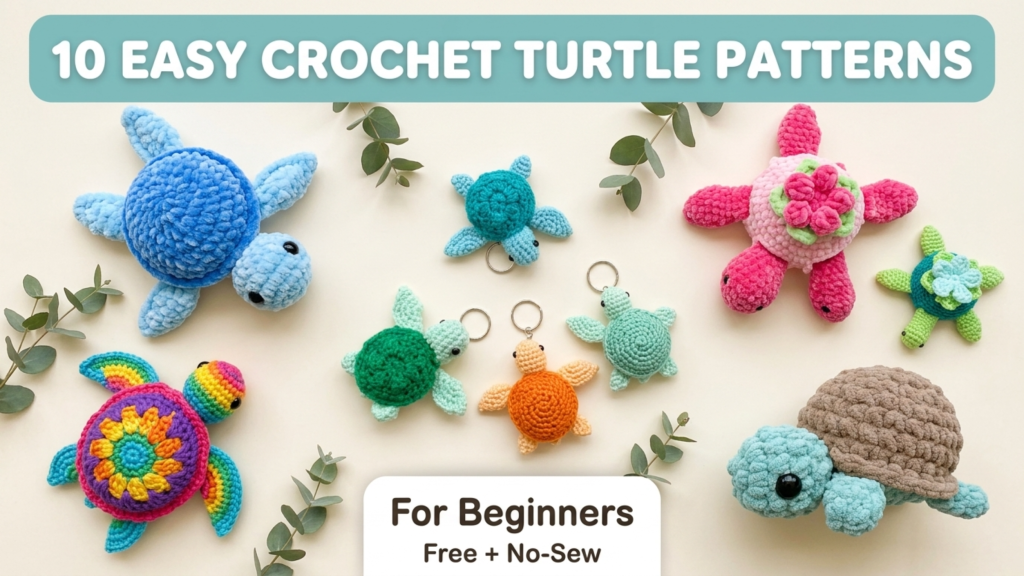
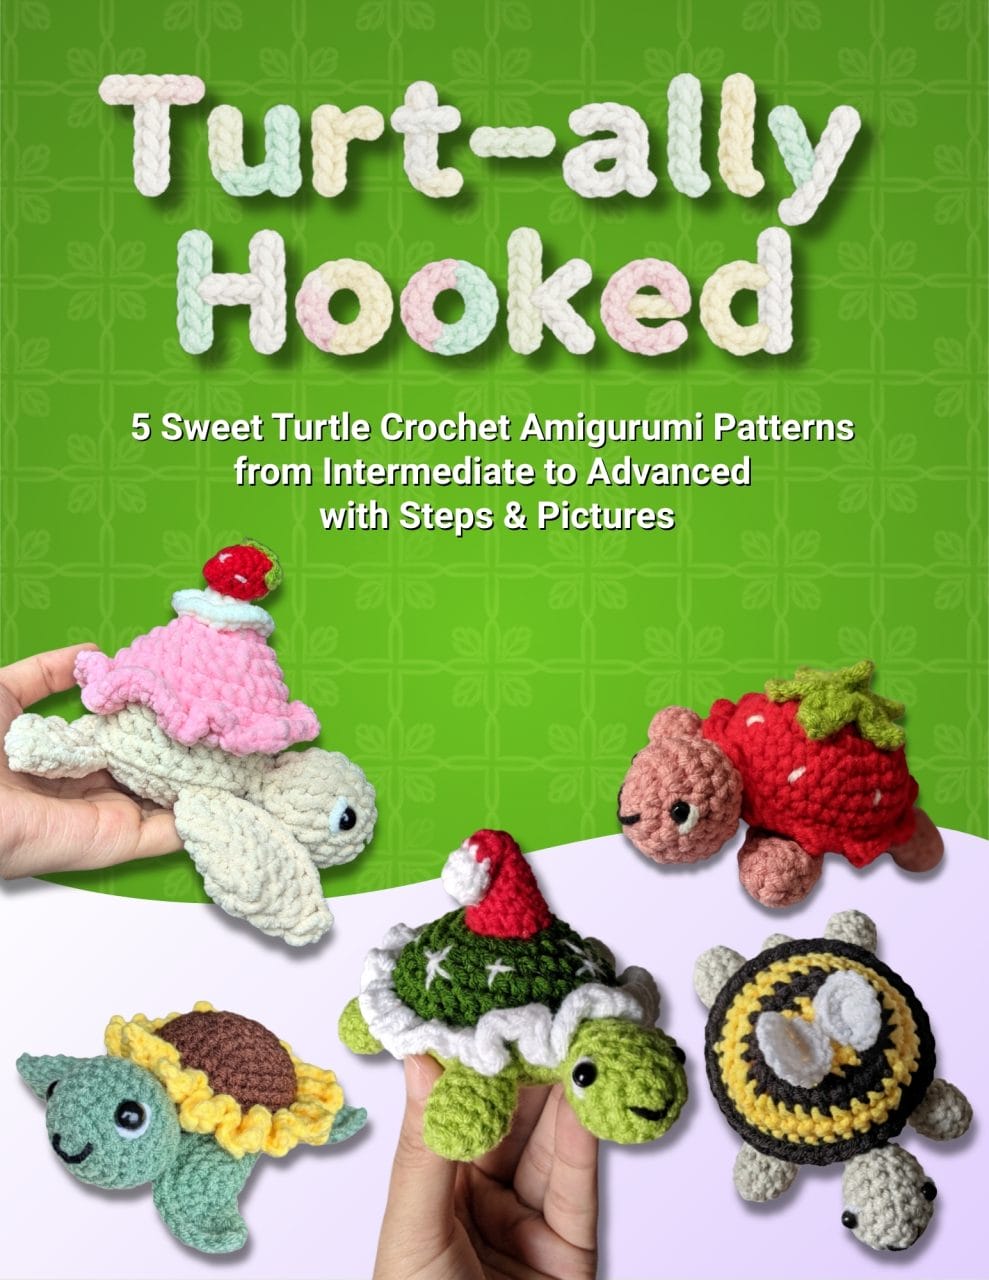
Turt-ally Hooked gives you 5 complete turtle patterns—each with a different theme, personality, and skill level.
Bee, strawberry, sunflower, Christmas, and cupcake. All adorable. All doable.
It’s straightforward, it’s cute, and if you’ve been meaning to make something other than another scarf—here’s your chance.
Skills you need
These are intermediate amigurumi patterns. You should be comfortable with:
- Magic ring and working in the round
- Single crochet, increase, decrease
- Front loop only (FLO) and back loop only (BLO) working
- Attaching multiple parts during construction
- Basic embroidery for facial features
If any of those feel rusty, walk through our strawberry turtle step-by-step pattern first — it covers all of these techniques in detail.
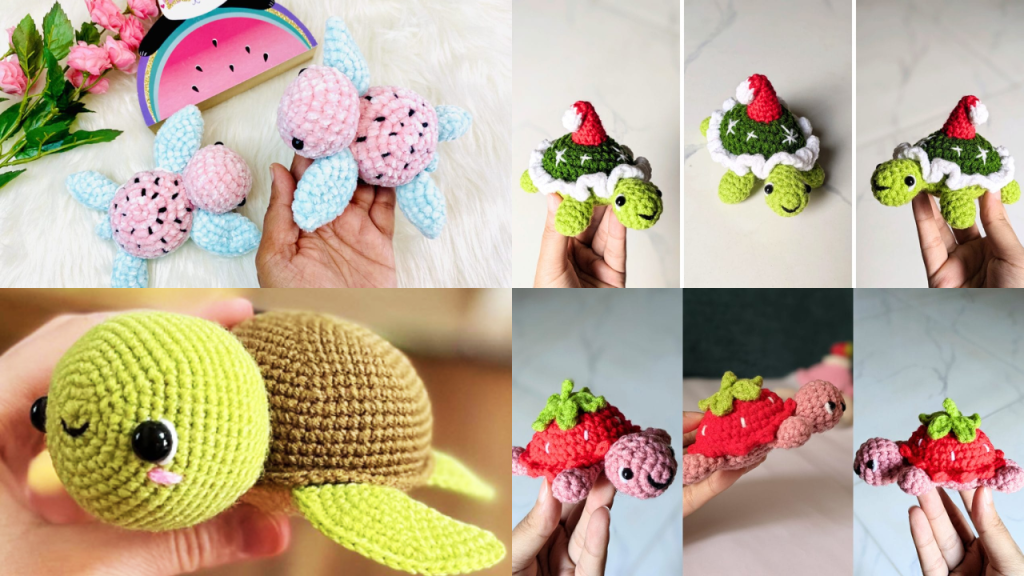
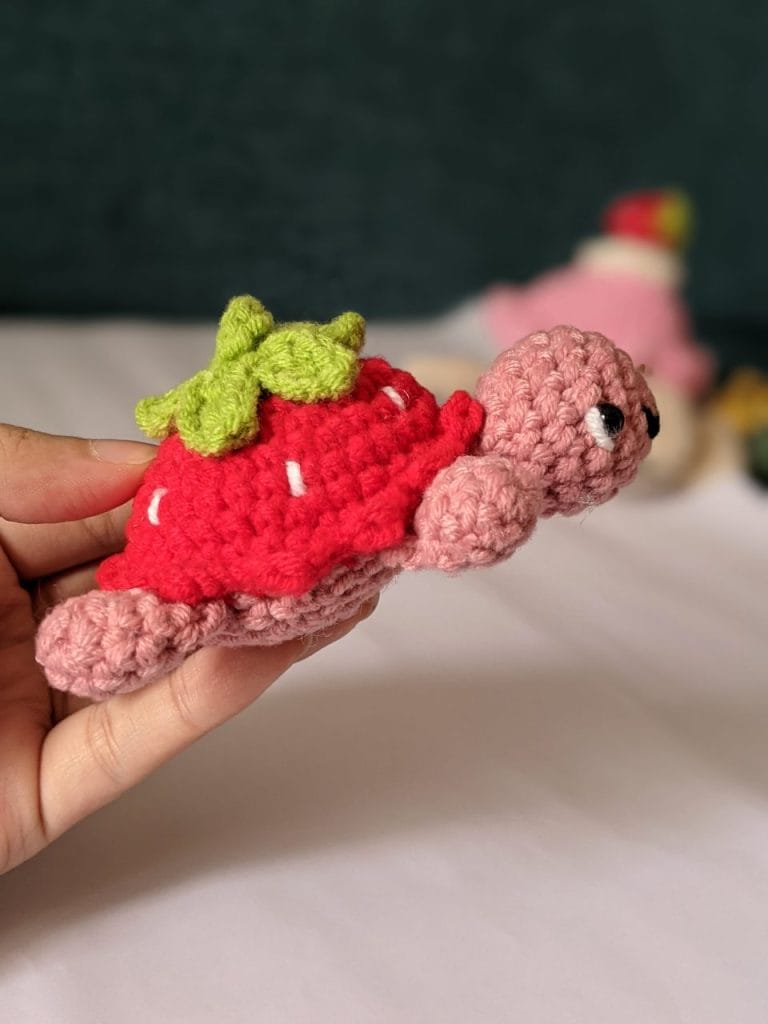
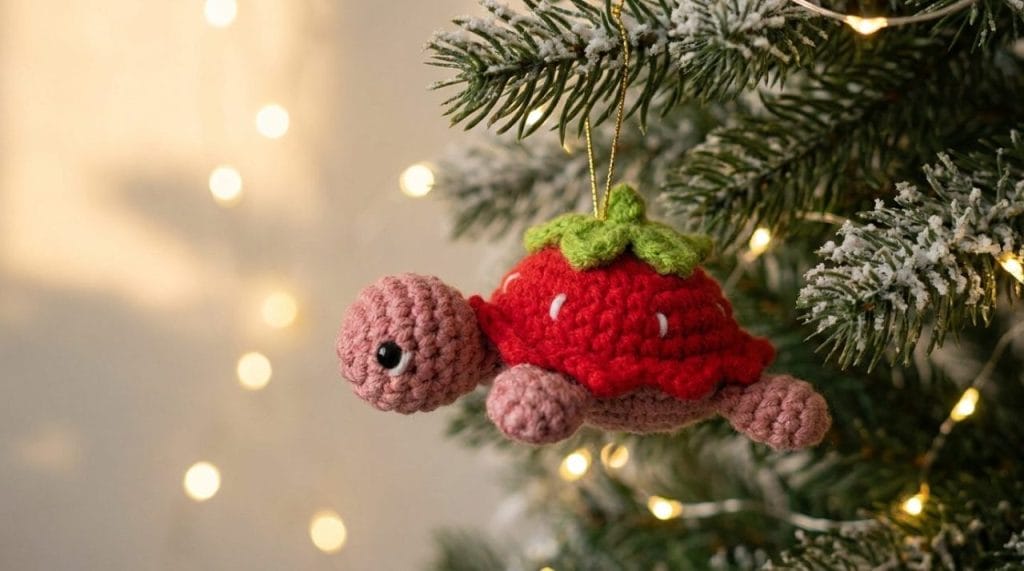
Pattern 1: Strawberry Turtle Christmas Ornament (Gold Loop)
Skill level: Intermediate · Finished size: ~11.5 cm (4.5 inches) · Loop: Gold metallic thread
The pink-and-red color scheme of the strawberry turtle reads as “Yuletide berry” on a tree. Pair it with a gold loop and it suddenly looks like an heirloom ornament from a fancy boutique.
Step 1: Crochet the strawberry turtle body
Follow the full pattern in our strawberry turtle crochet tutorial. You’ll make the head, four flippers, tail, upper shell (red), bottom shell (dusty pink), and the green leafy strawberry top — exactly as written.
Here’s a quick visual preview of what you’re building:
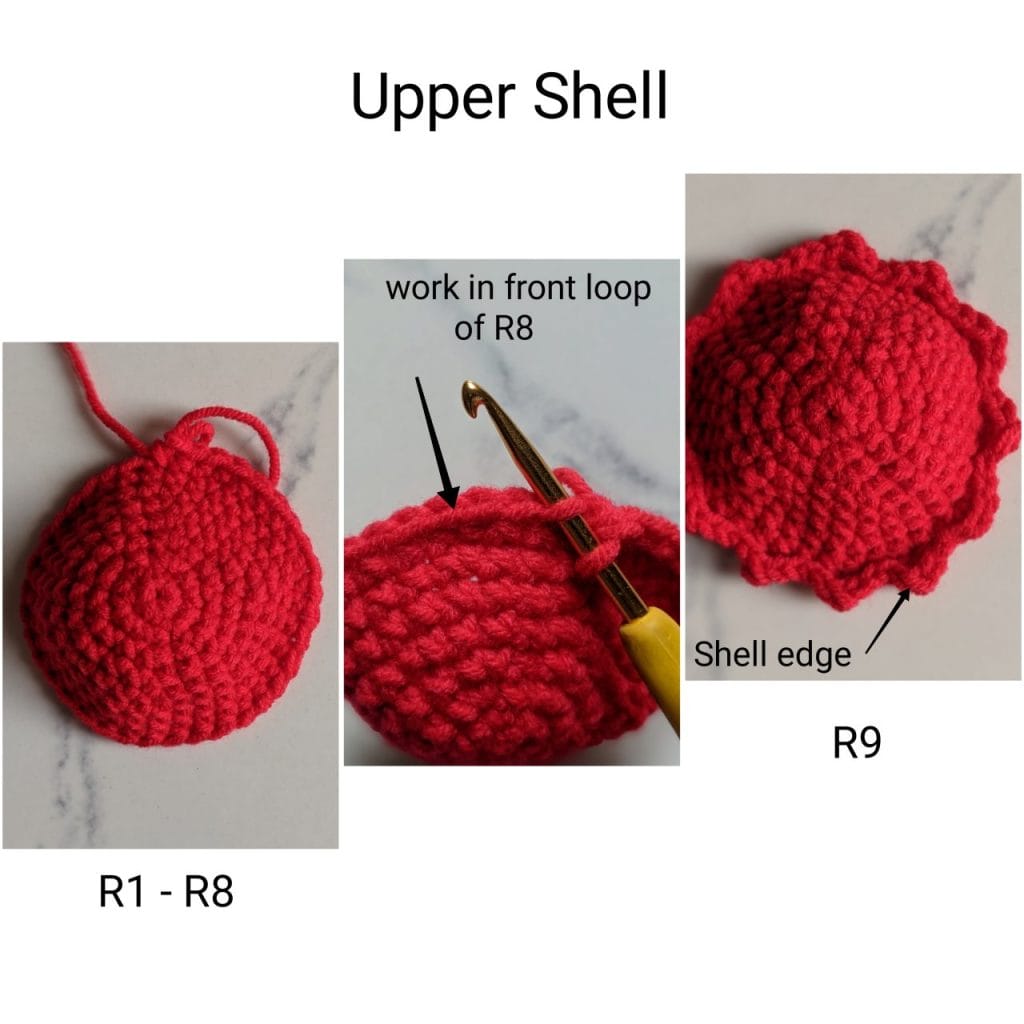
Stop right before the “Care Instructions” section. Your turtle is finished but doesn’t have a loop yet.
Step 2: Add the gold ornament loop
Now the only new instruction:
- Cut a 12-inch length of gold metallic thread.
- Thread one end through your tapestry needle.
- Insert the needle down through the center of the green strawberry top, between two of the leaves, and pull it out the bottom of the shell.
- Pull the thread through until about 2 inches are sticking out the bottom.
- Tie a tight double knot at the bottom, then tuck the knot up inside the shell stuffing so it disappears.
- Bring the long end back up through the same hole (or right beside it).
- Form a 3-inch loop at the top, then tie both thread ends together with a tight knot at the base of the leaves.
- Trim any excess thread, leaving the knot hidden under the leaves.
Display tip: Hang on a thicker tree branch where the gold catches the lights. Looks especially good against dark-green pine.
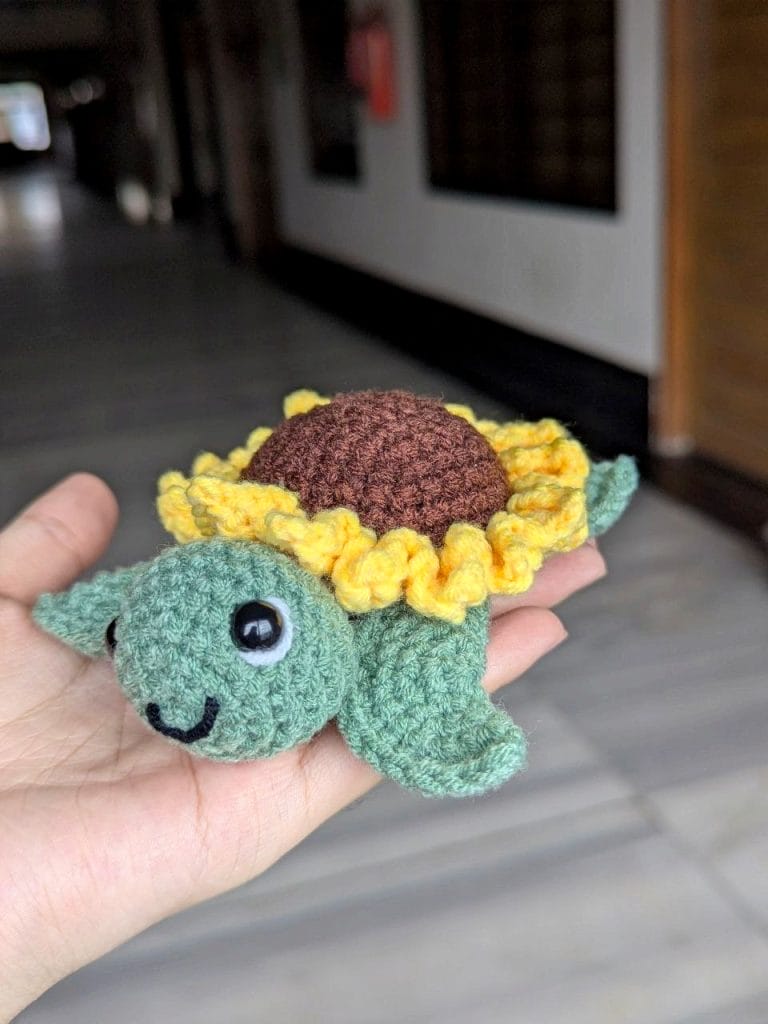
Pattern 2: Sunflower Turtle Christmas Ornament (Jute Twine Loop)
Skill level: Intermediate · Finished size: ~12 cm (5 inches) · Loop: Natural jute twine
Sunflowers in winter? Absolutely. The yellow petals plus brown shell give big “rustic farmhouse Christmas” energy, and jute twine pushes that vibe even harder.
Step 1: Crochet the sunflower turtle body
Follow the full pattern in our sunflower turtle amigurumi tutorial. You’ll make the dark brown upper shell, light green head/flippers/tail, the bottom shell with attached body parts, and the bright yellow sunflower petals using the peacock stitch.
Here’s what the build looks like:
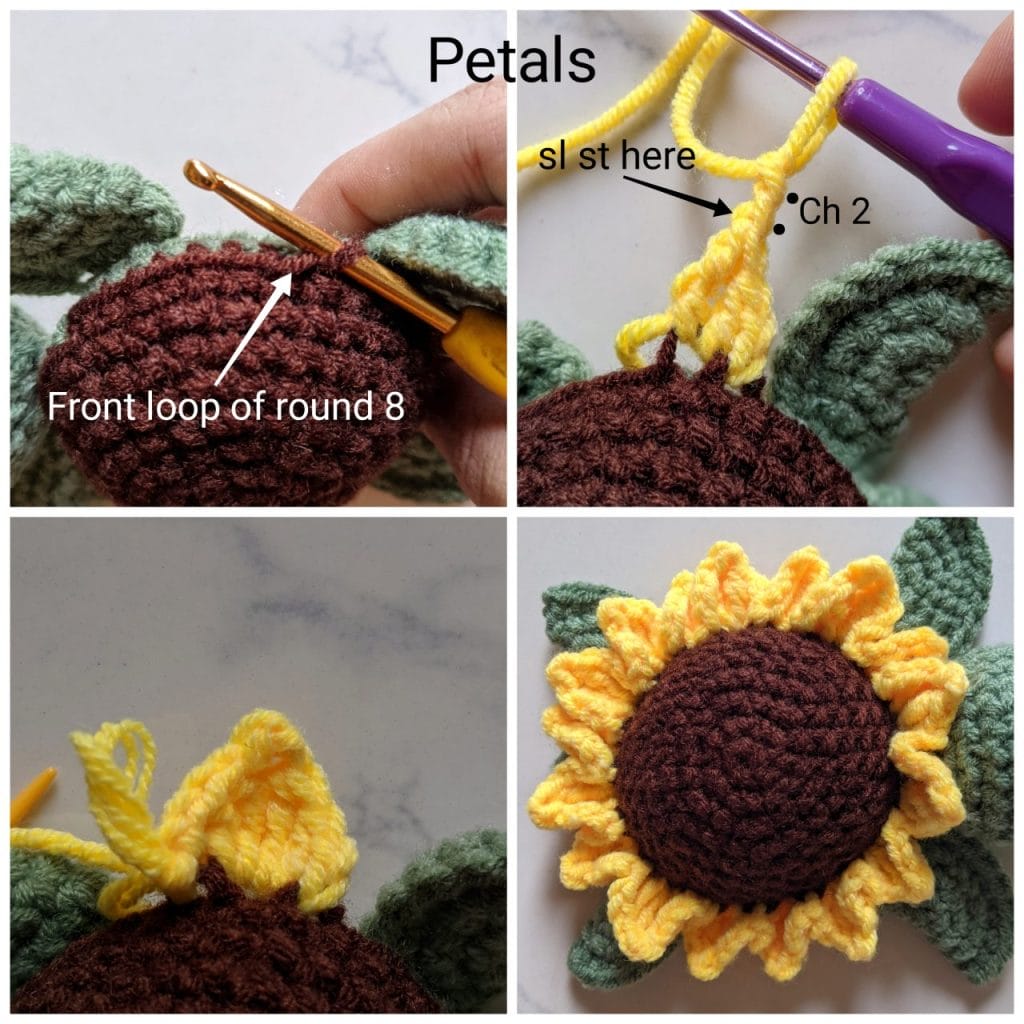
Stop after the petals are attached and the face is embroidered. Body’s done.
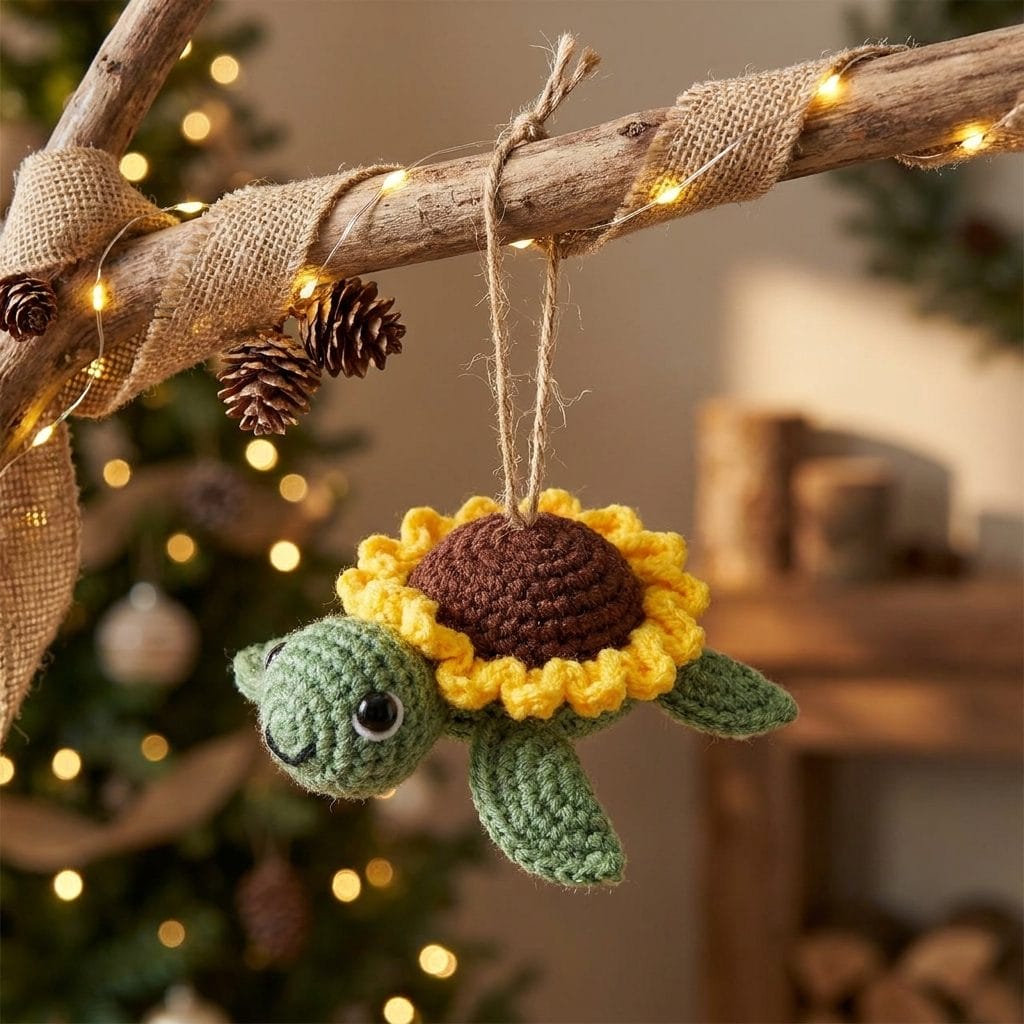
Step 2: Add the jute twine loop
- Cut an 8-inch length of jute twine.
- Find the center of the sunflower petals — right in the middle of the dark brown shell crown.
- Thread the twine through your tapestry needle (use one with a large eye — jute is thick).
- Insert the needle straight down through the center, between the petals, and pull it out the bottom of the shell.
- Pull until 1 inch of twine sticks out the bottom. Tie a tight square knot.
- Tuck the knot up into the stuffing.
- Pull the long end back up through the same spot.
- Form a 2.5-inch loop and tie both ends together with a square knot at the petal base.
- Trim ends to about 1/2 inch and let them fray slightly — that frayed look is what sells the rustic vibe.
Display tip: Pairs beautifully with burlap garlands, wooden ornaments, and warm white string lights. A natural-fiber Christmas tree’s best friend.
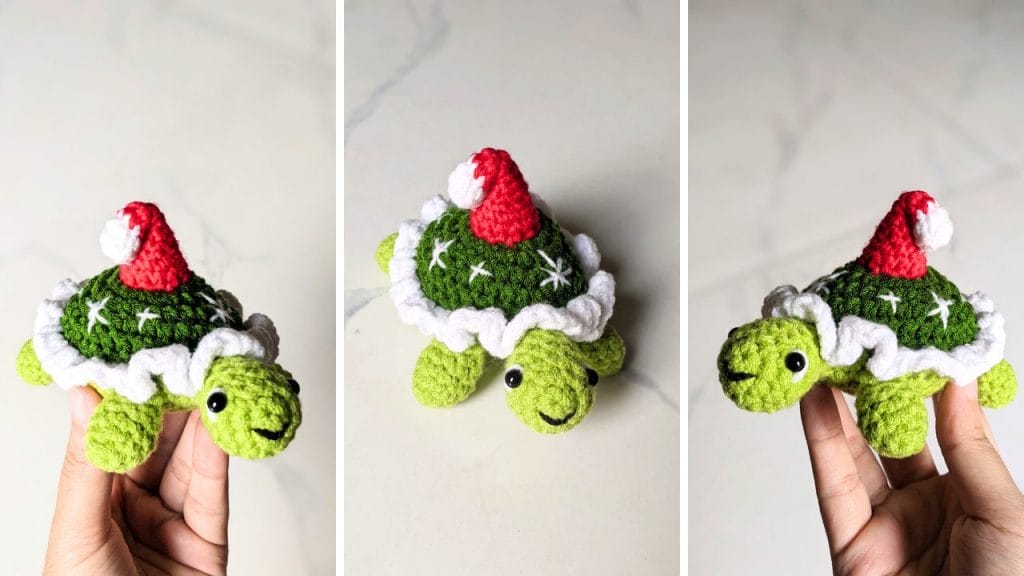
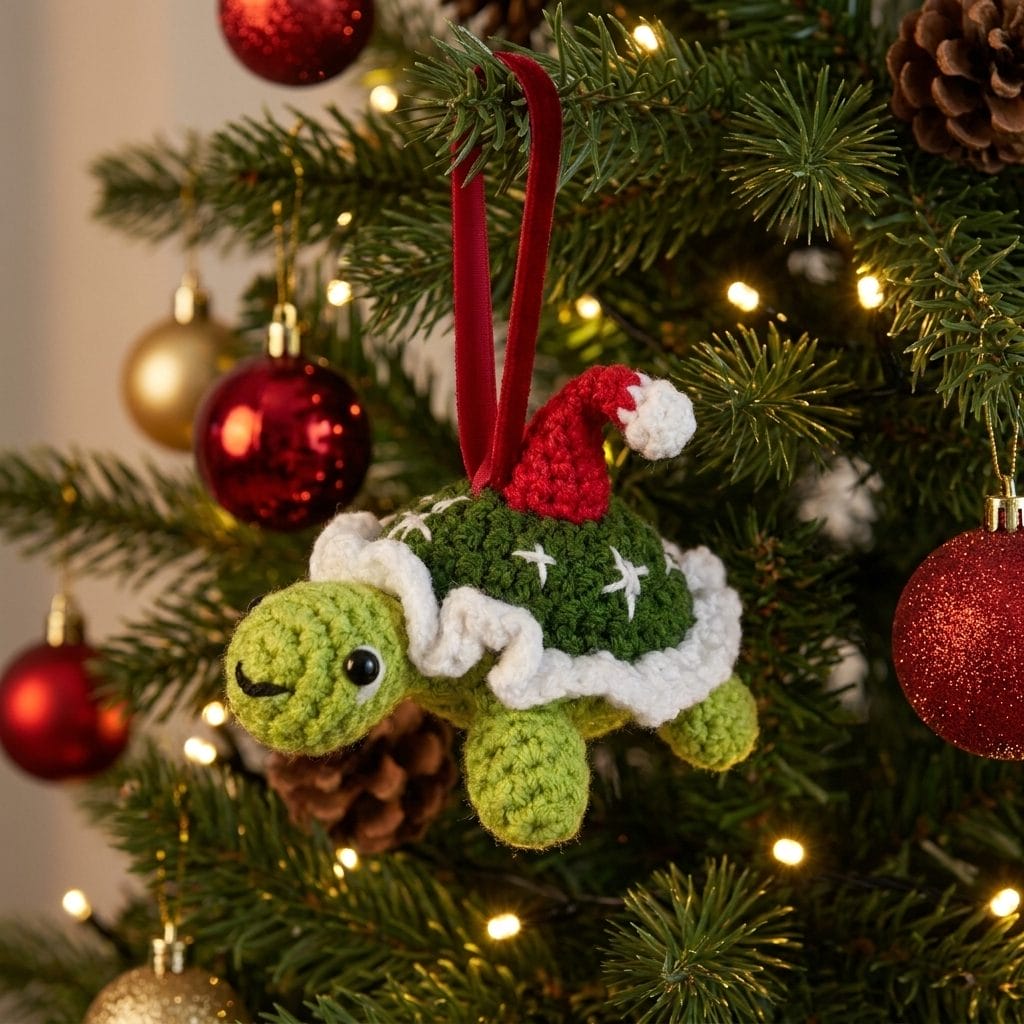
Pattern 3: Festive Tortoise Christmas Ornament (Red Velvet Ribbon Loop)
Skill level: Intermediate · Finished size: ~10 cm (4 inches) · Loop: Red velvet ribbon (1/4 inch)
The Santa-hat tortoise is the most overtly Christmassy of the three, and a red velvet ribbon is its perfect match — classic, plush, and unmistakably festive.
Step 1: Crochet the festive tortoise body
Follow the full pattern in our Christmas tortoise crochet tutorial. You’ll make the head, four legs (this one’s a tortoise, so legs not flippers), tail, dark green upper shell, lower shell, the white ruffled “snow” edge, and the red-and-white Santa hat.
Here’s what’s in store:

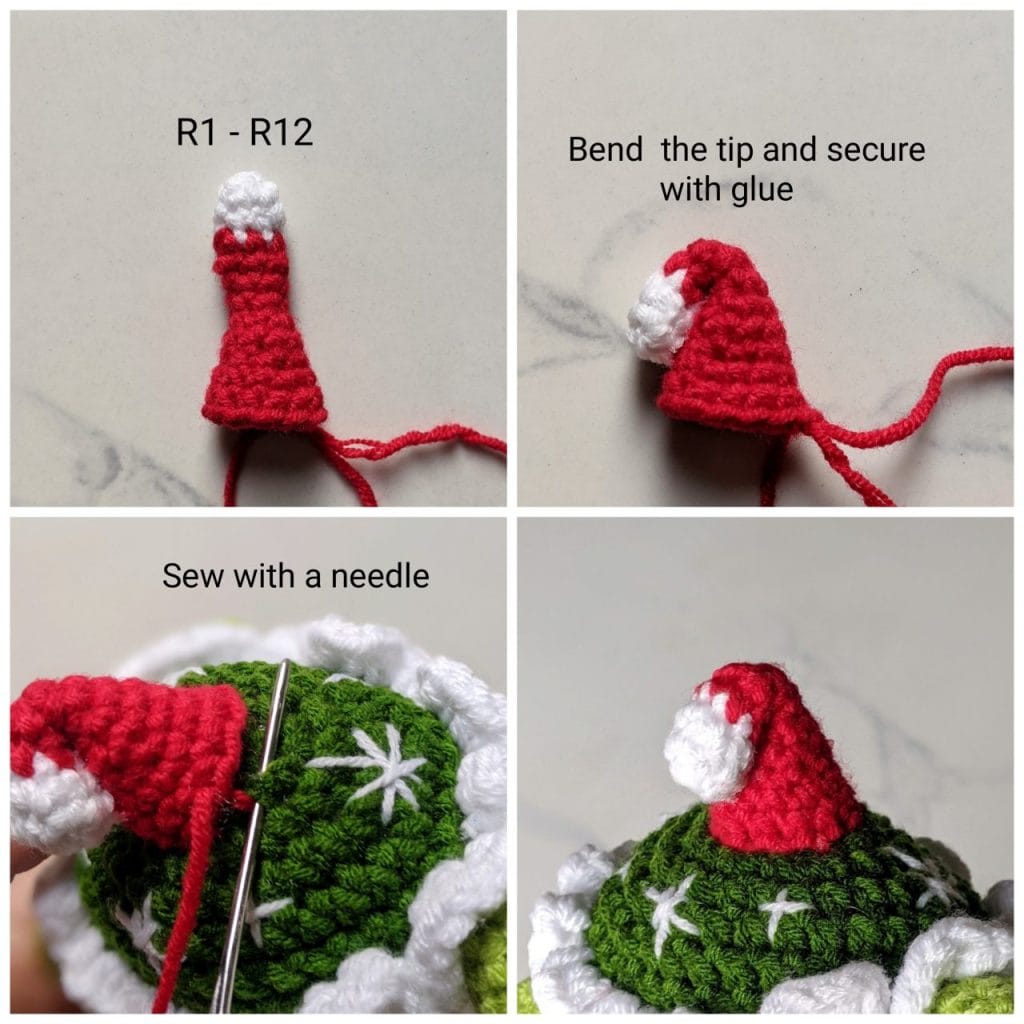
Stop before the “Display Ideas” section. The hat should already be sewn to the top of the shell.
Step 2: Add the red velvet ribbon loop
This one uses the Santa hat as its anchor, which makes it cleaner than thread-through methods:
- Cut a 6-inch length of red velvet ribbon.
- Fold the ribbon in half so the two ends meet.
- Position the looped end pointing up behind the bent tip of the Santa hat.
- Sew the two ends down to the back base of the Santa hat using red yarn and a tapestry needle. Take 4–5 stitches through both ribbon ends and the base of the hat to lock them in place.
- Trim any frayed ribbon edges.
- (Optional) Dab a tiny dot of fabric glue on the ribbon ends to stop fraying long-term.
The result: a 2-inch hanging loop that appears to come right out of the Santa hat, like a built-in decoration. Perfect.
Display tip: Hang at eye level so the Santa hat tip shows off properly. Looks great near twinkle lights — the red velvet picks up the warm glow.
Display and gifting ideas for your turtle ornaments
Once you have all three made, here’s how to actually use them:
- Tree statement cluster. Group all three on a single branch — different loop materials = visual variety in one spot.
- Garland. String a row of mini turtles along a mantle garland for a unique, non-traditional look.
- Gift toppers. Tie one onto a wrapped gift instead of a bow. Recipients keep the ornament forever.
- Advent countdown. Make 24 mini versions and pin one to a fabric advent calendar.
- Wreath embellishment. Wire one onto a Christmas wreath for an unexpected handmade detail.
- Stocking decoration. Sew a small loop on a stocking and clip the turtle ornament on as a personalized name marker.
How to store crochet ornaments year-round
Crochet ornaments survive long-term storage better than glass — but only if you treat them right:
- Store in a lidded plastic bin with a few silica gel packs to prevent moisture damage.
- Wrap each one loosely in tissue paper so the petals, leaves, or hat tip don’t get crushed.
- Keep the bin out of attics or basements if humidity swings hard. A closet shelf is ideal.
- Before packing them away, give each one a gentle once-over with a lint roller to lift any dust or dander.
Done right, these ornaments will look as good in their tenth Christmas as their first.
Frequently Asked Questions
Can I make these ornaments if I’m a complete beginner?
Honestly, not yet. All three patterns are intermediate-level amigurumi. Start with a simpler practice piece — a flat coaster or a basic ball — to nail down the magic ring, single crochet, and decreases. Once those feel automatic, come back and these will click.
Can I substitute the loop material?
Absolutely. Use baker’s twine for a candy-cane vibe, copper wire for industrial-modern, satin ribbon for a softer look, or even a length of beaded chain for extra sparkle. The attachment method stays the same — pick whatever matches your tree’s aesthetic.
Are these washable?
Yes, but spot-clean only. If your turtle picks up a smudge, dab it with a damp cloth and a drop of mild detergent. Avoid full submersion — it can warp the stuffing and stretch the loop attachment.
Can I sell ornaments made from these patterns?
Yes — small-scale handmade sales are fine. You can sell finished ornaments at markets, on Etsy, or in local shops. The one thing to avoid is reposting our written patterns or photos as your own.
How long does each ornament take?
Plan on 3–4 hours per ornament if you’re an intermediate crocheter, including the loop step. The strawberry and tortoise are slightly faster than the sunflower (those peacock-stitch petals take time).
Can I make them in different colors?
Of course. Try a blueberry turtle (blue + green), a snow turtle (all white with silver thread loop), or a candy cane turtle (red and white stripes). The construction is identical — just swap the yarn colors.
Final thoughts
These three crochet turtle ornaments cover the spectrum: elegant (strawberry), rustic (sunflower), and classic Christmas (festive tortoise). Make one of each and your tree has its own little turtle squad watching over the gifts.
If you make them, save this post to your Pinterest holiday board so you can find it again next year — and check out our growing collection of free turtle crochet patterns for more projects to add to your make-list.
Happy hooking, and happy holidays.

About Author
Muntaseer Rahman started keeping pet turtles back in 2013. He also owns the largest Turtle & Tortoise Facebook community in Bangladesh. These days he is mostly active on Facebook.