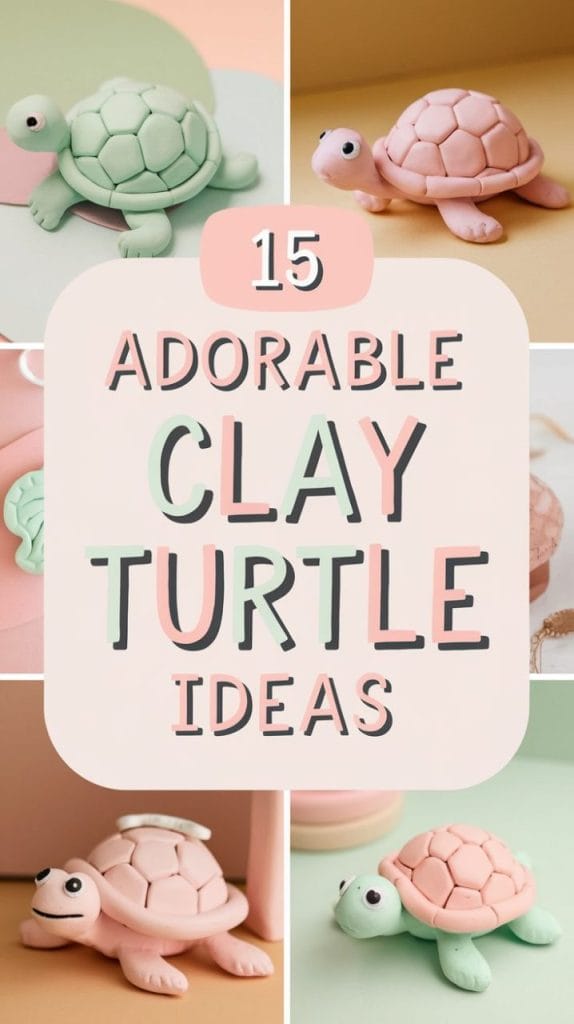
20 Adorable Clay Turtle Ideas You Can Make at Home
This post was created with help from AI tools and carefully reviewed by a human (Muntaseer Rahman). For more on how we use AI on this site, check out our Editorial Policy.
Warning: You’re about to fall in love with clay turtles!
These little guys are so cute and easy to make, you might end up with an entire turtle village before you know it.
Whether you want to sculpt a tiny turtle family, a keychain buddy, or a quirky plant pot pal, we’ve got the best ideas to get you started.
Why Make Clay Turtles?
Making clay turtles is fun, relaxing, and surprisingly useful. You don’t need to be a pro artist—just some clay, your hands, and a little patience.
I once made a clay turtle for my desk, thinking it would just sit there. Now, it’s my lucky charm. My wife says it looks like a potato, but I think it has character.
Reasons to Try Clay Turtle Art
1. Easy and Beginner-Friendly
Clay turtles don’t need fancy tools. Just roll, press, and shape. Even if it turns out a little wonky, it’s still cute.
2. Stress-Relieving
There’s something soothing about squishing clay. Shaping a turtle shell? Even better.
3. Customizable
Make a realistic sea turtle or a tiny fantasy turtle with wings. There are no rules.
4. Great Gift Idea
Handmade clay turtles make thoughtful gifts. Stick one on a keychain, and boom—instant personalized present.
For even more turtle-themed gift inspiration, check out our favorite turtle gifts and accessories.
5. Small, But Useful
Clay turtles aren’t just for decoration. You can turn them into magnets, jewelry dishes, or even coasters.
Materials Needed for Clay Turtle Projects
You don’t need a fancy art studio to make clay turtles. Just a few simple materials and your hands will do the trick. Here’s what you need:
1. Clay – The Star of the Show
Different types of clay work for different projects. Pick the right one based on what you want to make.
| Clay Type | Best For | Why? |
|---|---|---|
| Polymer Clay | Keychains, charms, small figurines | Easy to bake, holds details well |
| Air-Dry Clay | Larger sculptures, coasters | No baking needed, dries on its own |
| Foam Clay | Kids’ crafts, lightweight projects | Soft, squishy, fun to work with |
2. Sculpting Tools – Your Secret Weapons
You don’t need fancy tools. Even a toothpick can work wonders.
- Needle tool or toothpick – For tiny details and textures.
- Clay knife or craft blade – To shape and cut pieces.
- Rolling pin – Flattens clay evenly (a glass bottle works too).
- Ball stylus tool – Makes smooth indentations for eyes.
- Sponge or brush – Helps smooth out rough spots.
3. Work Surface – Keep Things Clean
Clay can stick to your table, so use:
- A non-stick mat (silicone works best).
- A smooth tile or glass sheet (clay doesn’t stick to it).
- Even parchment paper will do in a pinch.
4. Paints & Brushes – Bring Your Turtle to Life
Plain clay is nice, but adding color makes it pop.
- Acrylic paints – Best for polymer and air-dry clay.
- Soft brushes – Avoid streaky brush strokes.
- Paint pens – Perfect for tiny details.
- Varnish or Mod Podge – Adds a shiny or matte finish.
5. Extras for Special Turtle Projects
Want to make something unique? Add these:
- Magnets – Stick a clay turtle on your fridge.
- Keychain rings – Turn a mini turtle into a keychain.
- Glow-in-the-dark powder – Make your turtle glow at night.
- Textured sponges or stamps – Create shell patterns.
This Hilarious Turtle Book Might Know Your Pet Better Than You Do
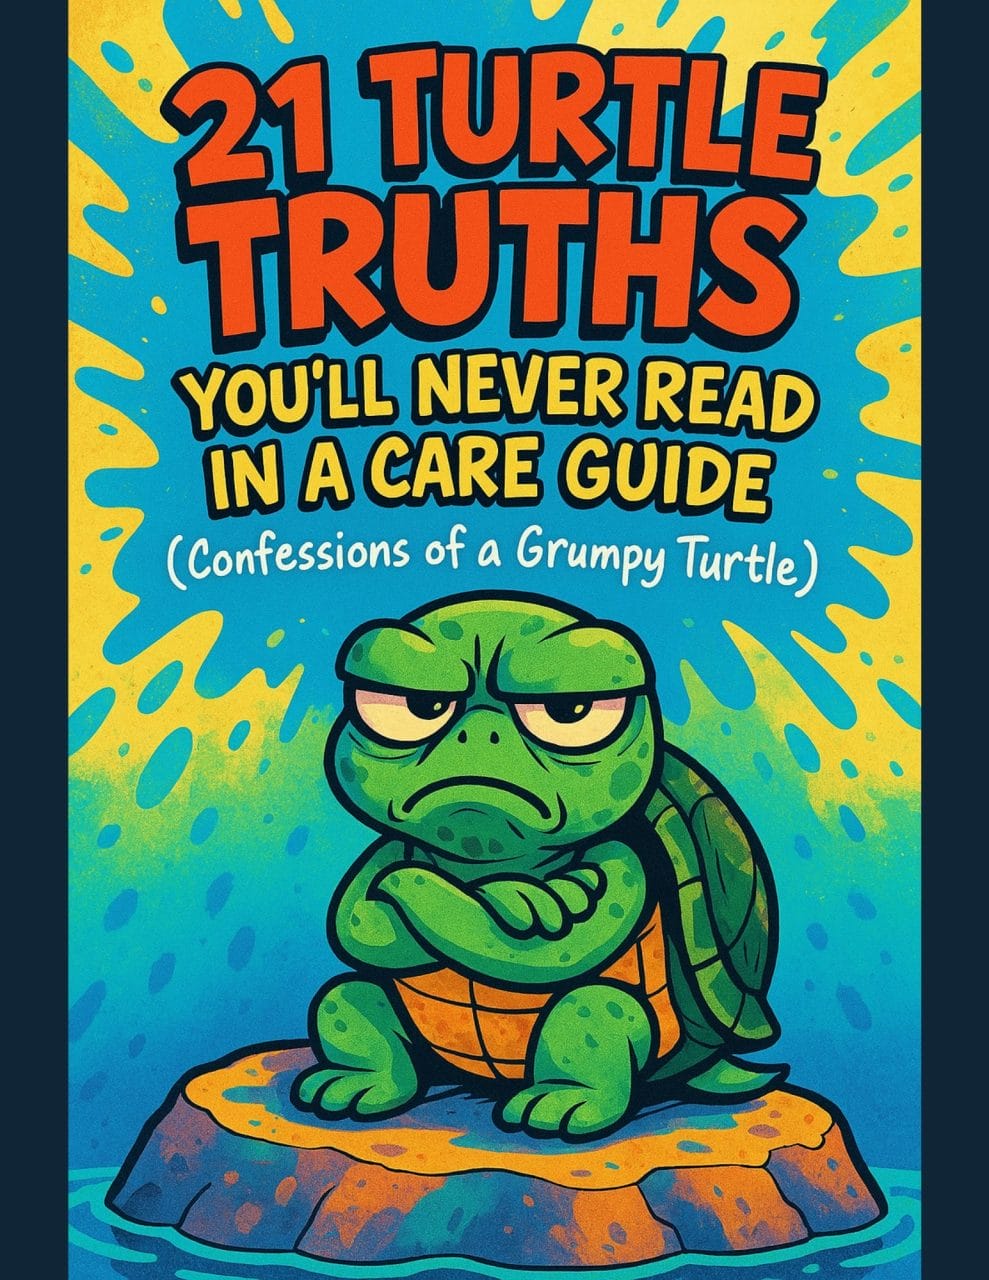
Let’s be real—most turtle care guides feel like reading a textbook written by a sleep-deprived zookeeper.
This one’s not that.
Told from the snarky point of view of a grumpy, judgmental turtle, 21 Turtle Truths You’ll Never Read in a Care Guide is packed with sarcasm, sass, and surprisingly useful insights.
And hey—you don’t have to commit to the whole thing just yet.
Grab 2 free truths from the ebook and get a taste of what your turtle really thinks about your setup, your food choices, and that weird plastic palm tree.
It’s funny, it’s honest, and if you’ve ever owned a turtle who glares at you like you’re the problem—you’ll feel seen.
20 Clay Turtle Ideas You Can Try
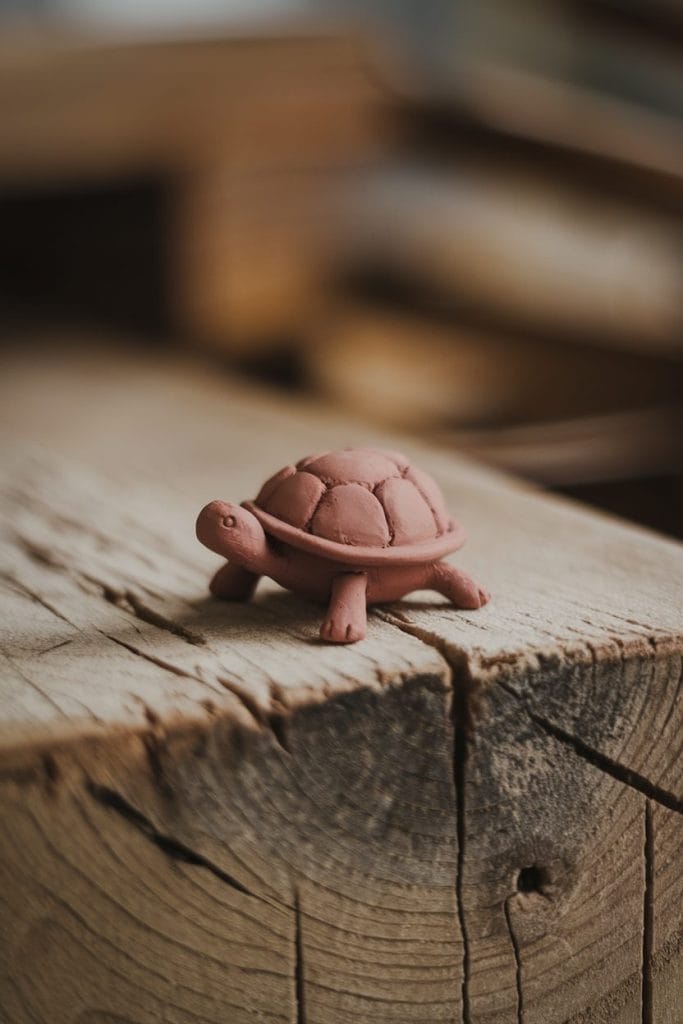
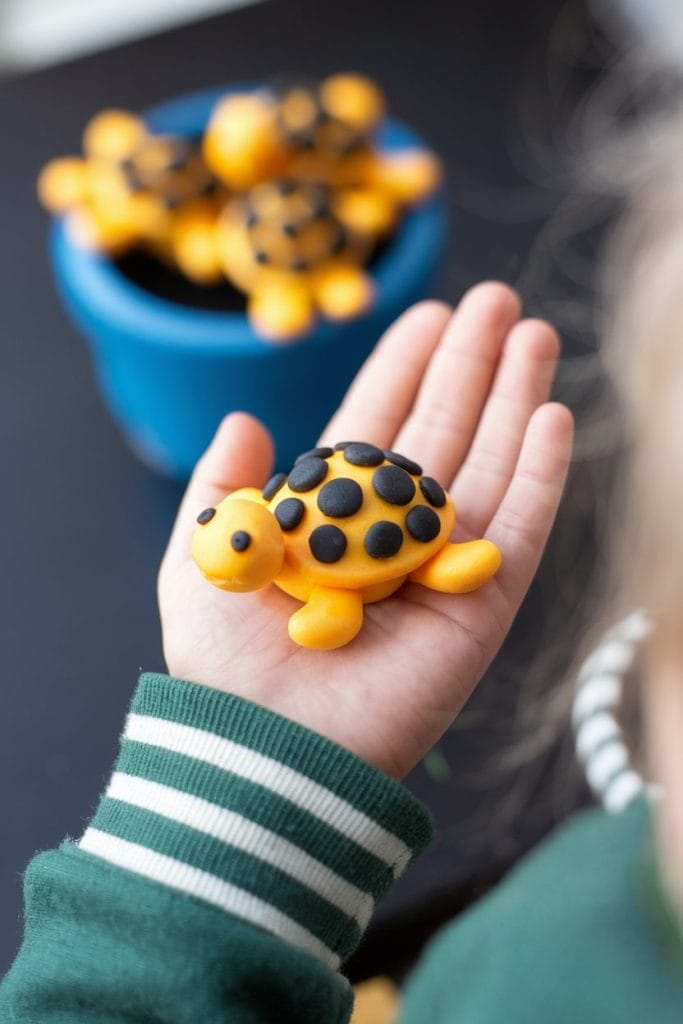
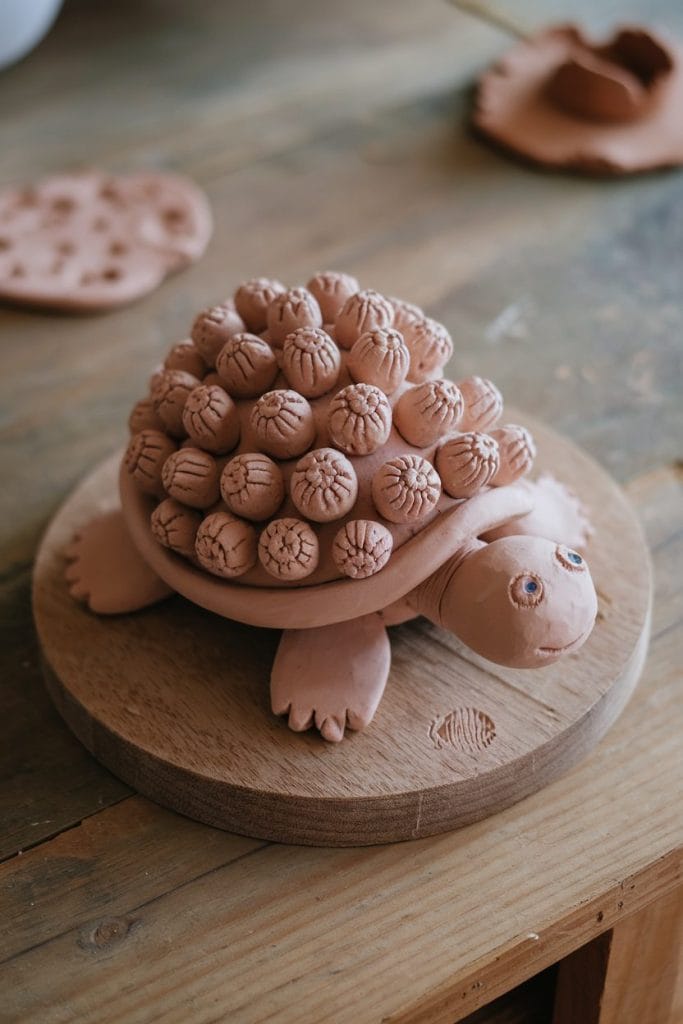
1. Mini Clay Turtle
A tiny turtle that’s easy to make. Perfect for beginners.
Steps:
- Roll a small ball of clay for the shell.
- Make four tiny oval shapes for the legs.
- Add a slightly bigger oval for the head.
- Press everything together gently.
- Use a toothpick to add shell details.
- Let it dry or bake as needed.
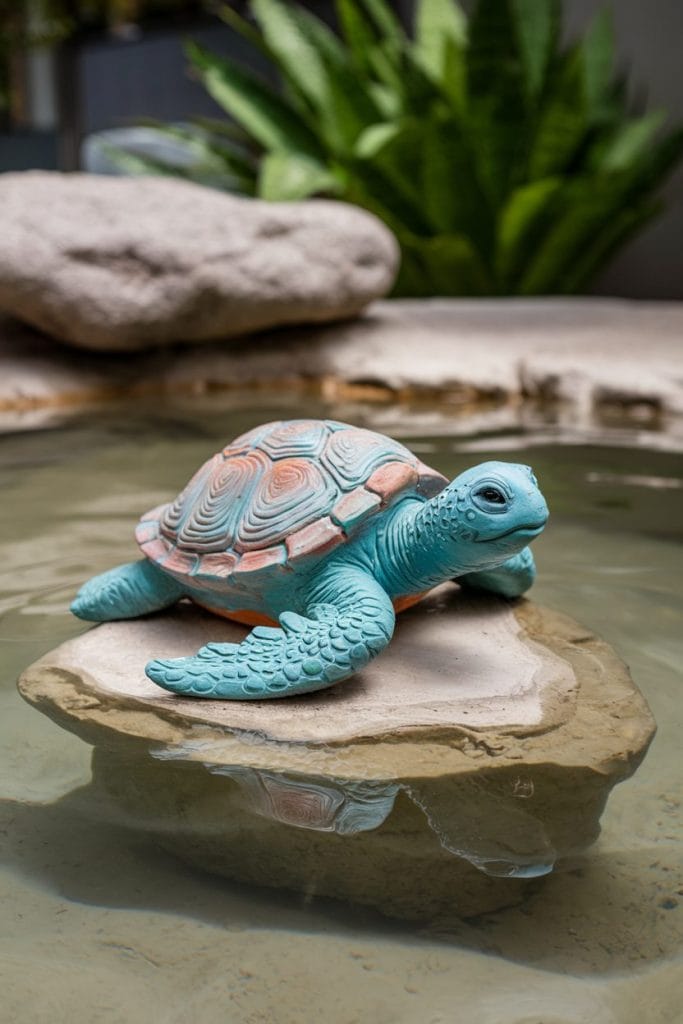
2. Sea Turtle Clay Sculpture
A more detailed, realistic turtle for ocean lovers.
Steps:
- Roll a medium-sized clay ball for the shell.
- Flatten it slightly and shape it into an oval.
- Make four flippers—long and slightly curved.
- Attach them to the body, smoothing the edges.
- Shape a small head and add tiny eyes.
- Carve details on the shell and flippers.
- Let it dry or bake.
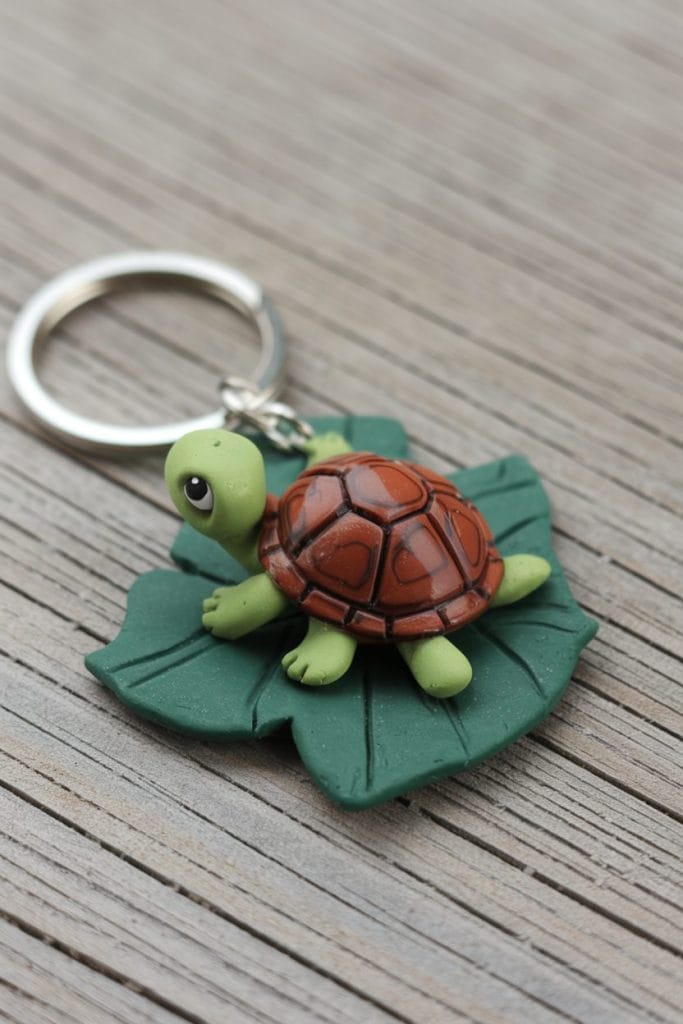
3. Polymer Clay Turtle Keychain
A cute polymer turtle keychain you can clip to a backpack, purse, or set of keys. Polymer clay is the right pick here because it bakes hard and survives daily wear without chipping. This is also the project that converts the most non-crafters — once people see how easy it is, they want their own.
Steps:
- Condition a small piece of polymer clay in your hands until it’s soft and pliable.
- Roll a marble-sized ball for the shell and flatten it slightly into a dome.
- Add four tiny oval legs and a small head, smoothing the seams gently.
- Use a toothpick to carve hexagon, flower, or sunburst patterns on the shell.
- Press a small metal eye-pin or screw eye into the back of the shell, leaving the loop exposed.
- Bake on a foil-lined tray at the temperature listed on your clay’s package (usually 130°C / 265°F for 15 minutes).
- Let it cool fully, seal with a thin glaze coat for shine, then attach a keyring through the loop.
4. Foam Clay Turtle Figurine
Foam clay is the unsung hero of beginner crafts — soft, lightweight, almost impossible to mess up, and it dries on its own with no oven needed. This makes foam clay turtles ideal for kids, sensory play, or anyone who wants the satisfaction of a finished sculpture without buying tools.
Steps:
- Pinch off a walnut-sized piece of foam clay for the shell.
- Roll it into a ball, then gently flatten the bottom so it sits stable.
- Shape four small log-like legs and one slightly larger oval for the head.
- Press the legs and head onto the shell — foam clay sticks to itself naturally, so no glue needed.
- Use a toothpick or the end of a paintbrush to add eyes, a smile, and a few shell lines.
- Pinch a tiny tail at the back so the turtle reads as complete from every angle.
- Set it aside on parchment paper and let it air dry overnight (24 hours for thicker pieces).
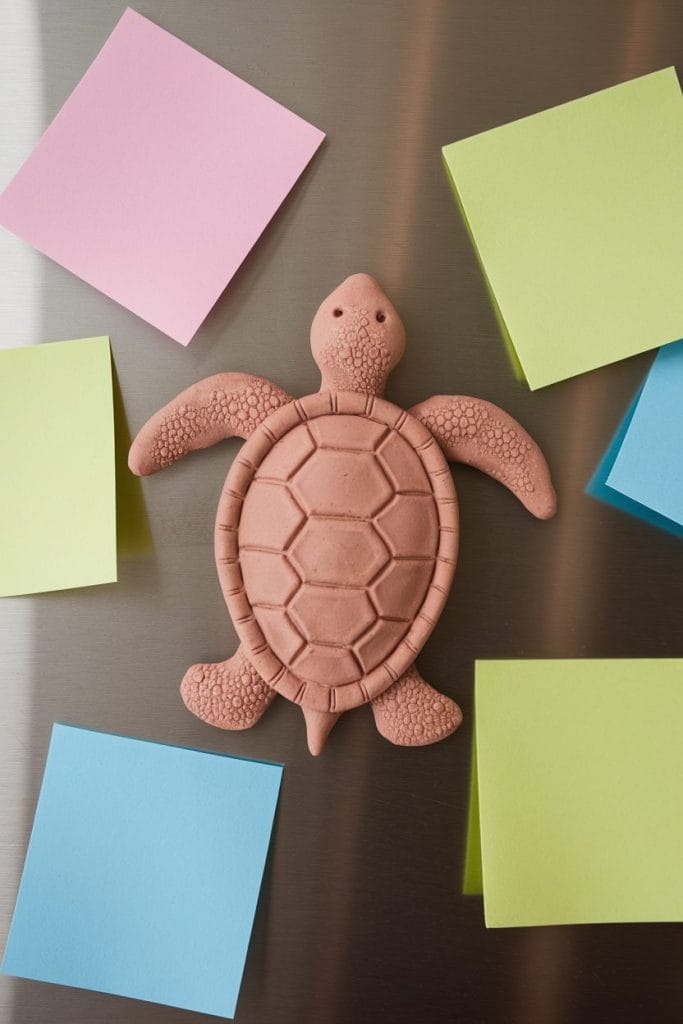
5. Easy Clay Turtle Magnet
Flat, fast, and a great gift to drop in a card. A clay turtle magnet takes maybe 20 minutes to shape and bakes (or dries) into a sturdy little fridge friend. This is the project I’d start with if you’re testing out clay for the first time.
Steps:
- Roll out a slab of clay about 5mm (¼ inch) thick on a non-stick surface.
- Cut a flat turtle shape — round body, four small leg nubs, a head, and a tail.
- Carve the shell pattern with a toothpick or a textured stamp before the clay firms up.
- Press a small flat magnet (8-12mm round neodymium works best) into the back of the body until it sits flush.
- Smooth a thin layer of clay over the magnet to lock it in place if it’s loose.
- Let it dry or bake according to the clay type, then paint with acrylics if you want color.
- Seal with a matte or gloss varnish so the paint doesn’t scratch off when it bumps against the fridge.
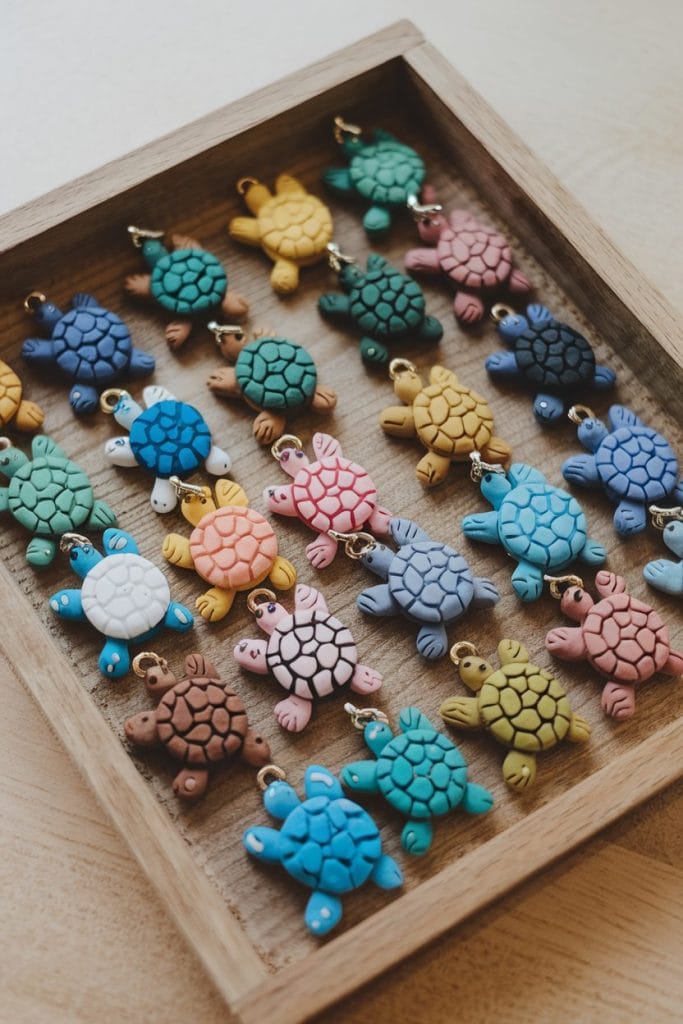
6. Small Clay Turtle Charms
Tiny turtles you can wear. These charms work for bracelets, necklaces, earrings, or zipper pulls — basically anywhere you can attach a jump ring. Polymer clay holds up best for jewelry because it stays flexible enough not to snap when bumped.
Steps:
- Roll a pea-sized ball of polymer clay for each charm — this is small on purpose so they don’t feel chunky on jewelry.
- Flatten slightly and shape into a tiny turtle silhouette with stubby legs.
- Carve fine details with a needle tool — fewer details usually look cleaner at this scale.
- Push a small eye-pin into the top edge of the shell, leaving the loop just barely poking out.
- Bake according to the polymer clay’s package instructions, then let cool completely before handling.
- Optional: paint shells with metallic gold, copper, or pearl acrylic for a boutique-quality finish.
- Attach a jump ring through the eye-pin loop, then connect to a chain, bracelet, or earring hook.
7. Clay Turtle Coaster
A practical project that doubles as decor. A turtle-shaped coaster is bigger and flatter than a figurine, which makes it forgiving — you don’t need precise proportions, just a recognizable silhouette. Air-dry clay works well here since it sits flat naturally.
Steps:
- Roll out a 1cm (½ inch) thick slab of air-dry clay between two flat objects to keep the thickness even.
- Cut a wide turtle shape large enough to fit a mug (about 10cm / 4 inches across).
- Round the edges with a damp finger so the coaster doesn’t have sharp corners.
- Stamp or carve a hexagonal shell pattern across the body — pressing harder around the rim creates a slight lip that catches drips.
- Add small low-relief legs, a head, and a tail so the turtle shape reads clearly from above.
- Let it dry slowly under a sheet of parchment to prevent warping (rushing this step makes coasters curl).
- Sand any rough spots, paint with acrylics, and finish with a food-safe waterproof sealant before using.
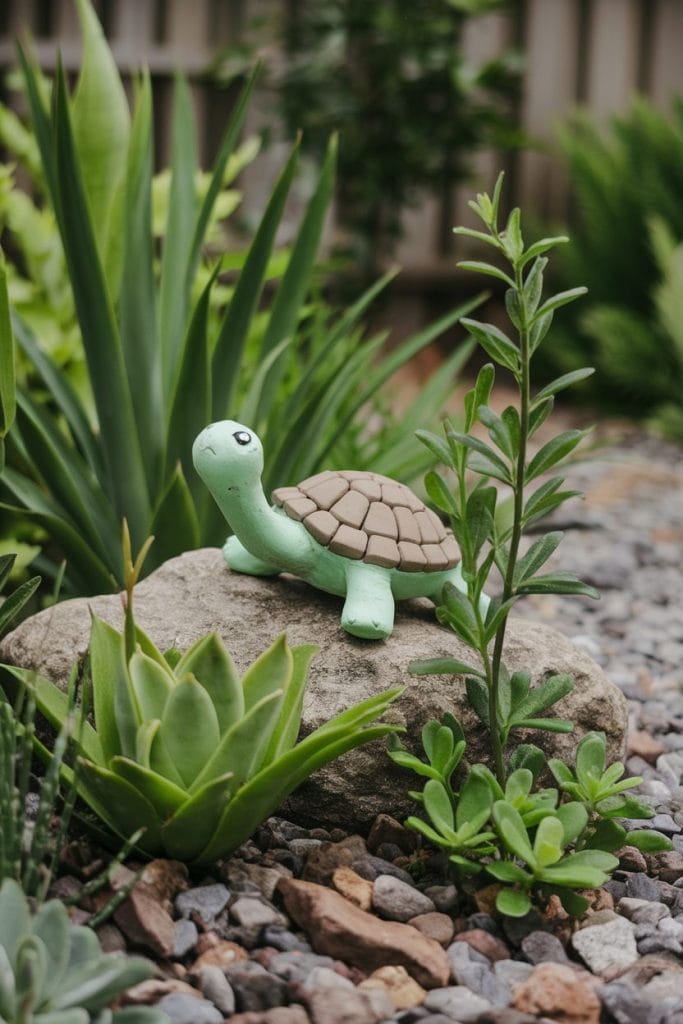
8. Mini Turtle Clay Garden Decor
Tiny tortoises peeking out from your potted plants are the kind of detail that makes a windowsill feel intentional. For outdoor use, you’ll want polymer clay or sealed air-dry clay since rain destroys raw clay quickly.
Steps:
- Make a simple chunky turtle (don’t overthink the proportions — garden turtles read better when they’re slightly stylized).
- Build a wider base on the underside so it sits stable on uneven soil instead of tipping over.
- Texture the shell aggressively with a toothbrush, lace, or mesh — outdoor pieces need depth to look right from a distance.
- Add weather-friendly details like a tiny smile or closed eyes, since fine details fade with sun exposure.
- Bake or dry fully, then paint with outdoor-rated acrylic paint in earthy moss greens, terracottas, or browns.
- Seal with at least two coats of outdoor varnish or polyurethane spray, paying extra attention to the underside.
- Tuck into a plant pot, rest on the soil, or hide it among succulents so it surprises you when you spot it.
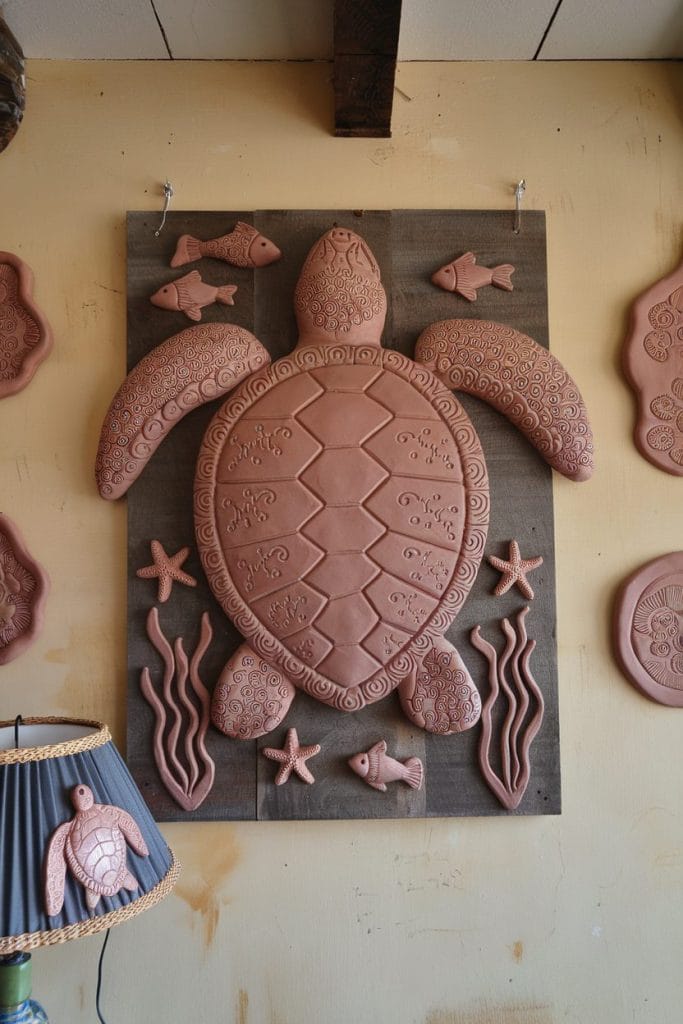
9. Clay Sea Turtle Wall Hanging
A decorative piece for ocean lovers.
Steps:
- Shape a large turtle from clay.
- Carve or stamp patterns onto the shell.
- Poke a hole at the top for hanging.
- Let it dry, then add a string.
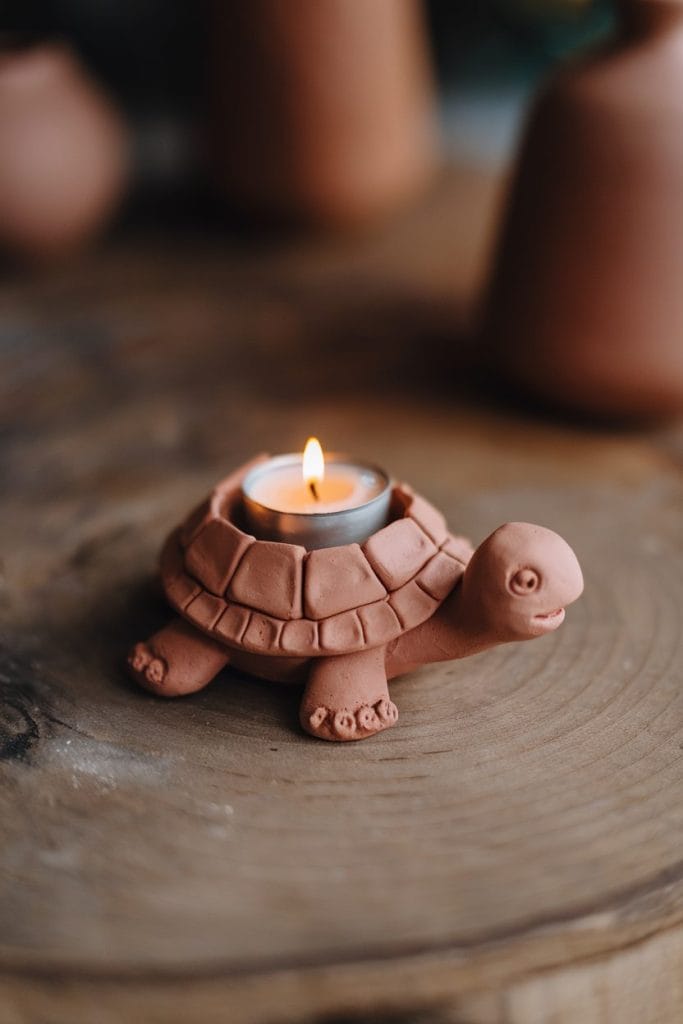
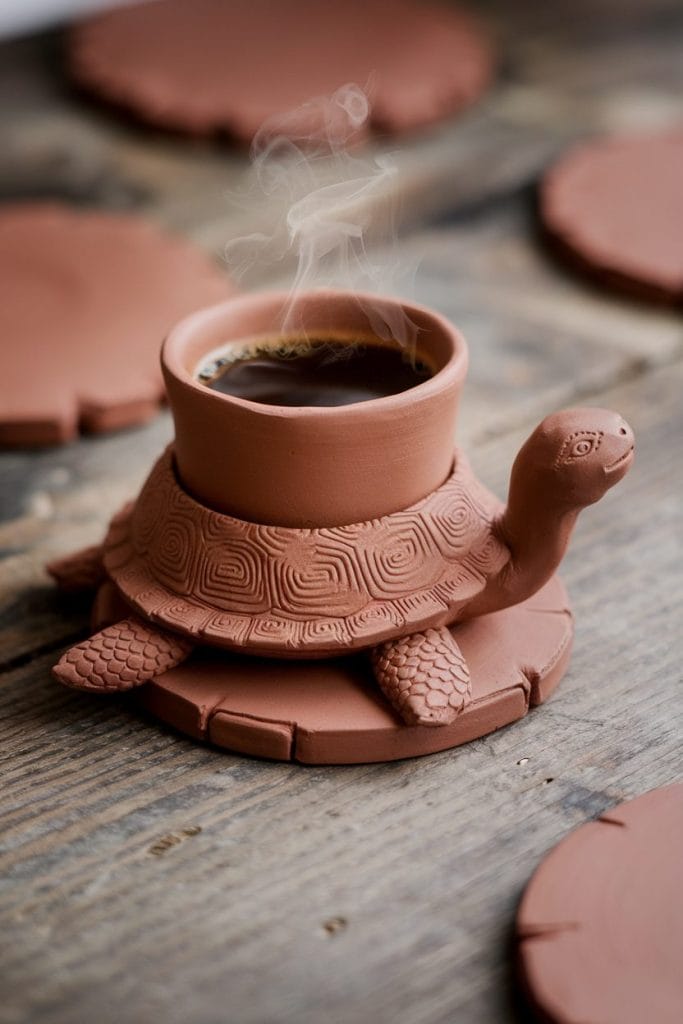
10. Turtle-Shaped Clay Candle Holder
A cozy, creative idea.
Steps:
- Make a flat turtle shell with a small dip in the center.
- Shape legs and a head separately.
- Attach the pieces together.
- Let it dry, then place a tealight inside.

11. Glow-in-the-Dark Polymer Clay Turtle
Lights up at night!
Steps:
- Use glow-in-the-dark polymer clay.
- Shape a turtle like usual.
- Bake according to instructions.
- Charge under a light and enjoy the glow.
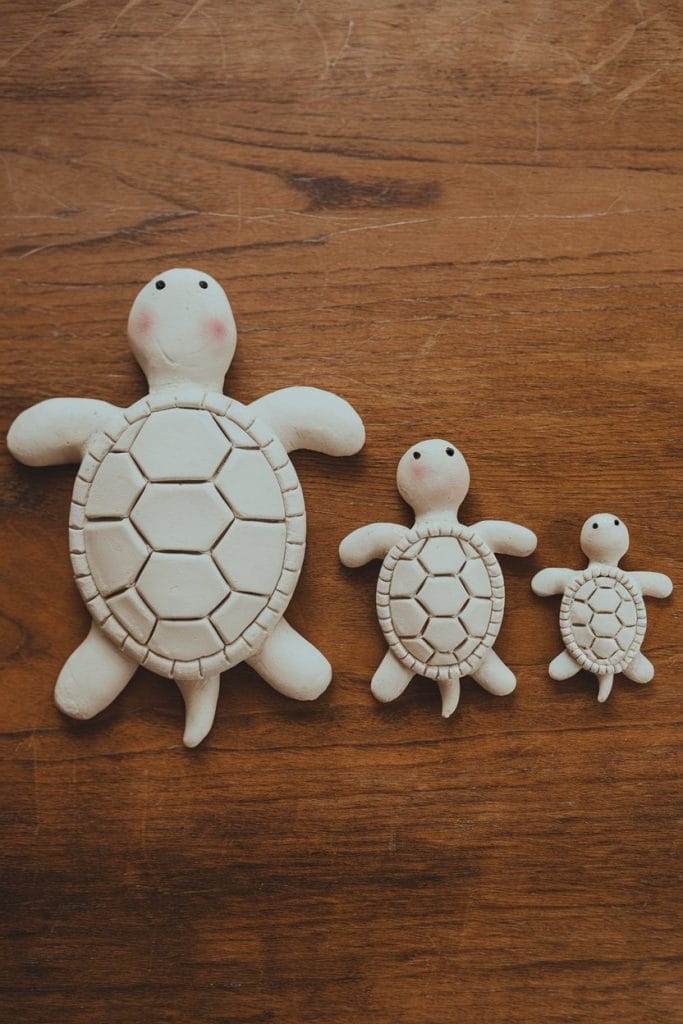
12. Miniature Clay Turtle Family
Make a whole turtle family set!
Steps:
- Create one big turtle and two smaller ones.
- Add tiny eyes and details.
- Bake or dry, then display them together.
13. Textured Clay Turtle for Kids
A sensory-friendly turtle for little hands.
Steps:
- Make a basic turtle shape.
- Use a net, sponge, or toothpick to add texture.
- Let it dry or bake.
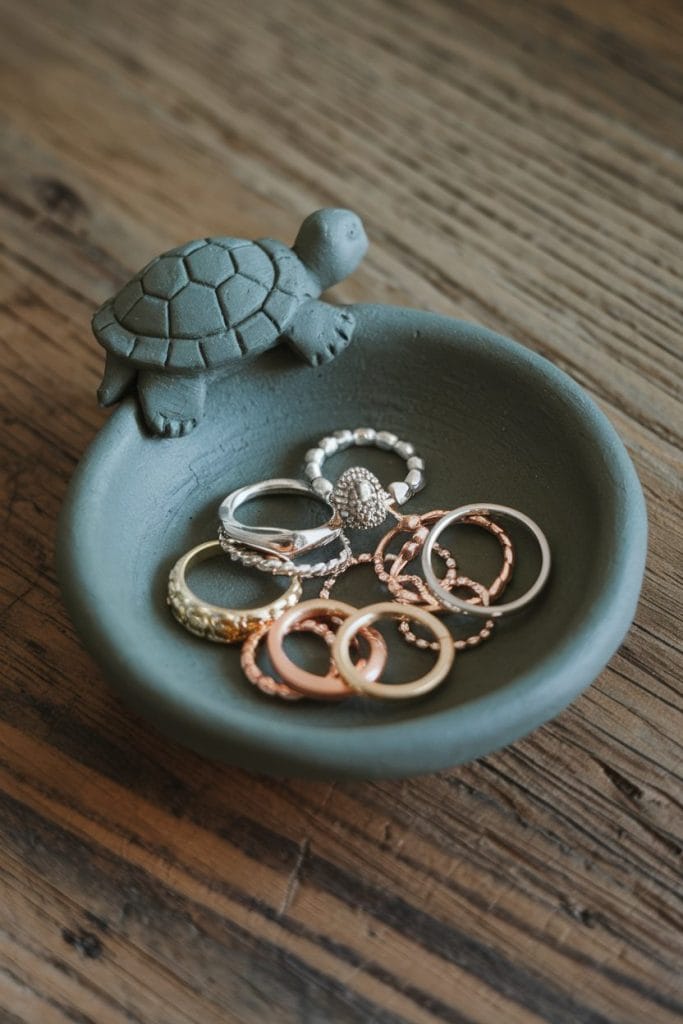
14. Turtle-Themed Clay Jewelry Dish
A beautiful and practical design.
Steps:
- Make a shallow clay dish.
- Attach a small turtle on one edge.
- Let it dry, then paint it.
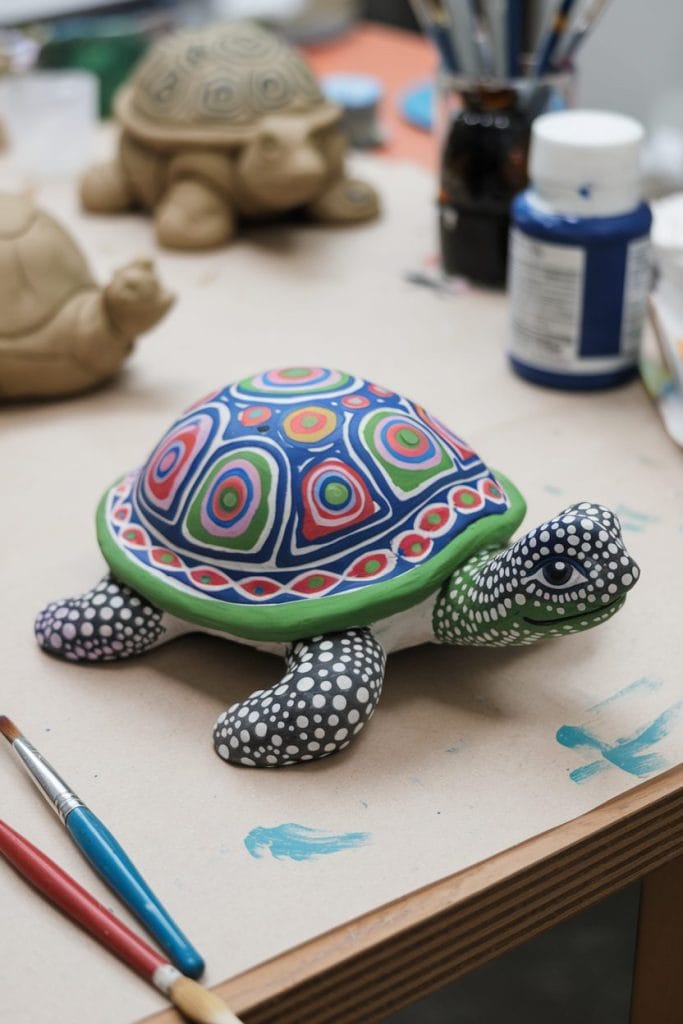
15. Hand-Painted Clay Turtle Sculpture
Give your turtle some personality.
Steps:
- Make a basic turtle sculpture.
- Let it dry or bake.
- Use acrylic paint to add details.
Bonus: Clay Tortoise Ideas
If you’ve made it this far, you’ve probably noticed turtles and tortoises are slightly different sculpting projects. Tortoises have rounder, more domed shells and stockier legs — and they make some of the most charming clay decor pieces you can sculpt at home. The next five ideas are all tortoise-themed, perfect for plant lovers and home decor crafters.
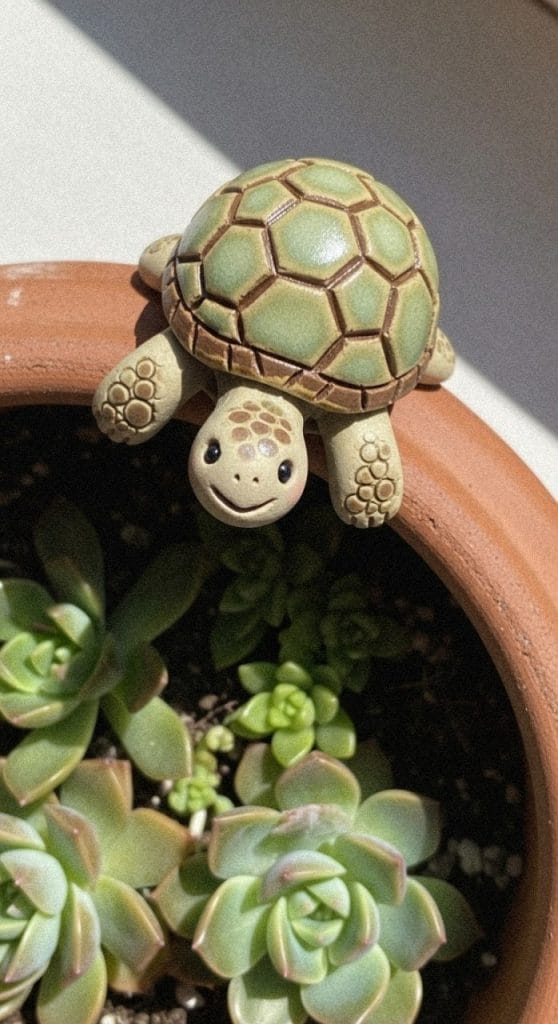
16. Baby Tortoise Plant Pot Buddy
A tiny tortoise that sits on the rim of your plant pots—adorable and functional!
Steps:
- Roll a small ball of clay for the shell (about the size of a walnut).
- Flatten it slightly into a dome shape.
- Use a toothpick to carve hexagon patterns on the shell.
- Create four small legs and press them onto the underside.
- Shape a tiny head with a smiling face.
- Make a small hook or flat base so it can grip the pot rim.
- Let it dry completely or bake according to clay instructions.
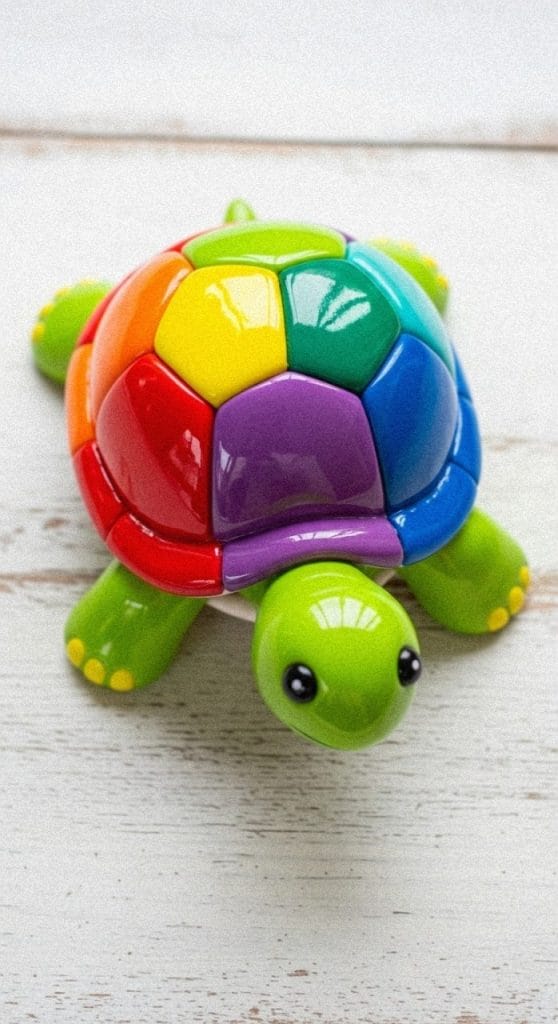
17. Rainbow Tortoise Figurine
A whimsical, colorful tortoise that brightens any shelf or desk.
Steps:
- Roll a medium ball for the shell and flatten into a dome.
- Divide the shell into sections with a clay tool.
- Fill each section with different bright colors of clay.
- Blend the edges slightly for a smooth rainbow effect.
- Add four chunky legs and a rounded head.
- Use black clay or a marker for cute eyes.
- Bake or air-dry, then seal with varnish for shine.
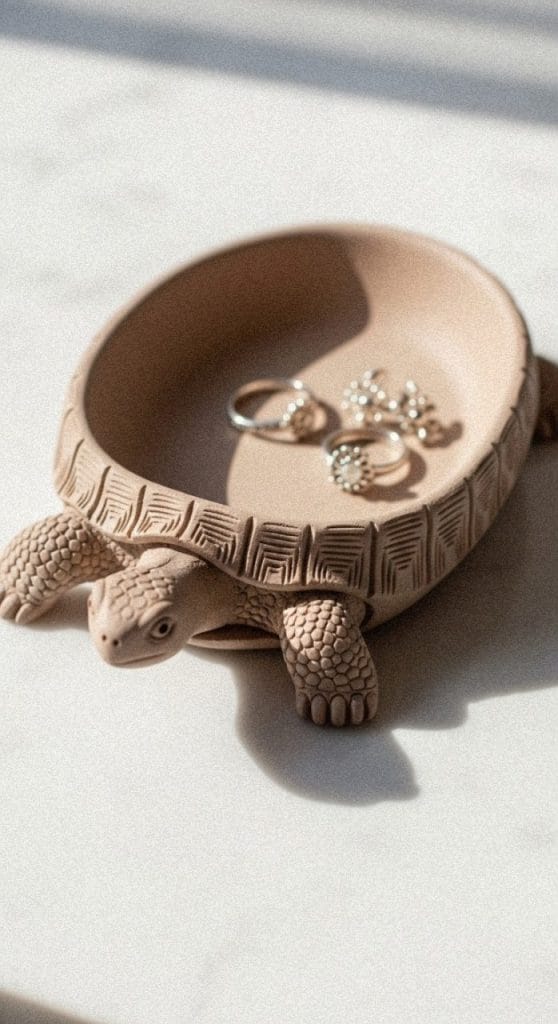
18. Tortoise Jewelry Dish
A functional tortoise sculpture that holds your rings and earrings.
Steps:
- Roll a large ball of clay and flatten it into a thick oval base.
- Press your thumb into the center to create a shallow dish.
- Smooth the inside of the dish with your fingers.
- Shape a small head, tail, and four legs around the edges.
- Add shell texture on top using a dotting tool or toothpick.
- Create facial details with tiny clay dots for eyes.
- Let it dry or bake, then seal to make it water-resistant.
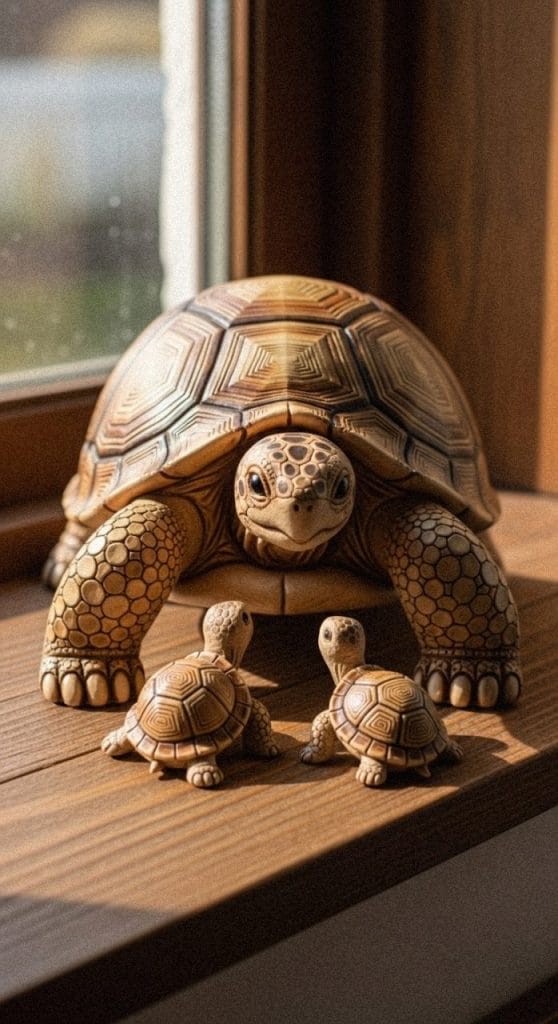
19. Miniature Tortoise Family Set
A mama tortoise with 2-3 babies—perfect for a windowsill display.
Steps:
- Roll one large ball for mama’s shell and 2-3 smaller balls for babies.
- Shape each into domed shells, graduating in size.
- Add legs (thicker for mama, tiny for babies) to each tortoise.
- Create heads with different expressions—mama looking down, babies looking up.
- Carve shell patterns on each one with varying detail.
- Arrange them together before drying to create a scene.
- Bake or dry completely, then display as a group.
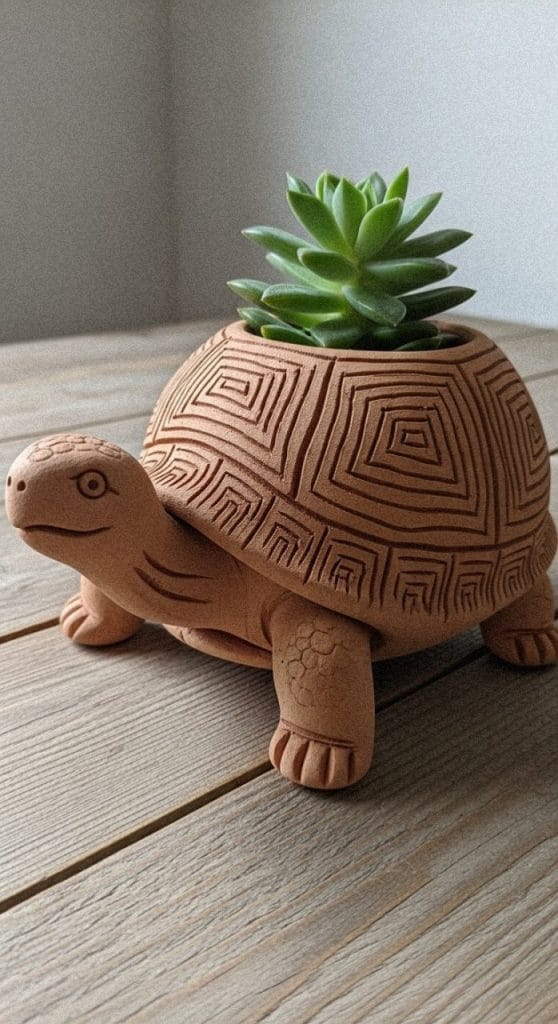
20. Textured Succulent Tortoise Planter
A hollow tortoise shell that becomes a tiny planter for succulents.
Steps:
- Roll a large ball of clay and hollow it out by pinching the walls thin.
- Shape it into a tortoise shell dome with an opening on top.
- Add detailed texture using stamps, lace, or carved patterns.
- Create a head, four legs, and a tail, attaching them to the base.
- Poke a small drainage hole in the bottom.
- Smooth all attached pieces so they blend naturally.
- Let it dry or bake, then add a small succulent and soil.
A finished tortoise planter also makes a great addition to your outdoor space—pair it with a solar-powered turtle garden light for a full turtle garden setup.
Clay Turtle FAQ
A few questions that come up almost every time I show someone how to make a clay turtle.
How long does air-dry clay take to dry fully?
Most air-dry clay turtles need 24 to 48 hours to fully cure, depending on thickness. Thin parts like flippers and tails dry first; the shell takes longest. Don’t rush it with a hairdryer or in front of a fan — uneven drying causes cracks. Patience is the cheat code.
Is polymer clay safe for kids?
Polymer clay is considered non-toxic for kids old enough not to put it in their mouths (typically 8+). For younger kids, foam clay or air-dry clay is the safer pick because there’s no oven step. Always supervise the baking phase since polymer clay needs a real oven and the trays get hot.
Do you have to bake polymer clay?
Yes — polymer clay only hardens when baked. Air-drying it doesn’t work; it will stay soft indefinitely. Most polymer clays bake at around 130°C (265°F) for 15 minutes per 6mm of thickness. Always check the package since brands vary.
What’s the cheapest clay for beginners?
Air-dry clay is the cheapest entry point. A block costs a few dollars, no oven required, and you can usually finish 5-10 small turtles from one block. Crayola Air-Dry Clay is widely available and beginner-friendly. Save polymer clay for when you’re ready to commit to baking and finishing techniques.
Can clay turtles get wet?
Only if you seal them. Raw air-dry clay dissolves in water; polymer clay survives splashes but isn’t waterproof. For coasters, jewelry dishes, or planters that touch moisture, finish with two coats of waterproof varnish or Mod Podge. For outdoor garden decor, use polyurethane spray.
How do I stop my turtle’s legs from falling off?
Score both surfaces (the leg and the body) with a toothpick before pressing them together, then add a tiny dab of water (for air-dry clay) or rub them with your finger to blend the seam (for polymer clay). Most “broken leg” disasters happen because the pieces were just stuck on without scoring.
3 Things That Go Wrong (and How to Fix Them)
Clay sculpting is forgiving — until it isn’t. Here are the three problems I’ve watched ruin the most beginner turtles, and what to do instead.
1. The Shell Cracks While Drying
Cracks usually mean the clay dried too fast or unevenly. Cover air-dry pieces loosely with a paper towel for the first 12 hours so moisture leaves slowly. If a crack does appear, mix a tiny bit of fresh clay with water into a paste, smooth it into the crack, and let it dry again. For polymer clay, cracks usually mean the clay was under-conditioned or baked at the wrong temperature — recondition next time.
2. The Turtle Looks Like a Lump
The most common beginner issue: the shell, legs, and head all blend together and the silhouette stops reading as a turtle. Fix this by exaggerating the proportions — make the shell more domed, the head more distinct, and the legs more separated than feels natural. Stylization beats realism for small clay sculptures every time.
3. The Paint Streaks or Peels
Streaky paint comes from skipping primer or using a brush that’s too dry. Always seal raw clay with a thin layer of gesso or white acrylic before adding color. For peeling paint, you probably skipped the sealant — finish every clay turtle with a layer of varnish, Mod Podge, or polyurethane to lock the paint in.
Tips for Perfecting Your Clay Turtle Art
Making a clay turtle is easy. Making a good clay turtle takes a few tricks. I’ve had my fair share of weird-looking turtles—some looked like lumpy potatoes, others like pancakes. But with a little practice, you can make a turtle that actually looks like a turtle.
1. Choose the Right Clay
Not all clay is the same. Some dry too fast, some crack, and some refuse to hold details.
| Clay Type | Best For |
|---|---|
| Polymer Clay | Smooth details, durable finish |
| Air-Dry Clay | No baking needed, good for kids |
| Foam Clay | Soft, squishy, lightweight |
2. Keep Your Hands Clean
Clay picks up everything—dust, lint, even crumbs from your last snack. Wash your hands and keep a damp towel nearby. Nobody wants a turtle covered in mystery specks.
3. Start with Simple Shapes
A turtle is just a few basic shapes. Roll a ball for the shell. Make small cylinders for legs. Add a tiny oval for the head. No need to overcomplicate things.
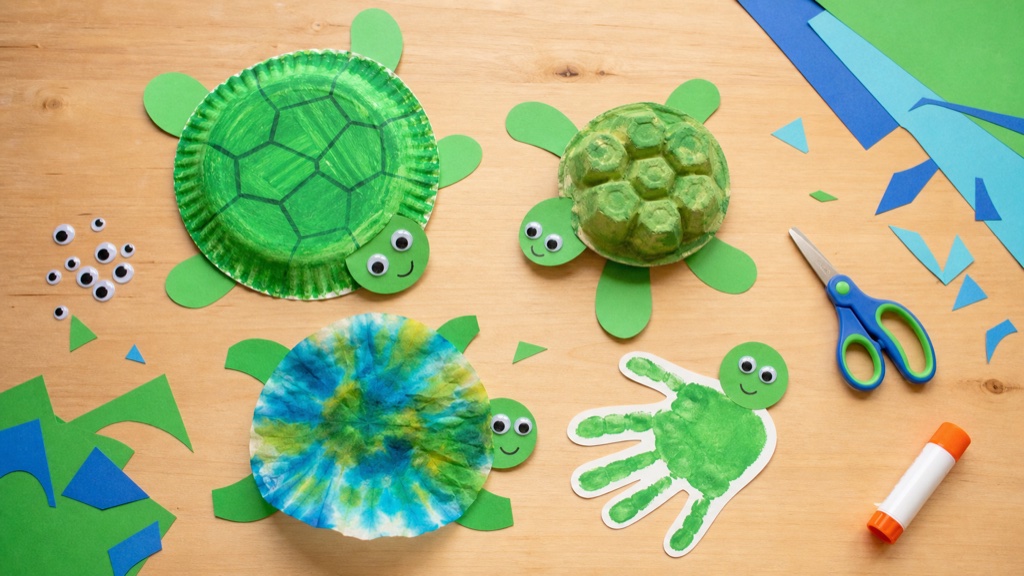
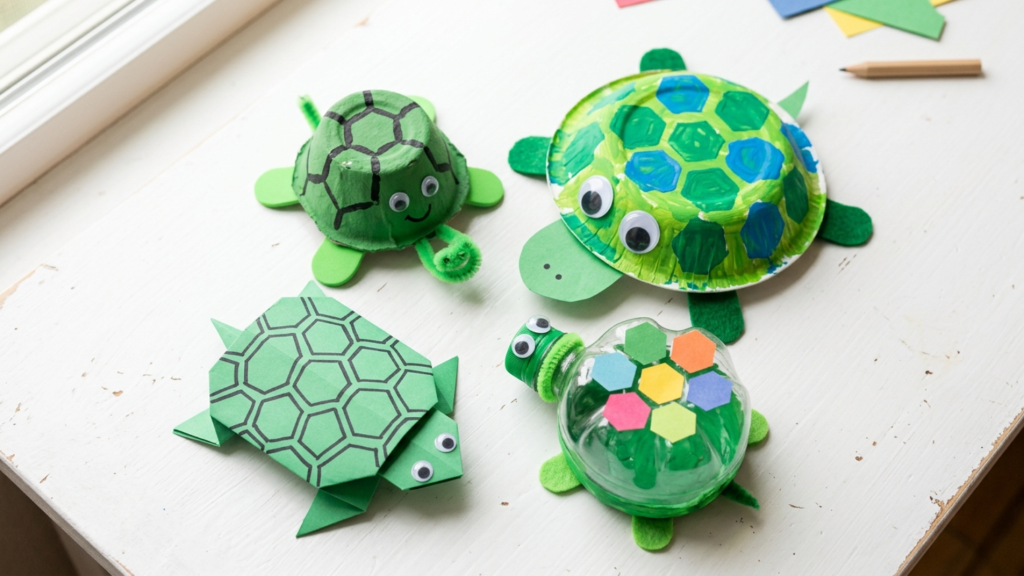
If clay isn’t your thing, we also have a list of easy turtle crafts using paper, egg cartons, and recycled materials that are perfect for beginners and kids.
4. Texture Makes It Realistic
A smooth shell is fine, but a textured one looks way better. Use a toothbrush, foil, or even a crumpled piece of paper to add details. I once used a piece of fabric—it worked surprisingly well.
5. Don’t Forget Facial Expressions
Turtles have personality! A slight tilt of the head, tiny dimples, or big round eyes can change the whole look. Give it a goofy smile or a wise old-turtle expression.
6. Bake or Dry Properly
Rushing this step leads to cracked turtles. Polymer clay needs baking at the right temperature. Air-dry clay needs patience. Don’t put it in front of a fan unless you want it to dry unevenly (learned that the hard way).
7. Add a Protective Finish
Sealing your turtle makes it last longer. A glossy finish makes it look polished. A matte finish keeps it natural. If you skip this step, your turtle might fade or break over time.
8. Experiment with Colors
Turtles don’t have to be green. Try blue, purple, or even rainbow shells. I once made a galaxy turtle—black with tiny white dots for stars. Looked like a tiny reptilian astronaut.
9. Fix Mistakes Before Baking
Once it’s baked, it’s final. If your turtle’s leg is falling off, fix it now. If the shell is lumpy, smooth it out. There’s no undo button in clay art.
10. Have Fun With It
Your turtle doesn’t have to be perfect. Wonky turtles have charm. A little uneven shell? Call it handmade character. A big head? That’s just cute exaggeration.
The best way to improve is to keep making turtles. Try different styles, textures, and colors. If one turns out looking like a blob, just tell people it’s abstract art.

About Author
Muntaseer Rahman started keeping pet turtles back in 2013. He also owns the largest Turtle & Tortoise Facebook community in Bangladesh. These days he is mostly active on Facebook.