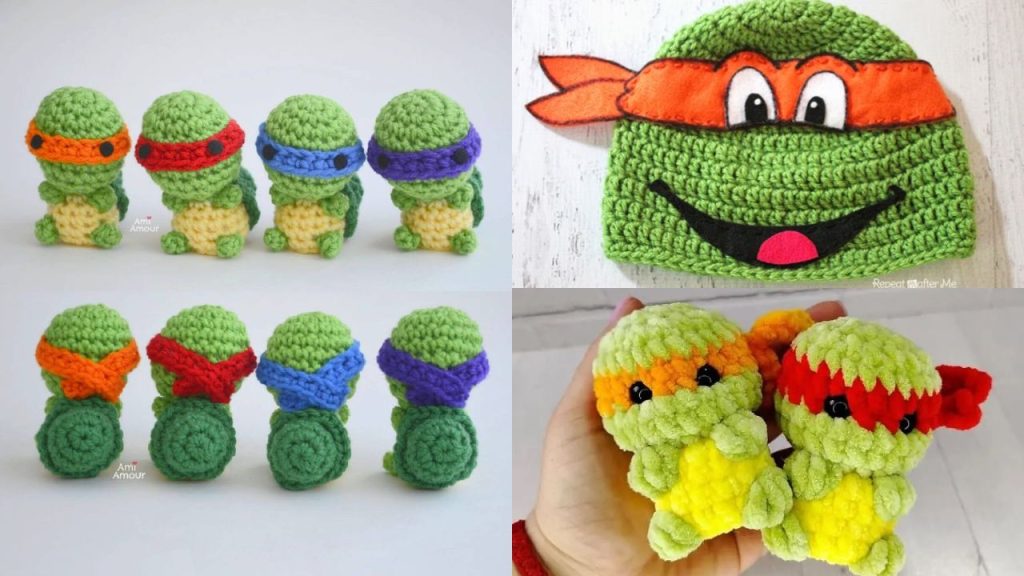
How to Crochet an Amigurumi Turtle: A Complete Beginner’s Guide
This post was created with help from AI tools and carefully reviewed by a human (Muntaseer Rahman). For more on how we use AI on this site, check out our Editorial Policy.
So you want to learn how to crochet an amigurumi turtle, and you’ve maybe never made anything rounder than a granny square.
Good news. A turtle is one of the friendliest things a beginner can make.
It’s small, so you finish it before you give up. It’s mostly one stitch repeated over and over. And even a slightly wonky one still looks cute, because turtles are forgiving little creatures.
This guide walks you through the whole thing. Not a single pattern, but the actual skill behind every cute turtle you’ve ever scrolled past.
By the end you’ll understand the materials, the stitches, how the shaping works, and how the pieces come together into something you’ll want to put on a shelf.
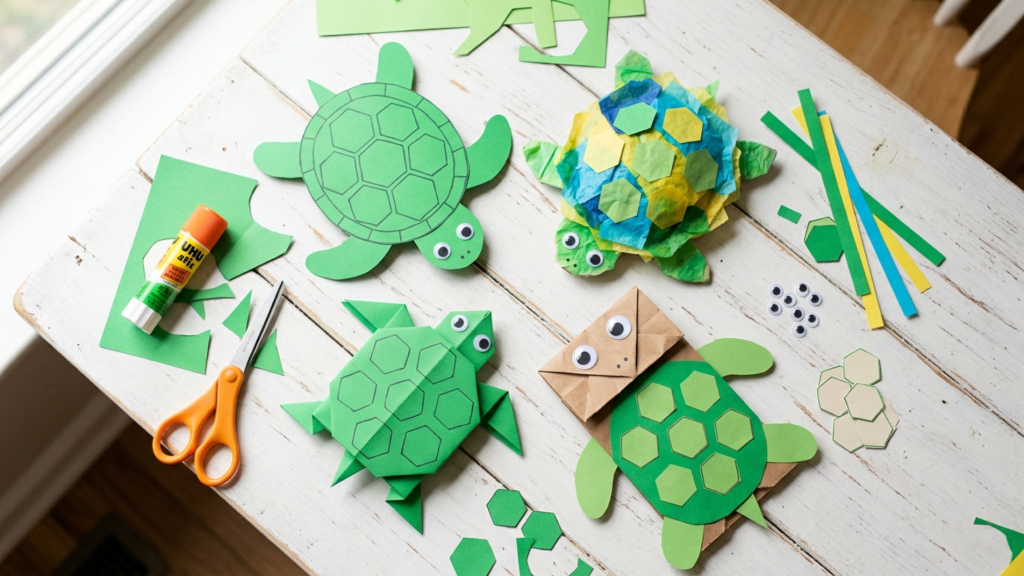
Why a Turtle Is the Perfect First Amigurumi
Most beginner amigurumi advice points you at a ball or a simple animal, and a turtle is basically a ball with a flat shell and four little legs.
That’s it. That’s the whole anatomy.
The body and shell are both just spheres you shape by adding and subtracting stitches. The legs are tiny tubes. Nothing here is hard once you’ve done it once.
And turtles are small projects, which matters more than people think. You can finish a beginner turtle in an evening or two, and finishing something is what keeps you crocheting.
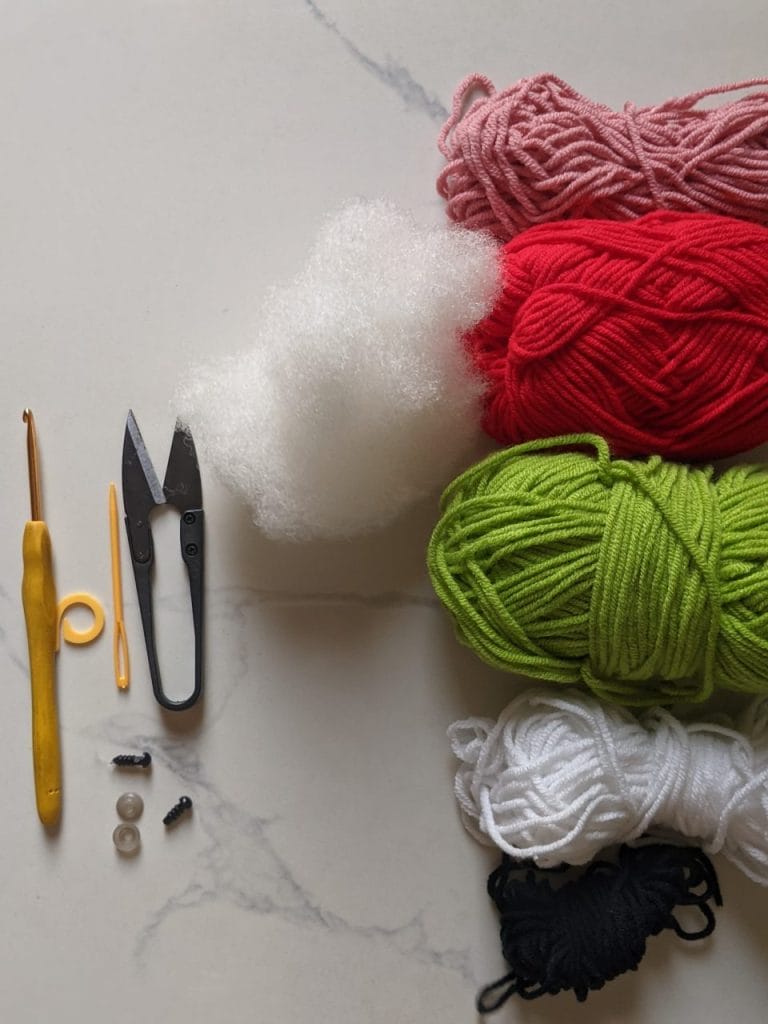
What You Need to Get Started
You don’t need a fancy kit. You need a handful of basics, and most of them are cheap.
Here’s the short list.
| Item | What it does | Beginner tip |
|---|---|---|
| Crochet hook (my pick: Clover Amour set) | Your main tool | A 3.0mm or 3.5mm hook pairs well with most amigurumi yarn (my pick: 24-pack milk cotton yarn) |
| Amigurumi yarn | The body of your turtle | Cotton yarn holds its shape better than fuzzy yarn |
| Polyester stuffing | Fills the turtle | A little goes a long way, keep it light |
| Safety eyes | The face | 6mm to 9mm for a small turtle |
| Stitch markers | Tracks your rounds | A scrap of contrast yarn works too |
| Tapestry needle | Sewing pieces together | Blunt tip, big eye |
| Scissors | Obvious, but easy to forget | Small sharp ones |
One thing worth saying up front about your crochet hook and your amigurumi yarn.
Go a little smaller on the hook than the yarn label suggests.
A tighter fabric is the single biggest difference between a clean amigurumi and a lumpy one with stuffing peeking through the gaps. When in doubt, size down.
If you want our specific gear picks, our Magic Ring Tutorial for Amigurumi Turtles breaks down the starting tools in more detail.
Your Yarn Stash Called. It Wants to Be a Turtle.
Look, you could spend another weekend scrolling Pinterest for the “perfect” turtle pattern.
Or you could grab one that’s already perfect.
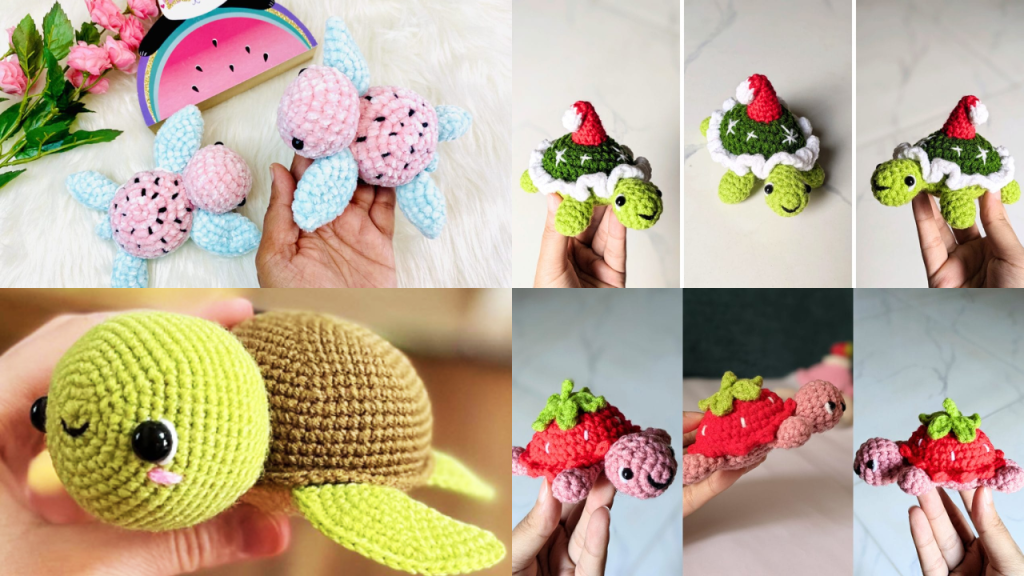
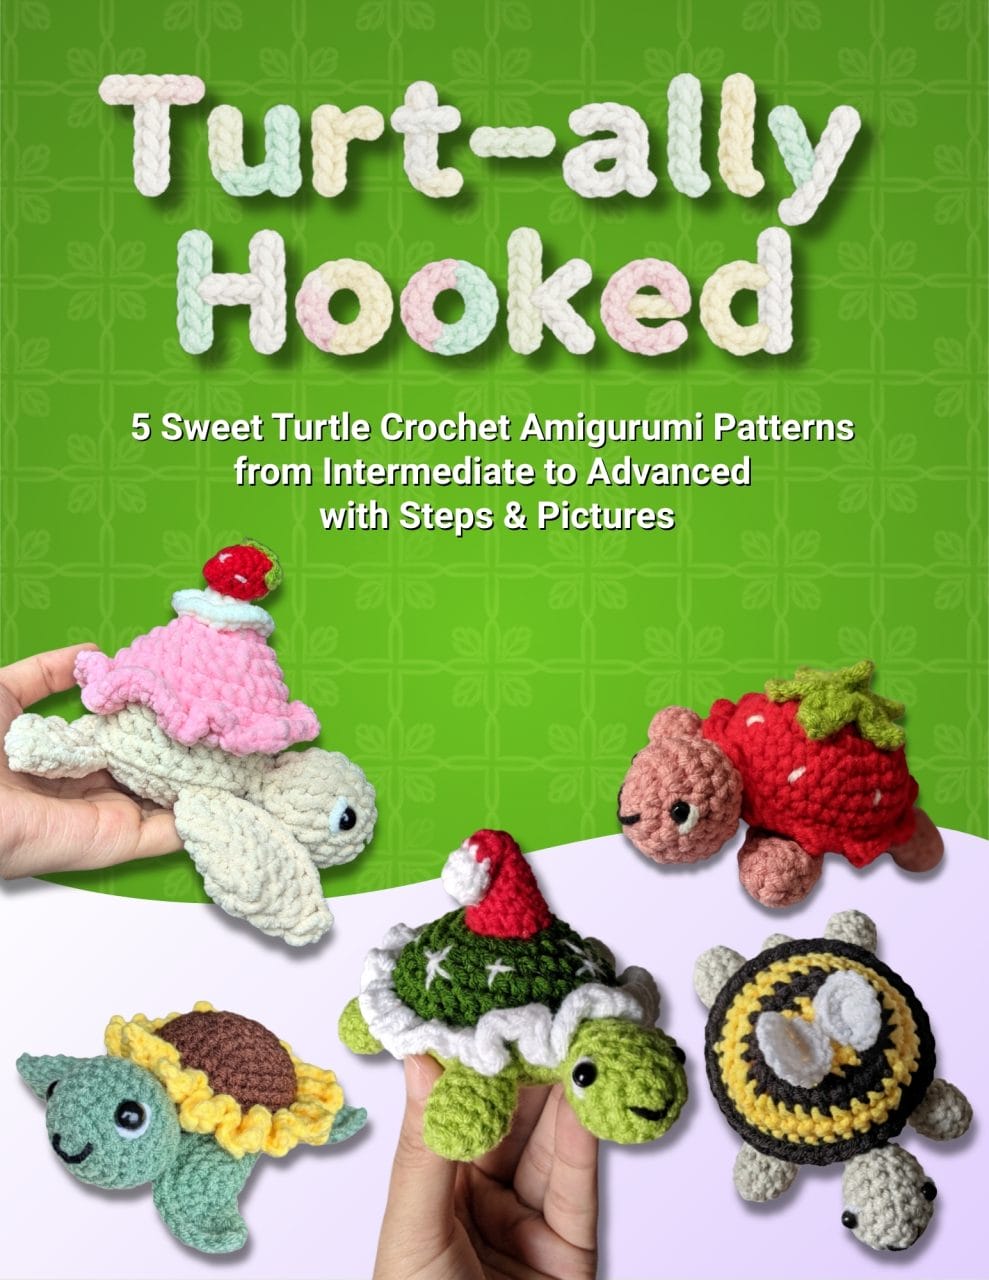
Turt-ally Hooked gives you 5 complete turtle patterns—each with a different theme, personality, and skill level.
Bee, strawberry, sunflower, Christmas, and cupcake. All adorable. All doable.
It’s straightforward, it’s cute, and if you’ve been meaning to make something other than another scarf—here’s your chance.
The Stitches You Actually Need to Know
Here’s the part that scares beginners off, and it shouldn’t.
Amigurumi uses a tiny number of stitches. Master these five and you can make almost any turtle.
The Magic Ring
Every cute crochet turtle starts with the same move: the magic ring.
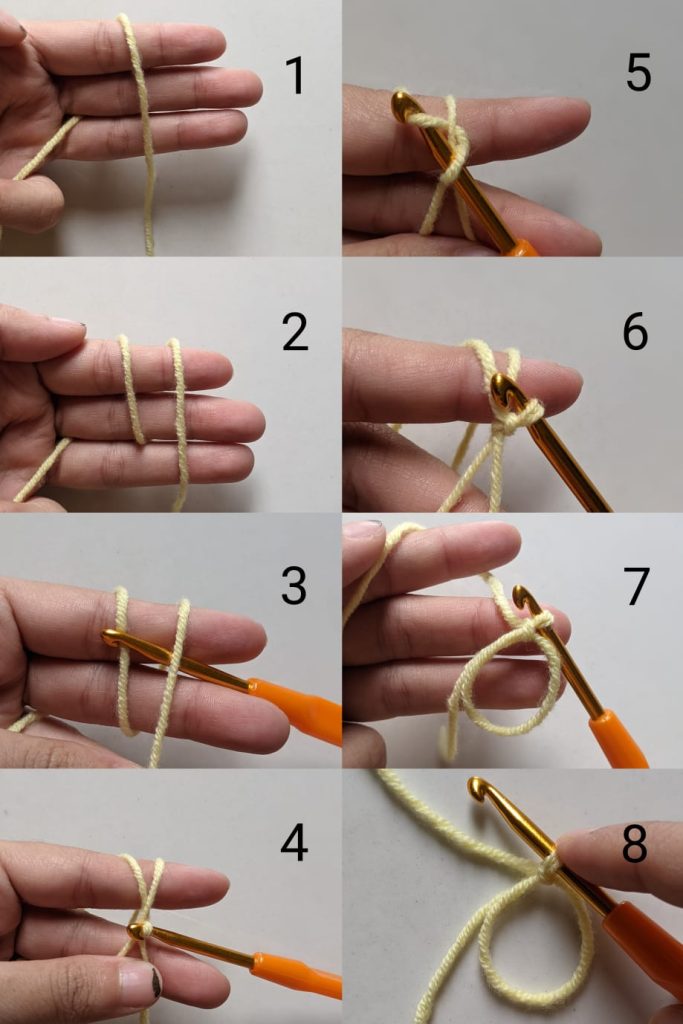
It’s an adjustable loop you crochet your first stitches into, then pull tight so there’s no hole in the center.
This one trips up almost everyone the first time, so we wrote a full photo walkthrough instead of cramming it here.
Go work through our Magic Ring Tutorial for Amigurumi Turtles until you can do it without thinking, then come back. Seriously, that one stitch unlocks everything else.
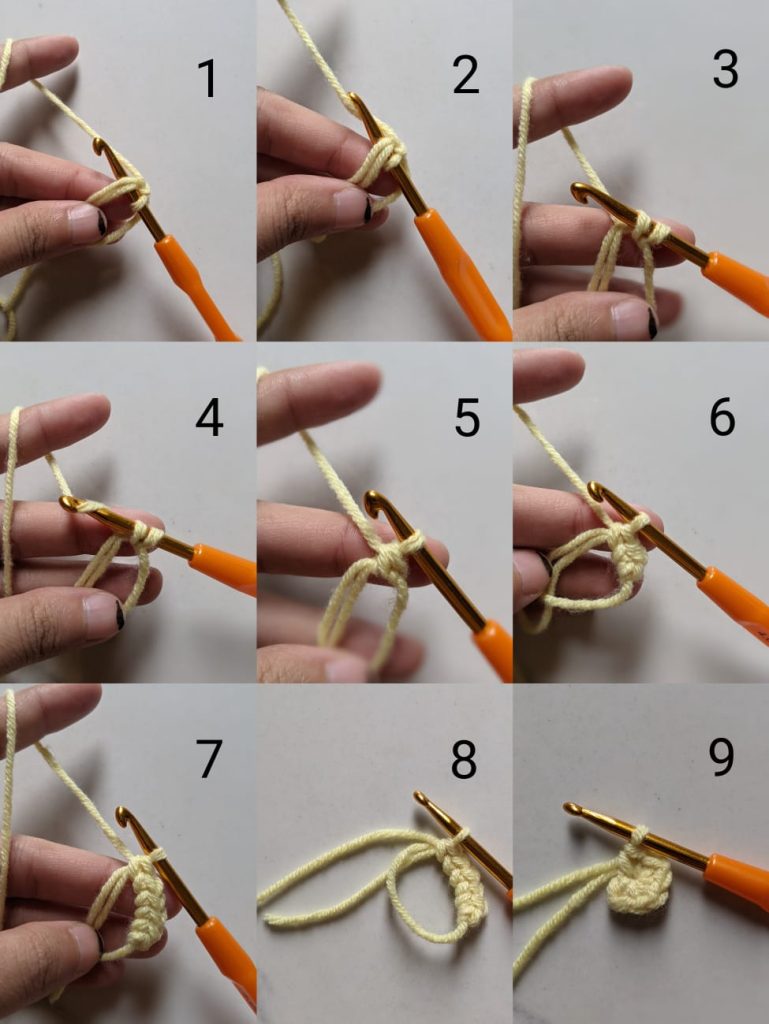
Single Crochet
This is the workhorse.
Roughly 95% of your amigurumi turtle is just single crochet stitches worked round and round in a spiral.
Insert hook, yarn over, pull through, yarn over, pull through both loops. That’s it. You’ll do it a few thousand times and it’ll become muscle memory fast.
Increases
An increase is just two single crochets worked into the same stitch.
That’s how a flat circle grows into a dome. More increases, bigger and rounder.
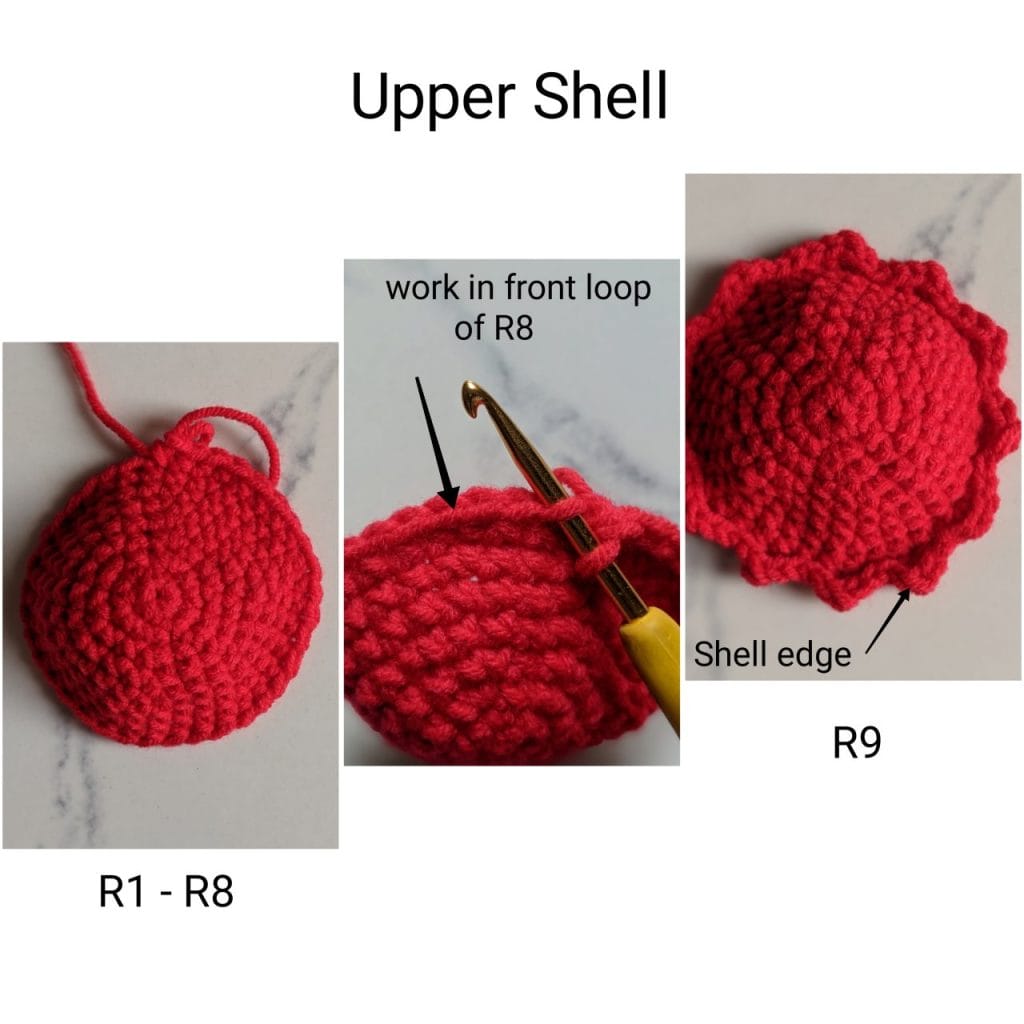
The Invisible Decrease
This is the one pro move worth learning early.
A regular decrease leaves an ugly little gap. The invisible decrease doesn’t.
Slide your hook into the front loops only of the next two stitches, yarn over, pull through those two loops, then yarn over and pull through both loops on your hook. Smooth, tight, no hole. Use it everywhere you need to close a shape.
Color Changes
Want a striped shell or a two-tone turtle? You’ll change colors.
The trick is to swap yarn on the very last step of the stitch before the new color starts.
Finish the previous stitch’s final pull-through with the new color, and the change looks clean instead of jagged.
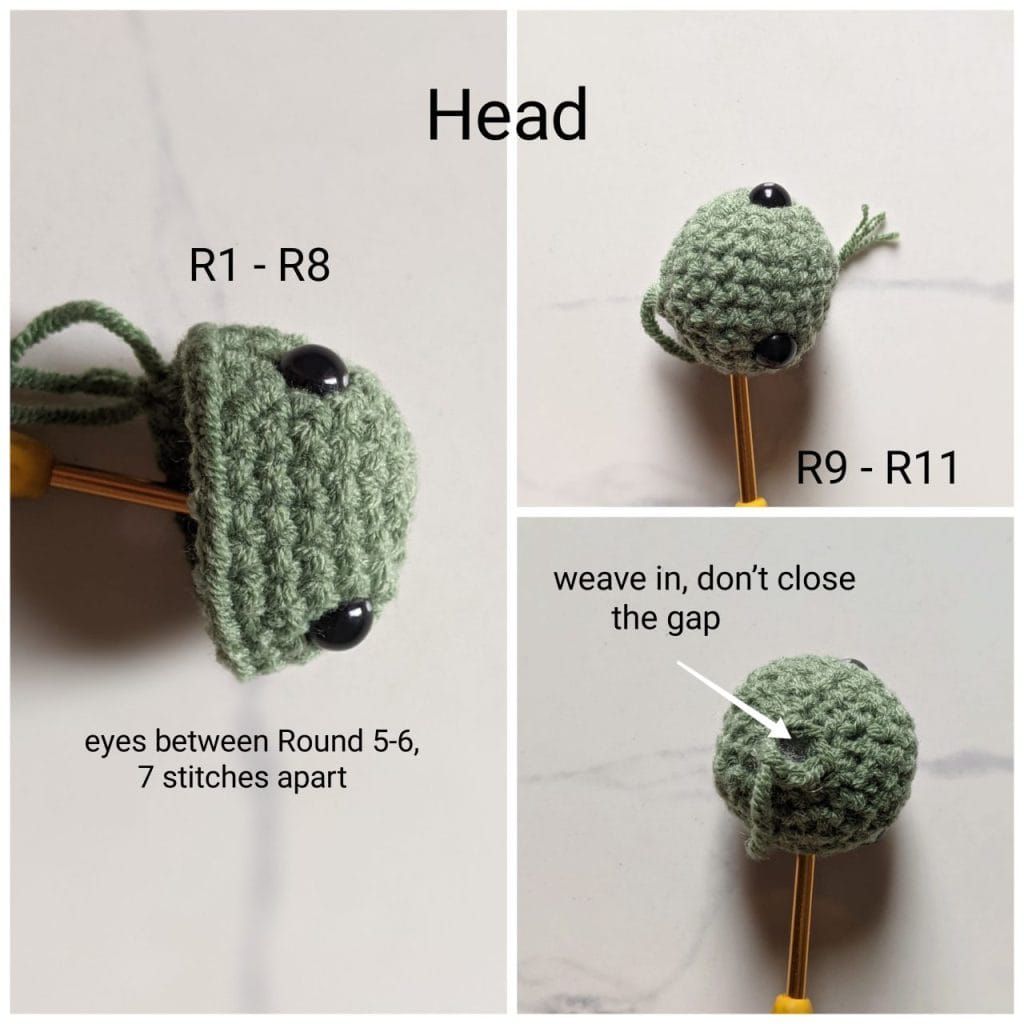
How Amigurumi Shaping Actually Works
Once you get this, you get all of it.
Amigurumi shapes are built from two moves: increase to make something bigger, decrease to make it smaller.
A sphere, which is what a turtle’s body and shell basically are, works like this. You increase steadily for the first several rounds to open it up into a bowl.
Then you crochet a few rounds straight with no changes, which builds the sides.
Then you decrease steadily to close it back up, stuffing as you go.
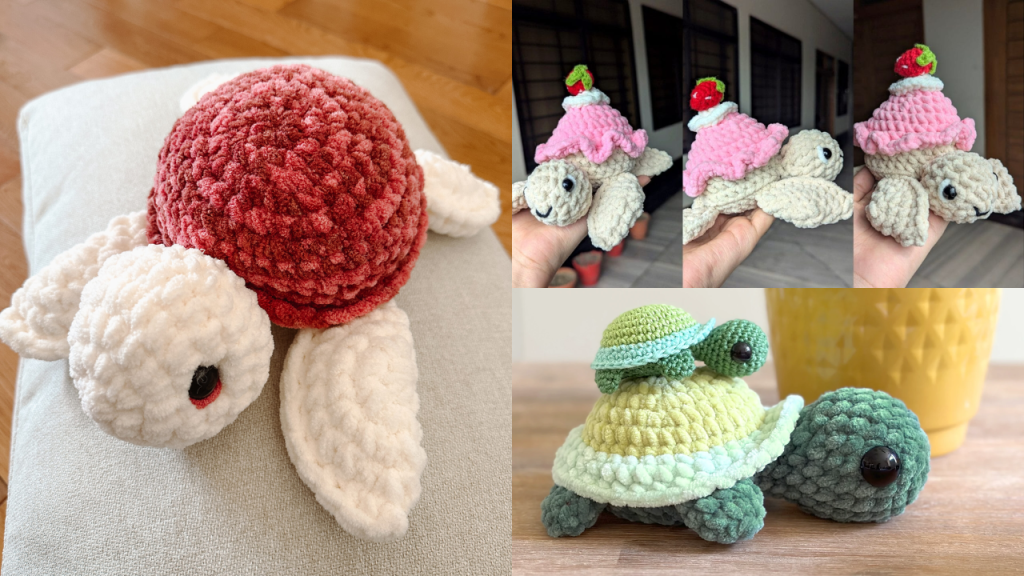
That’s a ball. Flatten it a bit and it’s a shell. Make a smaller one and it’s a head. The whole turtle is the same idea at different sizes.
Putting the Turtle Together, Piece by Piece
A standard beginner turtle breaks down into a few simple parts.
- The shell is a shallow dome, sometimes with a contrast color or stripes.
- The body is a flatter, wider piece the shell sits on.
- The head is a small ball, often with a short neck.
- Four legs are tiny tubes, and sometimes there’s a stubby tail.
You crochet each piece separately. Then you stuff them and sew everything together at the end.
This is exactly why we point beginners at a real pattern for their first one, with actual stitch counts round by round.
We have three of our own turtle patterns you can use as worked examples, each at a slightly different difficulty.
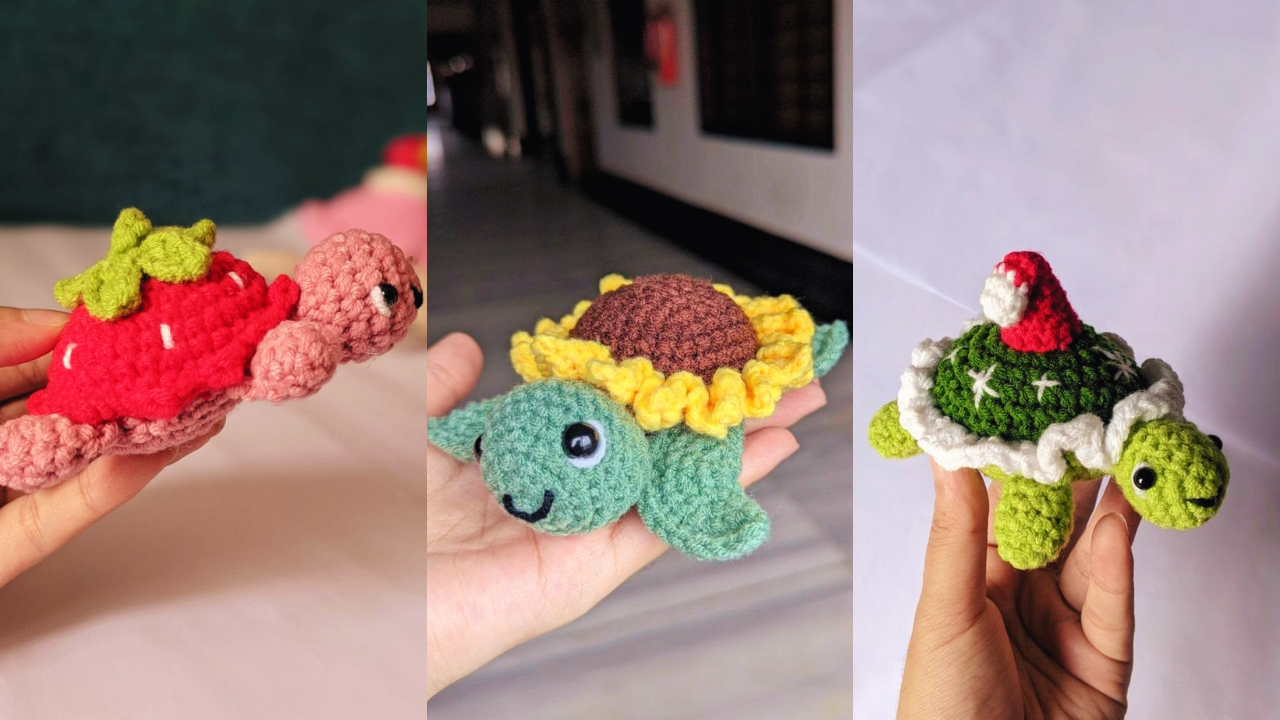
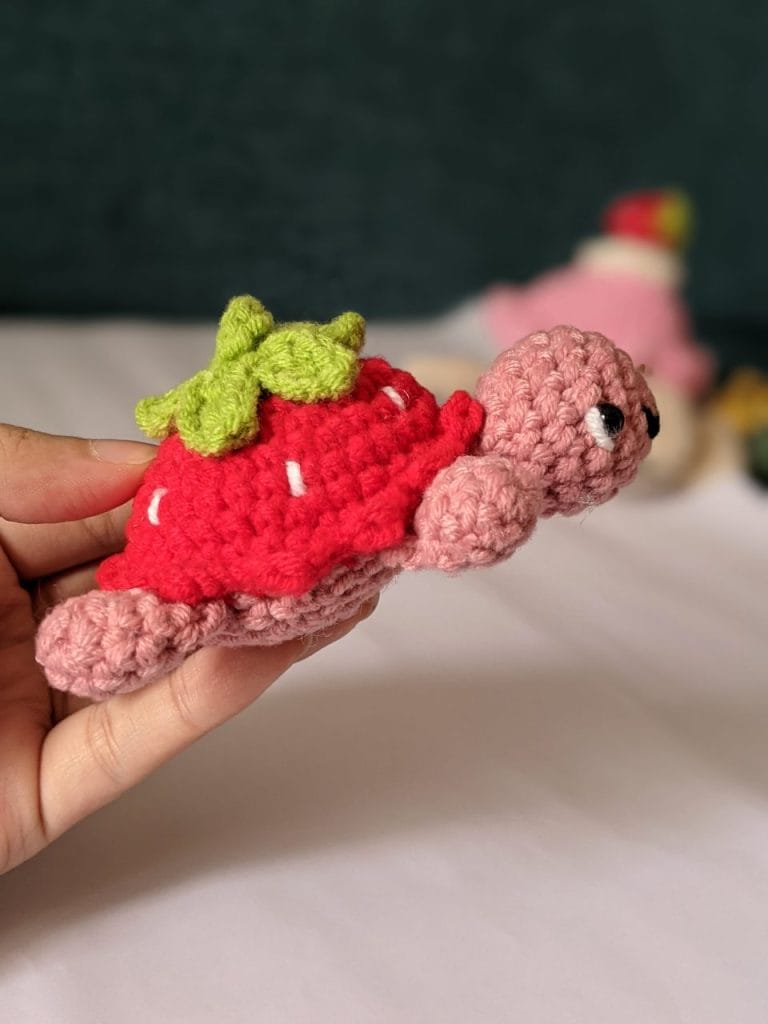
The Strawberry Turtle is the gentlest starting point.
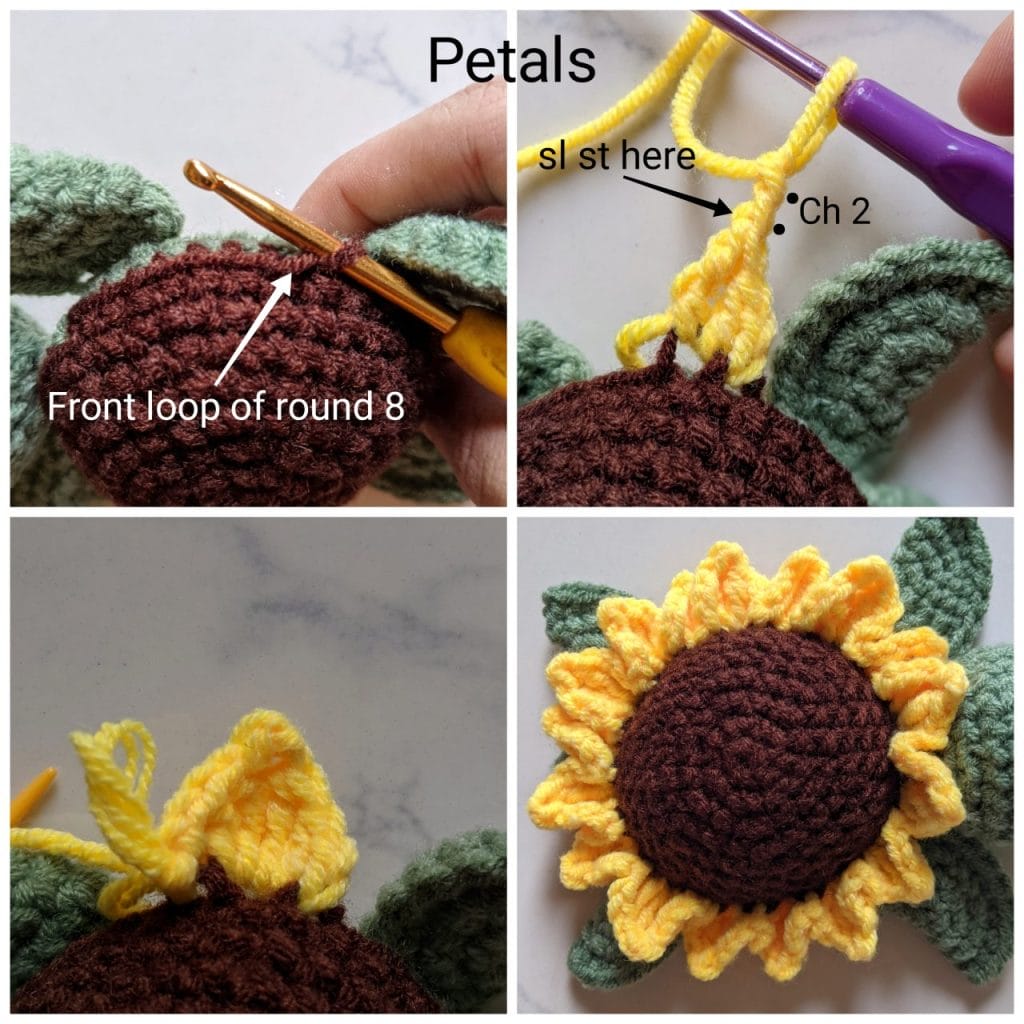
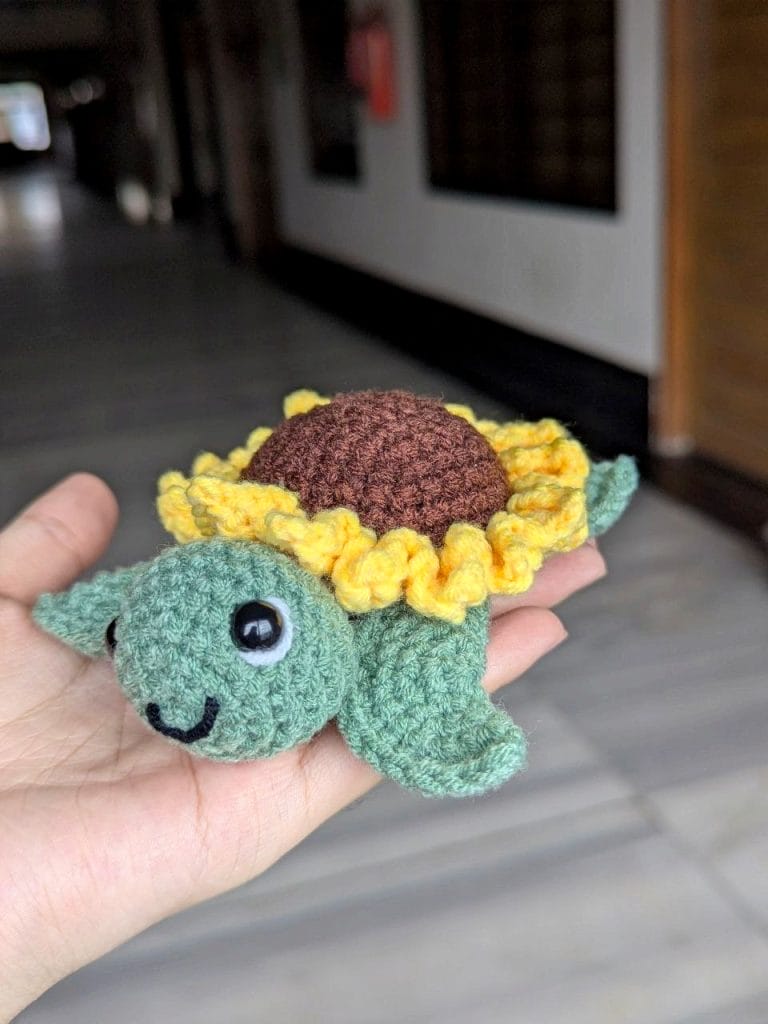
The Sunflower Turtle adds a little color-change practice with its petals.
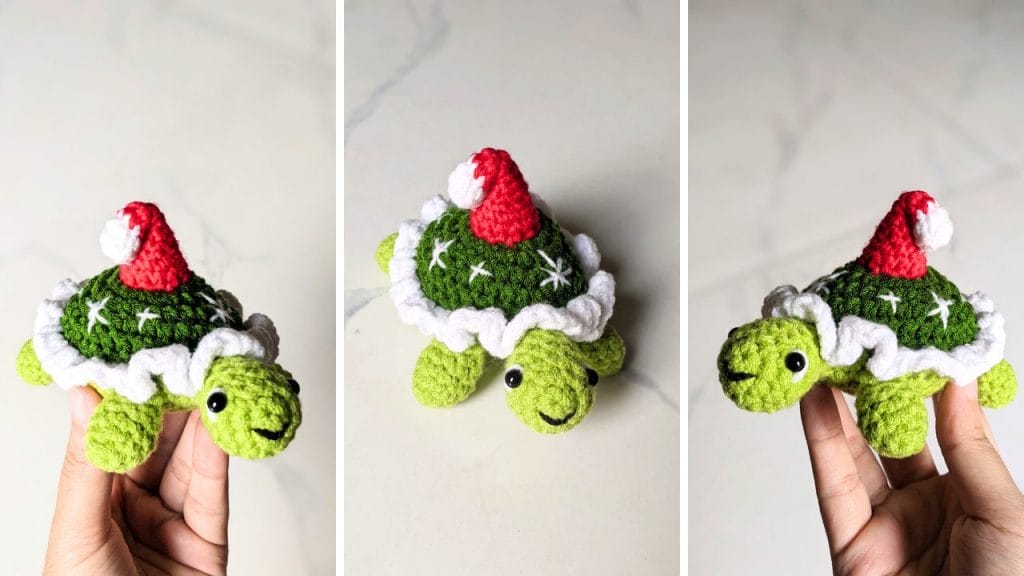
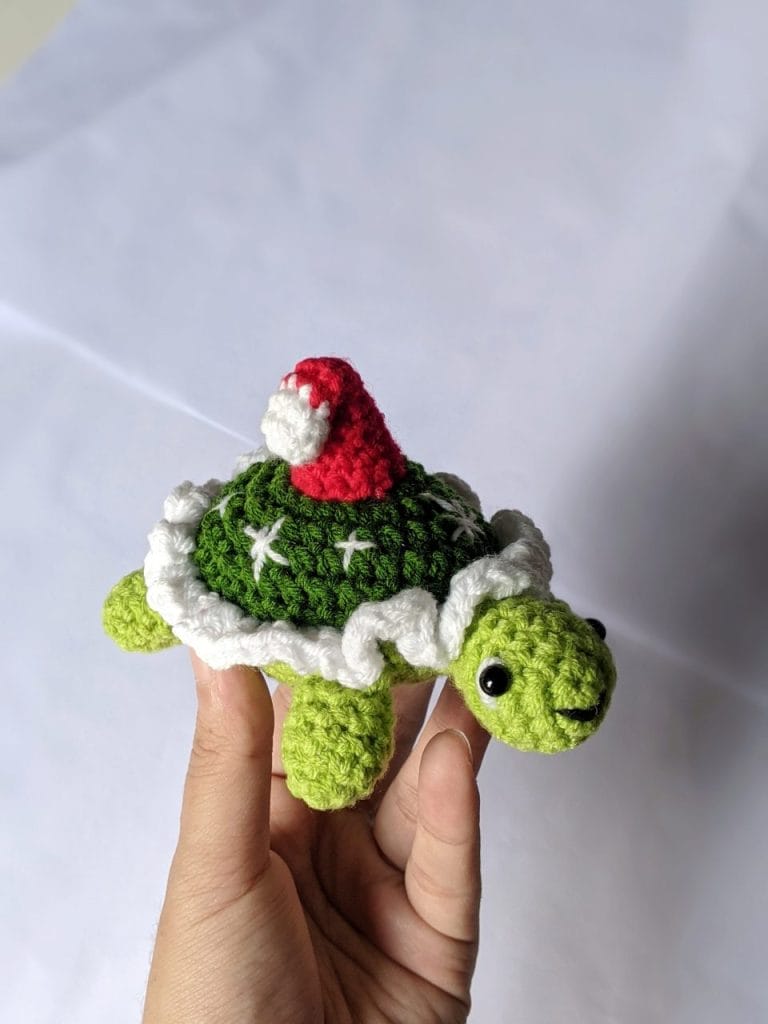
And the Christmas Tortoise throws in a tiny Santa hat once you’re feeling brave.
Read one of those alongside this guide and the round-by-round numbers will suddenly make sense.
Stuffing It the Right Way
Stuffing feels like the easy part, and it’s where most beginners go wrong.
Two rules save you.
First, use small pinches of stuffing at a time and shape as you go. One giant wad creates lumps you can see through the stitches.
Second, don’t overstuff. A turtle that’s packed rock hard will stretch its stitches apart and show gaps. You want it firm but still a little squishy.
For the small legs, push stuffing in with the back of your hook or a chopstick. Your fingers won’t fit.
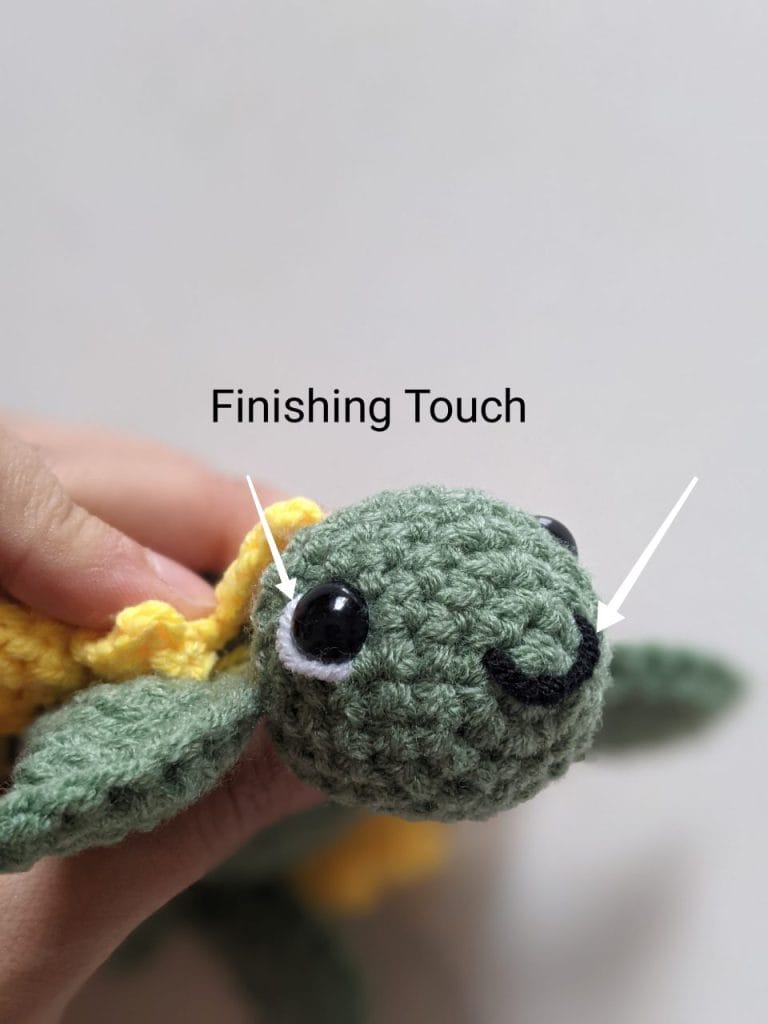
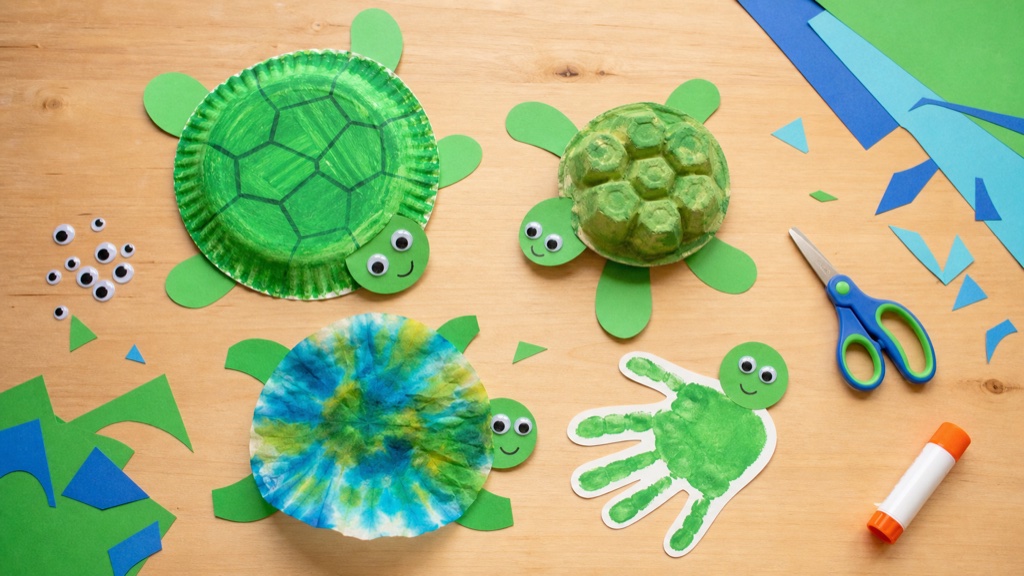
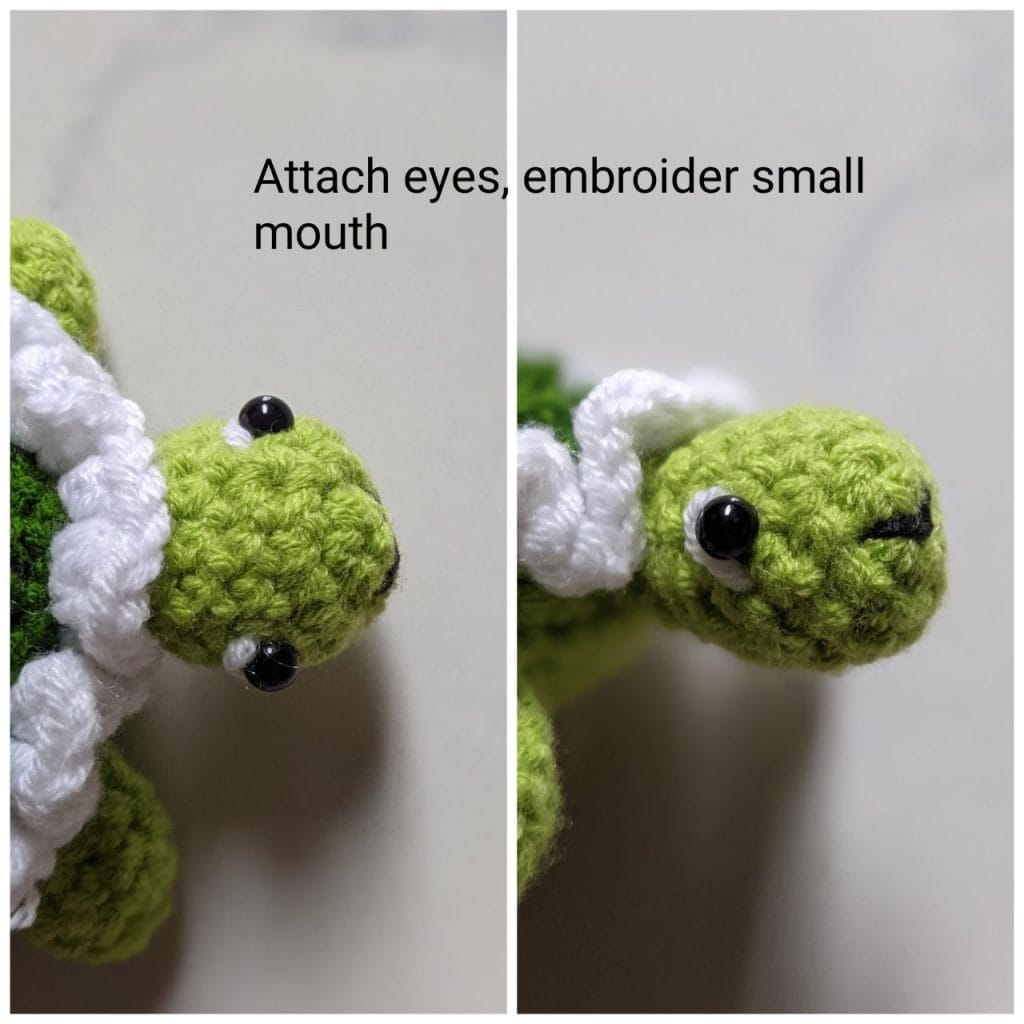
The Face: Eyes and Embroidery
The face is what gives your turtle personality, so slow down here.
Safety eyes go in before you stuff and close the head. Once the backing washer is on, they do not come off.
So here’s the move every guide repeats for good reason. Place the eyes without locking them, step back, and check the spacing before you commit. Crooked or too-far-apart eyes change the whole expression.
A couple of rounds between the eyes is a safe default for a small turtle.
For the mouth and any extra detail, a little embroidery with your tapestry needle does the job. A simple curved stitch is all a turtle needs to look happy.
Assembling Your Turtle
This is the home stretch, and it’s just sewing.
Thread a long tail onto your tapestry needle and use a whipstitch or mattress stitch with matching yarn.
Start with the shell on top of the body, line it up, and sew from the center outward so it sits straight.
Then attach the legs low on the sides, the way a real turtle sits, and add the head at the front.
Take your time pinning or holding pieces in place before you sew. Where you attach the legs and head decides whether your turtle looks like it’s walking, sleeping, or just vibing.
Common Beginner Mistakes (and Easy Fixes)
Almost every first turtle hits at least one of these. None of them are a big deal.
Gaps and visible stuffing. Your fabric is too loose. Go down a hook size next time, and for the current one, weave a little extra yarn over the worst spots.
Lumpy body. Too much stuffing at once. Smaller pinches, shaped as you go.
Losing your place in the round. Always mark the first stitch of each round with a stitch marker. A spiral has no obvious seam, so without a marker you will lose count.
Crooked eyes. You locked the safety eyes before checking placement. Next time, dry-fit first.
Holes when you decrease. You’re using a regular decrease. Switch to the invisible decrease from the stitches section above.
Your First Three Turtles to Try
Reading about it only gets you so far. The skill lands when you actually make one.
Start with whichever of our patterns matches your mood.
The Strawberry Turtle is the friendliest first project.
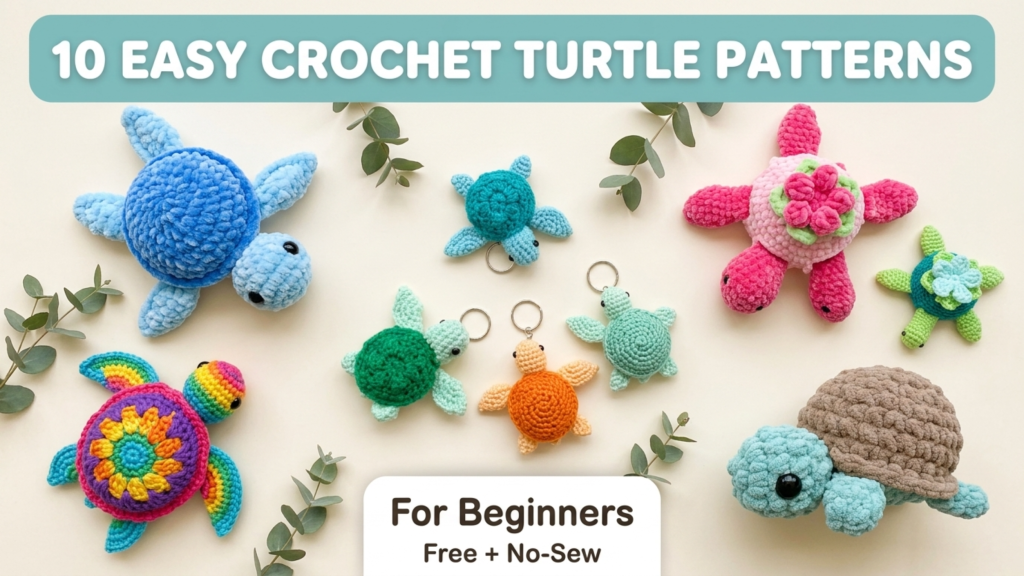
When you want options, our roundup of beginner crochet turtle patterns with 10 easy designs gives you a whole lineup to pick from, sorted by difficulty.
Every one of them uses exactly the stitches and shaping you just learned here.
You’re Ready to Make Your First Turtle
That’s genuinely the whole craft.
A magic ring, a pile of single crochets, a few increases and invisible decreases, some careful stuffing, and a little sewing at the end.
The first turtle will be a bit wonky. That’s the rule, and it’s part of the fun.
Your second one will be noticeably better, and by your third you’ll be eyeing yarn colors for a whole turtle family.
Grab your hook, pick a pattern, and make the little guy. He’s waiting.

About Author
Muntaseer Rahman started keeping pet turtles back in 2013. He also owns the largest Turtle & Tortoise Facebook community in Bangladesh. These days he is mostly active on Facebook.