How To Treat A Turtle’s Shell Rot? [Treatment At Home Guide]

This post was created with help from AI tools and carefully reviewed by a human (Muntaseer Rahman). For more on how we use AI on this site, check out our Editorial Policy.
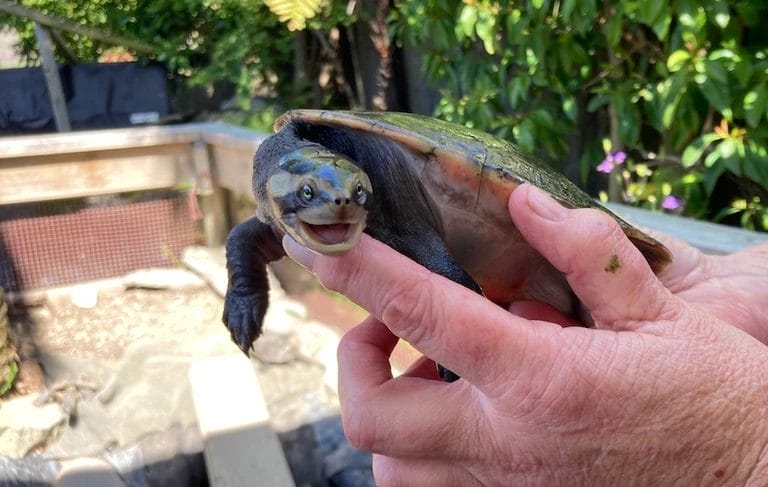
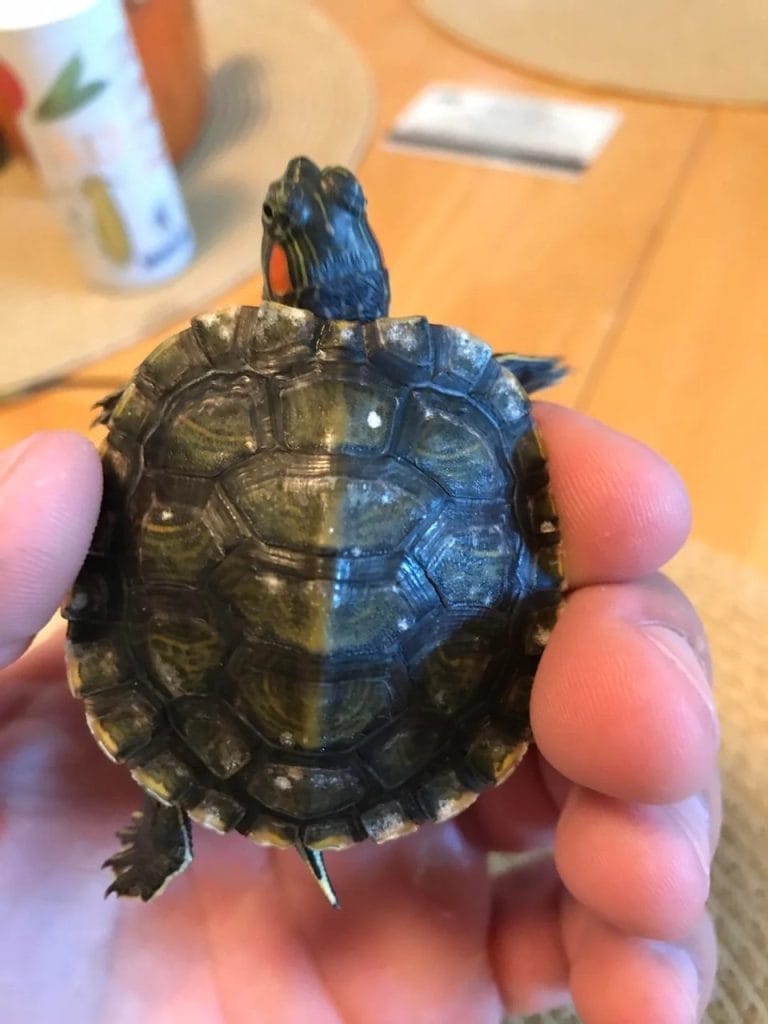
My friend sent me a video last night of his turtle looking… off. The shell had weird red patches and some gunky fluid leaking around the scutes. Classic case of shell rot. And like most people, he asked the first question that pops up: “Can I fix this at home?”
If it’s mild, yes—you can treat it at home with the right steps. But you have to act early, clean it properly, and keep the turtle dry and warm.
In this guide, I’ll walk you through the full treatment process I’d personally follow, what supplies you’ll need, how to tell if it’s serious, and when it’s time to call the vet.
Let’s keep your turtle from turning into a walking science project.
Need To Talk With A Turtle Vet Right Now?

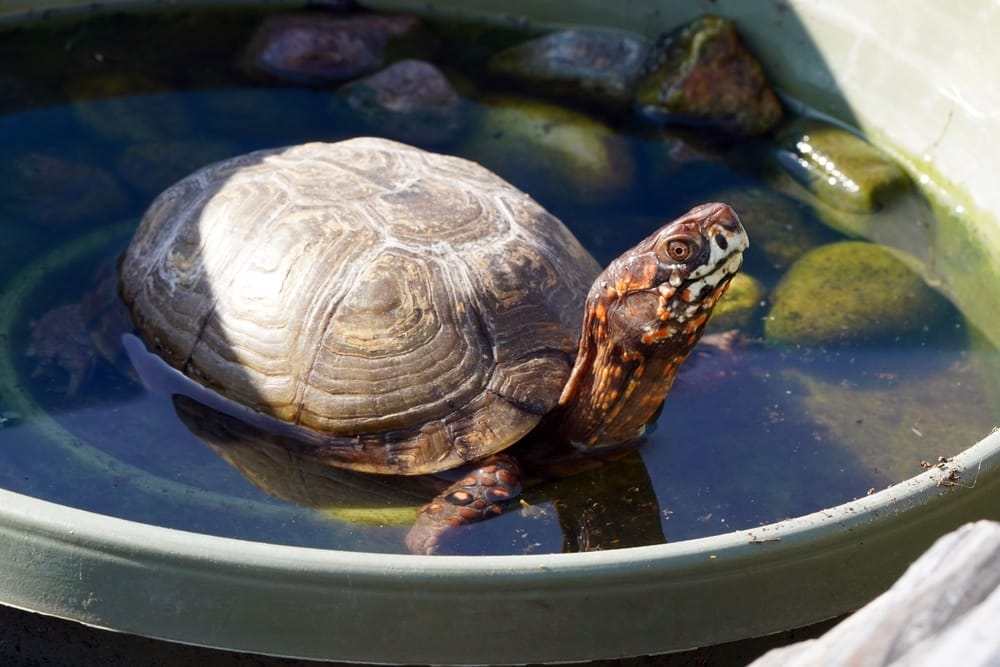
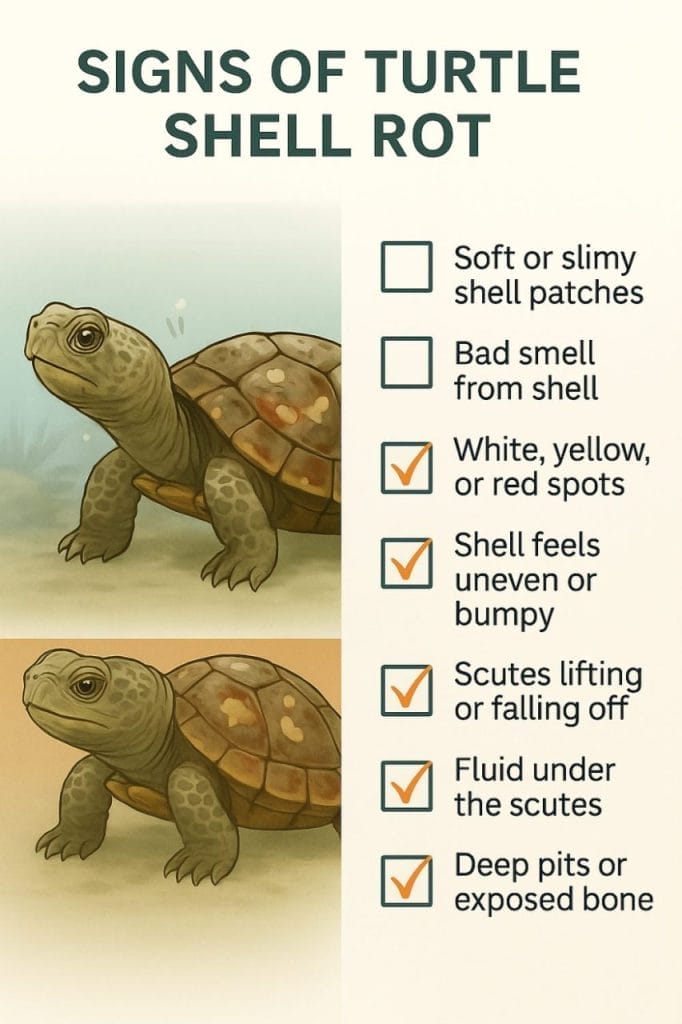
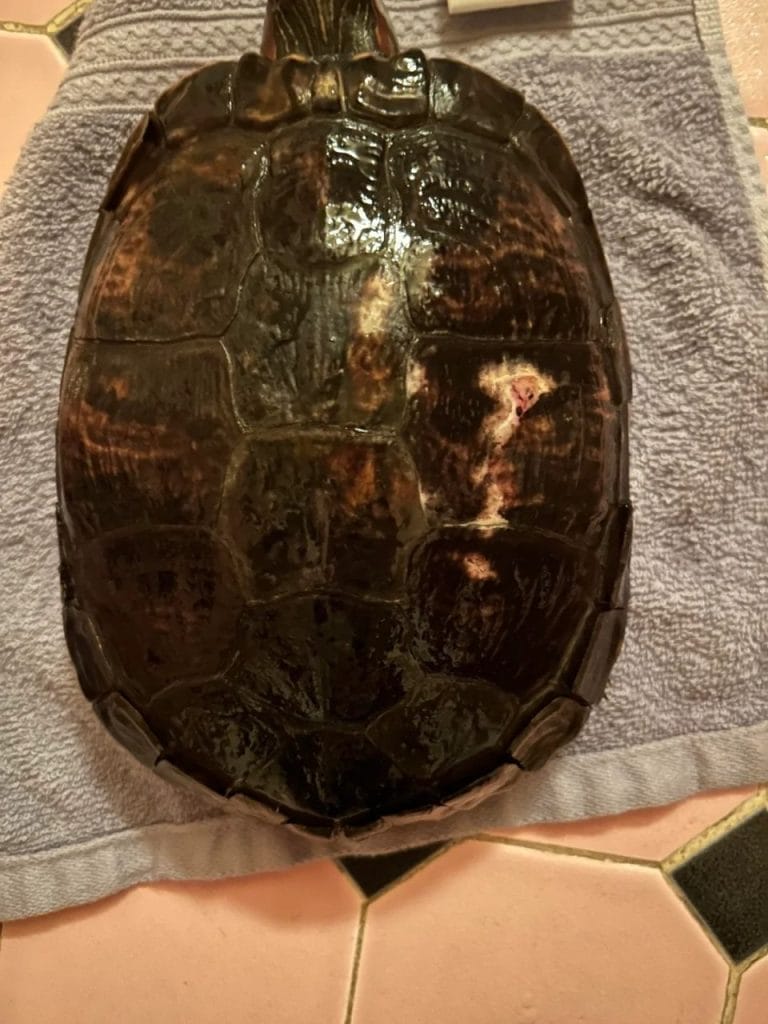
Quick Signs Your Turtle Has Shell Rot
If you’re staring at your turtle’s shell thinking, “Hmm… that doesn’t look right,” you’re probably onto something.
Here’s what to check:
- The shell has weird soft spots
- Some scutes look discolored—faded yellow, white, or even reddish
- There’s a nasty smell you can’t ignore
- You see gooey fluid or gunk under the scutes
- The turtle isn’t moving much and has lost its appetite
- In bad cases, the scutes lift up or fall off
It might start with a small crack or scrape. But if bacteria or fungus sneak in, things go downhill fast.
If you see one or two of these signs, you can probably handle it at home (I’ll show you how).
If it looks like a horror show? Call the vet. No point trying to DIY a medical emergency.
Before starting treatment, make sure you’re actually dealing with shell rot and not normal shedding—this guide on shell rot vs shedding will help you differentiate.
What You’ll Need for Home Treatment
Don’t jump in without gear. You’ll need a few things ready before touching your turtle’s shell.
Here’s the full list:
- Scalpel blade or blunt-edged knife – for gently scraping off dead stuff (only if you’re confident)
- Soft toothbrush – to clean the shell without scratching it
- Antiseptic – Betadine, chlorhexidine, or diluted iodine (not daily use)
- Antibiotic cream – Silver sulfadiazine, 2% mupirocin, or Neosporin (the plain kind, no pain relief additives)
- Paper towels or soft cloth – for drying the turtle and wiping the shell
- Mild soap (optional) – only if absolutely needed and safe
- UV or heat lamp – must-have for dry docking
- Latex gloves – don’t skip this, for your safety too
- Clean container or dry dock setup – where the turtle stays during treatment
- Calcium or vitamin supplement (optional) – helps healing from the inside
Once you’ve got all these, you’re ready to start fixing the problem.
This Hilarious Turtle Book Might Know Your Pet Better Than You Do

Let’s be real—most turtle care guides feel like reading a textbook written by a sleep-deprived zookeeper.
This one’s not that.
Told from the snarky point of view of a grumpy, judgmental turtle, 21 Turtle Truths You’ll Never Read in a Care Guide is packed with sarcasm, sass, and surprisingly useful insights.
And hey—you don’t have to commit to the whole thing just yet.
Grab 2 free truths from the ebook and get a taste of what your turtle really thinks about your setup, your food choices, and that weird plastic palm tree.
It’s funny, it’s honest, and if you’ve ever owned a turtle who glares at you like you’re the problem—you’ll feel seen.
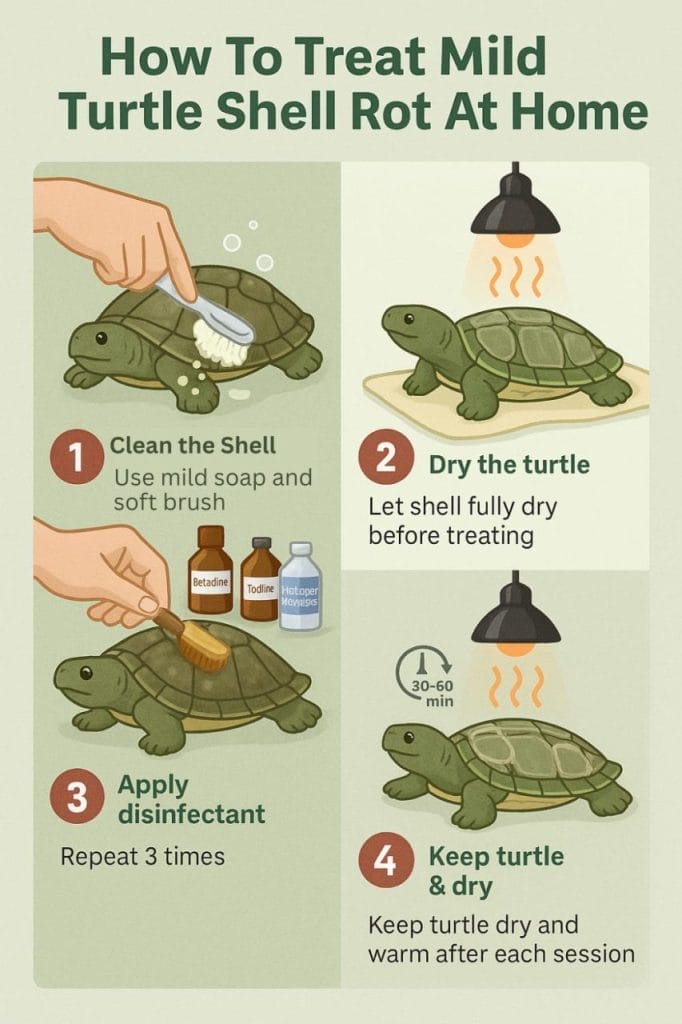
Step-by-Step Shell Rot Treatment at Home
Spot the Problem
Check the shell closely. Look for soft patches, weird colors, gunk, or that gross smell. If it’s just starting out and your turtle’s still eating and active, you can try home treatment.
Clean Off the Dead Stuff
Wear gloves. Gently scrape away any loose, dead scutes or flaky areas using a scalpel or blunt knife. If you’re not sure or it feels risky—stop. You don’t want to dig too deep.
Disinfect the Area
Mix a little Betadine or chlorhexidine in lukewarm water. Dip a clean toothbrush in the solution and gently scrub the shell. Avoid eyes, nose, and soft skin.
Do this 2 to 3 times a week, not every day—too much can slow healing.
Dry It Out
Pat the turtle completely dry with paper towels. Then place it under a heat or UV lamp for at least 30 minutes. The shell must be dry before applying any cream.
Apply Antibiotic Cream
Use silver sulfadiazine, mupirocin, or plain Neosporin. Dab a thin layer on the infected area. Let the cream sit for at least 20–30 minutes before returning the turtle to any water.
Do this once or twice a day.
Set Up a Dry Dock
Keep your turtle in a dry, warm place with access to UV light. No water except one short swim (20–60 minutes max) per day for food and waste. Dry it fully again after.
Repeat Daily
Clean → dry → apply cream → dry dock. Do this for at least 1–2 weeks.
If you see no improvement or it spreads, stop everything and take your turtle to a vet.
Advanced cases require systemic antibiotics prescribed by veterinarians in addition to topical treatments.
Diet Tips That Speed Up Healing
You can’t fix shell rot with meds alone. Your turtle needs the right fuel to actually heal.
Feed more protein (if your turtle is young)
Young turtles heal faster when they get enough protein. Offer things like feeder fish, bloodworms, or boiled egg white a few times a week.
Add calcium to the diet
Without enough calcium, the shell won’t rebuild right. Use cuttlebone, calcium blocks, or dust food with a reptile-safe calcium powder (no phosphorus).
Use vitamin D3 supplements
Even with a UV lamp, some turtles don’t get enough D3. Use a supplement once or twice a week—just don’t overdo it.
Give leafy greens (for adults)
For older or herbivorous turtles, offer kale, collard greens, dandelion leaves, etc. Mix things up to keep the nutrients coming.
Avoid junk food
No shrimp treats every day. No goldfish nonstop. Cut out anything that doesn’t help recovery.
Hydration matters too
Make sure your turtle drinks water during swim time. Dehydrated turtles heal slow.
A solid diet won’t magically cure shell rot—but it gives your turtle the power to fight back.
How Long Does Healing Take?
If you’re expecting overnight results, sorry to break it to you—this takes time.
Mild shell rot usually starts to look better in 1 to 2 weeks if you stay consistent with cleaning, dry docking, and creams.
Moderate cases might need 3 to 5 weeks before the shell hardens and new scutes start forming.
Severe infections can take months, especially if the damage goes deep or parts of the shell fell off.
The healing isn’t just about what you see—the scutes grow back slowly underneath, and it can take up to a year to fully restore the shell’s original look and strength.
Don’t stop treatment just because the surface looks okay. Give it time. Be patient. Keep checking for soft spots, cracks, or gunk coming back.
When to Stop and See a Vet
Home treatment only works if the infection is caught early. If things start going sideways, don’t wait around.
Here’s when you drop everything and call a vet:
- The rot is spreading: If new spots keep popping up or the discoloration gets worse, home care isn’t cutting it.
- Your turtle stops eating: Loss of appetite is a big red flag. Sick turtles often stop eating when the infection gets serious.
- The scutes are falling off: One or two lifting scutes? Maybe okay. But if they’re actually falling off or you see raw tissue—get help.
- Foul smell won’t go away: If the shell still smells like rot after a week of treatment, the infection might be deep.
- Turtle seems weak or lethargic: No swimming, no basking, no interest in food = not a good sign.
- No improvement after 2 weeks: You’re doing everything right but nothing’s changing? Time to let a professional step in.
It’s not about guessing right—it’s about not letting the turtle suffer while you “see how it goes.” If in doubt, get help.

Common Mistakes to Avoid
- Scraping too hard: You’re trying to clean the shell, not sand it down. Scrape gently. If it doesn’t come off easily, leave it alone.
- Using antiseptic every single day: Betadine or chlorhexidine isn’t a daily routine. Too much dries out the shell and slows healing. Stick to 2–3 times a week.
- Letting the turtle swim right after applying meds: Big mistake. The cream just washes off. Always wait 20–30 minutes before letting the turtle near water.
- Skipping the dry dock: Water is the enemy during healing. If your turtle stays wet, the infection won’t go away.
- Using the wrong Neosporin: Pain-relief versions contain stuff toxic to turtles. Only use the plain triple antibiotic kind.
- No UV or heat: If there’s no proper UV light or basking spot, the shell won’t rebuild. No matter how much cream you use, it won’t work without heat and light.
- Not cleaning the tank: You treat the turtle, but leave it in a dirty tank? That’s like showering and then rolling in mud. Keep the habitat clean or the infection will come right back.
Prevention Guide (So This Doesn’t Happen Again)
Keep the tank clean
Dirty water = bacteria party. Use a strong filter, clean the tank often, and do water changes regularly.
Give your turtle a basking dock
Turtles need to dry off every day. No dock? Their shell stays wet. Wet shell? Perfect setup for rot.
Use a proper UVB and heat lamp
No UVB, no vitamin D3. No heat, no drying. Both are non-negotiable if you want a healthy shell.
Feed a balanced diet
Junk food and vitamin deficiencies weaken the shell. Stick to greens, protein, and calcium-rich stuff depending on your turtle’s type.
Remove sharp or rough tank decor
That cool rock with jagged edges? It can scrape the shell and start the whole rot cycle again.
Watch for fights
Turtles can be jerks. If one’s bullying the other, separate them. Injuries from bites or ramming can lead to infections.
Handle with care
If you drop your turtle—even from a short height—it can crack the shell. Always stay low when picking it up.

About Author
Muntaseer Rahman started keeping pet turtles back in 2013. He also owns the largest Turtle & Tortoise Facebook community in Bangladesh. These days he is mostly active on Facebook.