Make This Adorable Cupcake Sea Turtle Plushie (Free Sewing Pattern!)

This post was created with help from AI tools and carefully reviewed by a human (Muntaseer Rahman). For more on how we use AI on this site, check out our Editorial Policy.
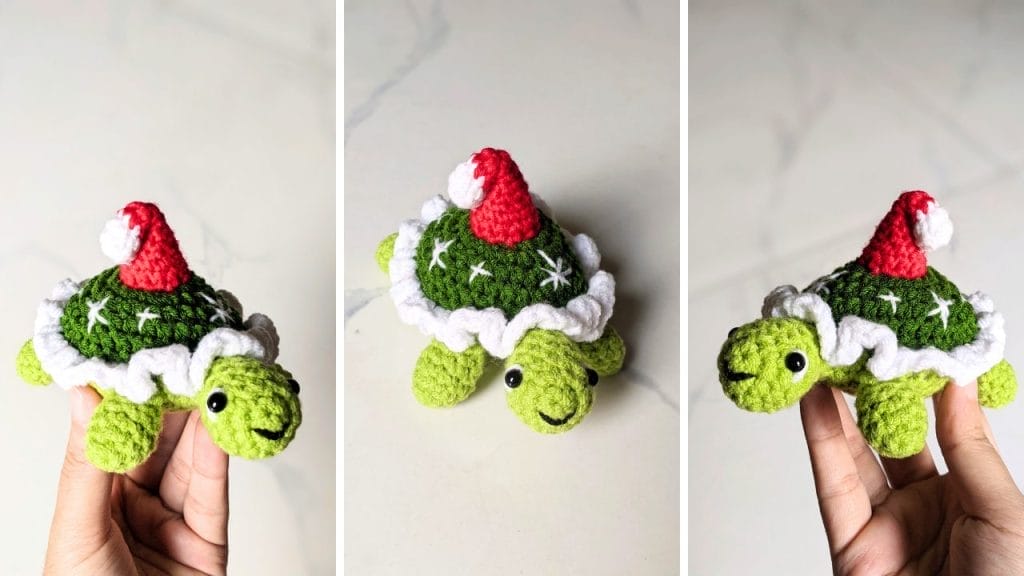
Ever wanted to combine your love for sea turtles with something deliciously sweet? This cupcake-themed sea turtle plushie is about to become your new favorite project!
With its charming pink shell, fluffy whipped cream topping, and tiny strawberry garnish, this little guy looks good enough to eat.
This isn’t your typical sea turtle pattern.
Created by a crochet expert, this design transforms the classic plushie turtle into an irresistible dessert-inspired creation that’s perfect for gift-giving, nursery decor, or adding a touch of whimsy to your home.
Ready to dive into this sweet project? Let’s get started!

What You’ll Need to Know
Skill Level: Intermediate
This pattern requires familiarity with basic crochet stitches (such as single crochet, increase, and decrease), working in the round, and attaching multiple parts together.
If you’re comfortable with basic amigurumi techniques, you’ll do great with this project.
Finished Size: Approximately 15 cm (5 inches)
Size may vary depending on yarn thickness, hook size, and your individual tension. Don’t worry if yours turns out slightly different—each handmade turtle has its own personality!
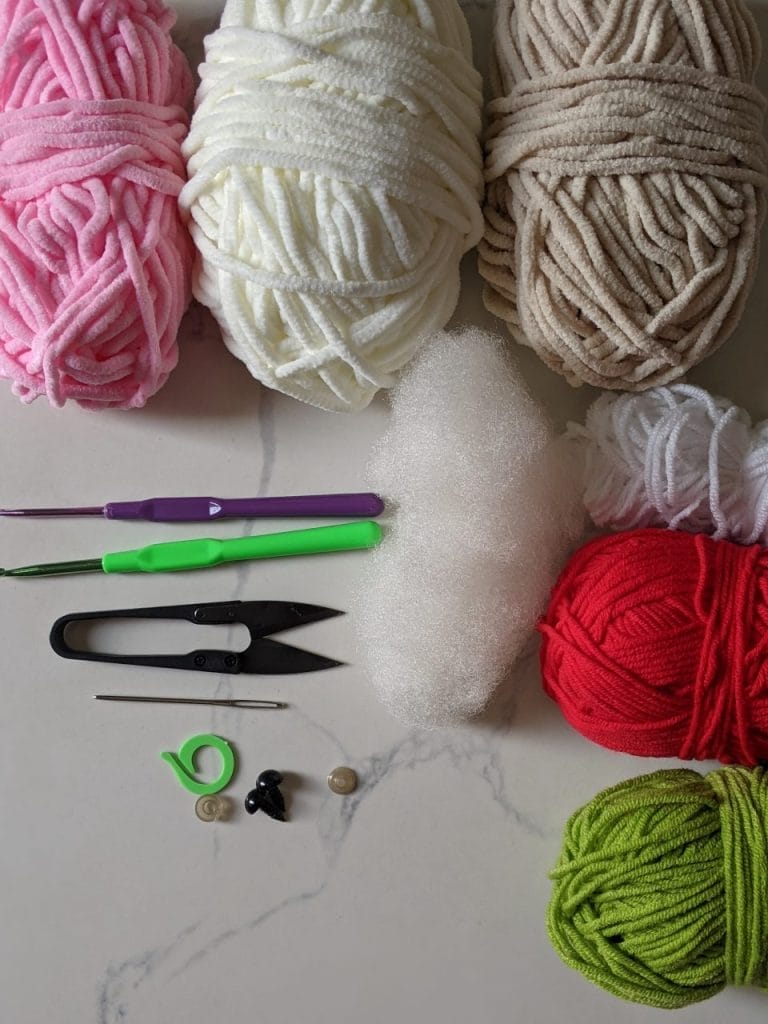
Materials You’ll Need
Yarn:
- Plush Yarn (4.5 – 5 mm hook): Pink, White, Light Brown
- Milk Cotton Yarn (4ply, 3 mm hook for details): Red, Green, White, Black
Tools & Notions:
- Hooks: 3 mm (for strawberry details), 4.5 mm (for main turtle parts)
- 10 mm safety eyes (or small black beads if you prefer)
- Fiberfill stuffing
- Tapestry needle
- Scissors
Pro tip: The plush yarn gives this turtle an incredibly soft, cuddly texture that makes it perfect for snuggling!
Your Yarn Stash Called. It Wants to Be a Turtle.

Look, you could spend another weekend scrolling Pinterest for the “perfect” turtle pattern.
Or you could grab one that’s already perfect.
Turt-ally Hooked gives you 5 complete turtle patterns—each with a different theme, personality, and skill level.
Bee, strawberry, sunflower, Christmas, and cupcake. All adorable. All doable.
It’s straightforward, it’s cute, and if you’ve been meaning to make something other than another scarf—here’s your chance.
Crochet Abbreviations
Before we start, here are the abbreviations you’ll see throughout the pattern:
- MR = Magic Ring
- ch = Chain
- sc = Single Crochet
- inc = Increase (2 sc in one stitch)
- dec = Decrease (2 sc together)
- sl st = Slip Stitch
- R = Round/Row
- BLO = Back Loop Only
- FLO = Front Loop Only
Step-by-Step Pattern

Head (Light Brown Yarn)
R1: 6 sc in MR [6]
R2: 6 inc [12]
R3: (1 sc, 1 inc) × 6 [18]
R4 – R5: sc around [18]
Attach eyes between R3-R4, approximately 6 stitches apart.
R6: (1 sc, 1 dec) × 6 [12]
R7: 6 dec [6]
Fasten off, leave a long tail for sewing.

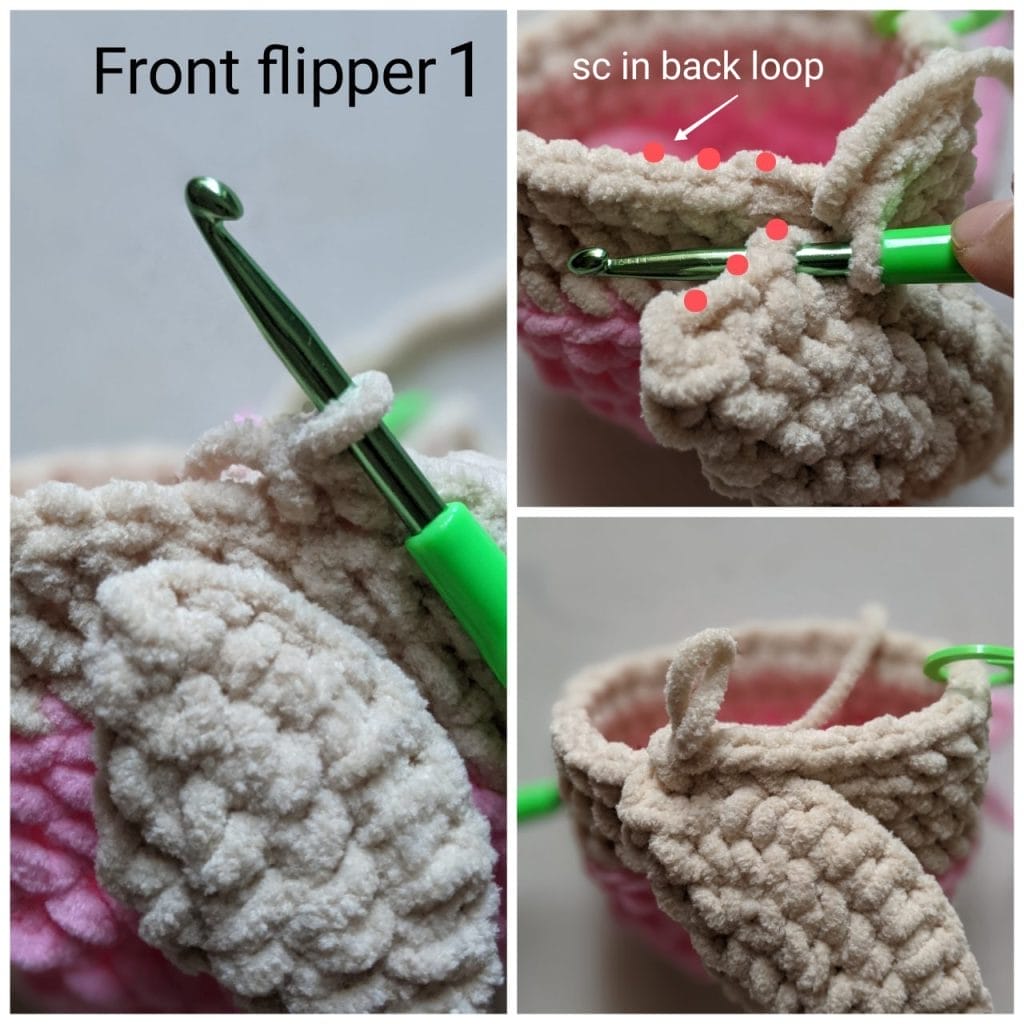
Front Flippers (Make 2, Light Brown Yarn)
R1: 6 sc in MR [6]
R2: 6 inc [12]
R3: (1 sc, 1 inc) × 6 [18]
R4: (2 sc, 1 inc) × 6 [24]
Fold in half and work 12 sc across both layers. Fasten off and weave in the end.
Back Flippers (Make 2, Light Brown Yarn)
R1: 6 sc in MR [6]
R2: 6 inc [12]
R3: (1 sc, 1 inc) × 6 [18]
Fold in half and work 9 sc across both layers. Do not stuff. Fasten off and weave in the end.
Tail (Light Brown Yarn)
R1: 6 sc in MR [6]
R2–R3: sc around [6]
Fasten off and leave a long tail for sewing.
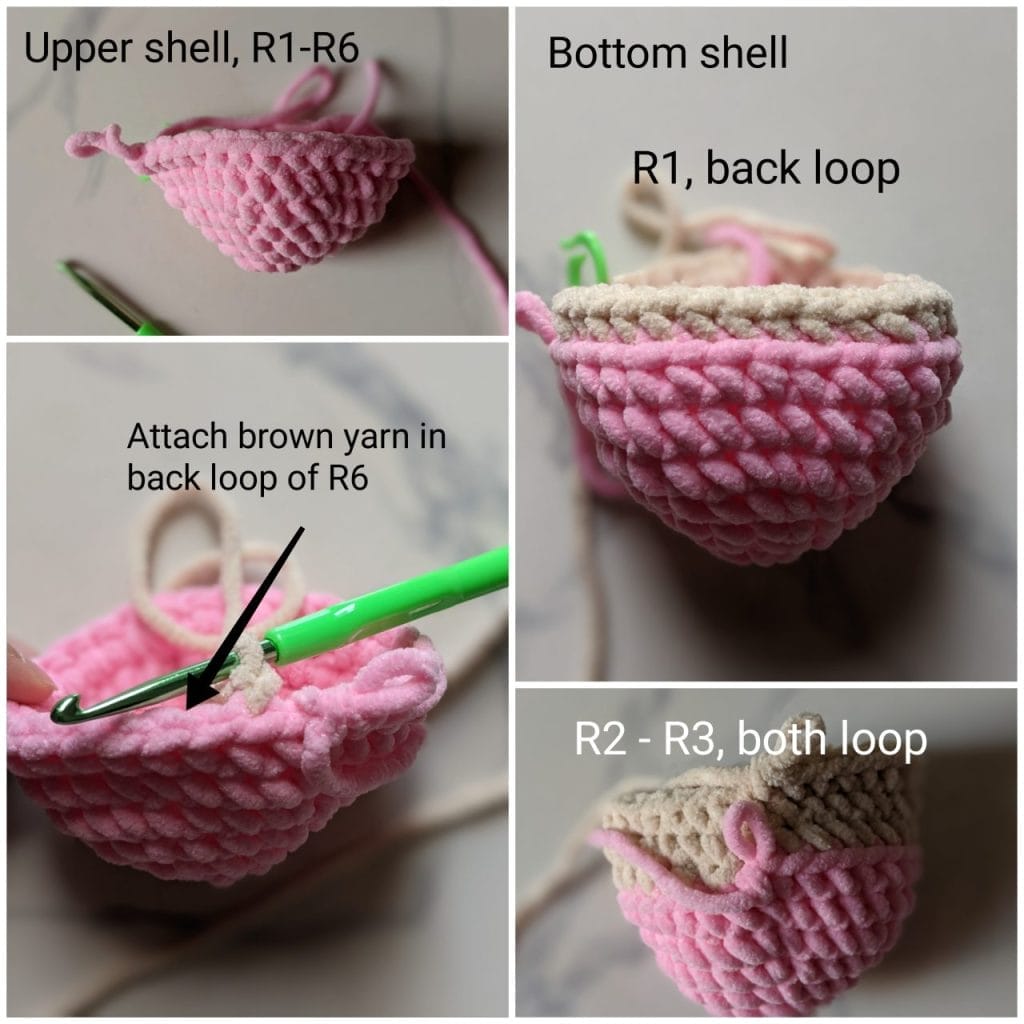
Upper Shell (Pink Yarn)
R1: 6 sc in MR [6]
R2: 6 inc [12]
R3: (1 sc, 1 inc) × 6 [18]
R4: (2 sc, 1 inc) × 6 [24]
R5: (3 sc, 1 inc) × 6 [30]
R6: sc around [30]
Do not cut the yarn.
Bottom Shell (Light Brown Yarn)
Attach yarn to the BLO of Round 6 of the upper shell.
R1: BLO, sc around [30]
R2 – R3: Work in both loops, sc around [30]
R4: While working this round, attach the flippers. Place the flippers outside the shell, insert the hook through the flipper first, then through the shell, and complete the single crochet.
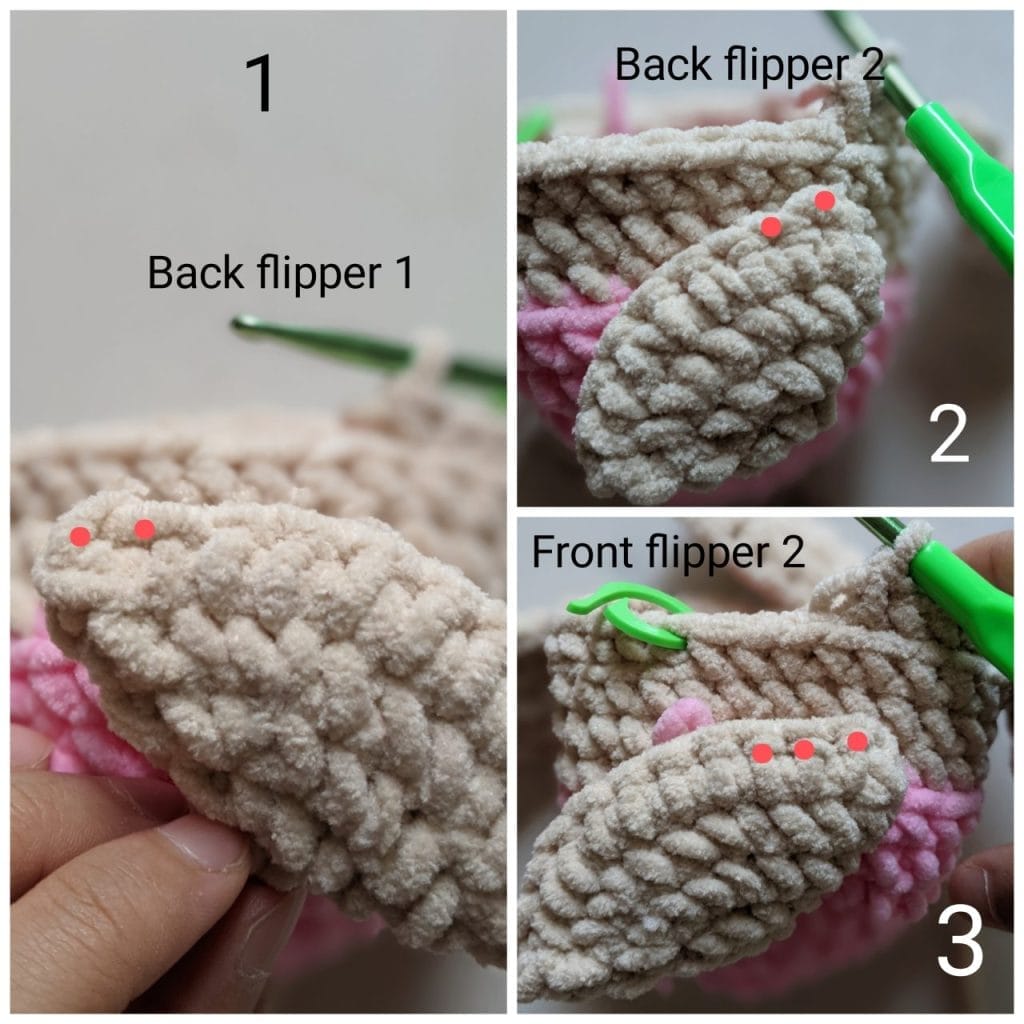
(Work in both loops) 6 sc, attach front flipper with 3 sc, 5 sc, attach back flipper with 2 sc, 4 sc, attach back flipper with 2 sc, 5 sc, attach front flipper with 3 sc. [30]
R5: (3 sc, 1 dec) × 6 [24]
R6: 12 dec [12]
Stuff with fiberfill
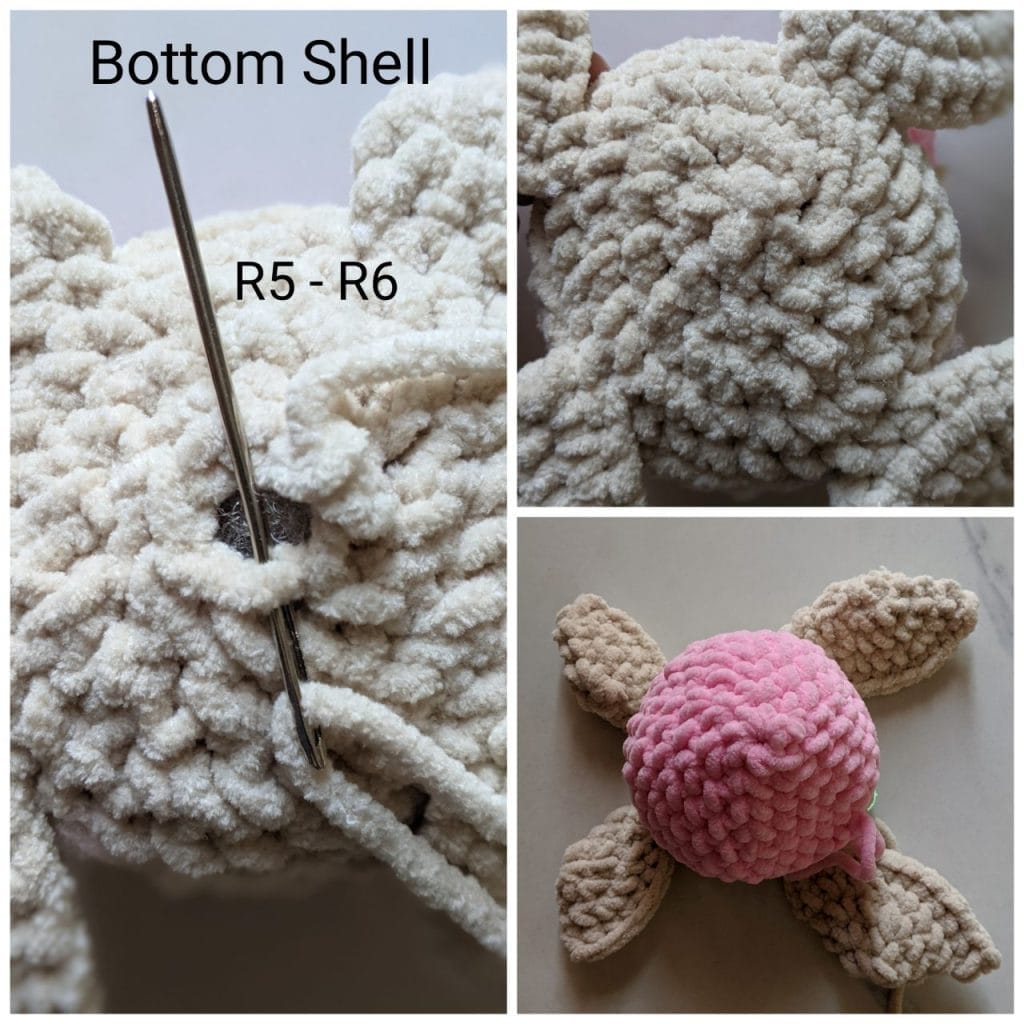
R7: 6 dec [6]
Fasten off, then close the gap by weaving through the front loops only of the remaining 6 stitches. Pull tight to close and hide tail.

Attaching Head and Tail
Attach the head between the front flippers and the tail between the back flippers using a tapestry needle.
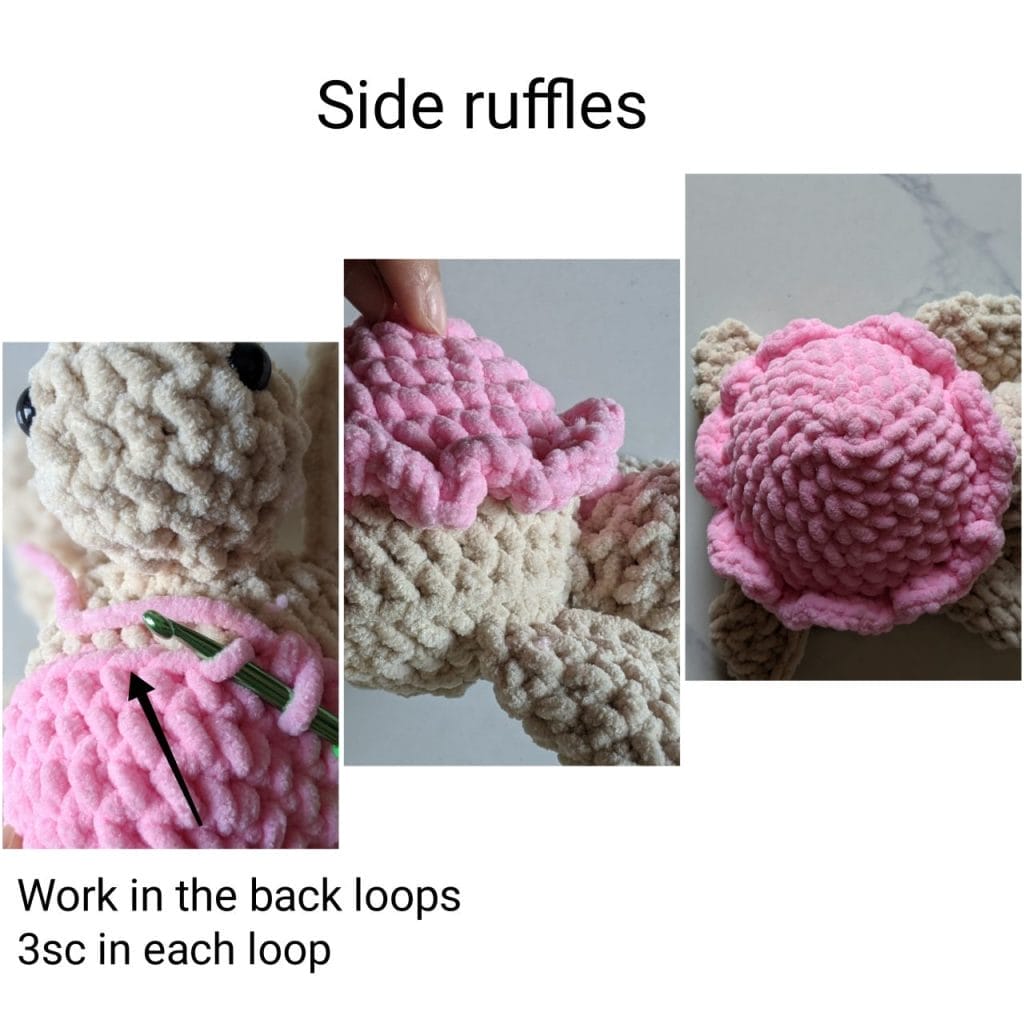
Side Ruffles (Pink Yarn)
Continue working with the pink yarn in FLO of Round 6 of upper shell.
Work 3 sc into each loop around. Sl st, fasten off and weave in the end.
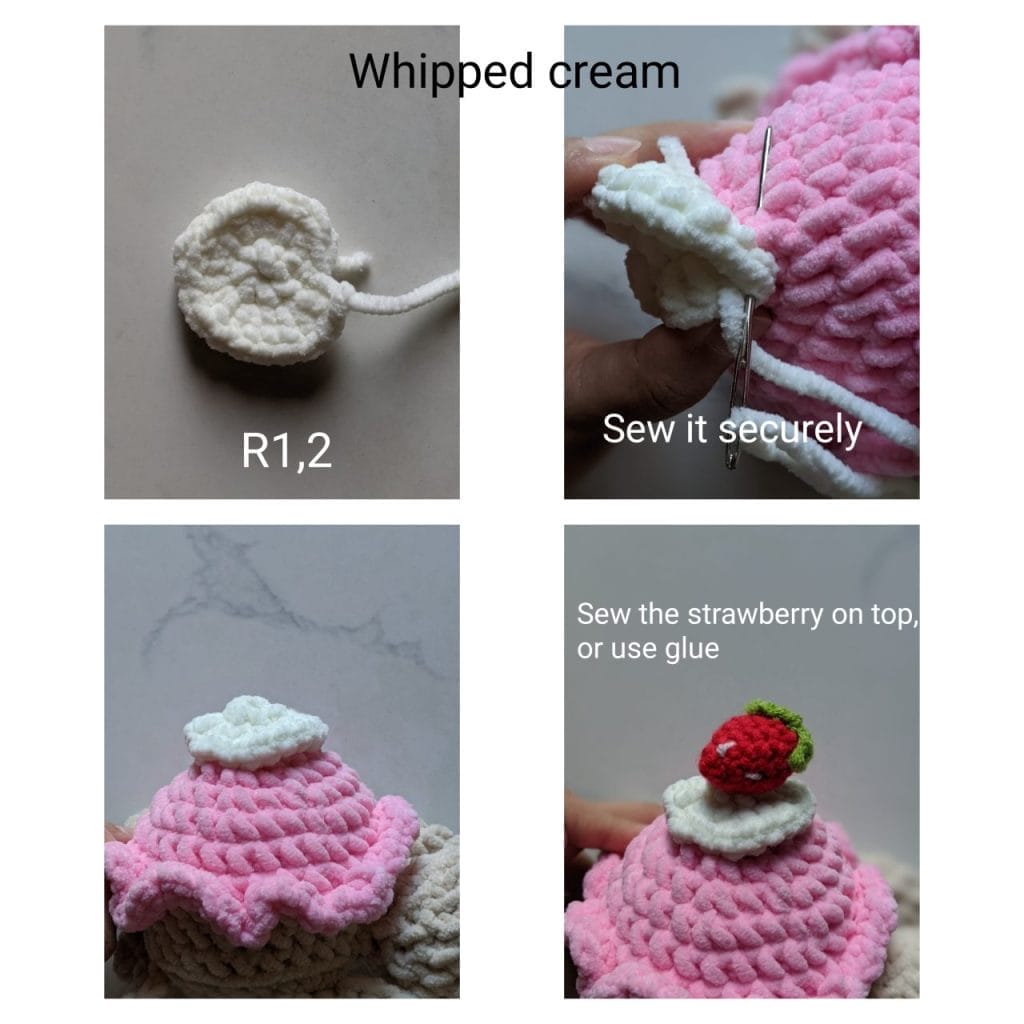
Whipped Cream Topping (White Yarn)
R1: 6 sc in MR [6]
R2: (3 hdc) × 6 [18]
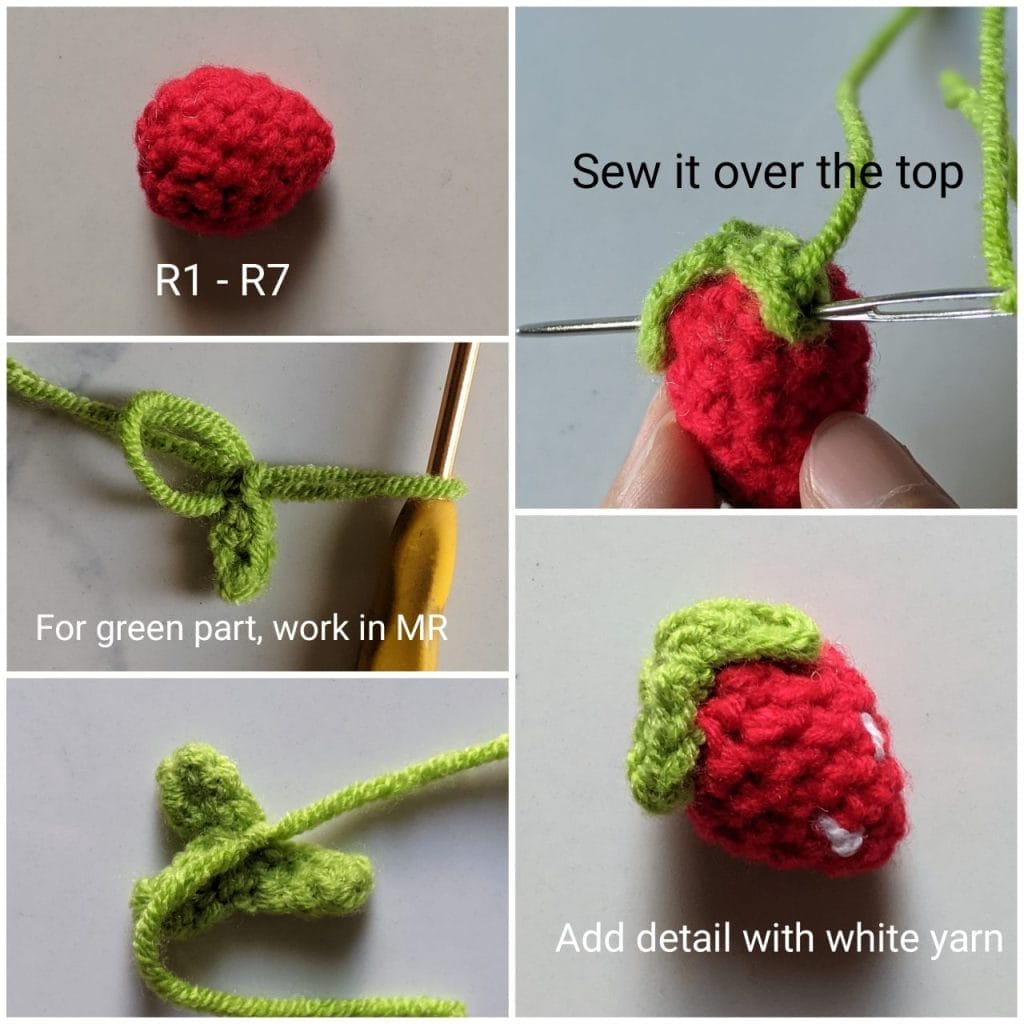
Strawberry (Use 3mm hook)
Red yarn: R1: 6sc in MR [6]
R2: 6sc [6]
R3: 6inc [12]
R4 – R6: sc around [12]
Stuff with fiberfill.
R7: 6 dec [6]
Fasten off, close the gap with a needle, and weave in the end.
Green part (Use green yarn): Do a magic ring.
(ch 4, skip the first ch from hook, sc in 3ch and sl st into MR) × 3
Fasten off, leave a long tail and attach it to the strawberry by sewing.

Finishing Touches
- Sew the whipped cream and strawberry securely to the top of the shell.
- Embroider a small mouth with black yarn.
- Add a tiny white highlight on each eye with white yarn.
Expert Tips for Success
Take Your Time with Assembly: The magic of this pattern is in how all the pieces come together. Don’t rush the attachment process—proper placement makes all the difference in your turtle’s final appearance.
Stuffing Technique: Stuff firmly but not overly tight. You want your turtle to maintain its shape while still being soft and cuddly.
Eye Placement: Position the safety eyes carefully before securing them. They should be evenly spaced and positioned to give your turtle a sweet, friendly expression.
Flipper Attachment: When attaching the flippers in Round 4 of the bottom shell, make sure they’re positioned naturally. The front flippers should angle slightly forward, while the back flippers point more to the sides.

Troubleshooting Common Issues
Uneven Stitches: Don’t worry if your stitches aren’t perfectly uniform—this adds to the handmade charm! Consistent tension is more important than perfect individual stitches.
Difficulty with Magic Ring: If you’re struggling with the magic ring, you can substitute by chaining 2 and working your first round into the second chain from the hook.
Flipper Positioning: If your flippers seem awkward after attachment, you can adjust their position by adding a few extra stitches to secure them where they look most natural.
Why This Pattern Works So Well
This cupcake sea turtle combines the beloved appeal of sea creatures with an irresistible dessert theme.
The expert construction techniques—like working into back loops only and the clever flipper attachment method—ensure your finished turtle has a professional, polished look.
The color combination of pink, brown, and white creates a soft, harmonious palette that’s both eye-catching and soothing.
Plus, the addition of the strawberry and whipped cream details transforms this from a simple turtle into a truly special creation.
Perfect for Gift-Giving
This adorable turtle makes an excellent gift for:
- Crochet enthusiasts who love unique patterns
- Children who adore soft, cuddly toys
- Anyone who appreciates handmade items with personality
- Beach and ocean lovers
- Dessert enthusiasts with a sense of humor
Final Thoughts
There’s something truly special about creating an plushie from start to finish.
This cupcake sea turtle pattern offers the perfect balance of challenge and reward—complex enough to keep experienced crocheters engaged, but with clear instructions that lead to beautiful results.
When you finish this project, you’ll have more than just a cute decoration. You’ll have a handcrafted piece that showcases your skills and brings joy to everyone who sees it.
Whether you keep it for yourself or give it as a gift, this little cupcake turtle is sure to bring smiles wherever it goes.
Happy crocheting, and enjoy creating your very own cupcake sea turtle!

About Author
Muntaseer Rahman started keeping pet turtles back in 2013. He also owns the largest Turtle & Tortoise Facebook community in Bangladesh. These days he is mostly active on Facebook.