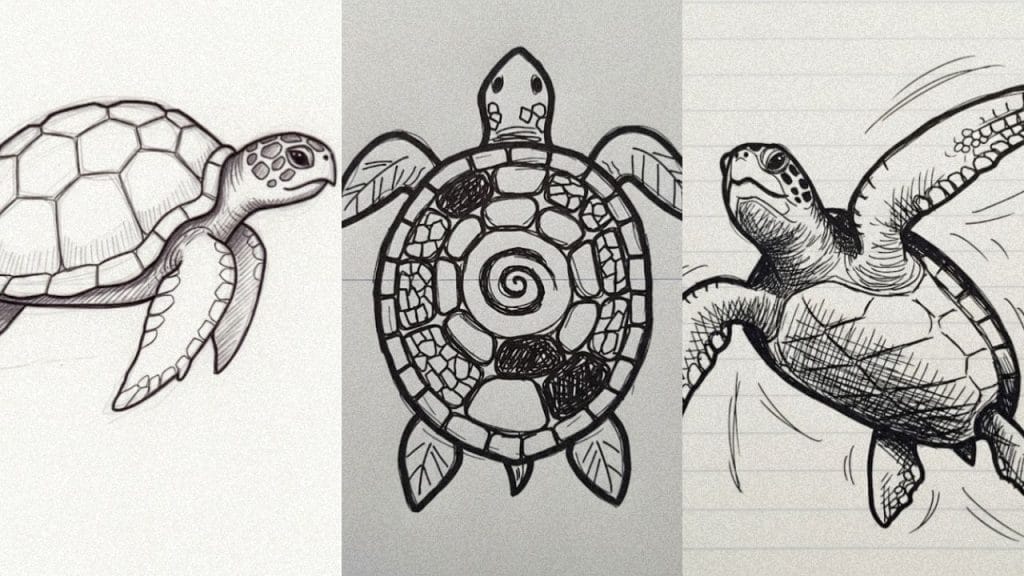
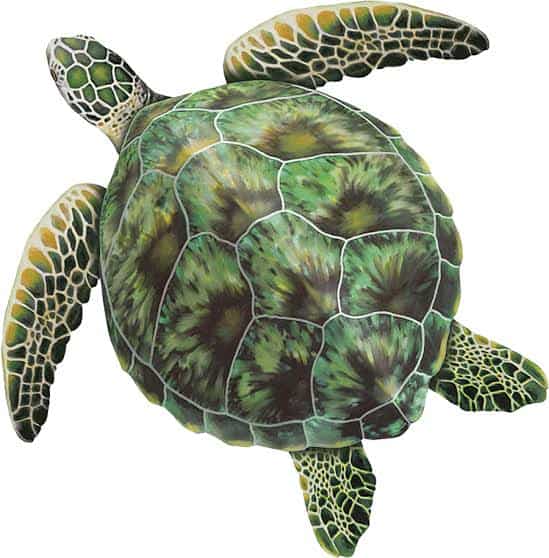
2 Realistic Sea Turtle Drawing & Sketching Ideas [For Artists]

This post was created with help from AI tools and carefully reviewed by a human (Muntaseer Rahman). For more on how we use AI on this site, check out our Editorial Policy.
Dive with me into the deep blue, where I’ll share with you two personal insights on capturing the serene beauty of sea turtles through your art.
Whether you’re refining your craft or diving in for the first time, these ideas are my challenge and inspiration to you.
Together, we’ll explore the ancient grace of sea turtles, from the delicate textures of their shells to the gentle flow of their flippers.
Let’s get started!
Method 1:
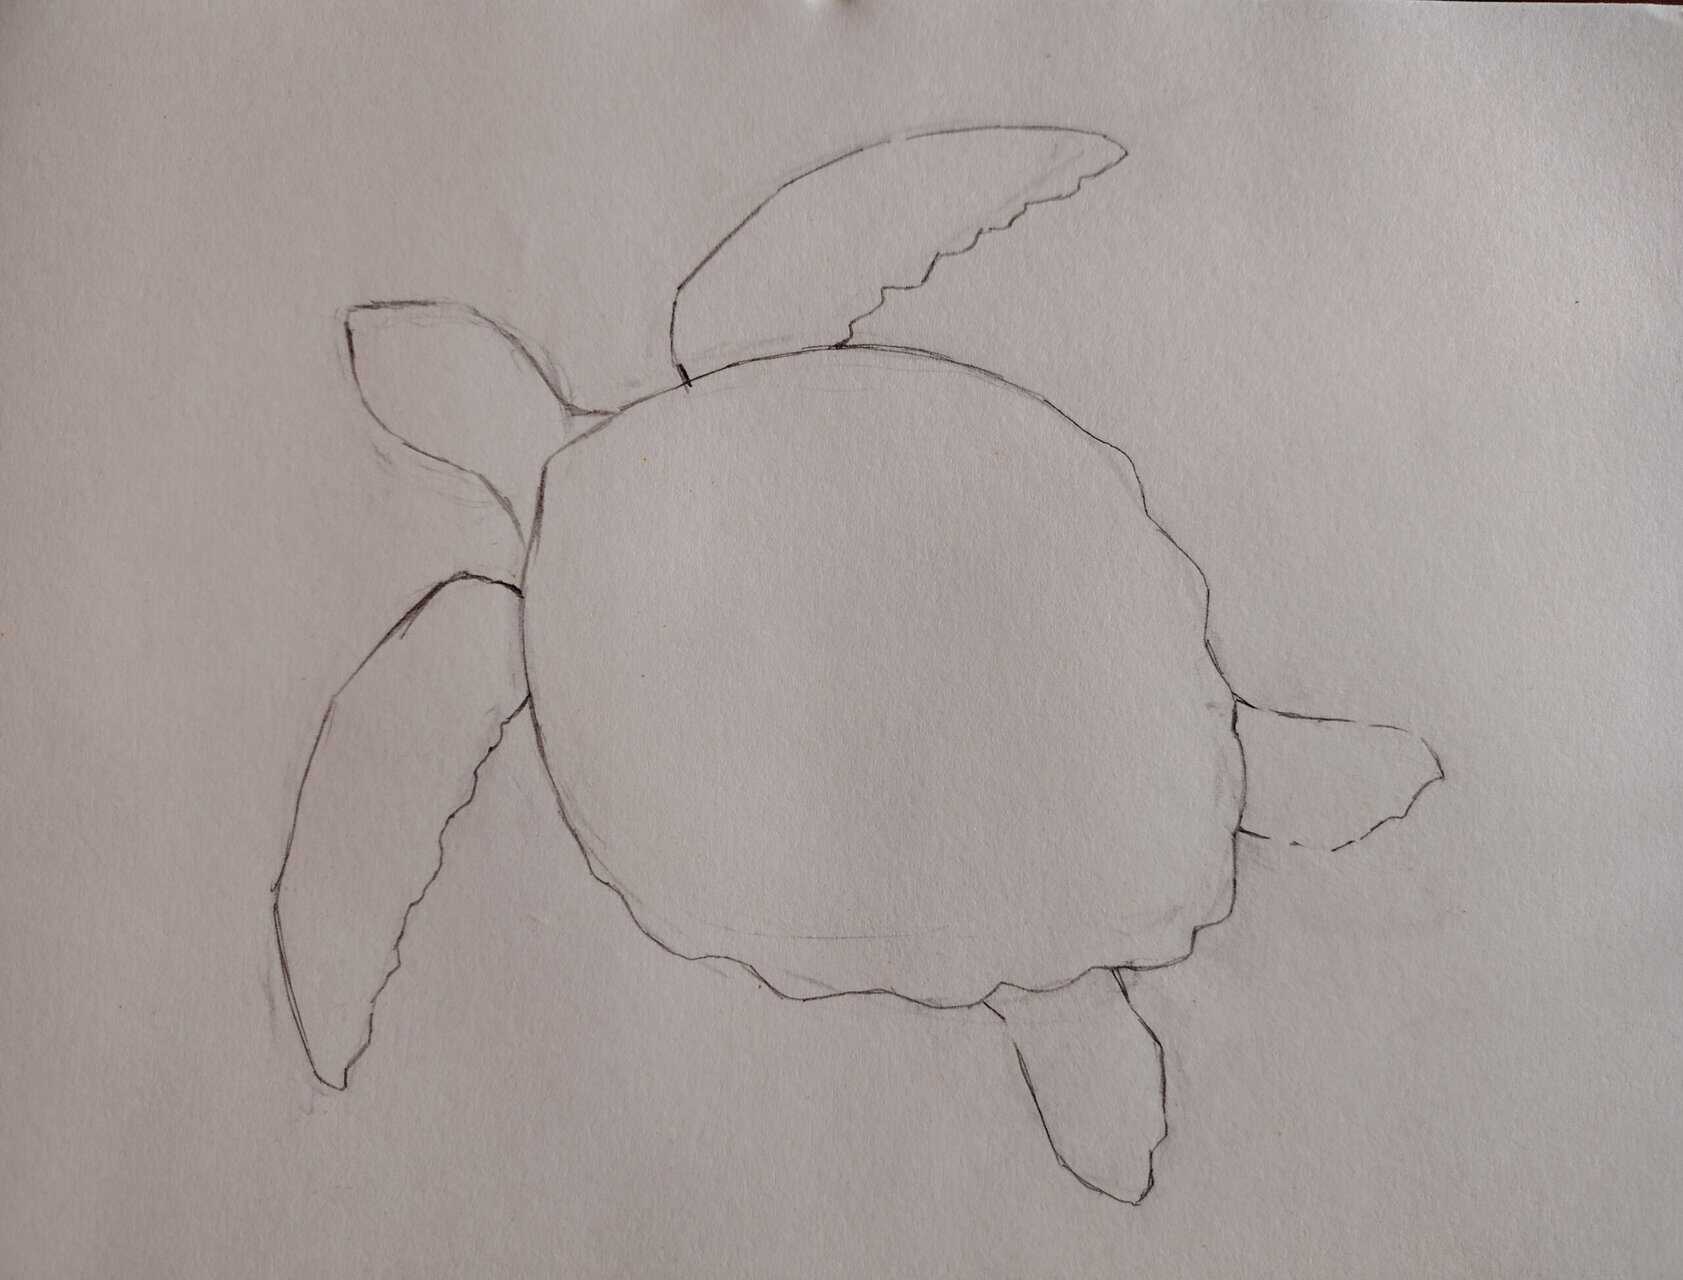
Step: 1
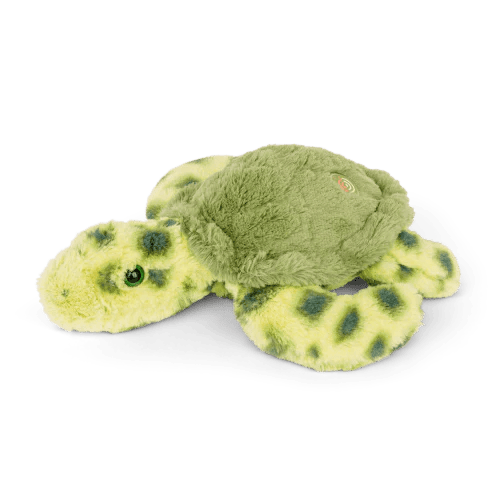
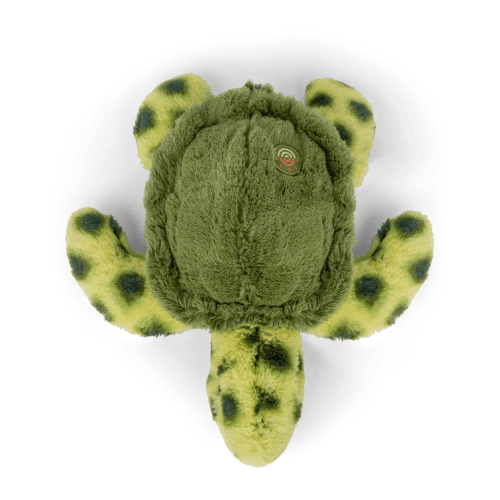
Begin by selecting a detailed turtle reference to serve as a visual guide.
Step: 2
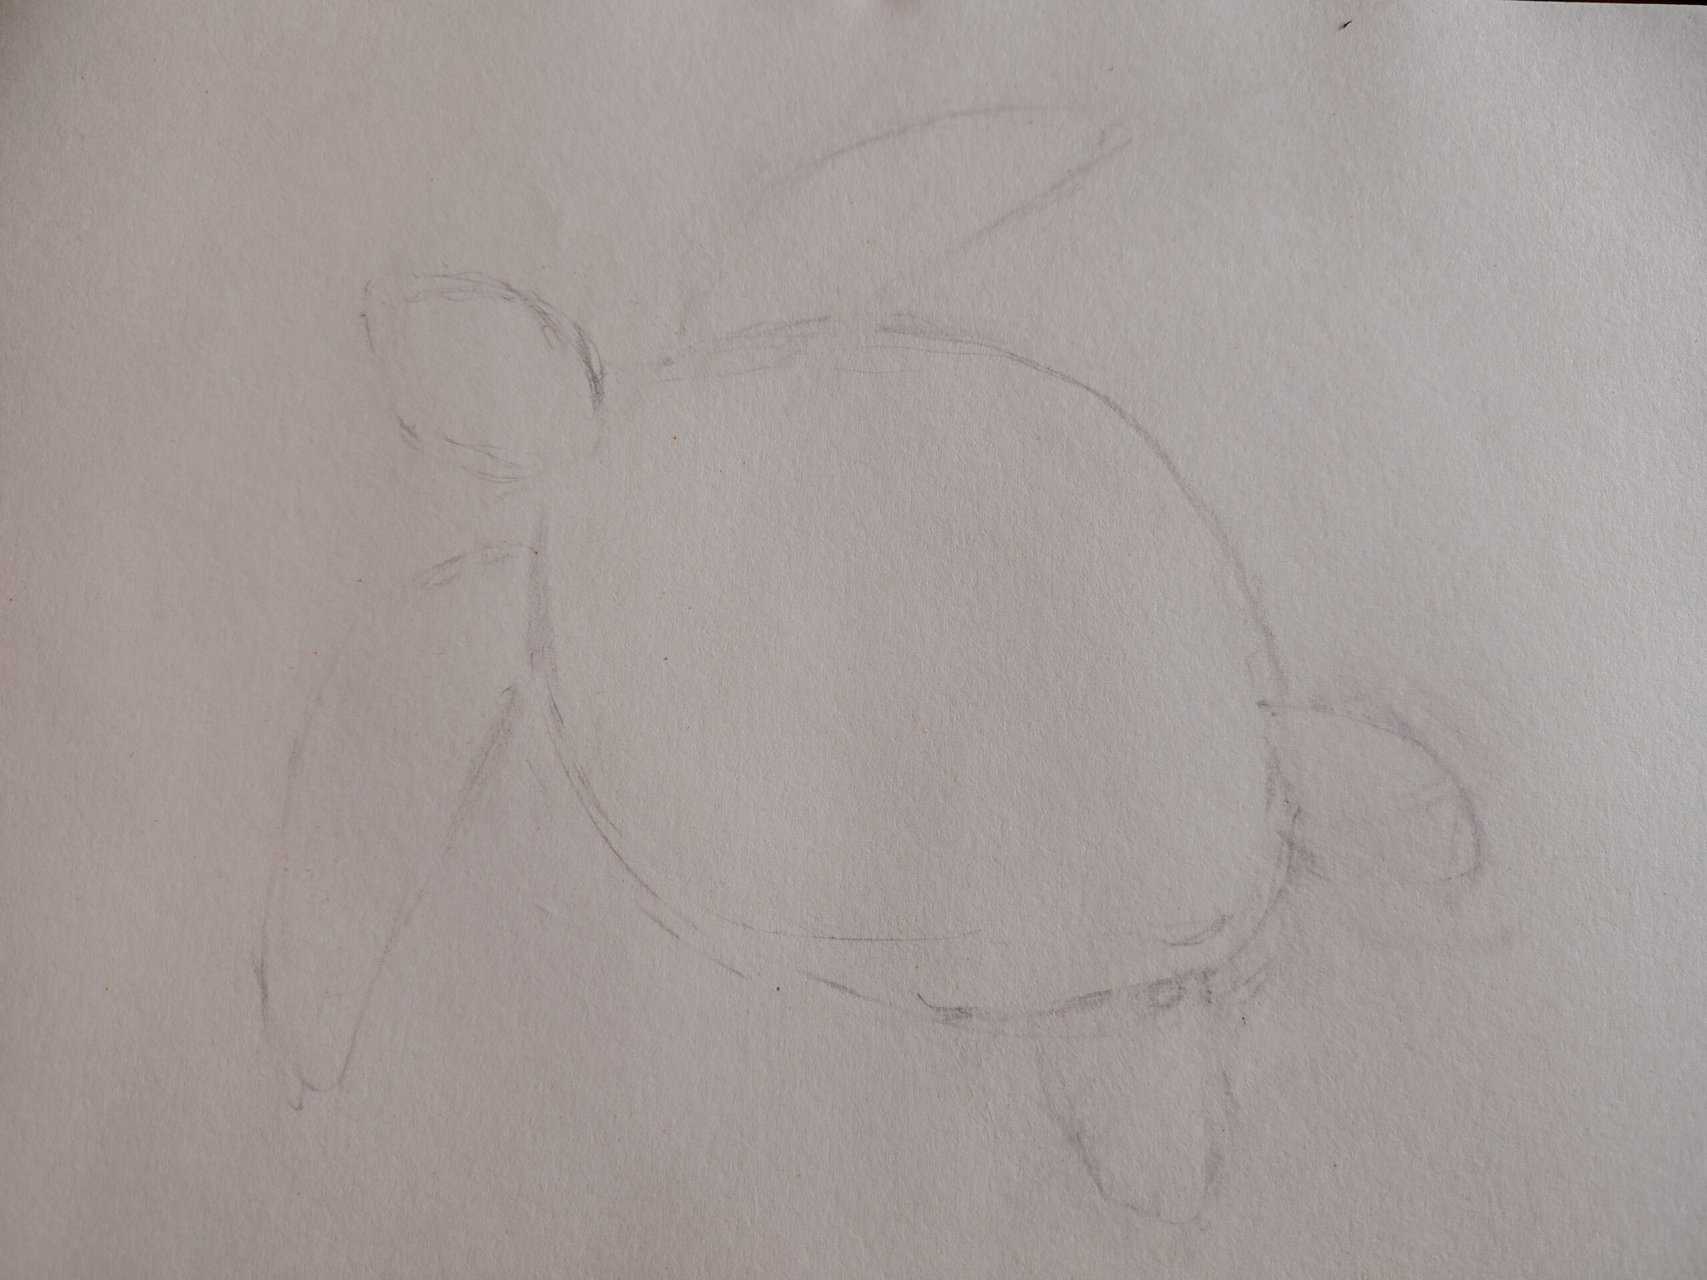
Sketch the basic shapes of the turtle’s body and shell using circles, ovals, and rectangles, following the reference closely.
Step: 3
Gently erase the initial guidelines to refine the sketch.
Track A Real Sea Turtle With Each Bracelet!

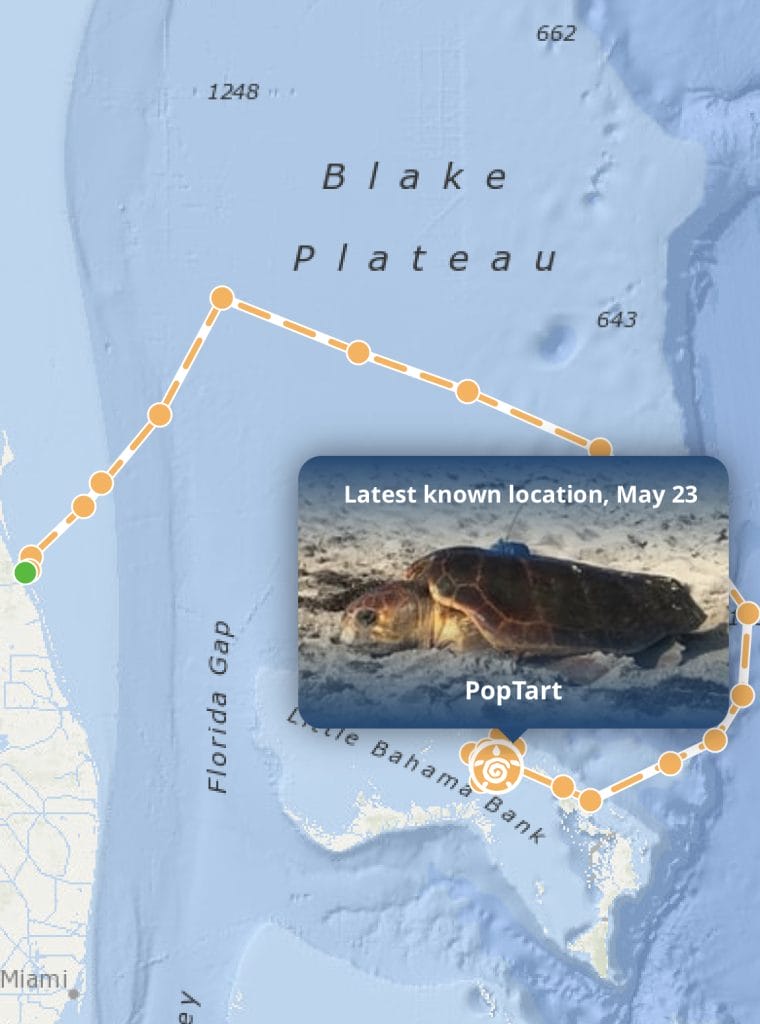
Learn Name
You get to learn your sea turtle’s name, size, age. Also a picture!
Enjoy Stories
Enjoy the story of your sea turtle, where it came from, where is it going?
Follow Me
You get to follow the sea turtle’s journey on an interactive tracking map!
Click Here & Use Coupon Code: THETURTLEHUB20 For A 20% Discount!
Most people think drawing is a talent—you’re either born with it or you’re not.
That’s a lie. The real reason so many struggle? They’re learning it wrong.
This course fixes that. It’s packed with 42 hours of step-by-step lessons made for total beginners. No fluff. No guesswork.
Just real techniques for drawing faces, hair, birds, and more that don’t look like a toddler did it.
Here’s the link if you want to see what it’s about.
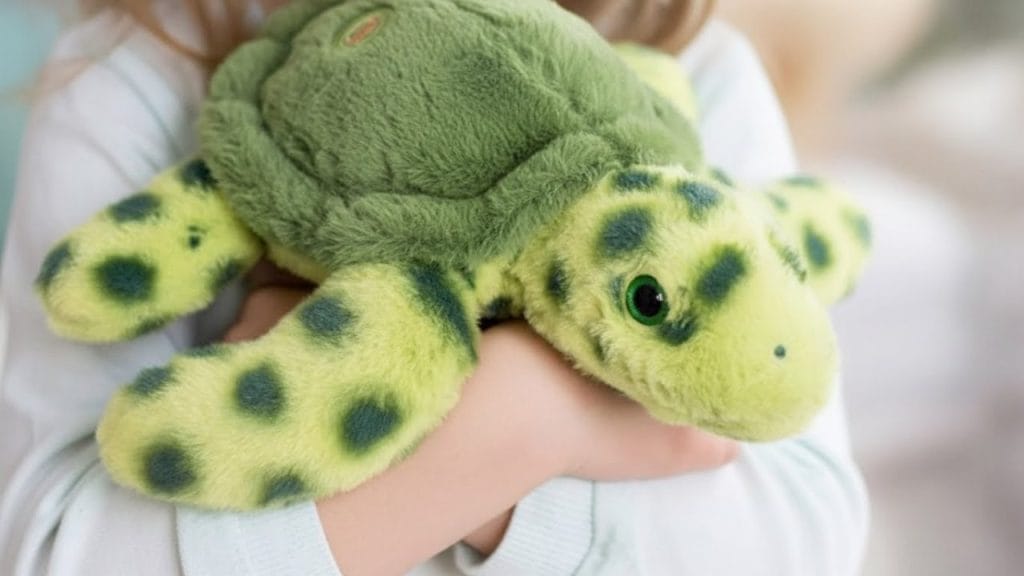
Snuggle a Plush. Track a Turtle.
🧸 + 🌊 = 🐢 A toy that connects you to real sea turtles in the wild.
Meet Your Turtle
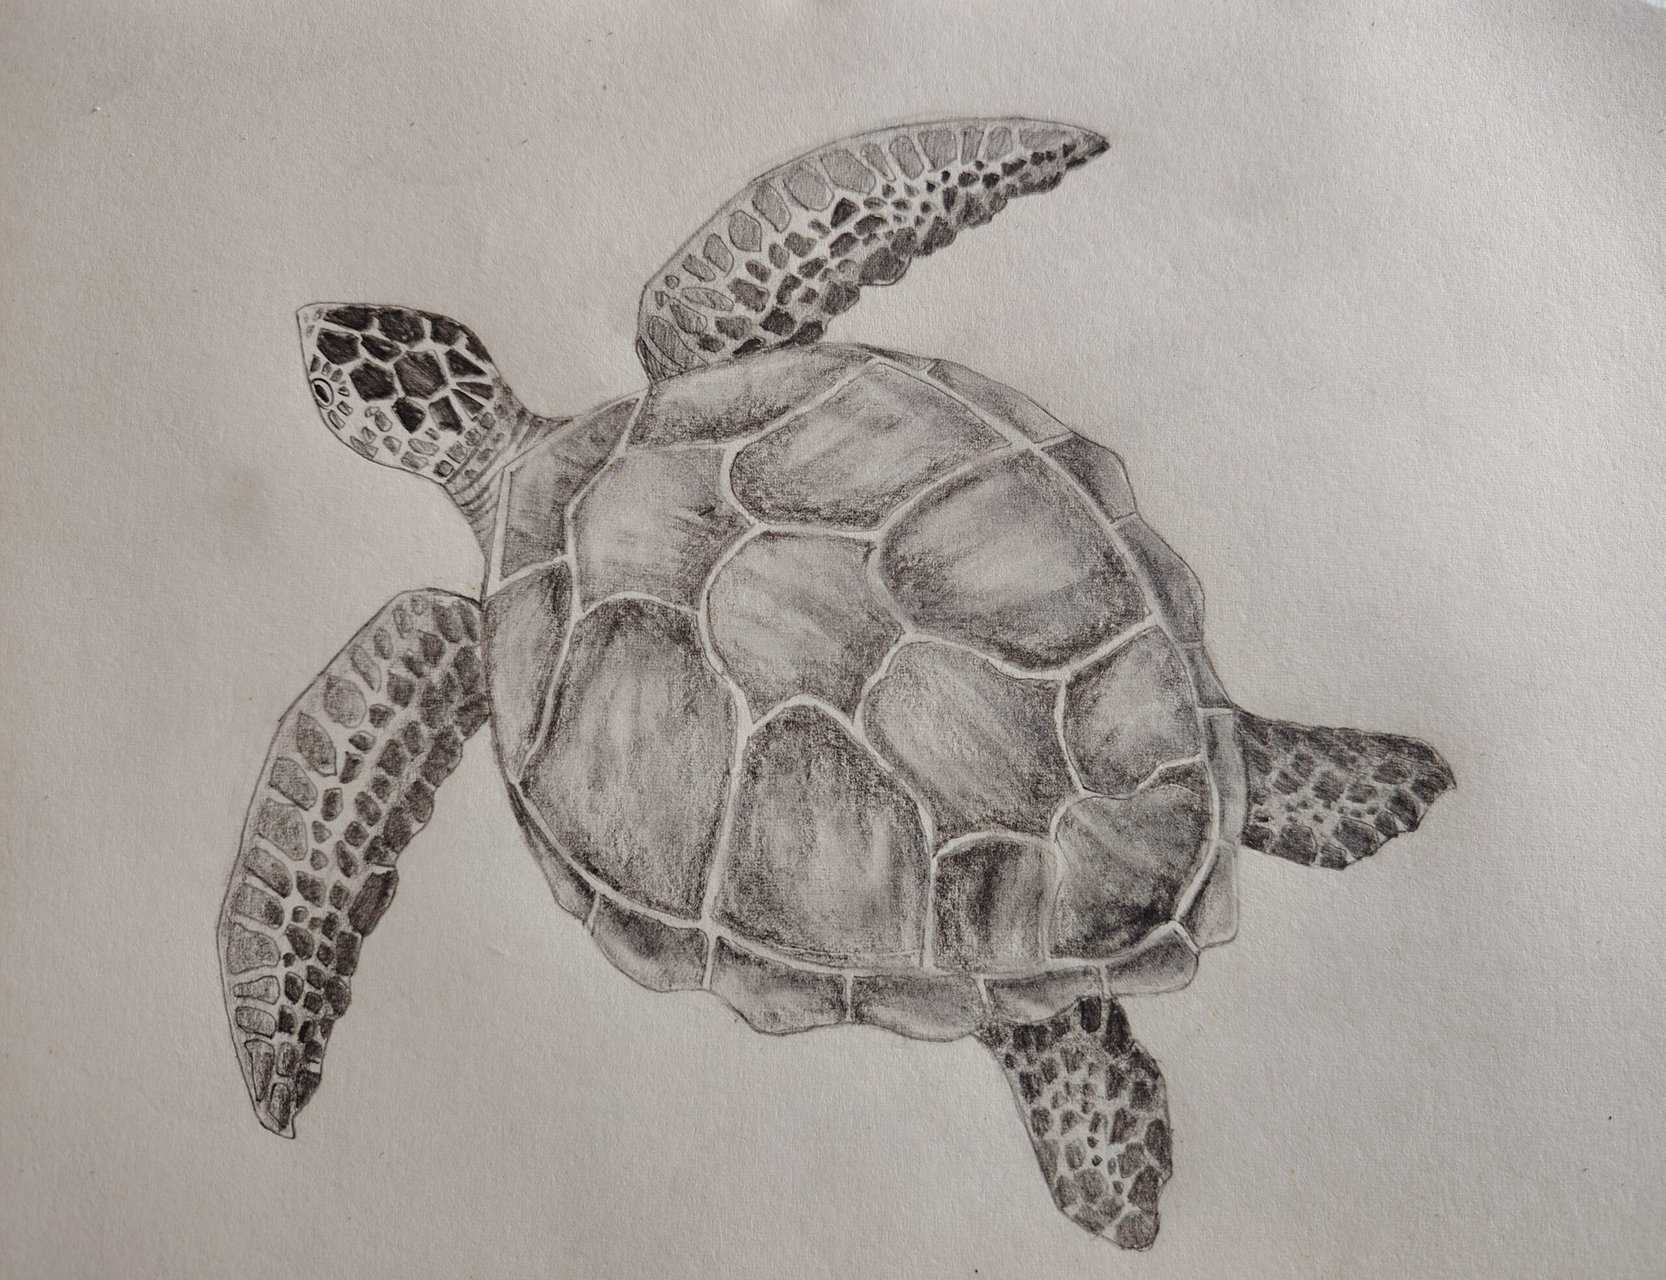
Scan the tag to meet your real sea turtle. Learn its name, species, and see a real photo!
Follow the Journey
Watch your turtle swim across the ocean using the 3D tracking map. It’s like a sea adventure in your pocket.
Support Wildlife
Every plush supports turtle conservation efforts through the Sea Turtle Conservancy.
Click Here & Use Coupon Code: THETURTLEHUB20 For A 20% Discount! (Your hug helps a turtle.)
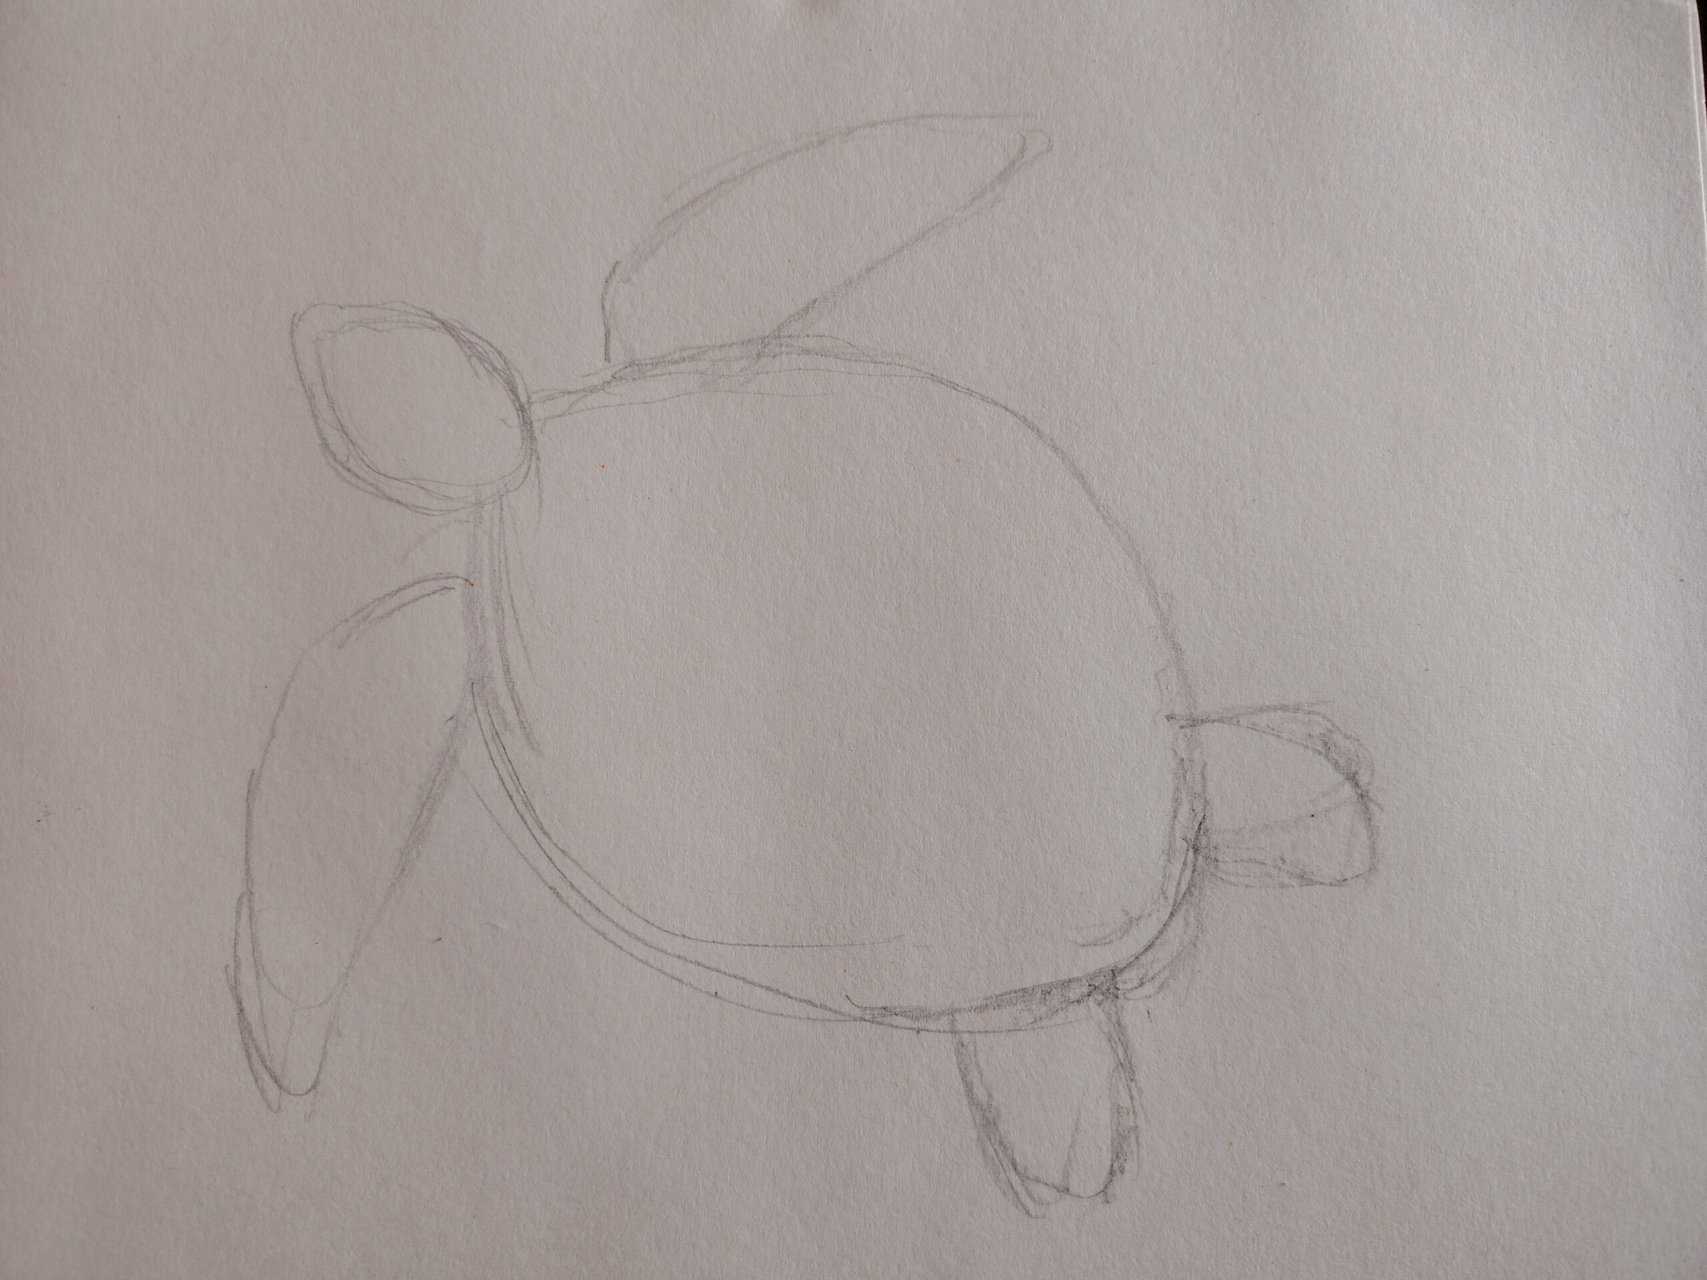
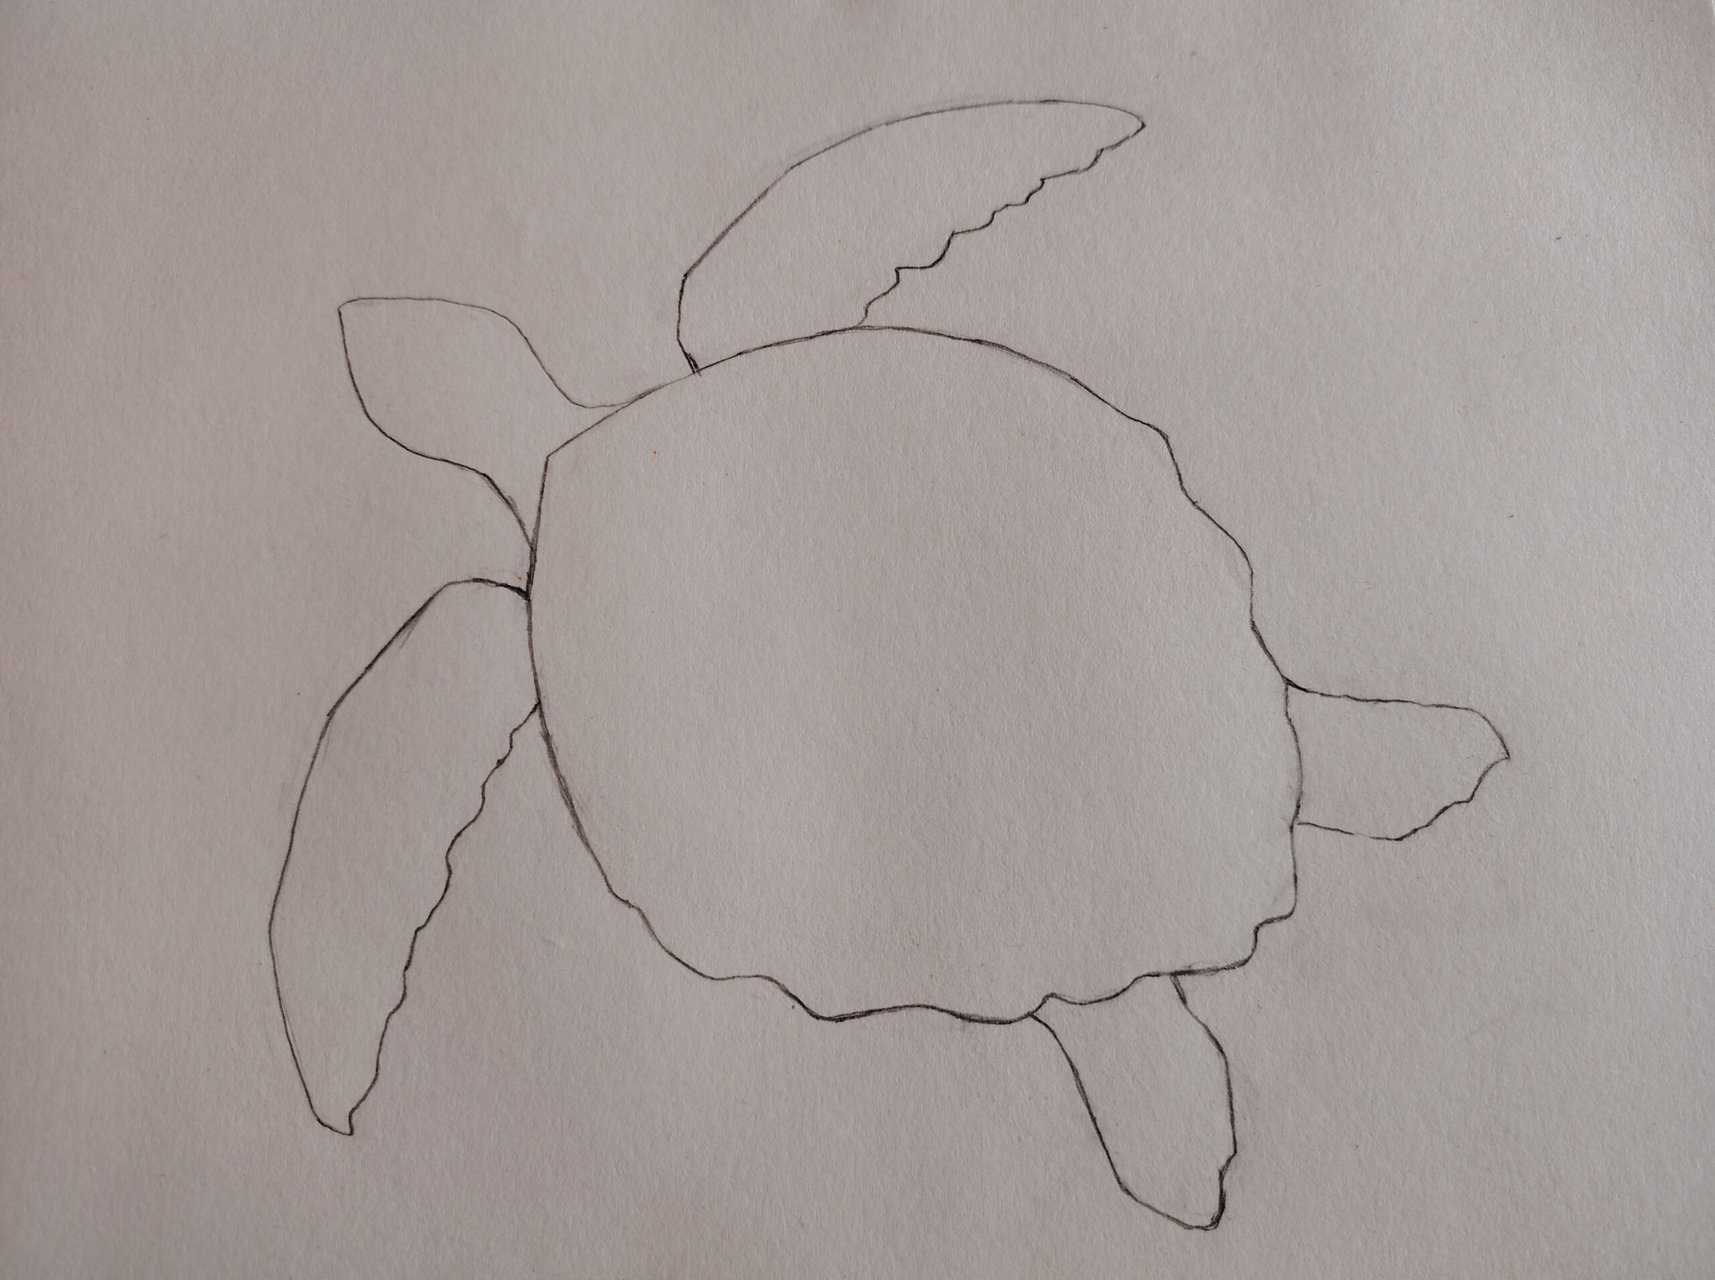
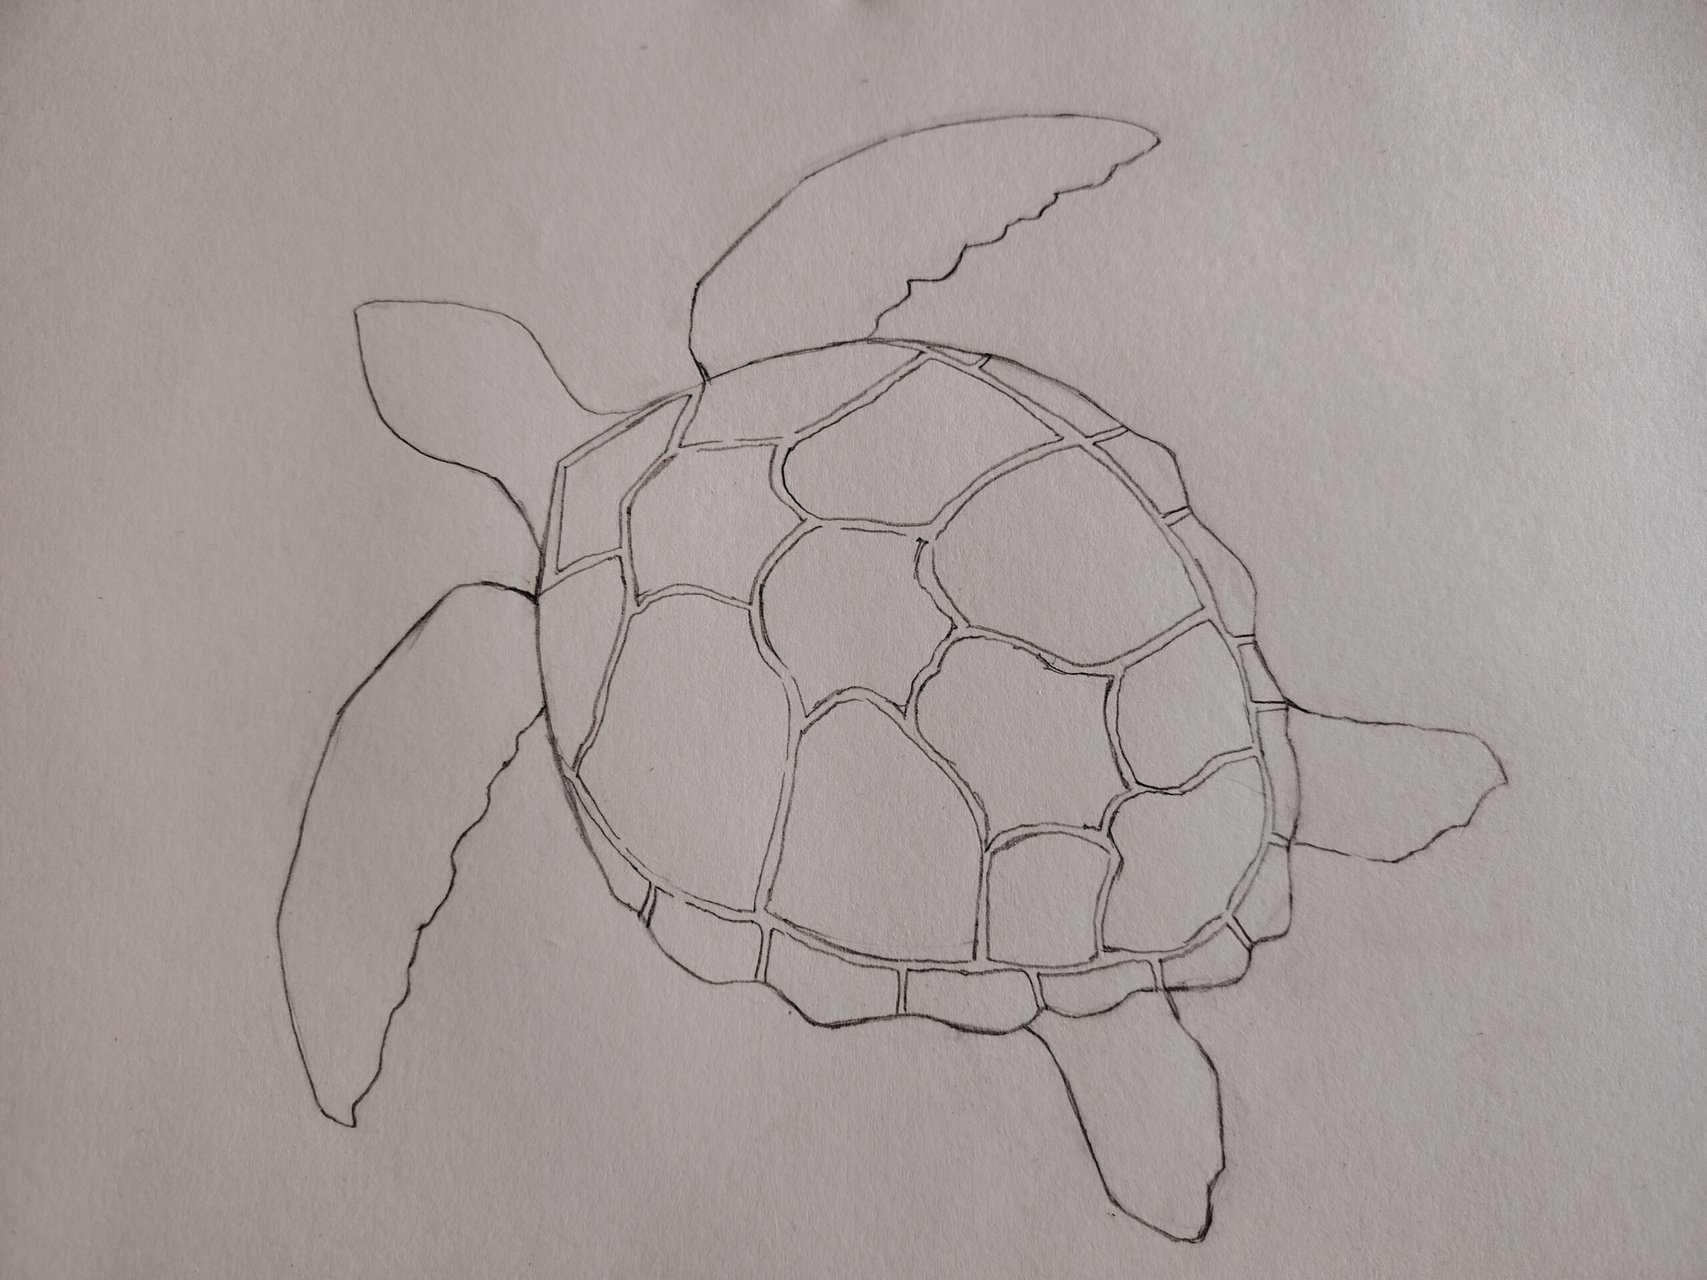
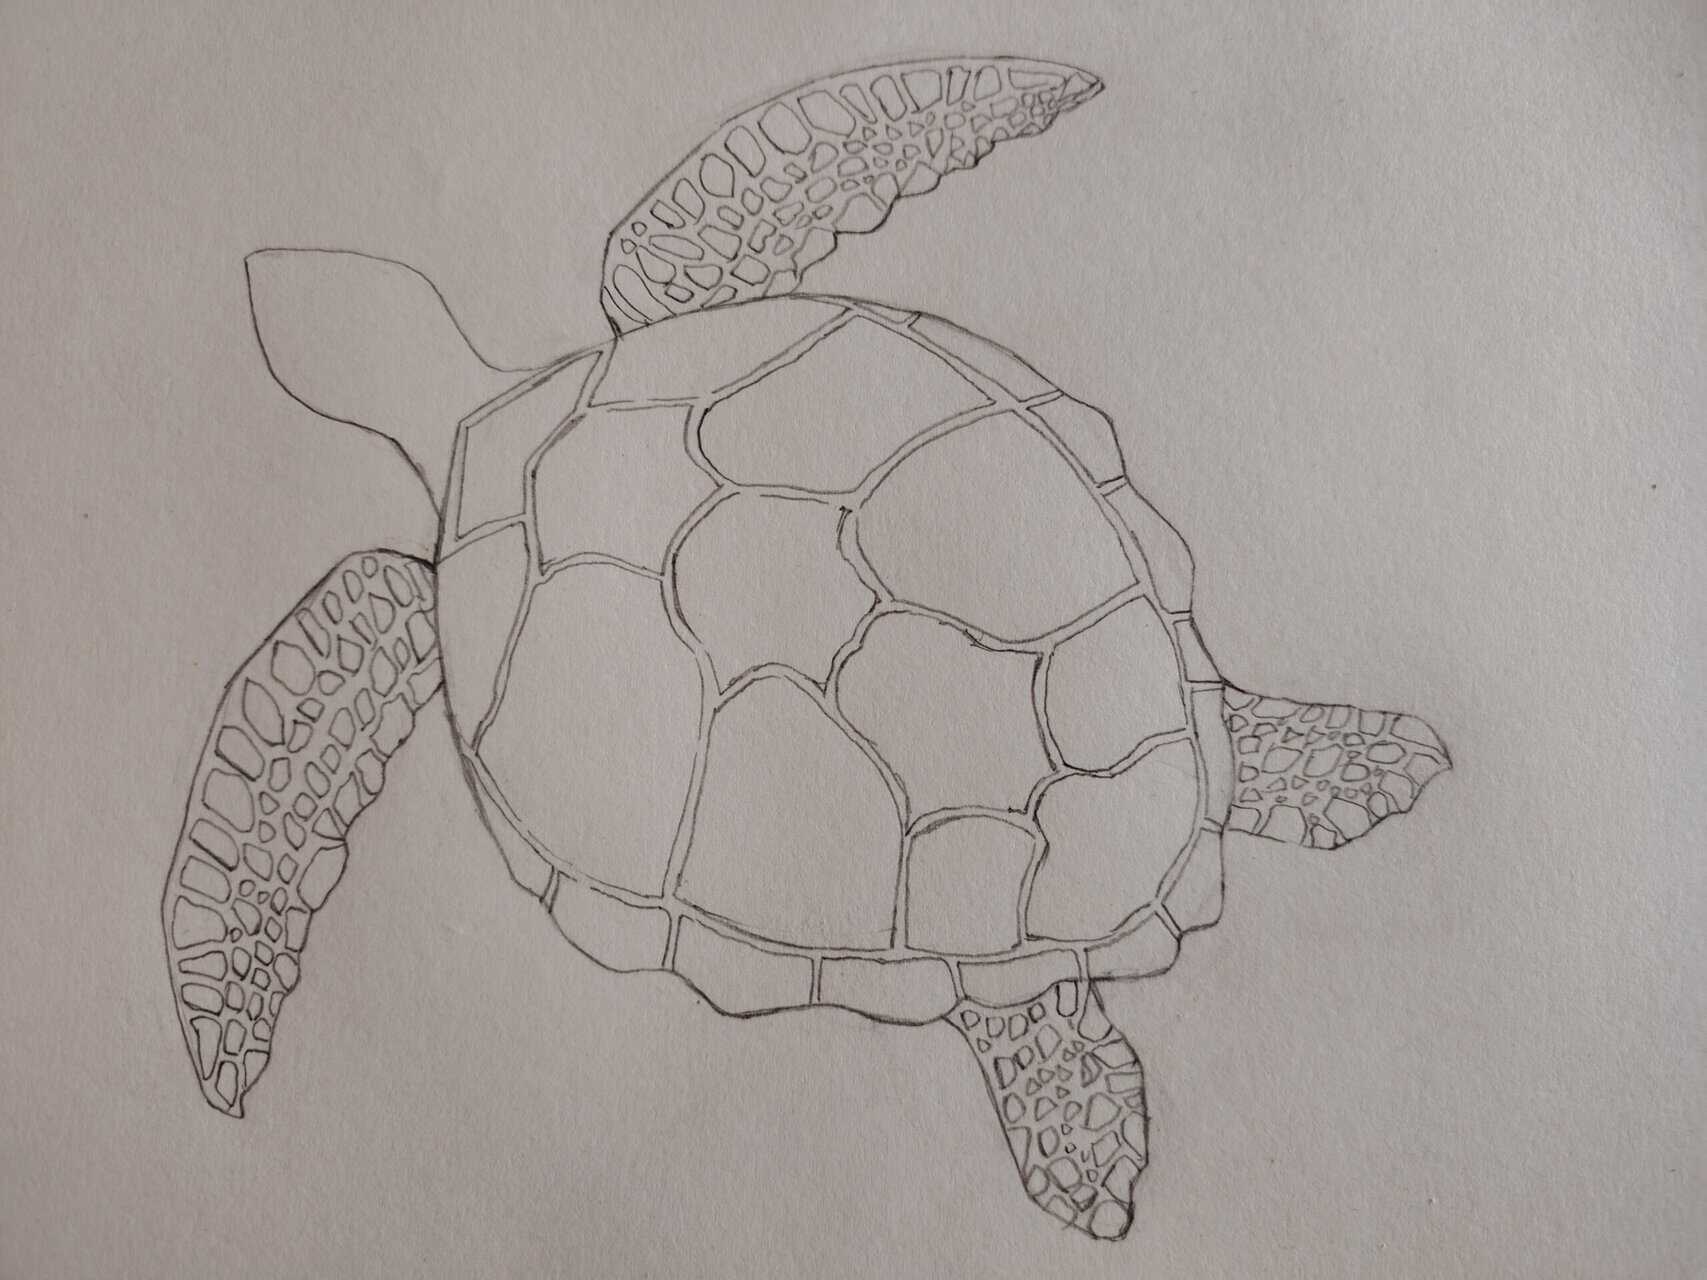
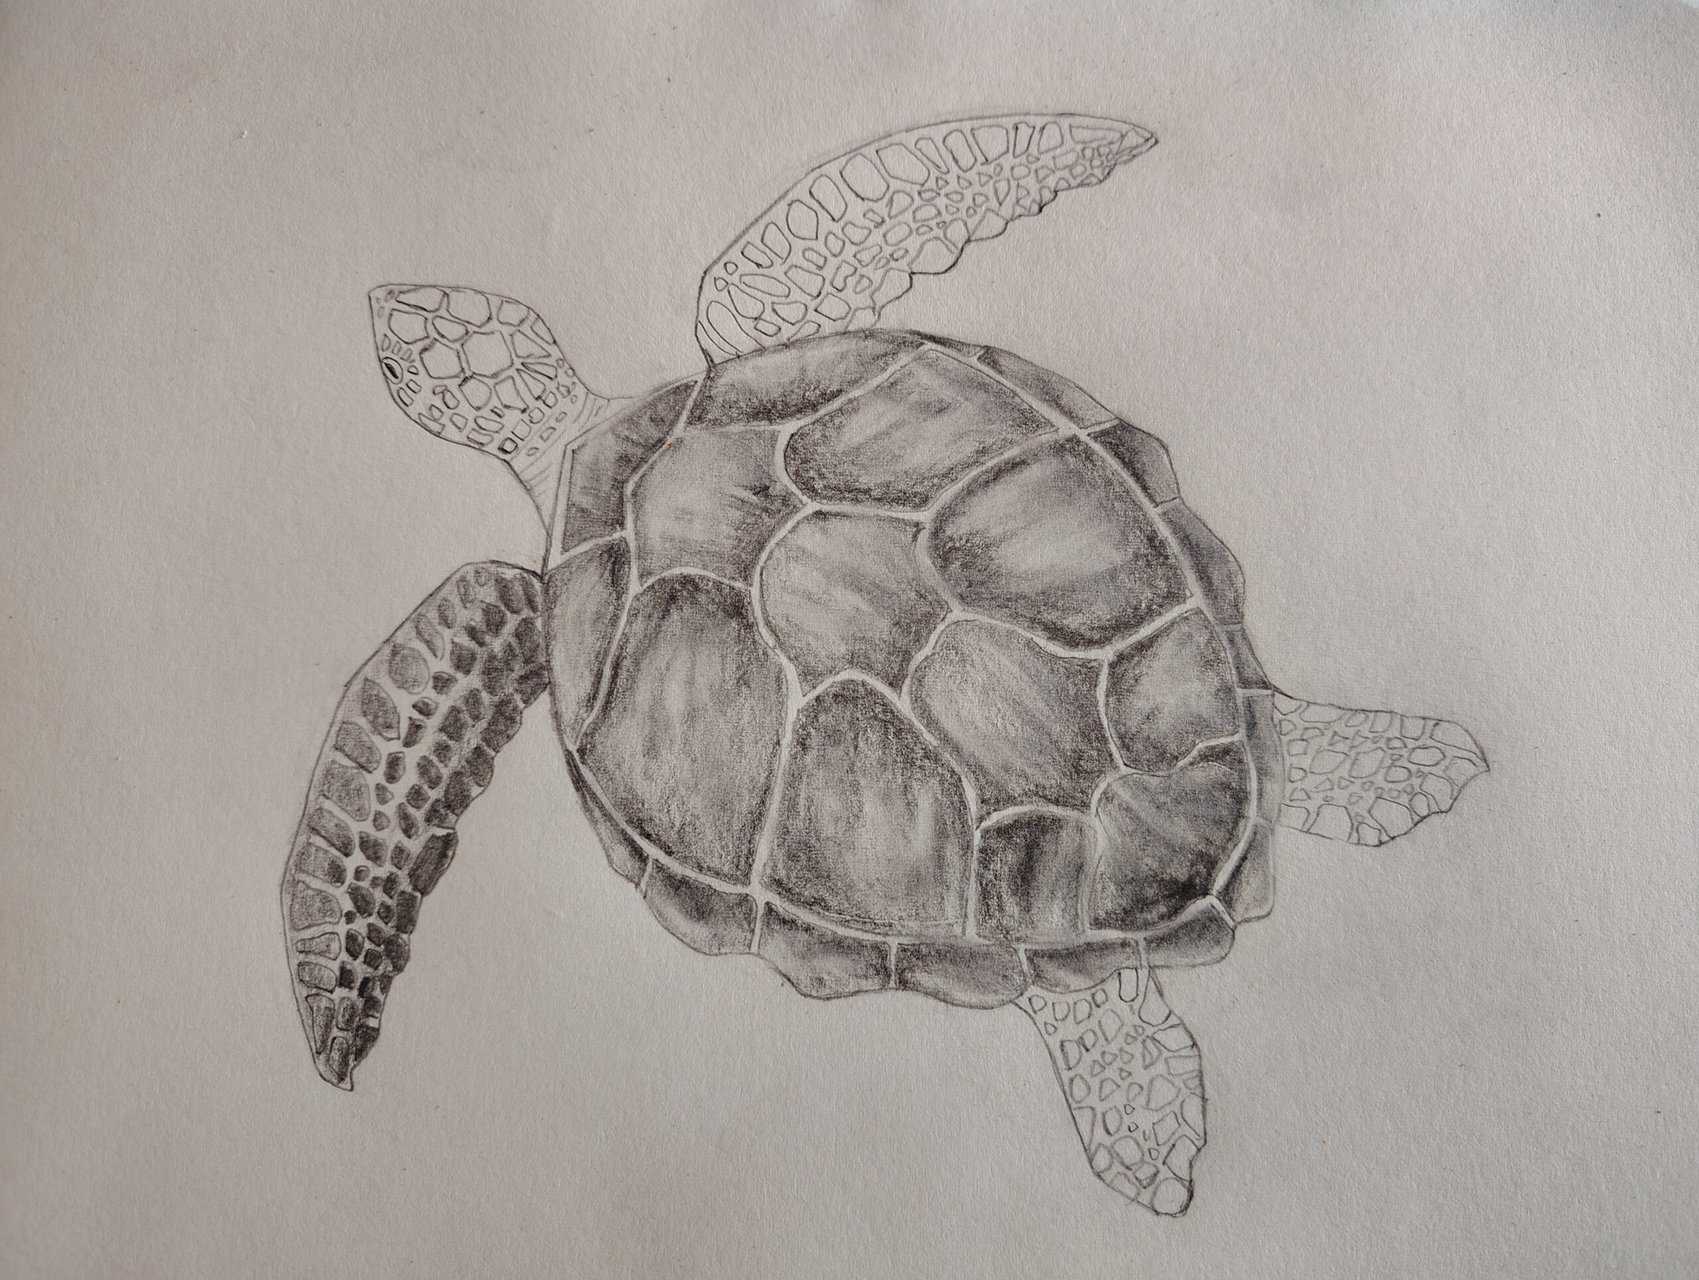
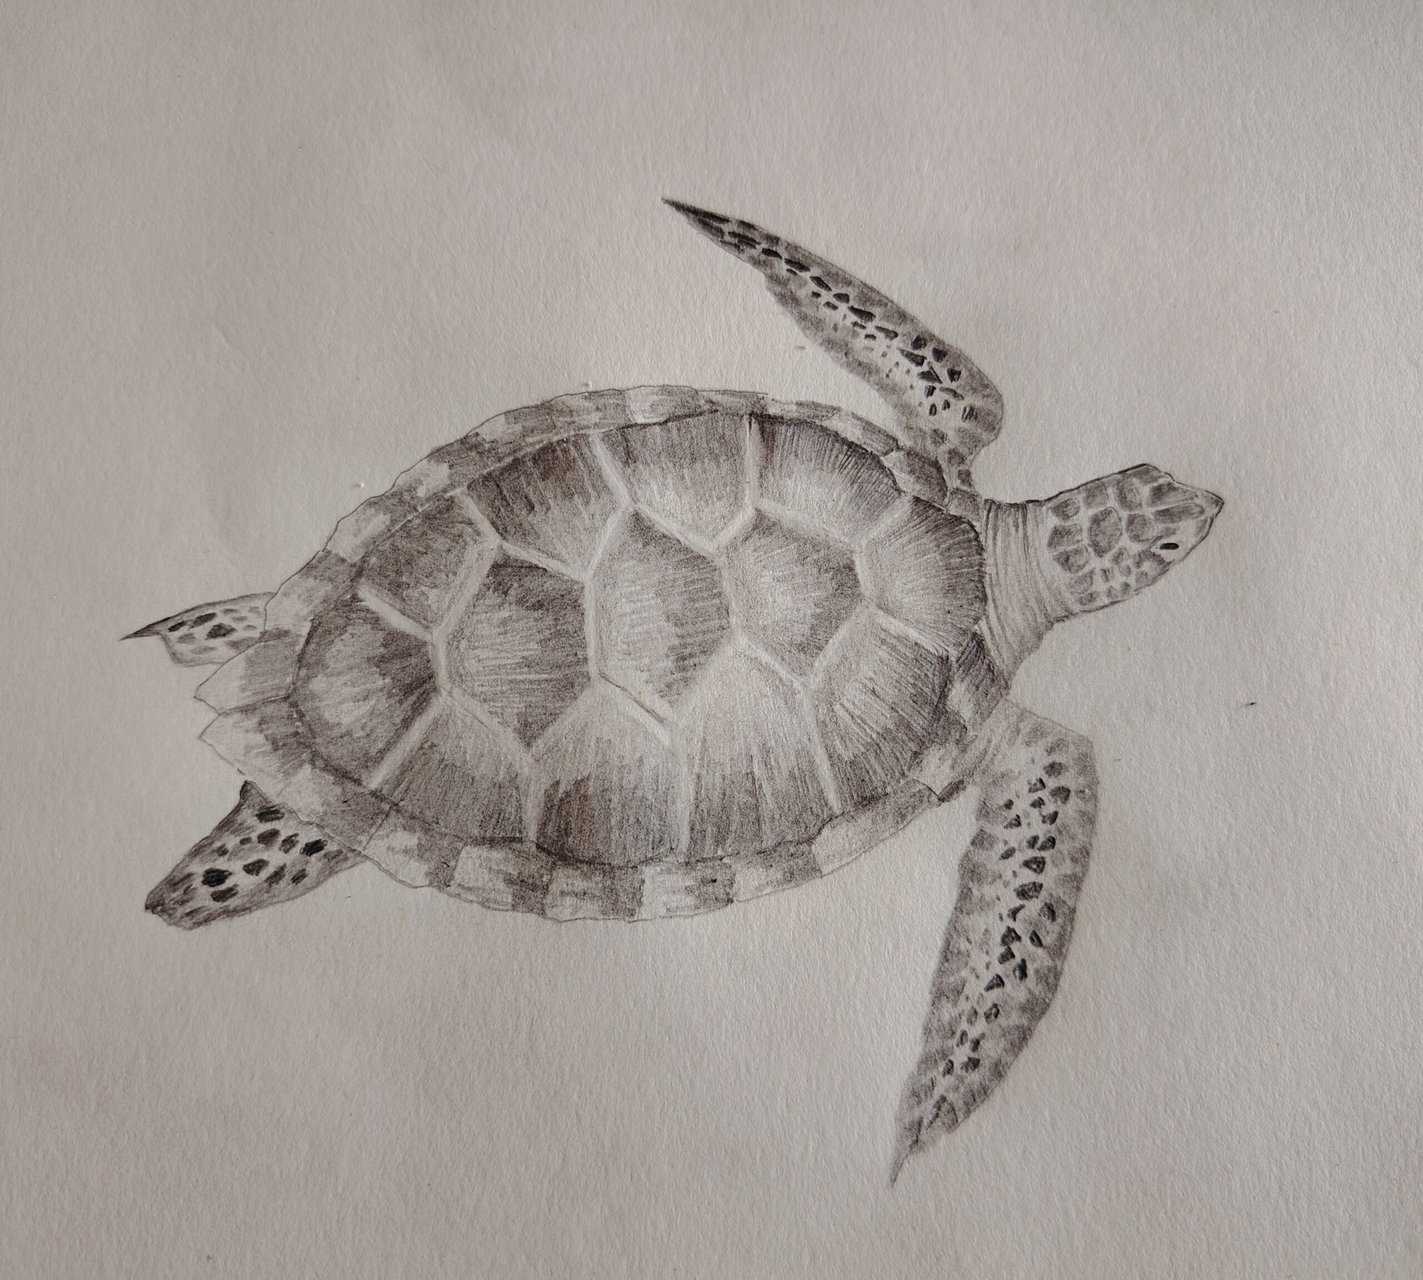
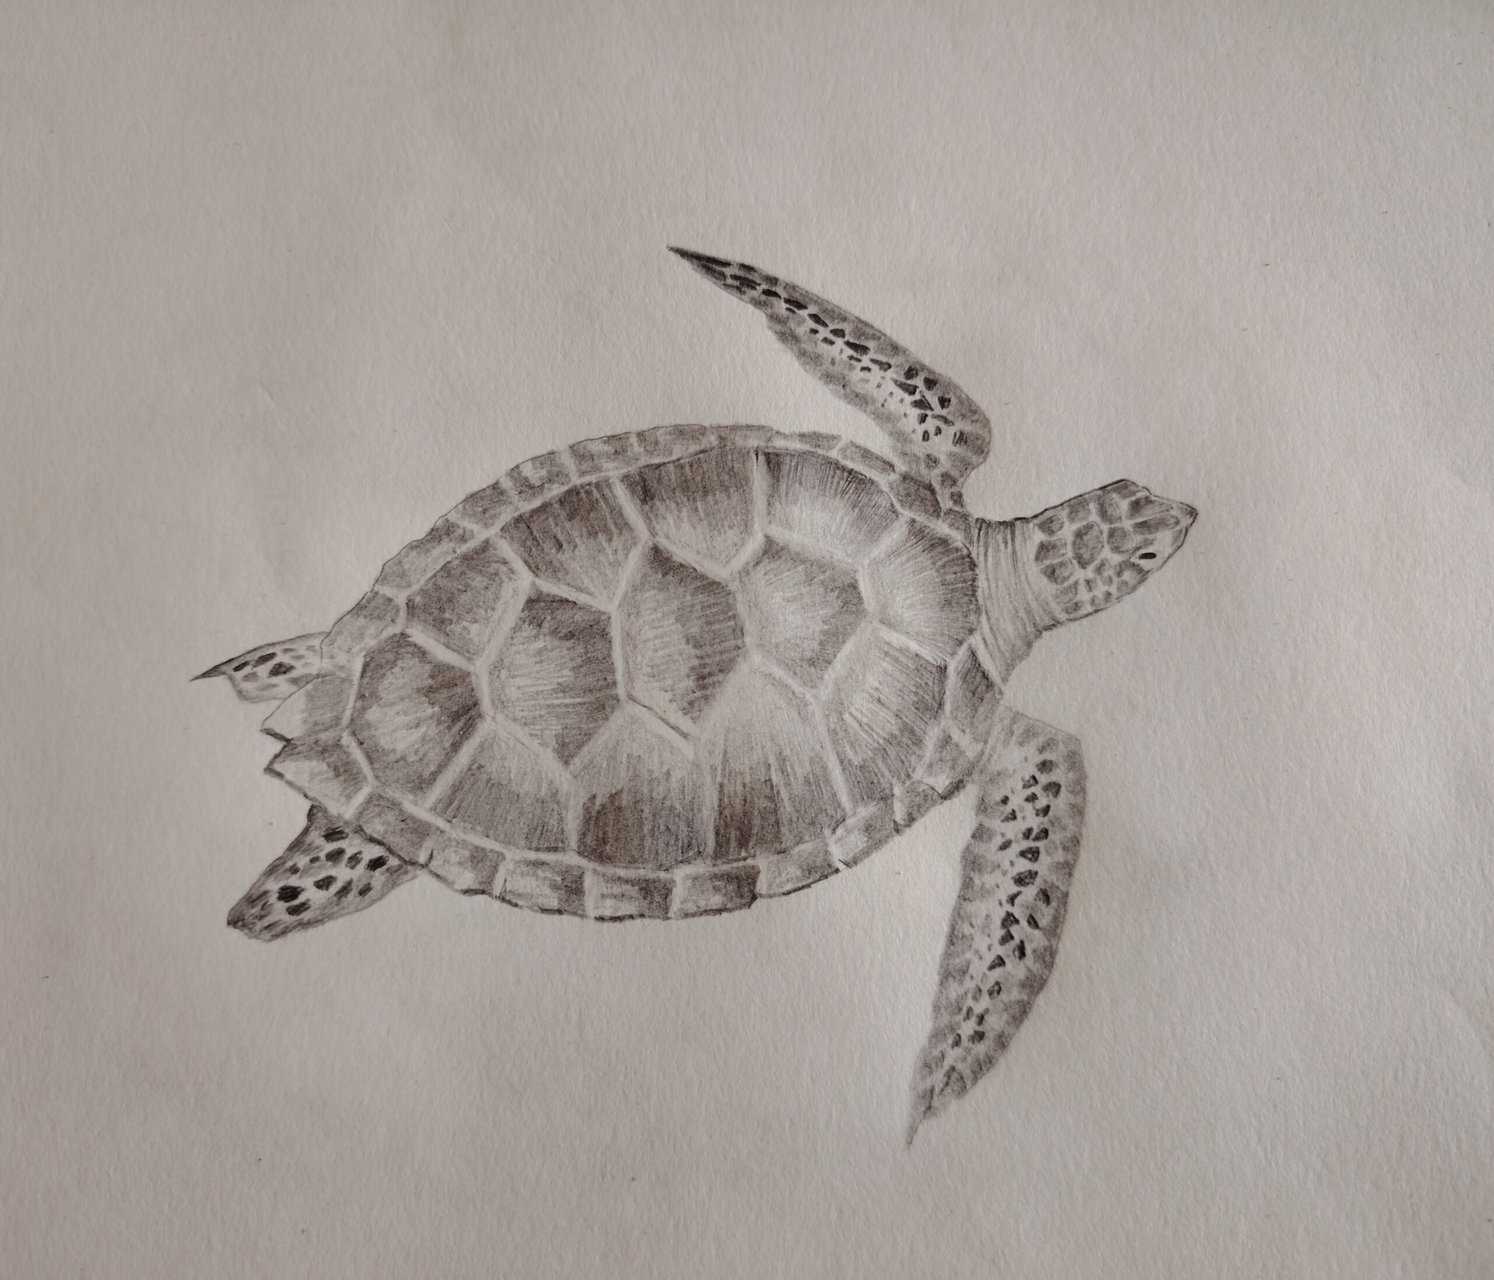
Step: 4
Outline the turtle’s head and shell based on the reference.

Step: 5
Outline the front flippers following the reference.

Step: 6
Repeat the process for the back flippers to complete the sketch.
Step: 7
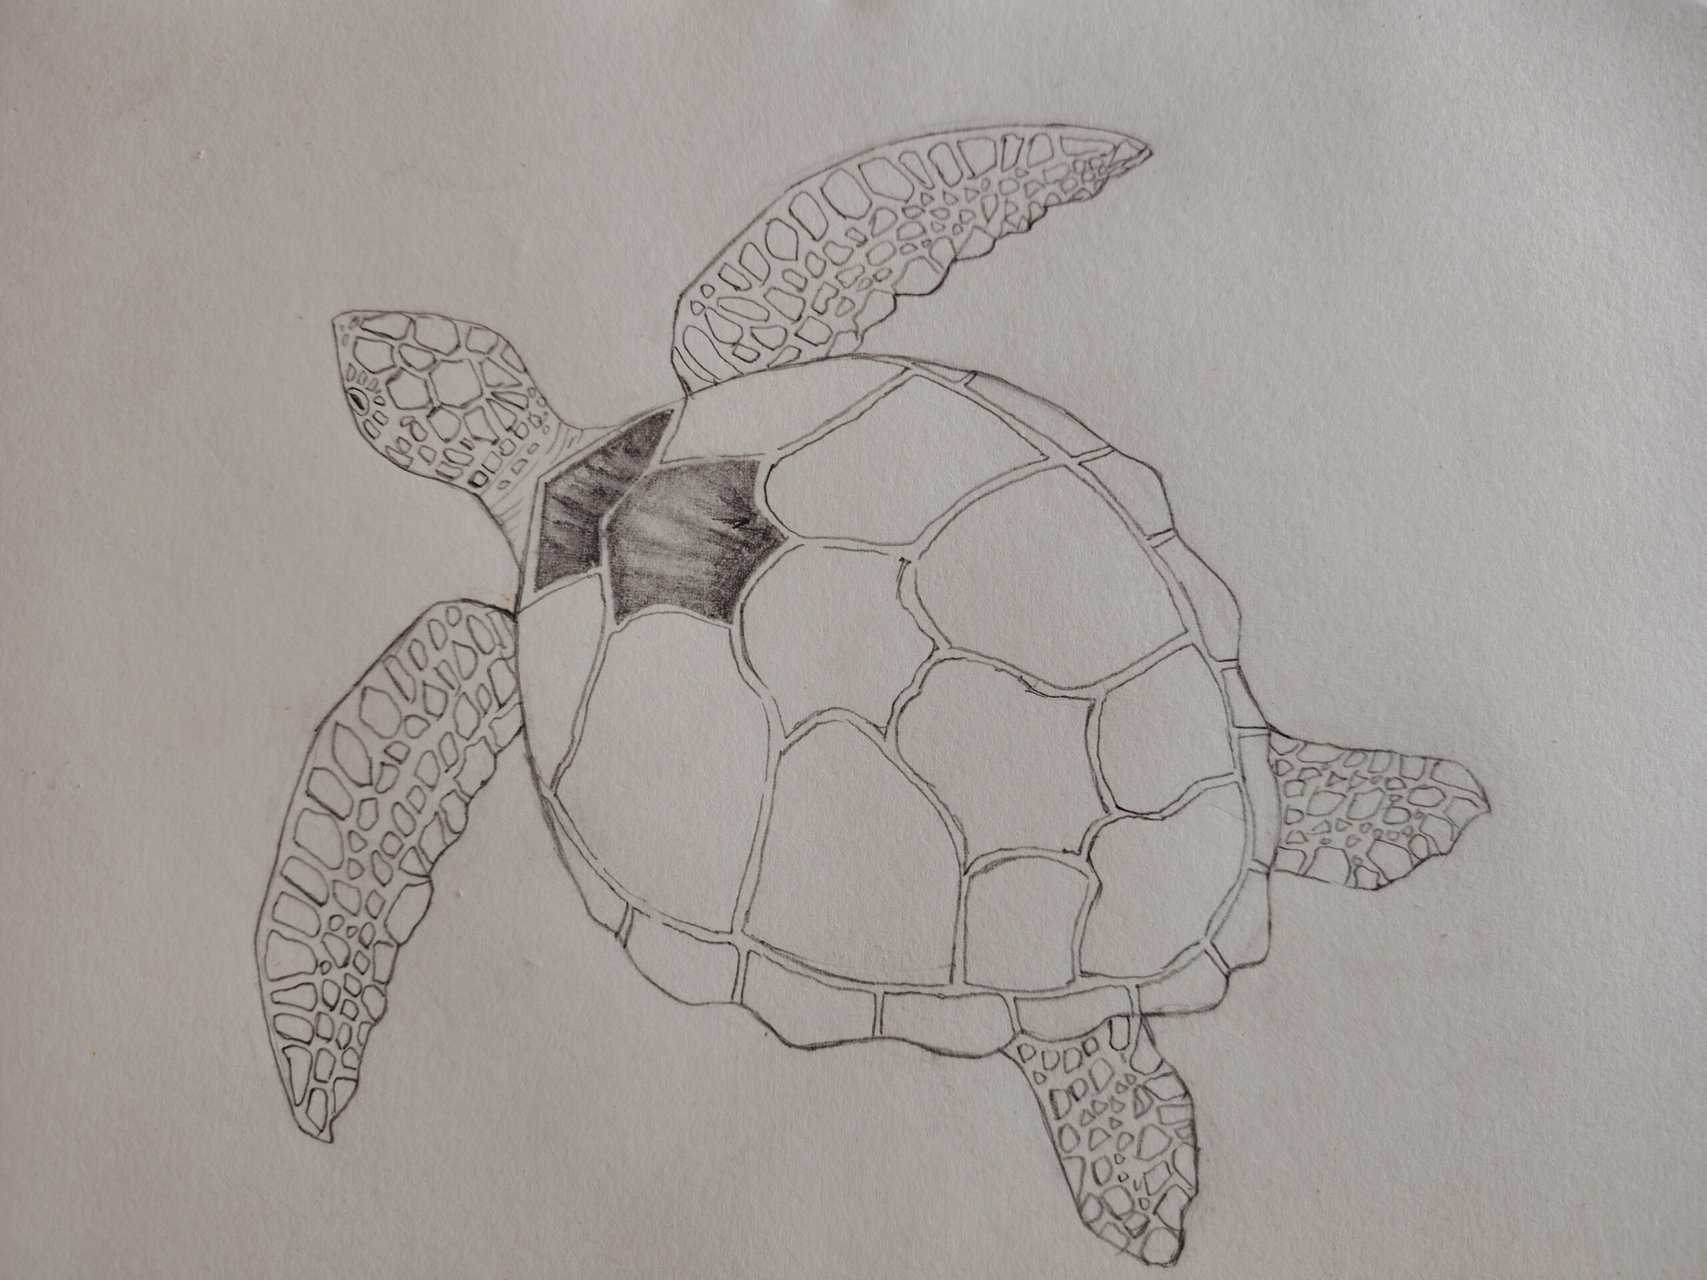
Clean up the sketch by erasing any remaining guidelines, leaving behind a clear outline of the turtle.
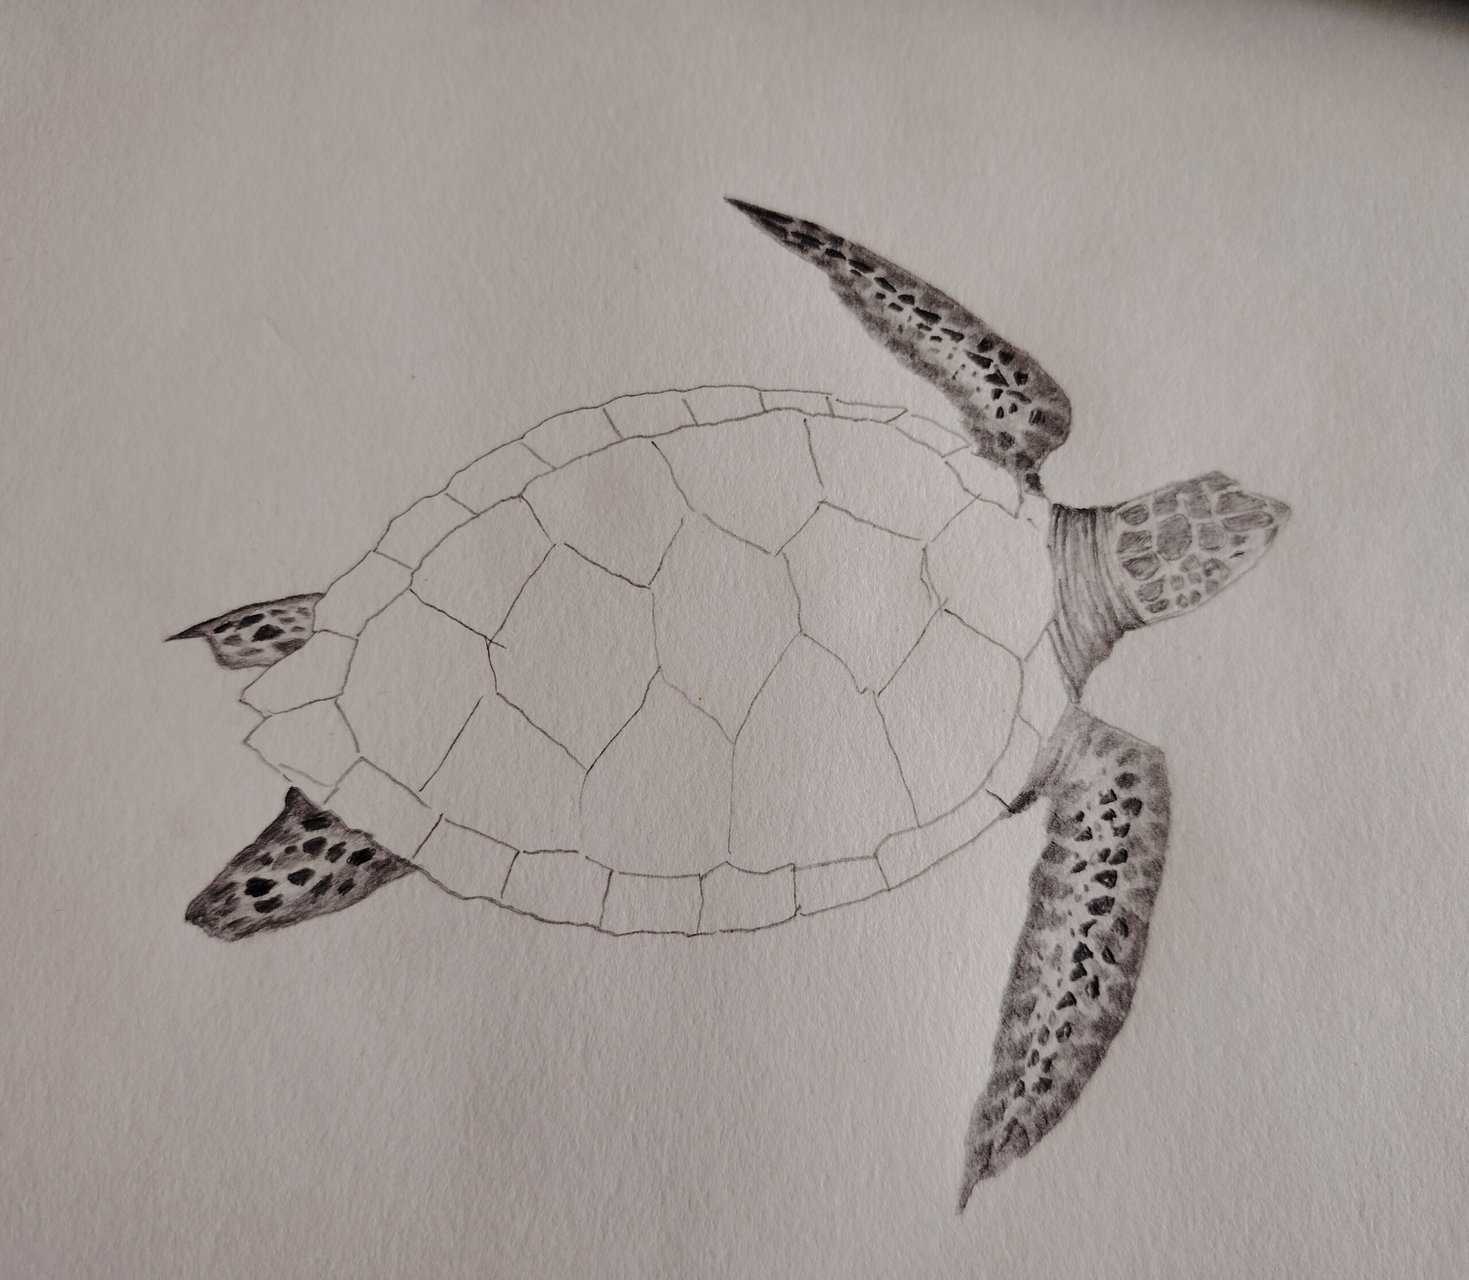
Step: 8
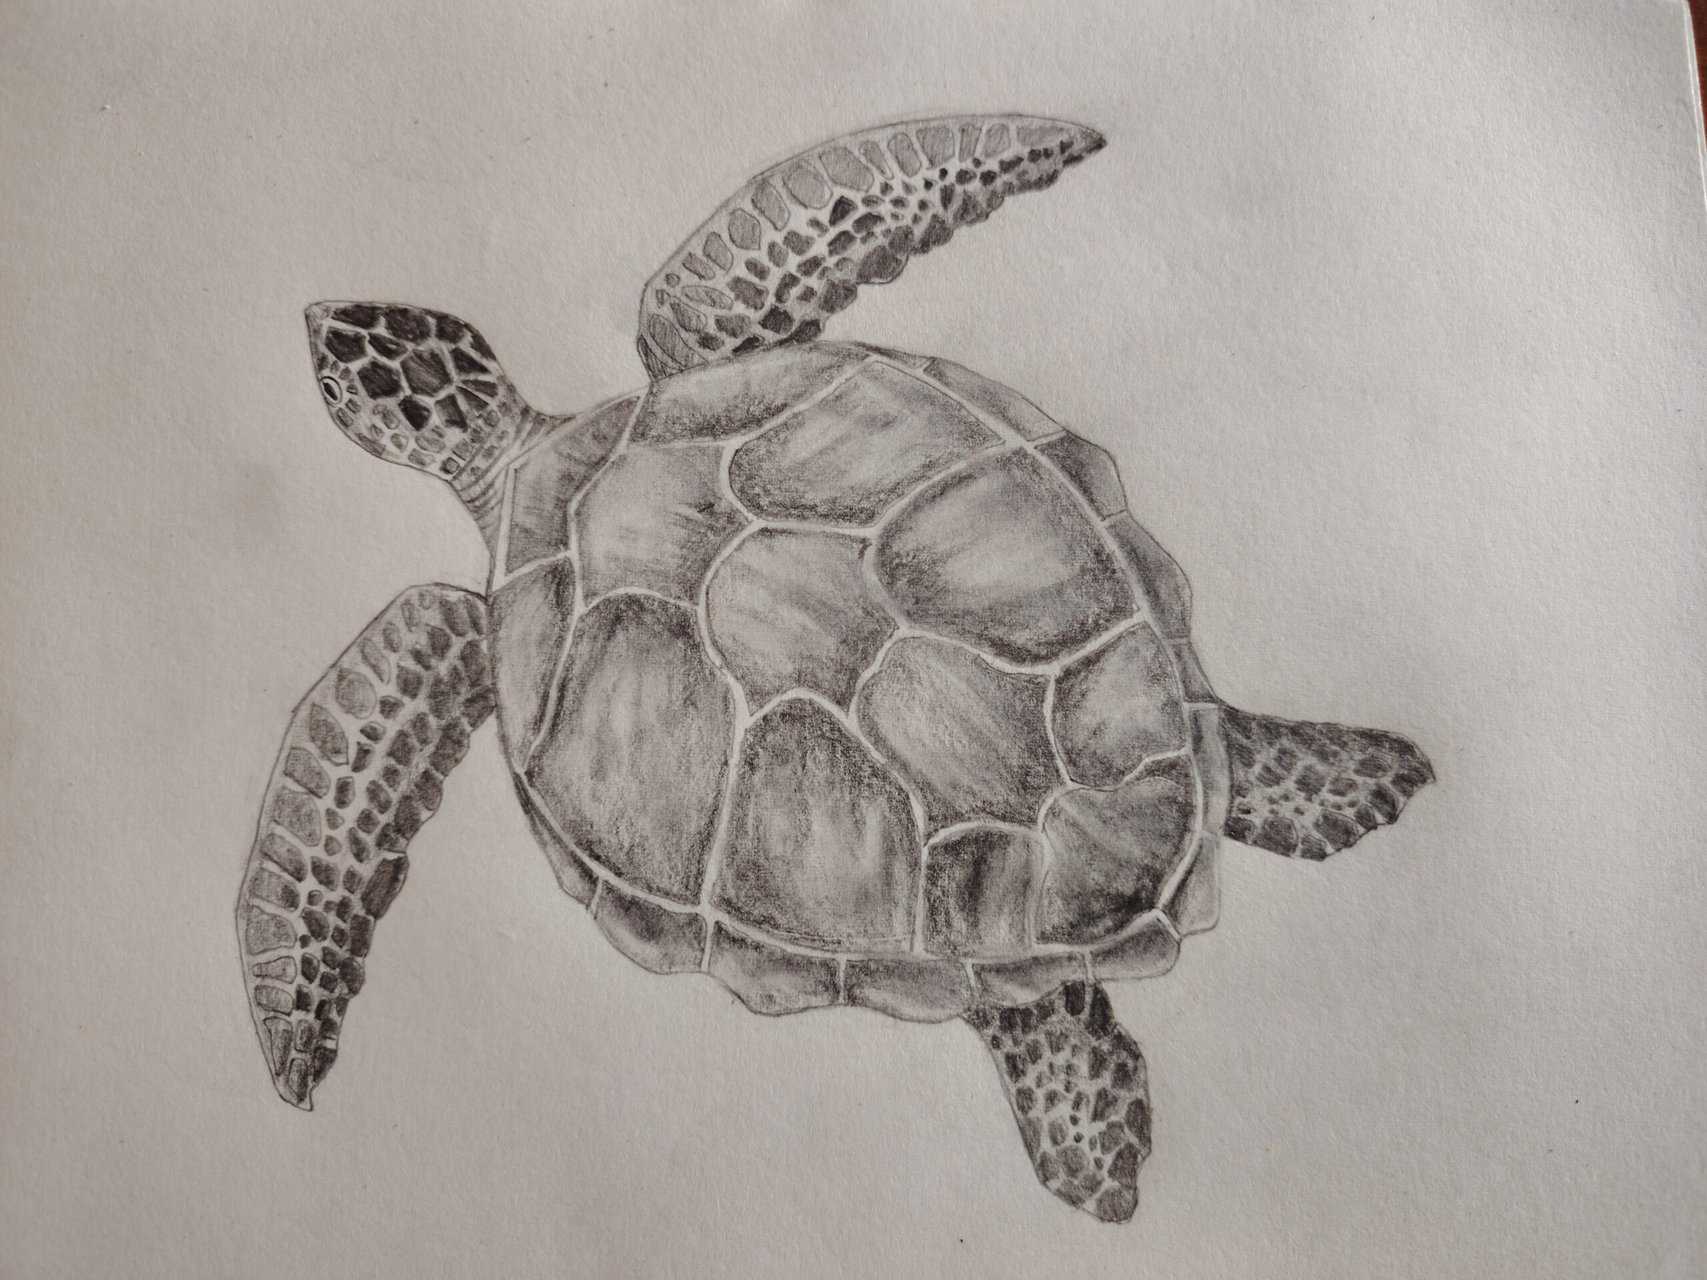
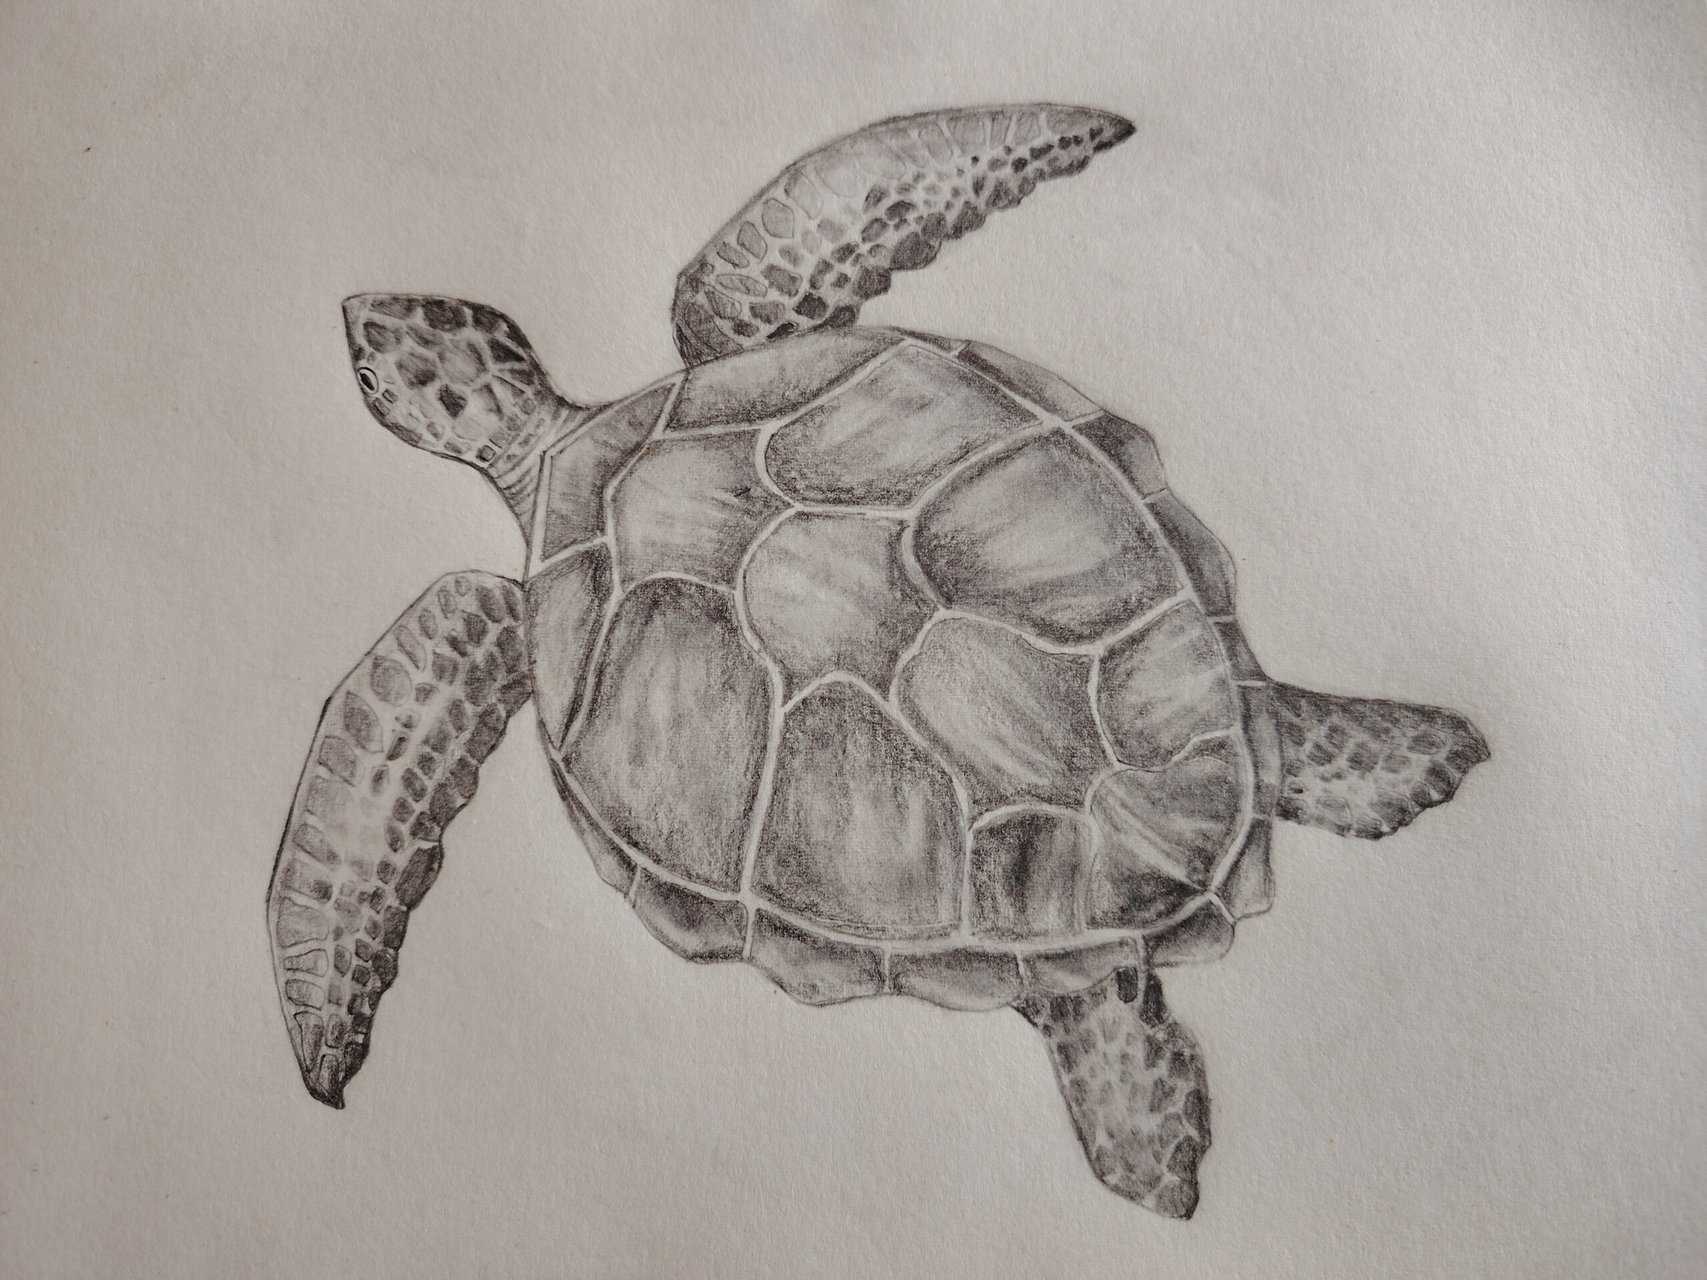
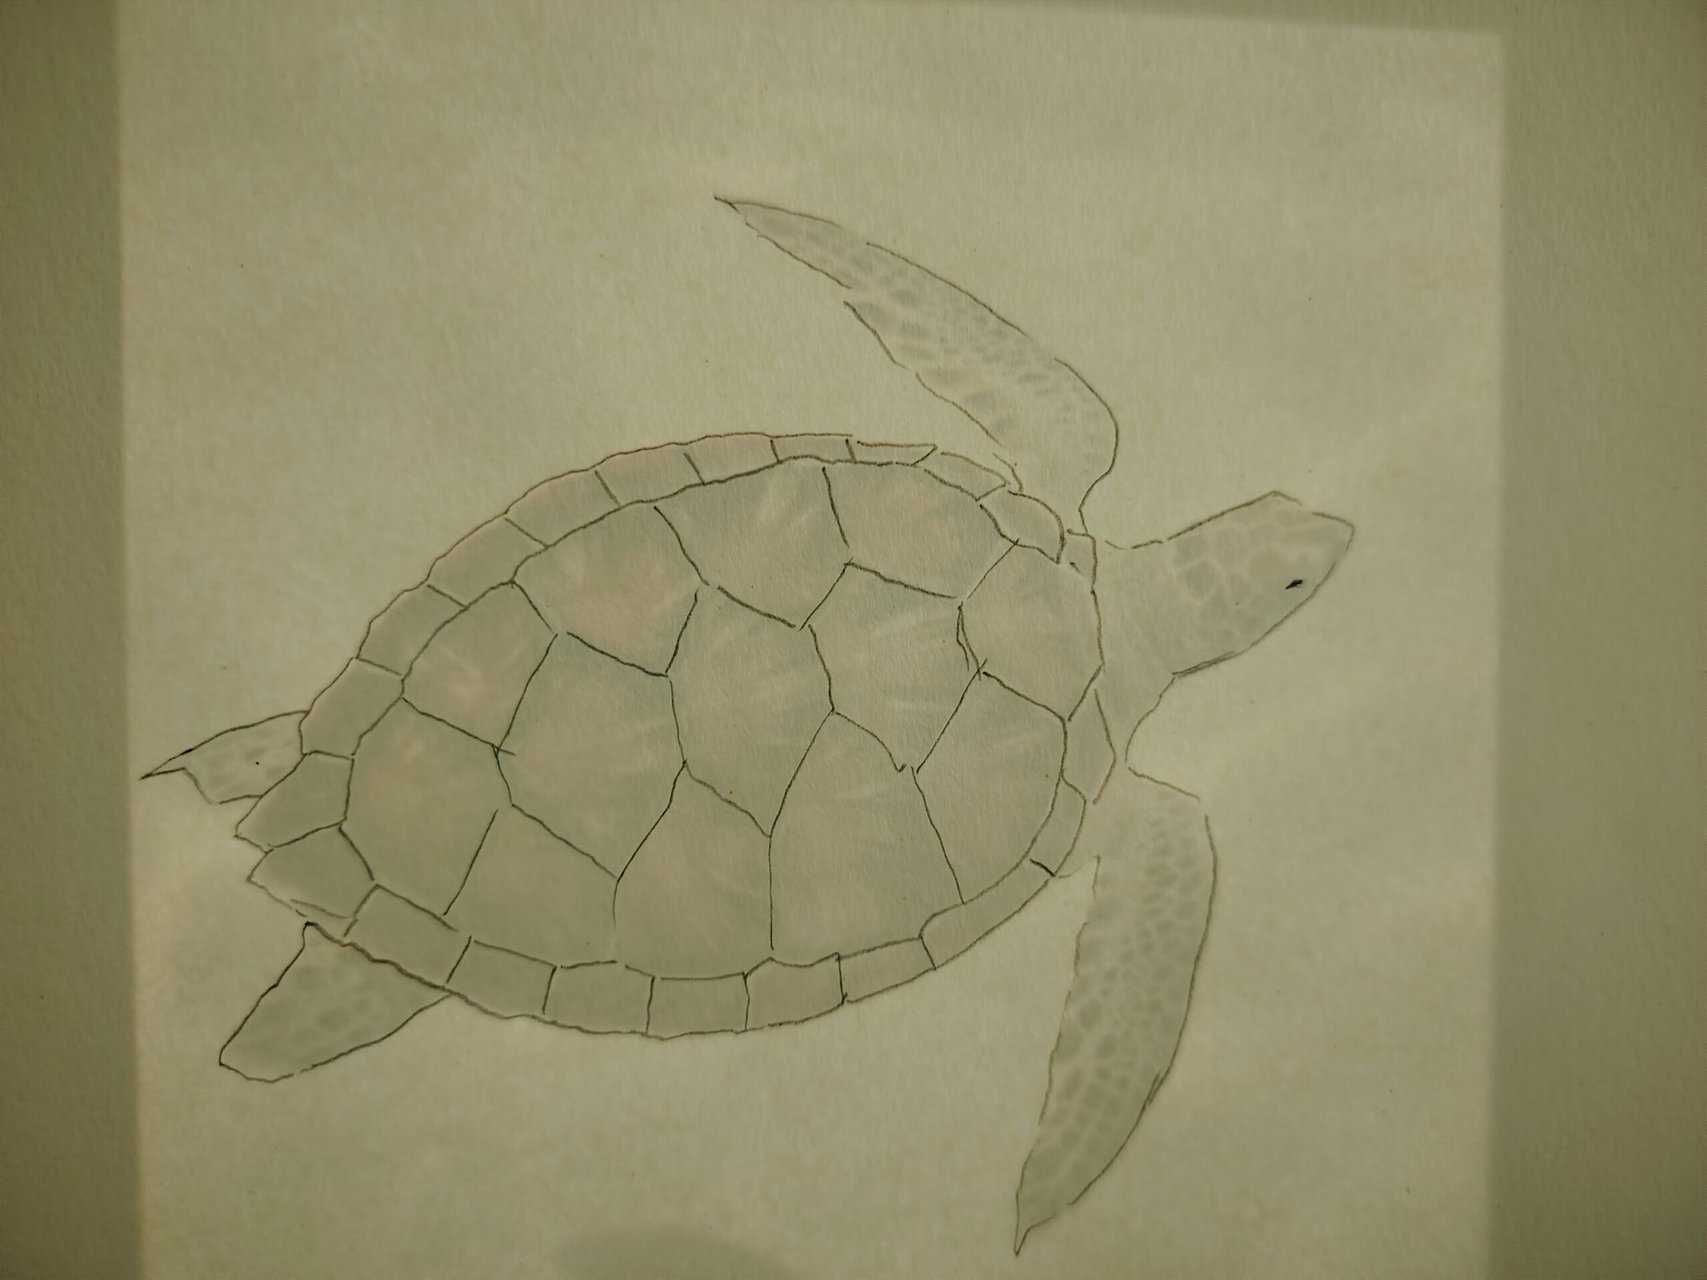
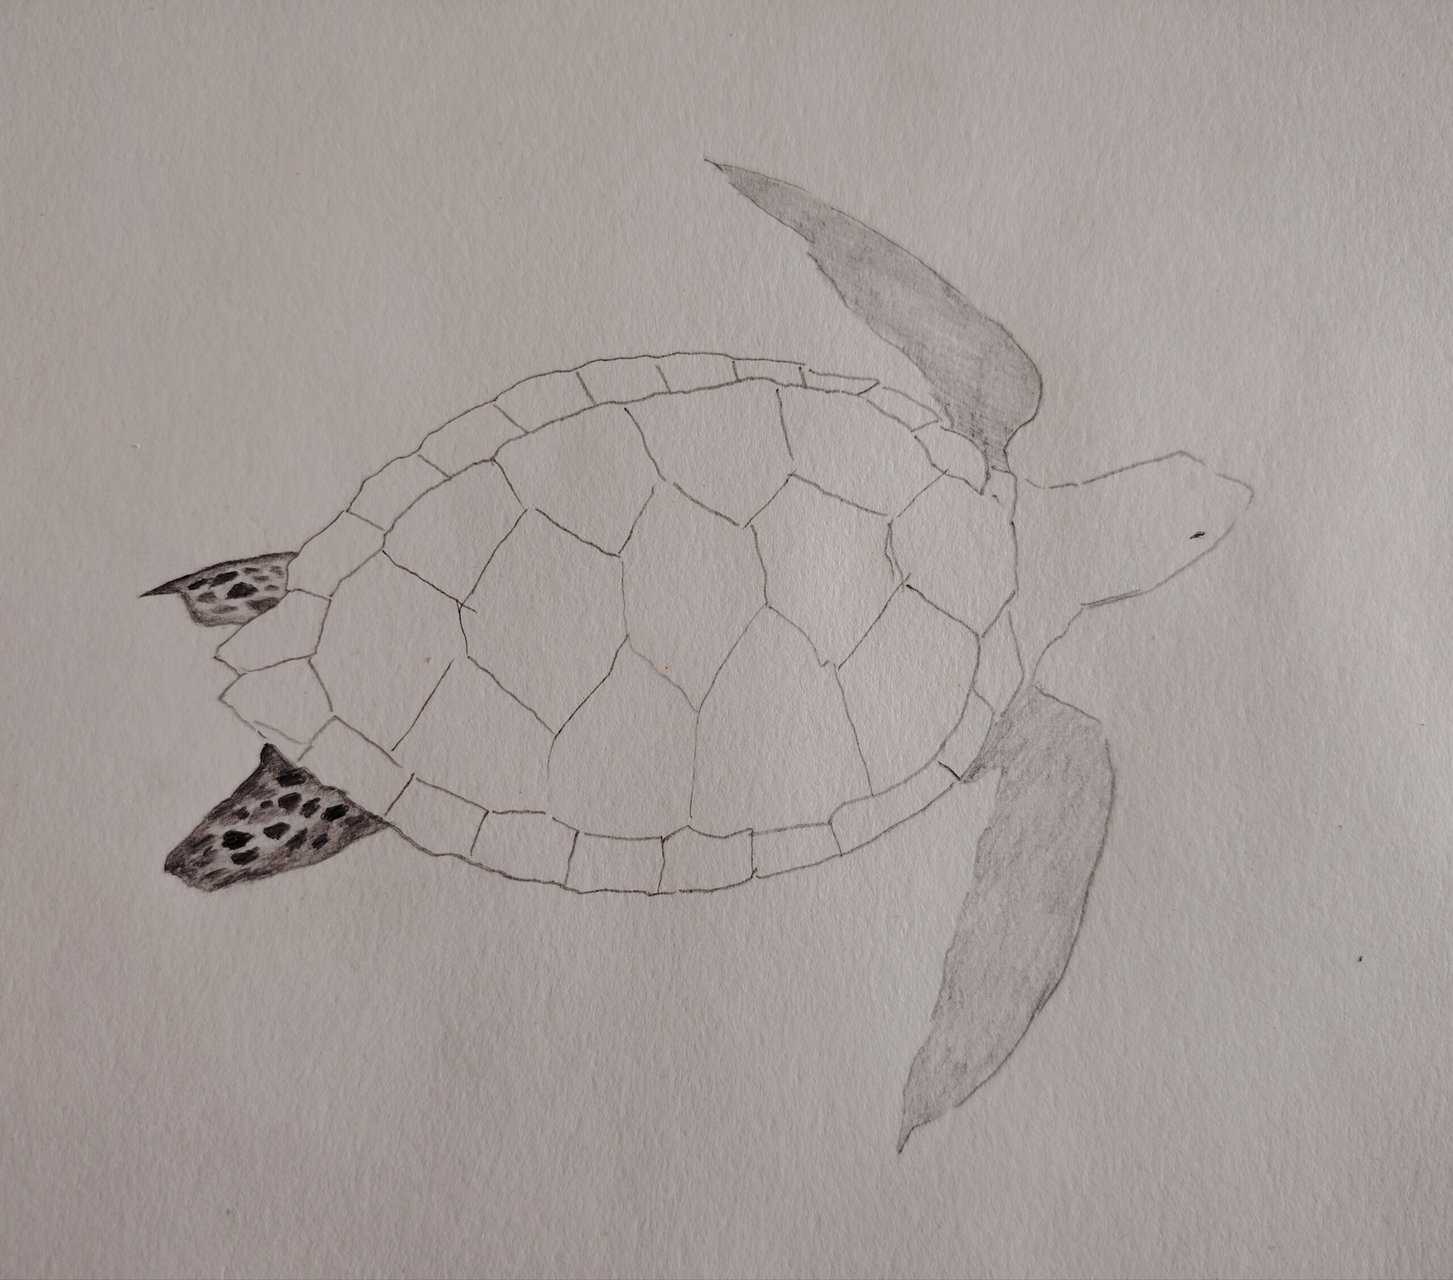
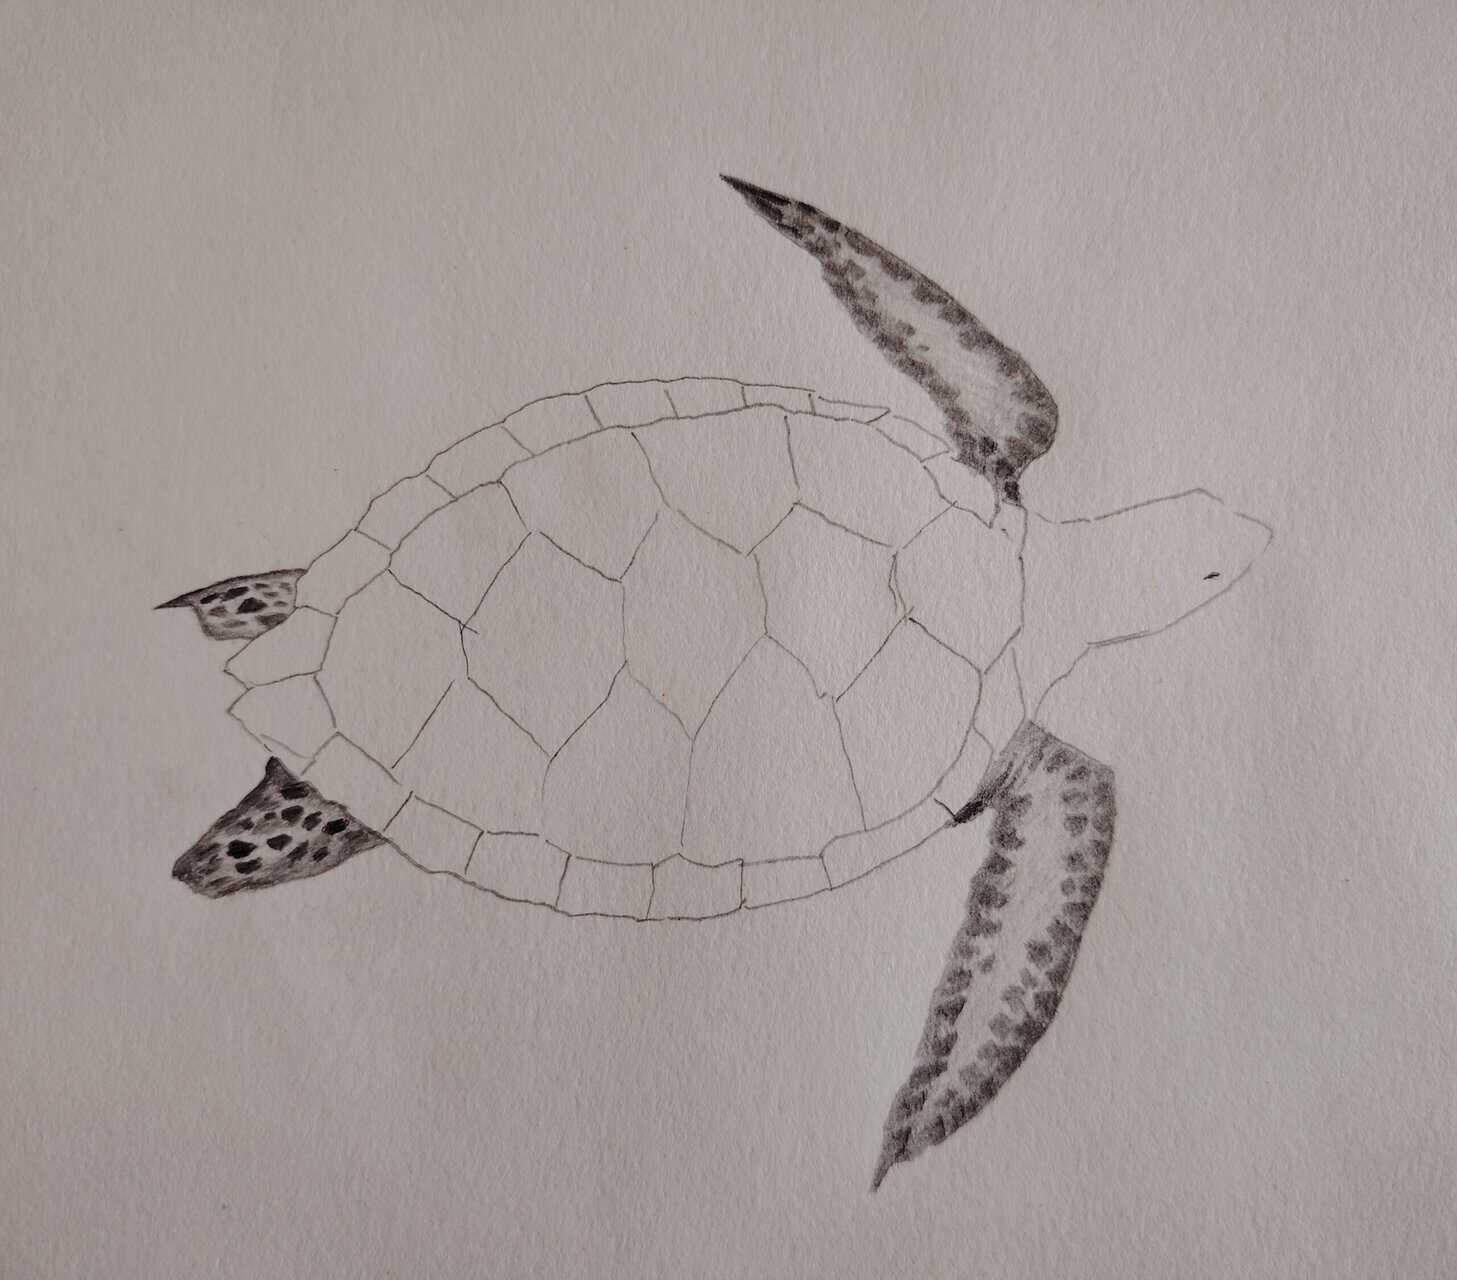
Add the intricate pattern of the shell, following the design observed in the reference image.
Step: 9
Create the texture of the flipper scales by adding rows of irregular shapes, varying in size and placement for a natural appearance.
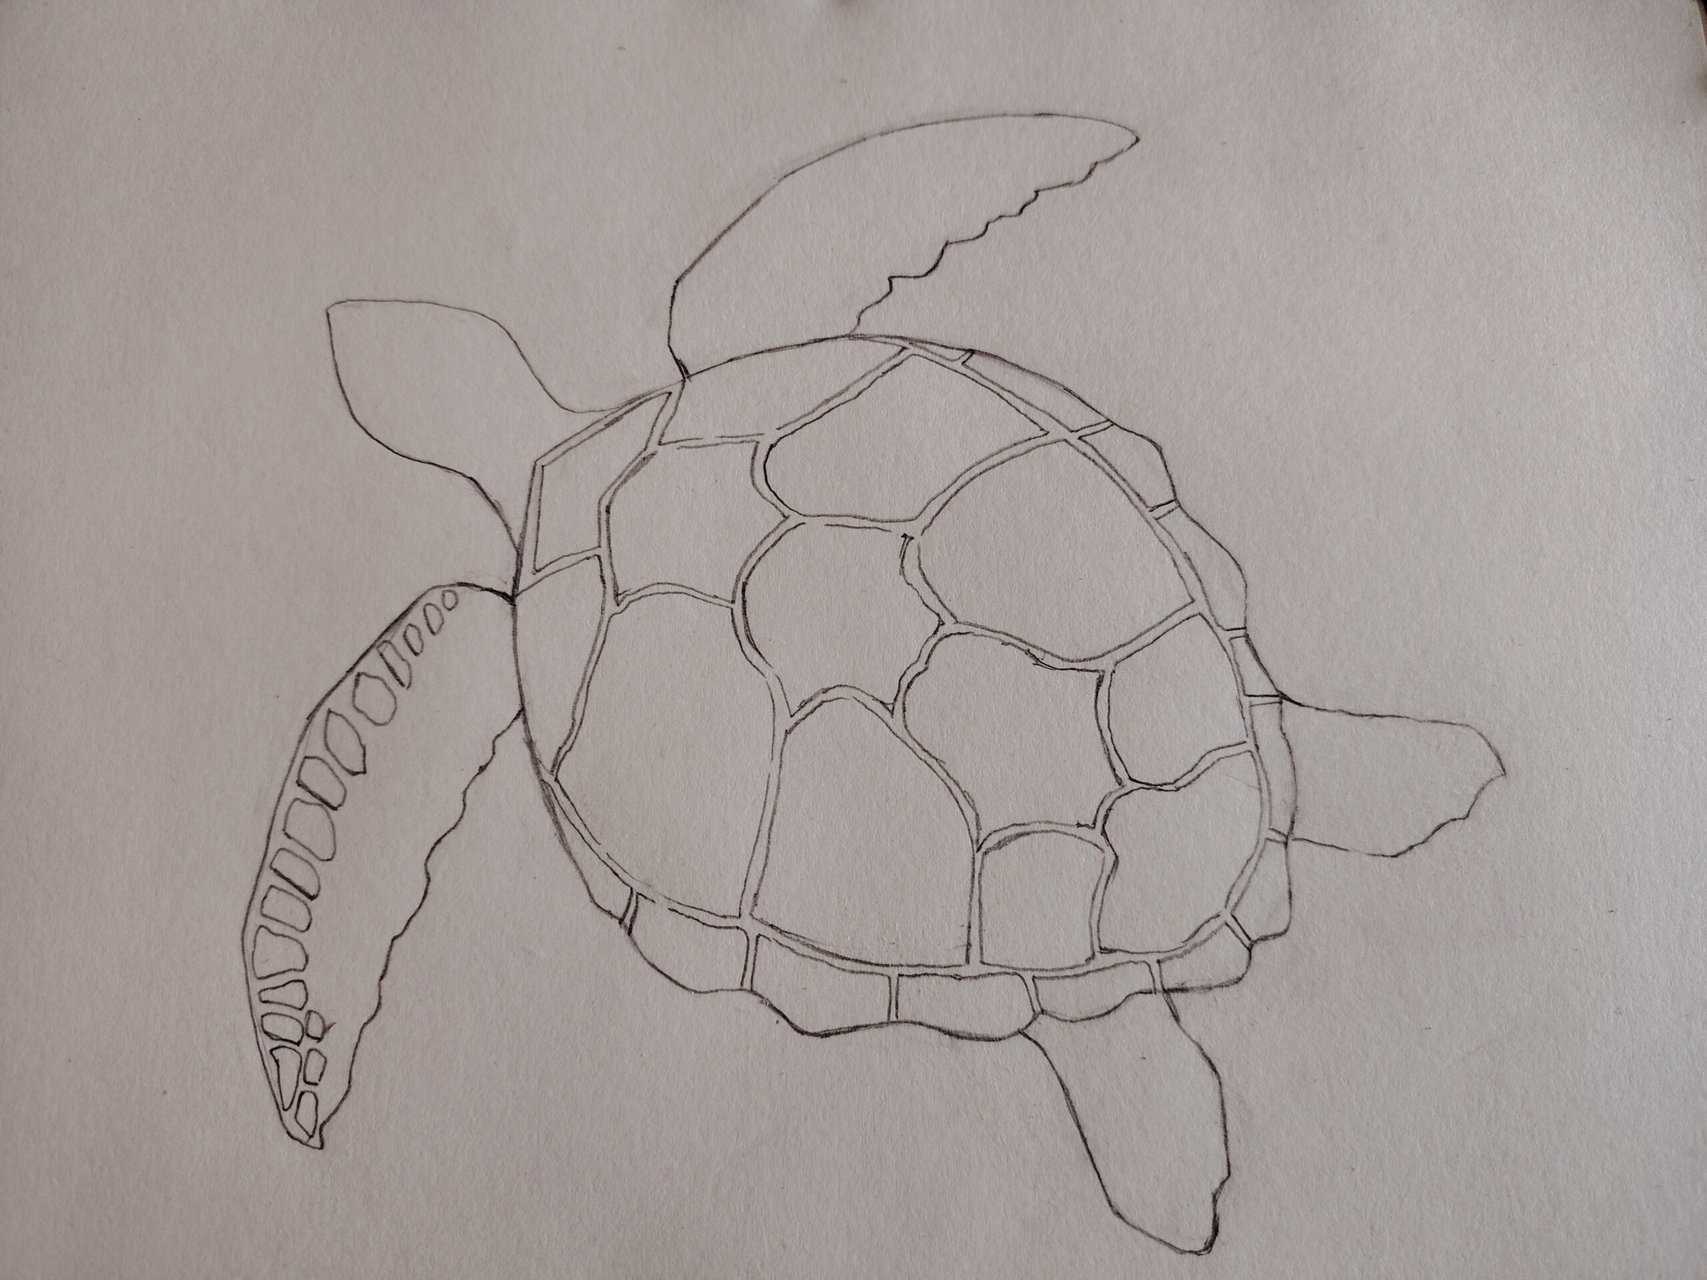
Step: 10
Add smaller scales below the larger ones.
Step: 11
Complete the flipper with large scales at the bottom and smaller scales filling the remaining space.
Step: 12
Repeat the scaling process for the remaining three flippers.
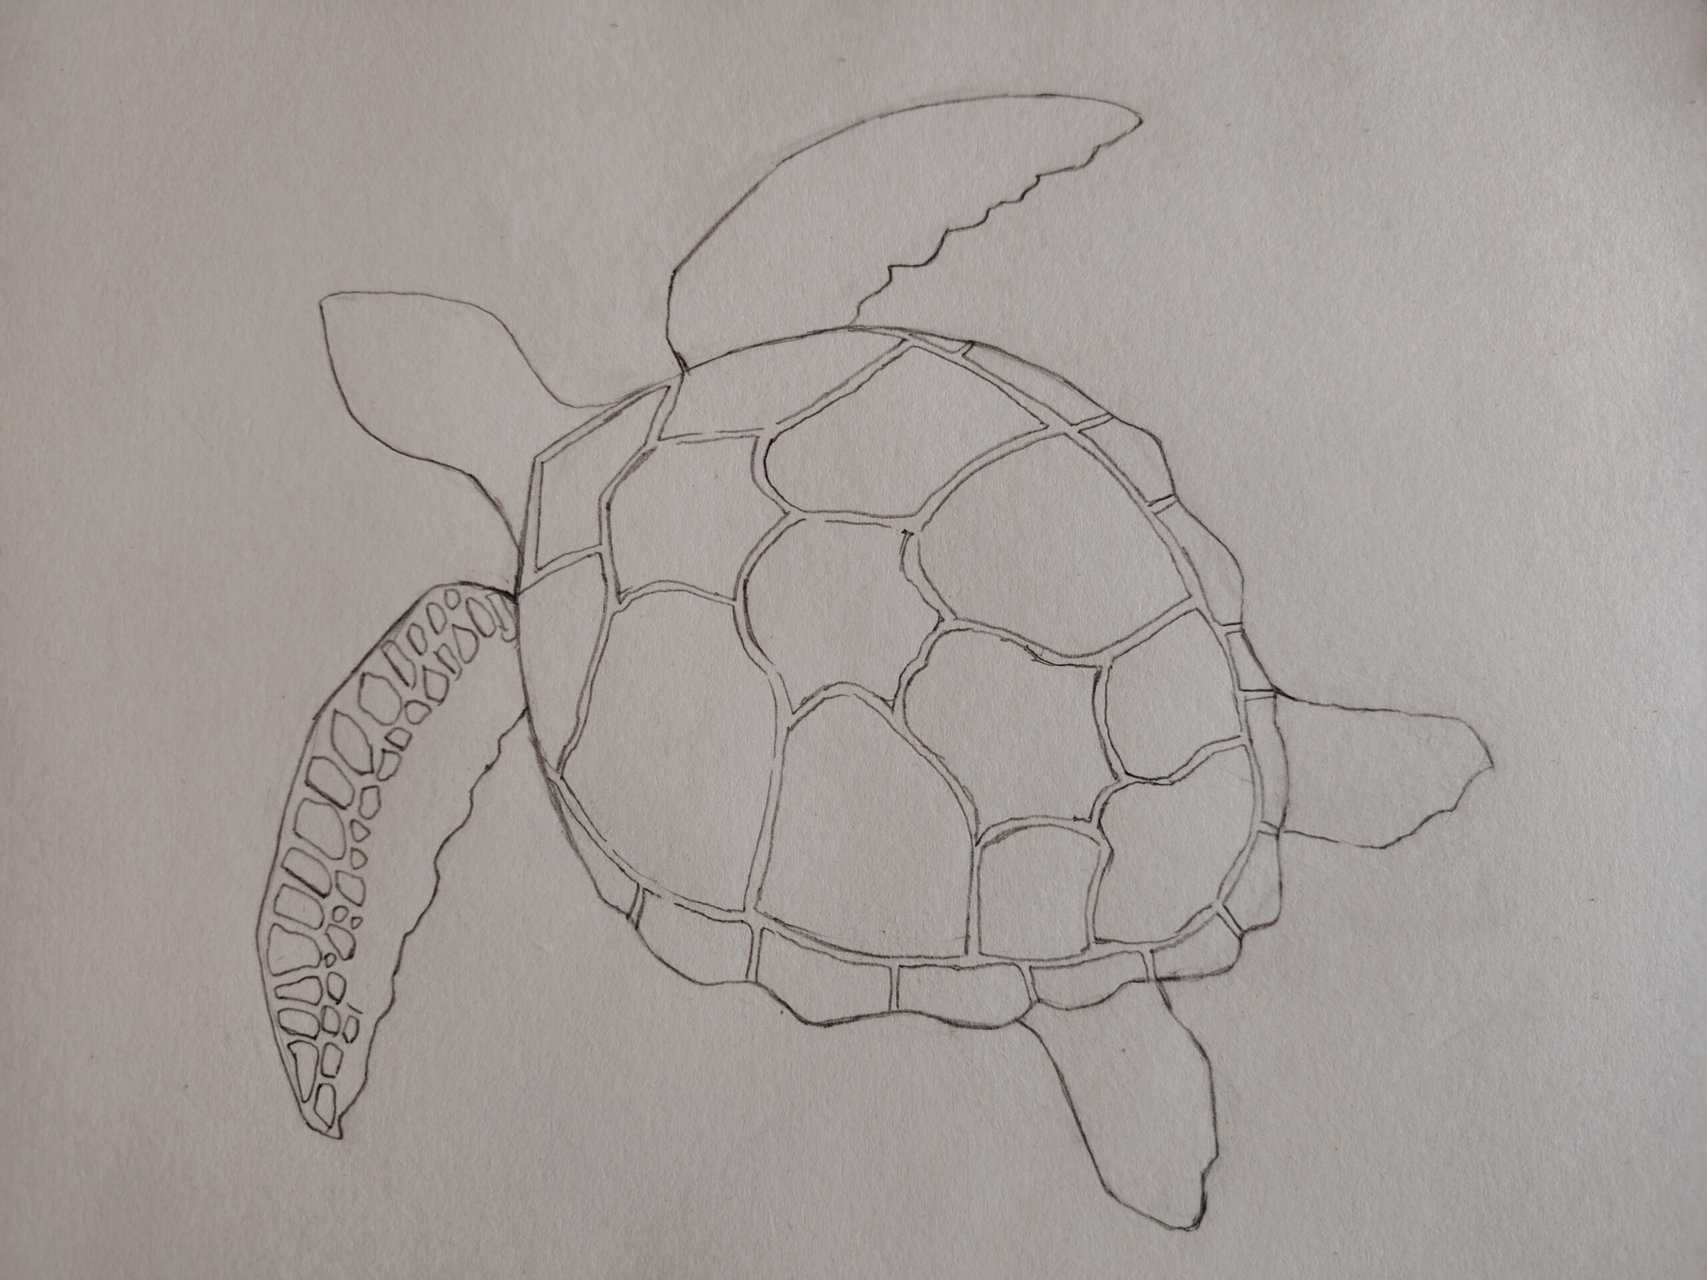
Step: 13
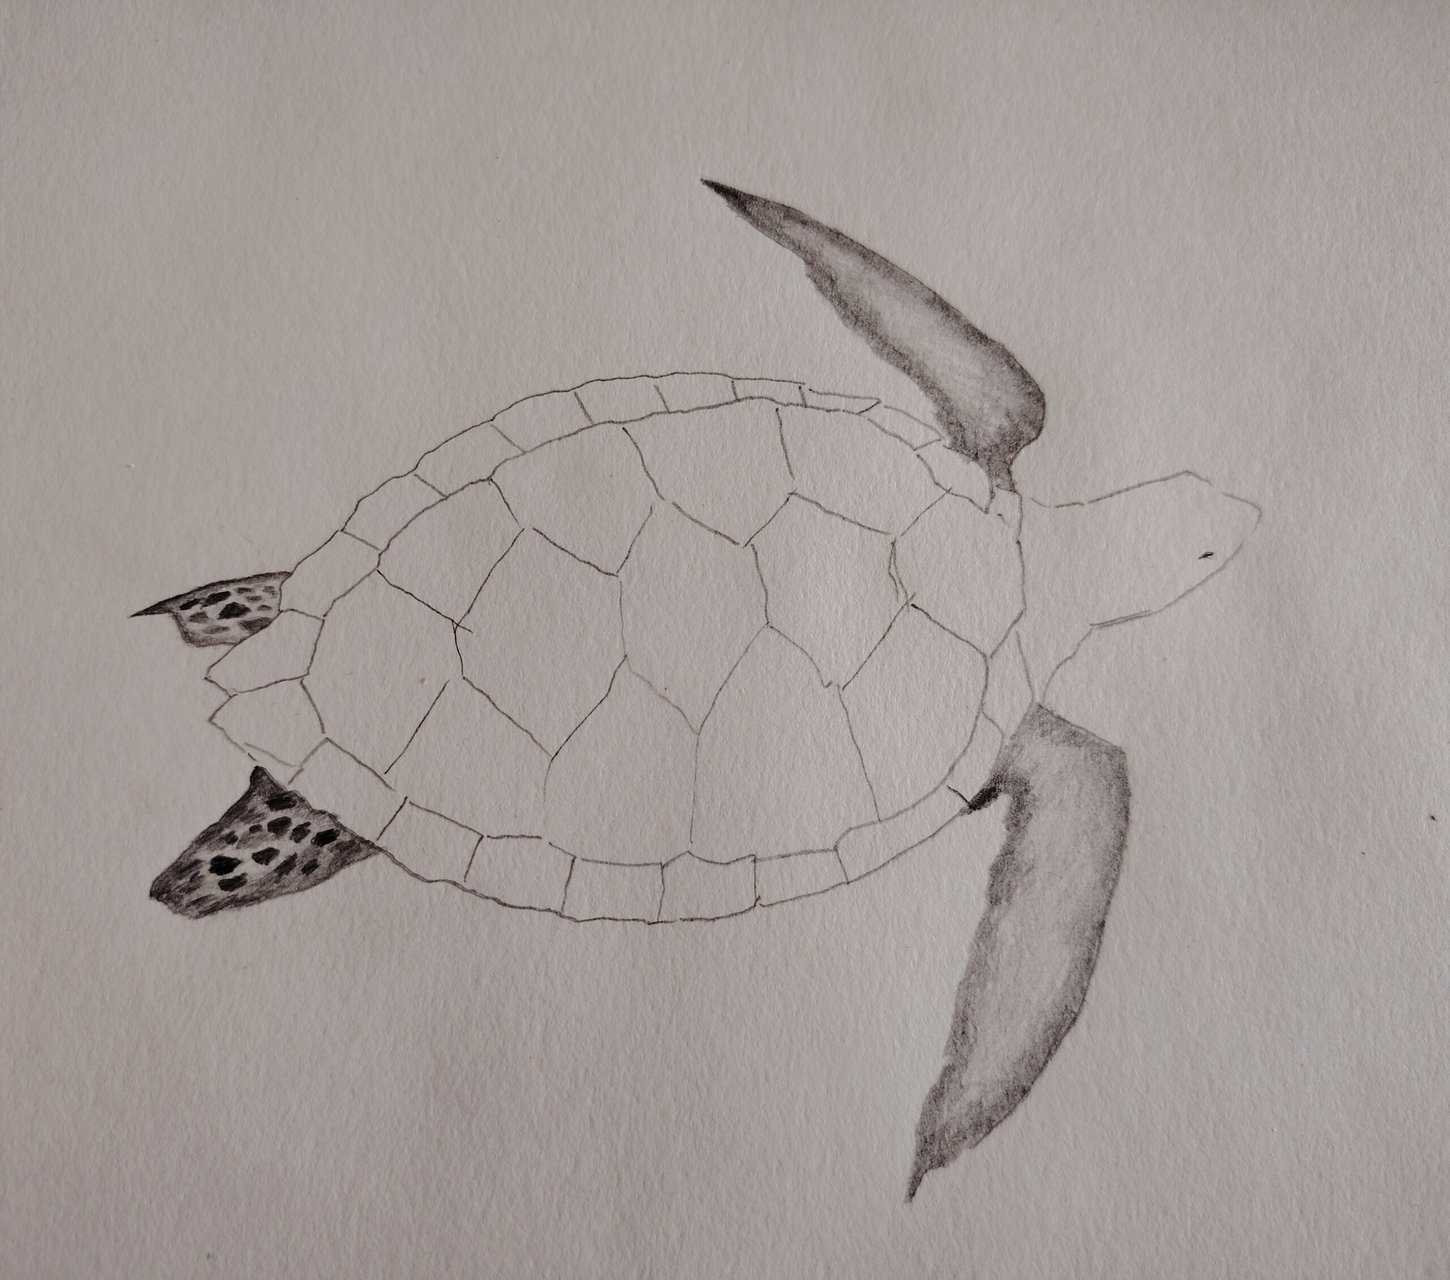
Add larger scales to the top of the head.
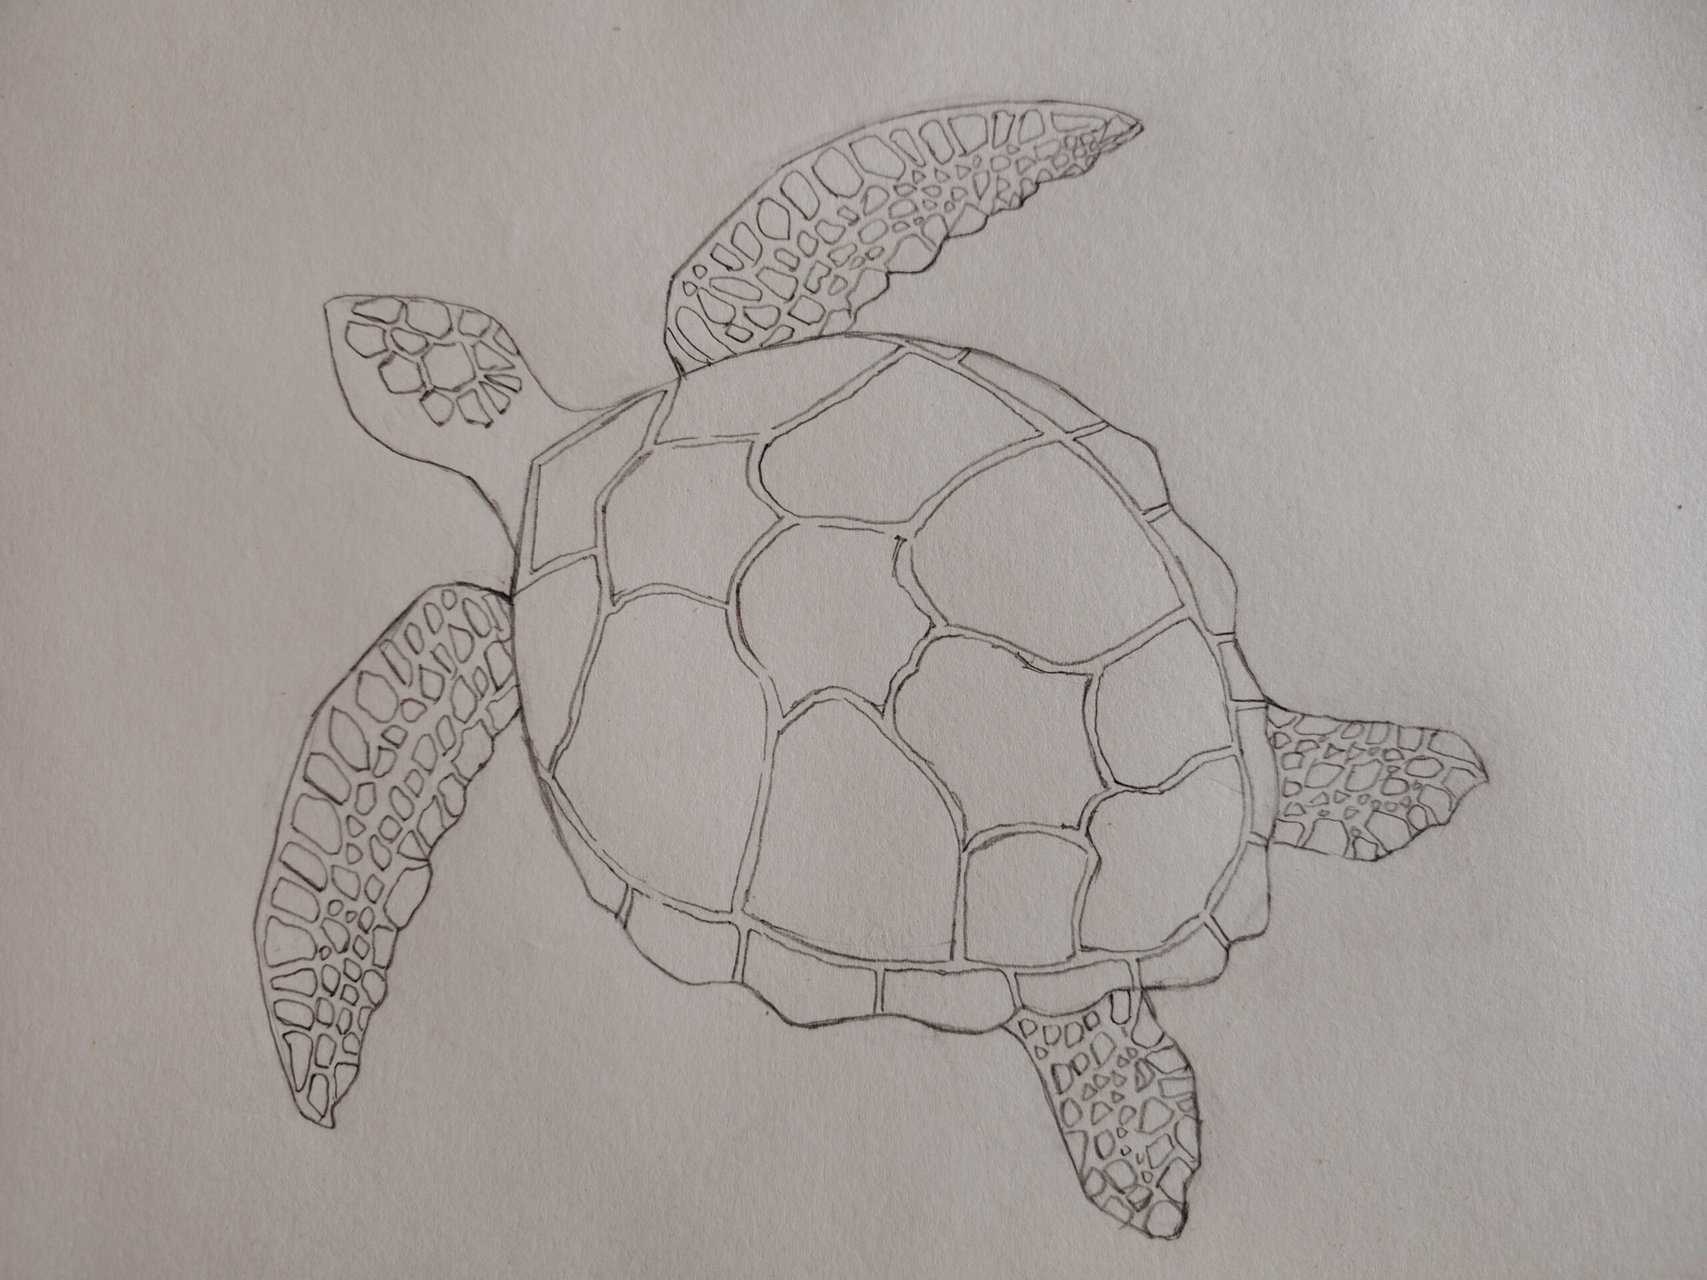
Step: 14
Add subtle lines to represent skin folds on the neck, adding smaller scales to fill in the rest of the space, except the place of the eye.

Step: 15
Add the eye and refine its surrounding area with smaller scales following the reference.
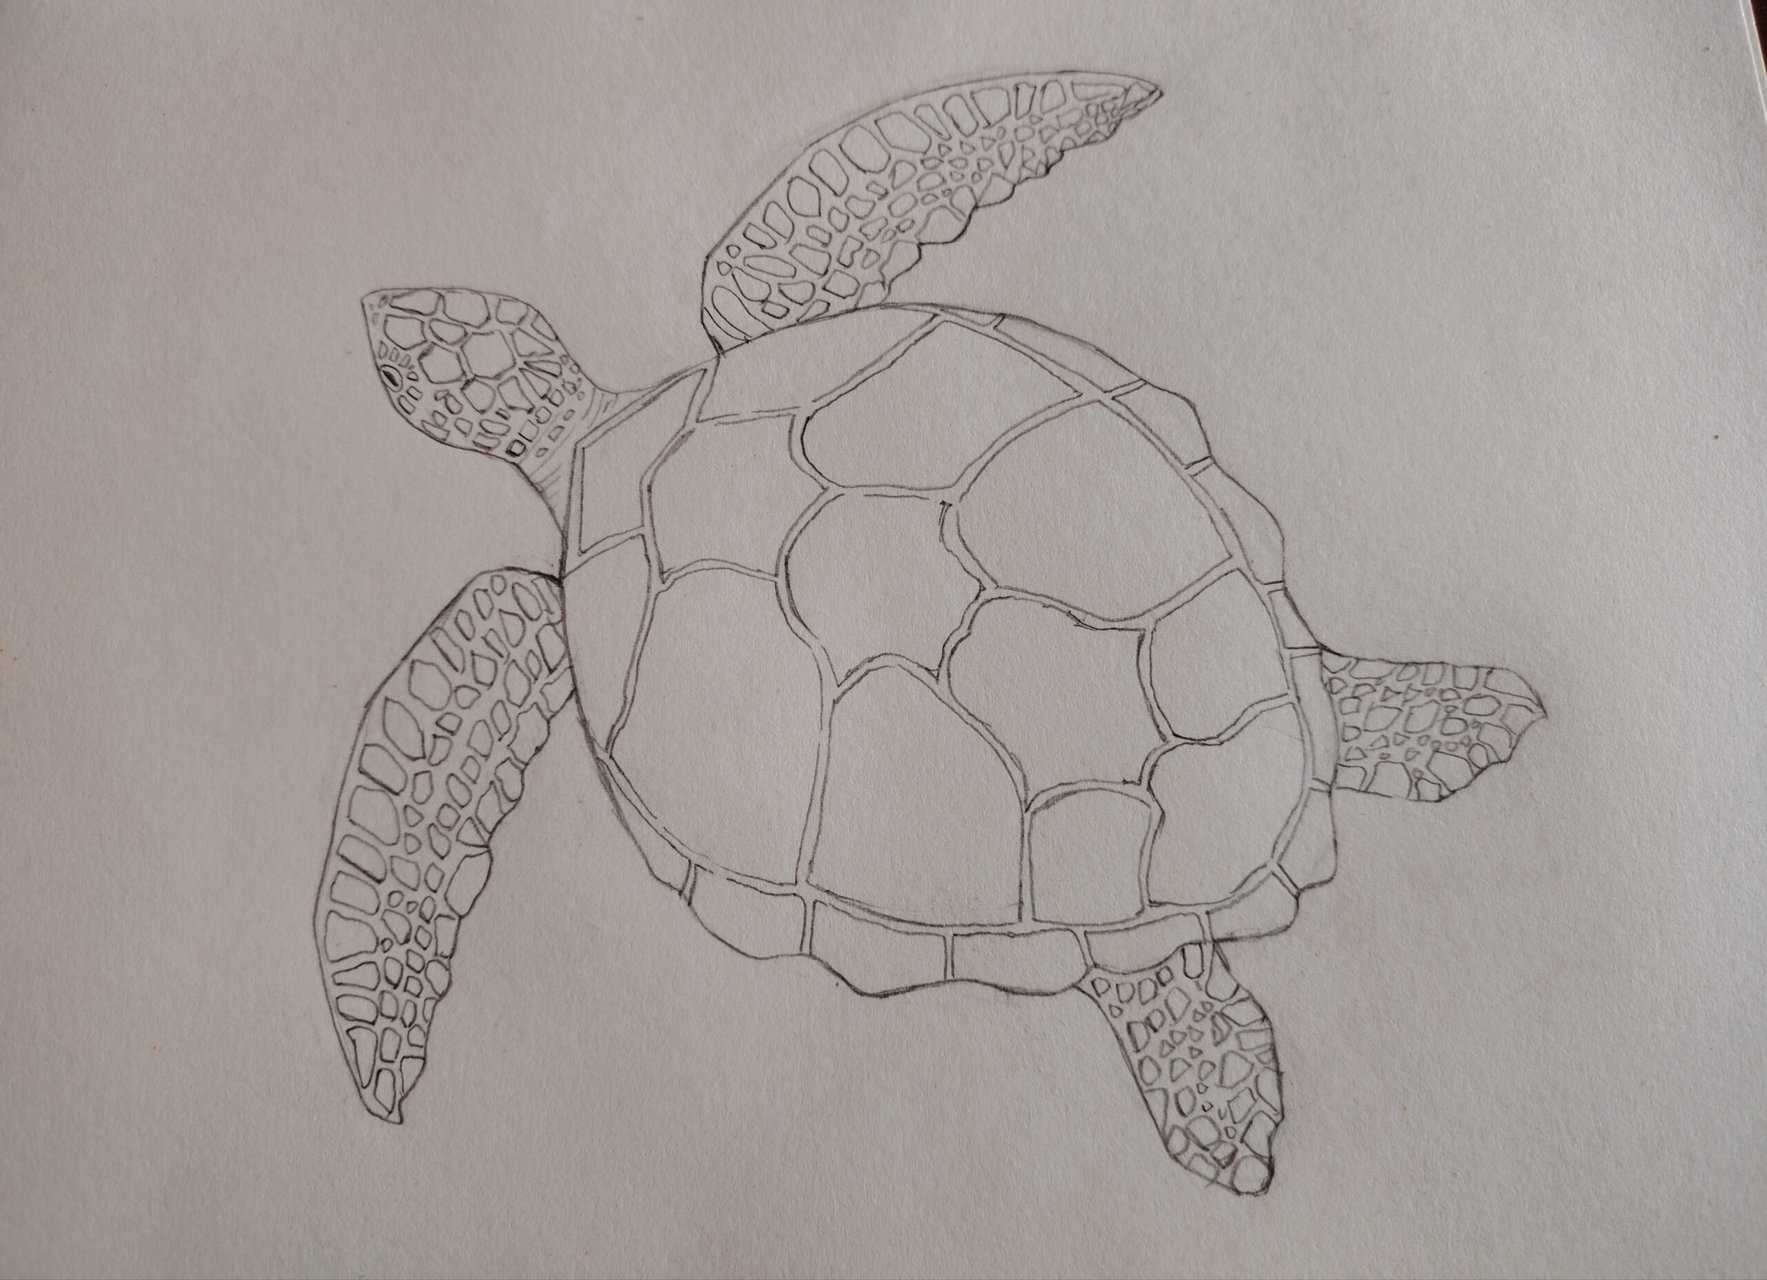
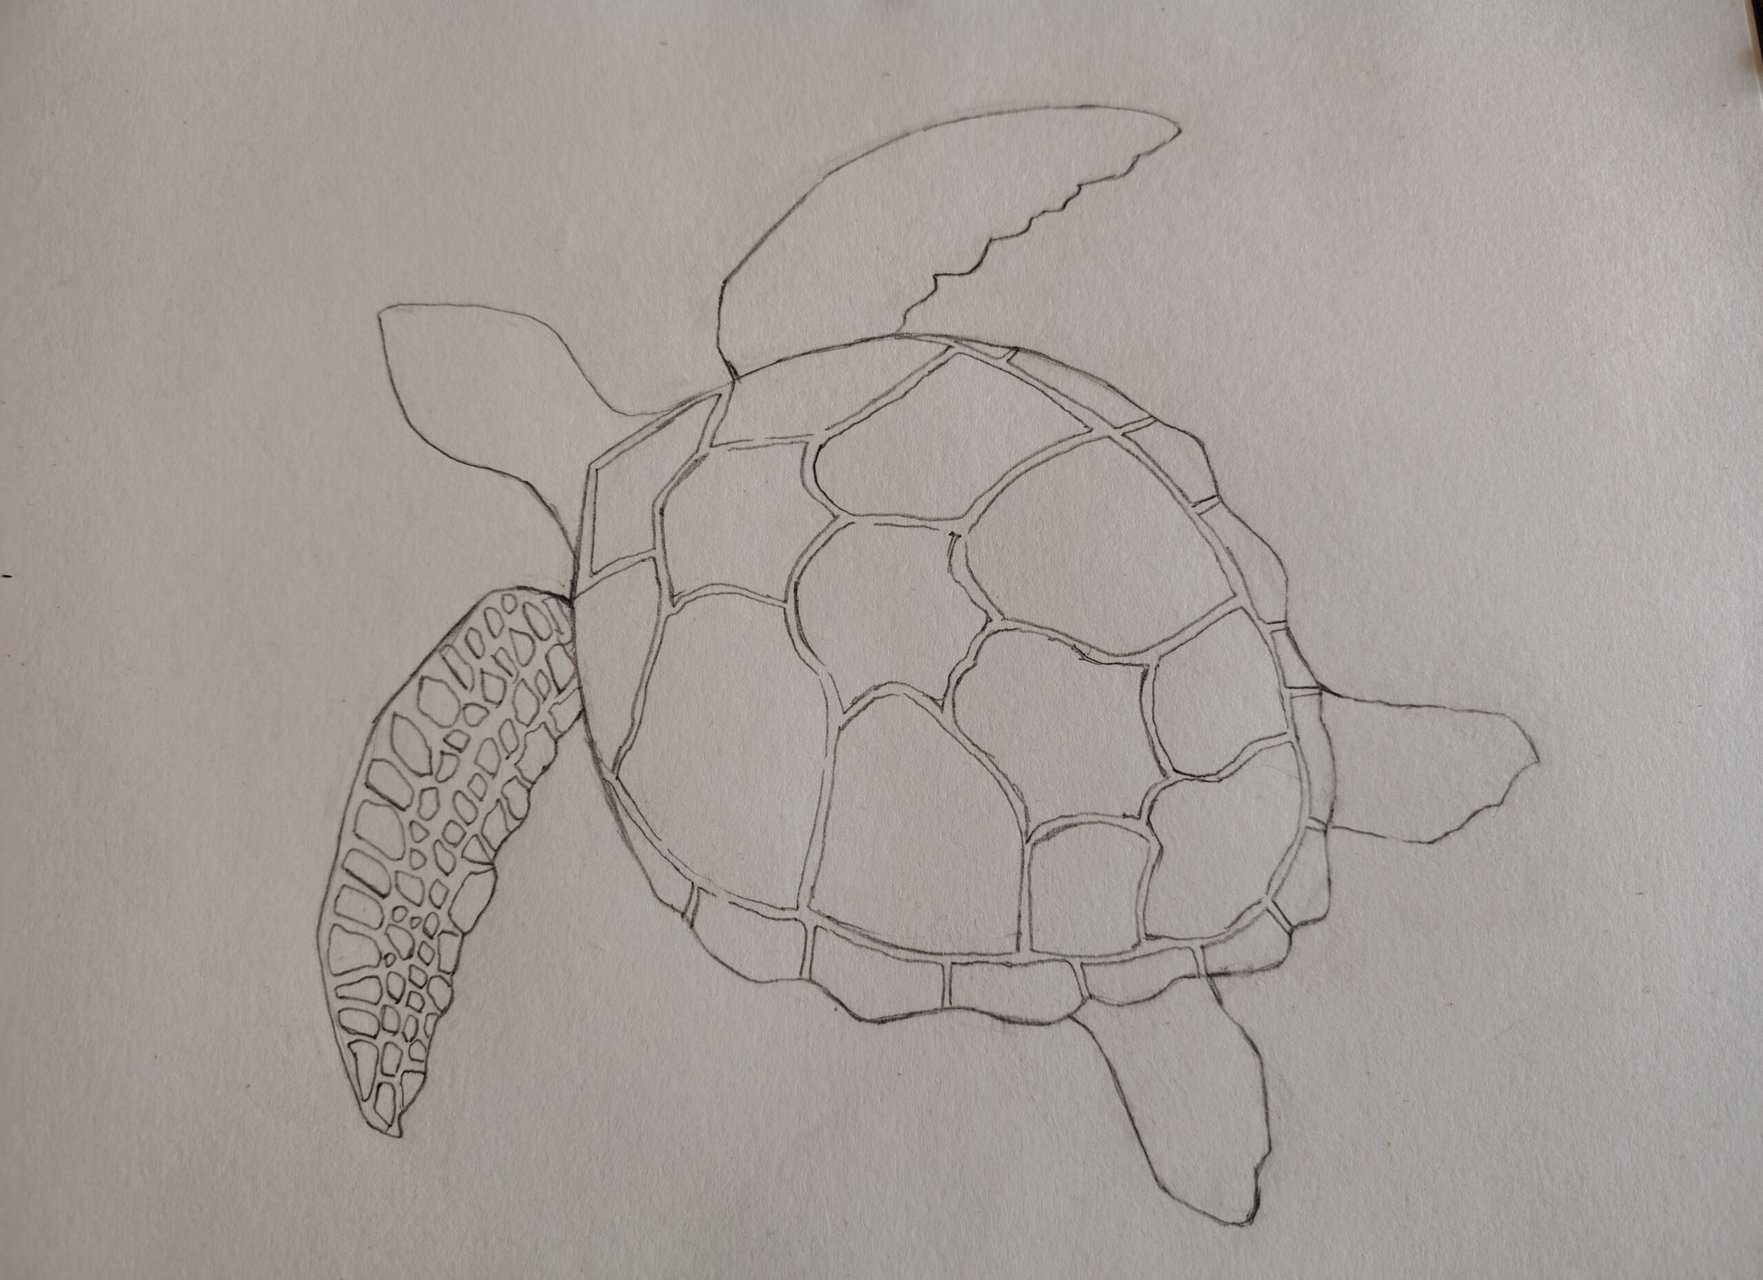
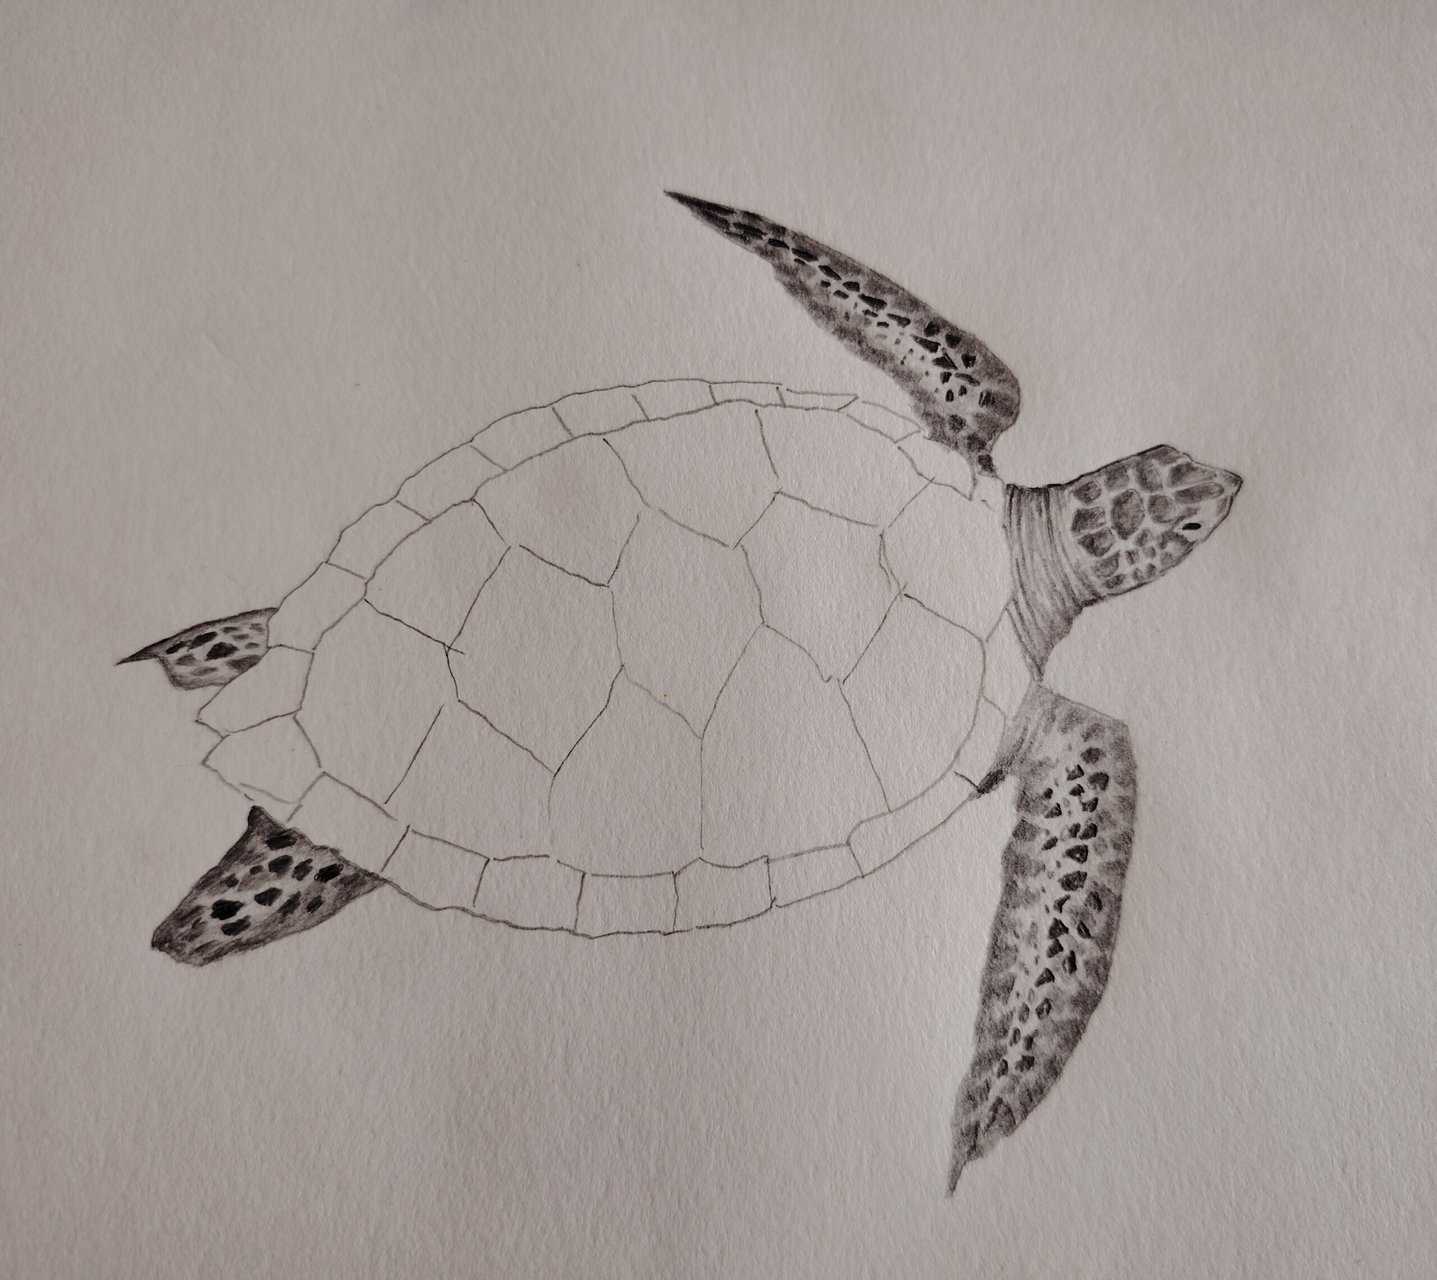
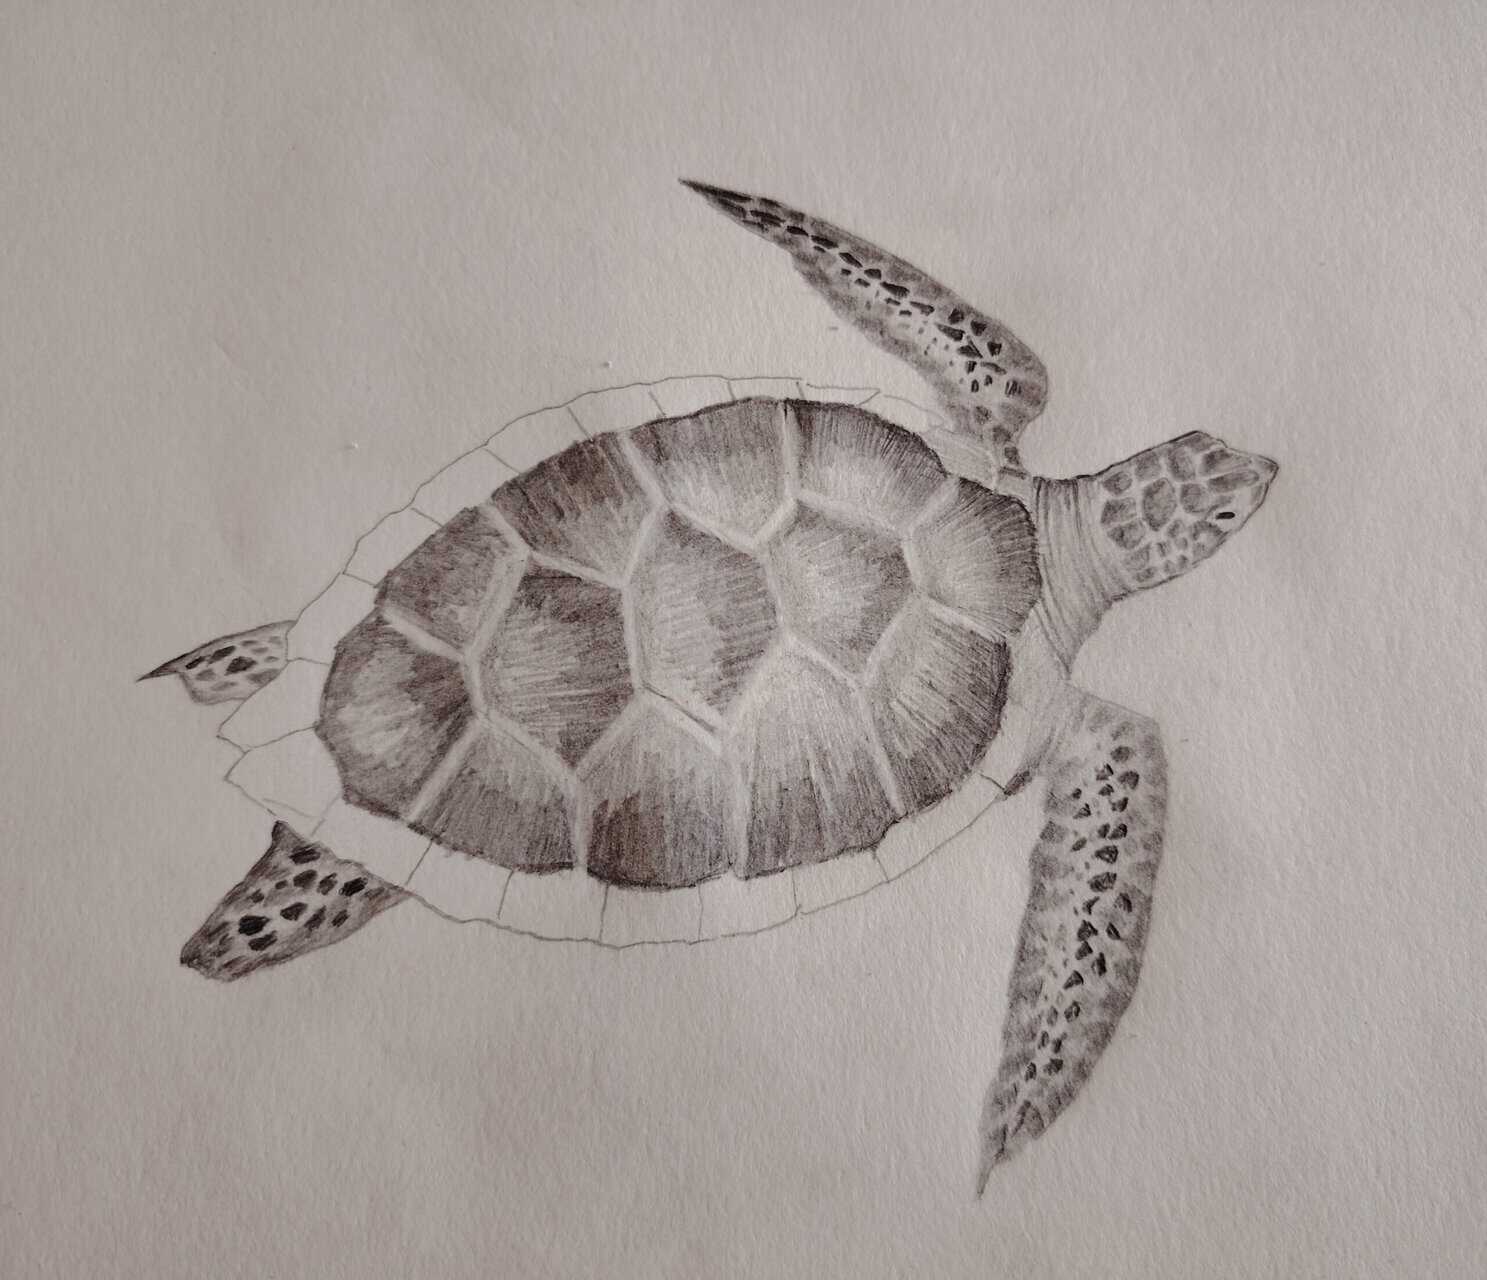
Step: 16
Shade the shell sections lightly with graphite, one section at a time.
Step: 17
Darken the edges of the shell sections slightly to add dimension.

Step: 18
Incorporate darker lines along the shell section for detailing.
Step: 19
Follow the same technique of shading for the rest of the sections of shell.
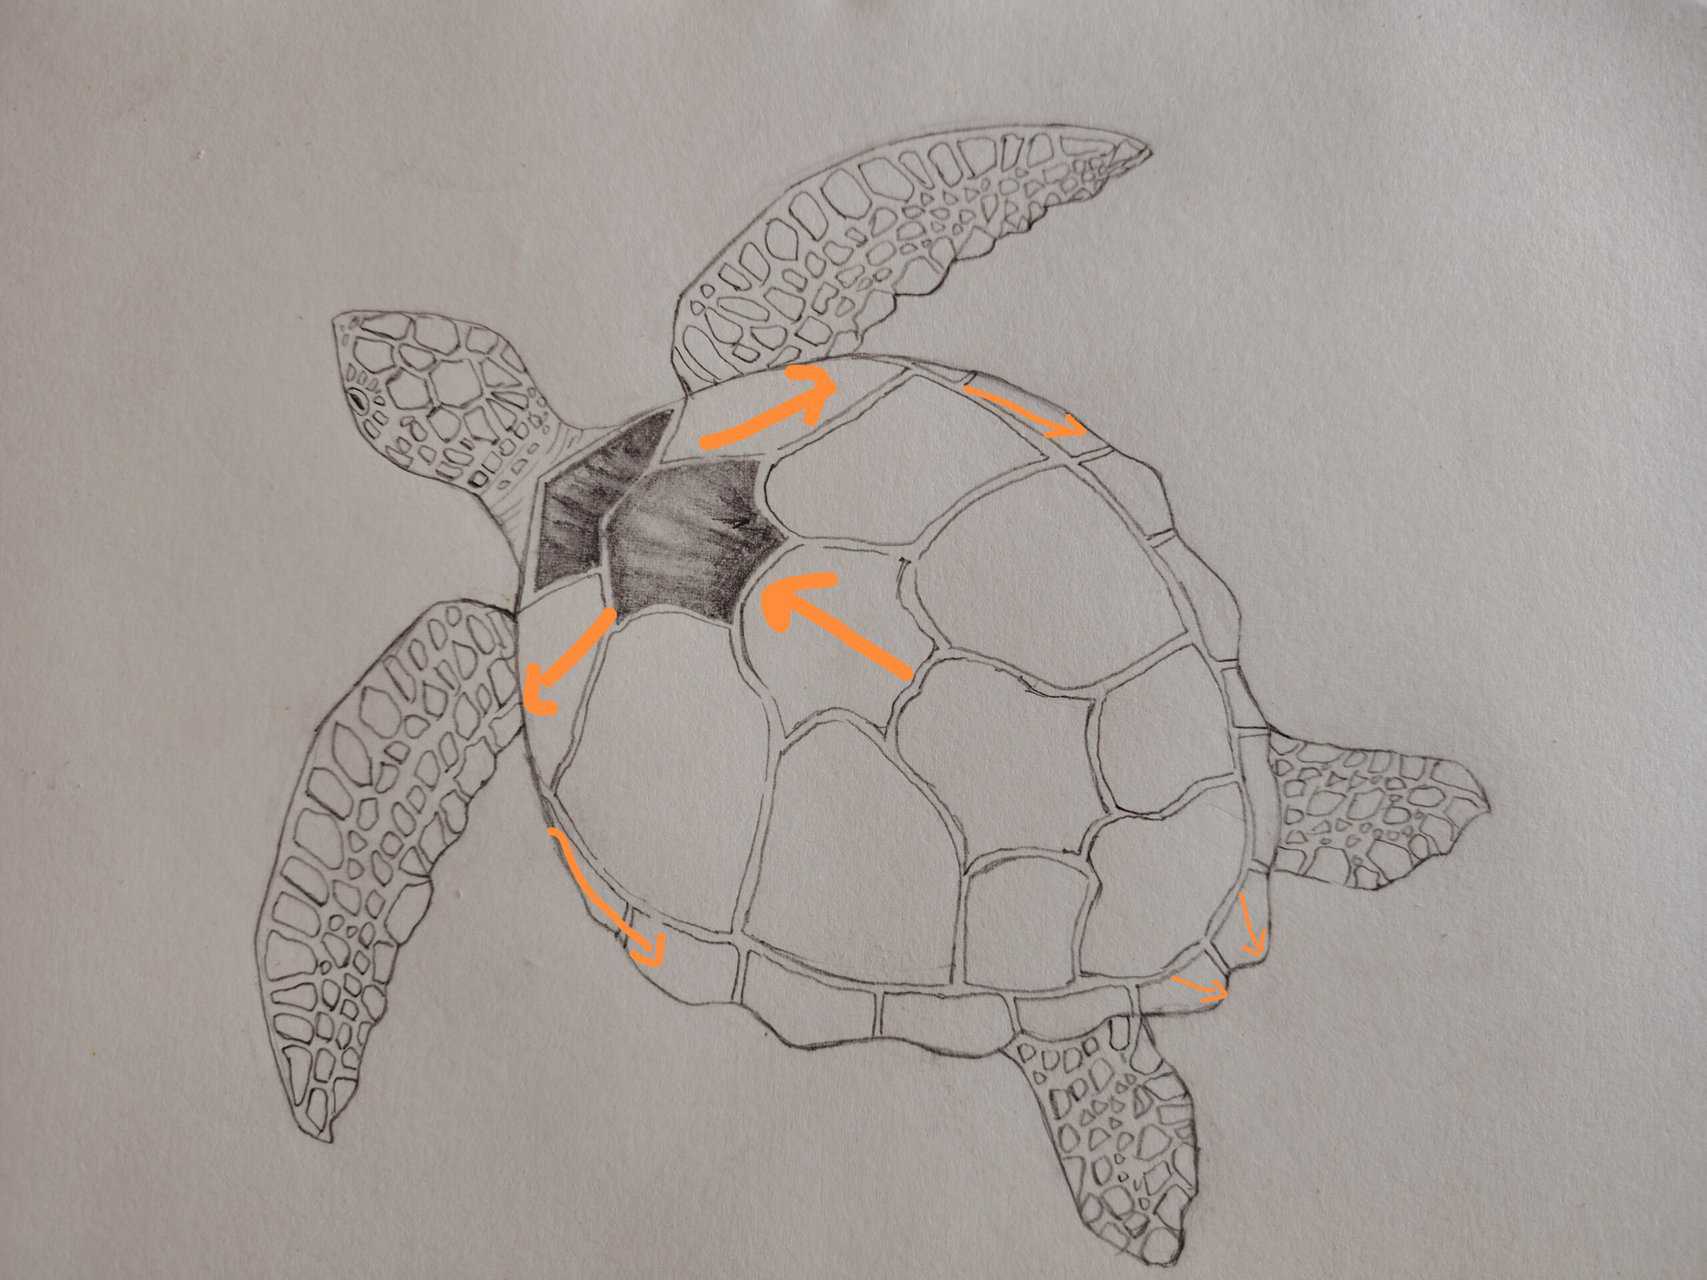
Step: 20
Complete the shell shading, ensuring all sections are adequately shaded.

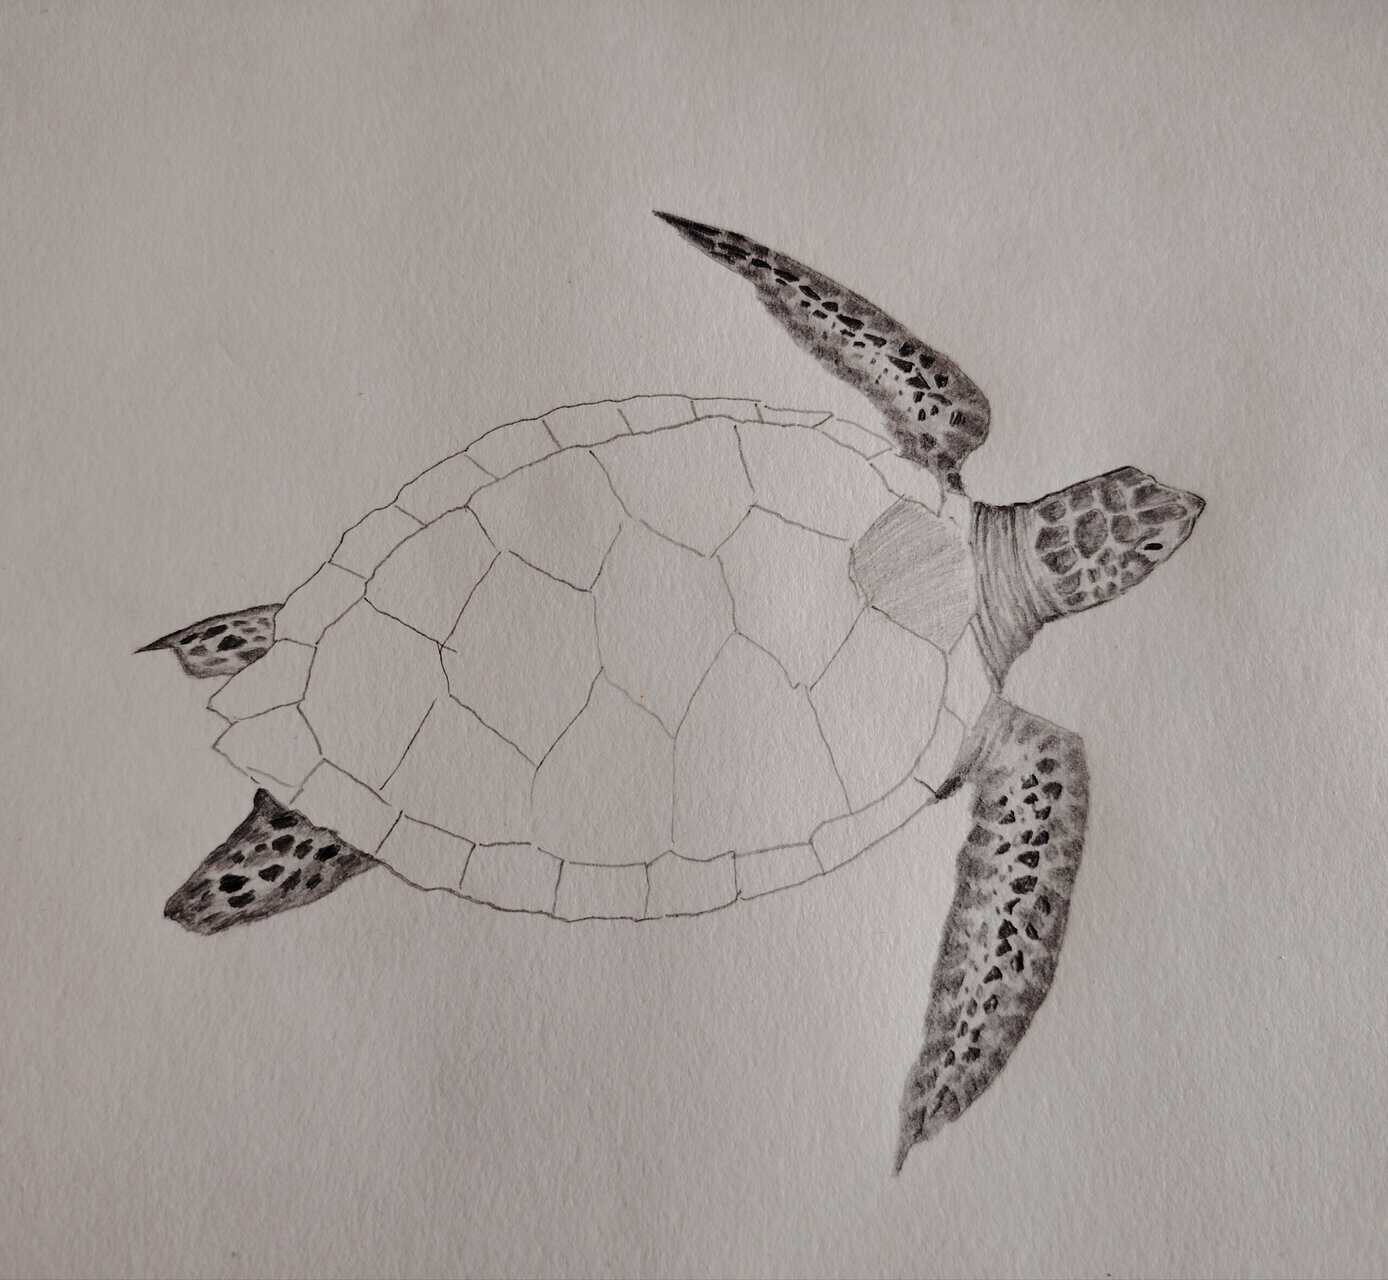
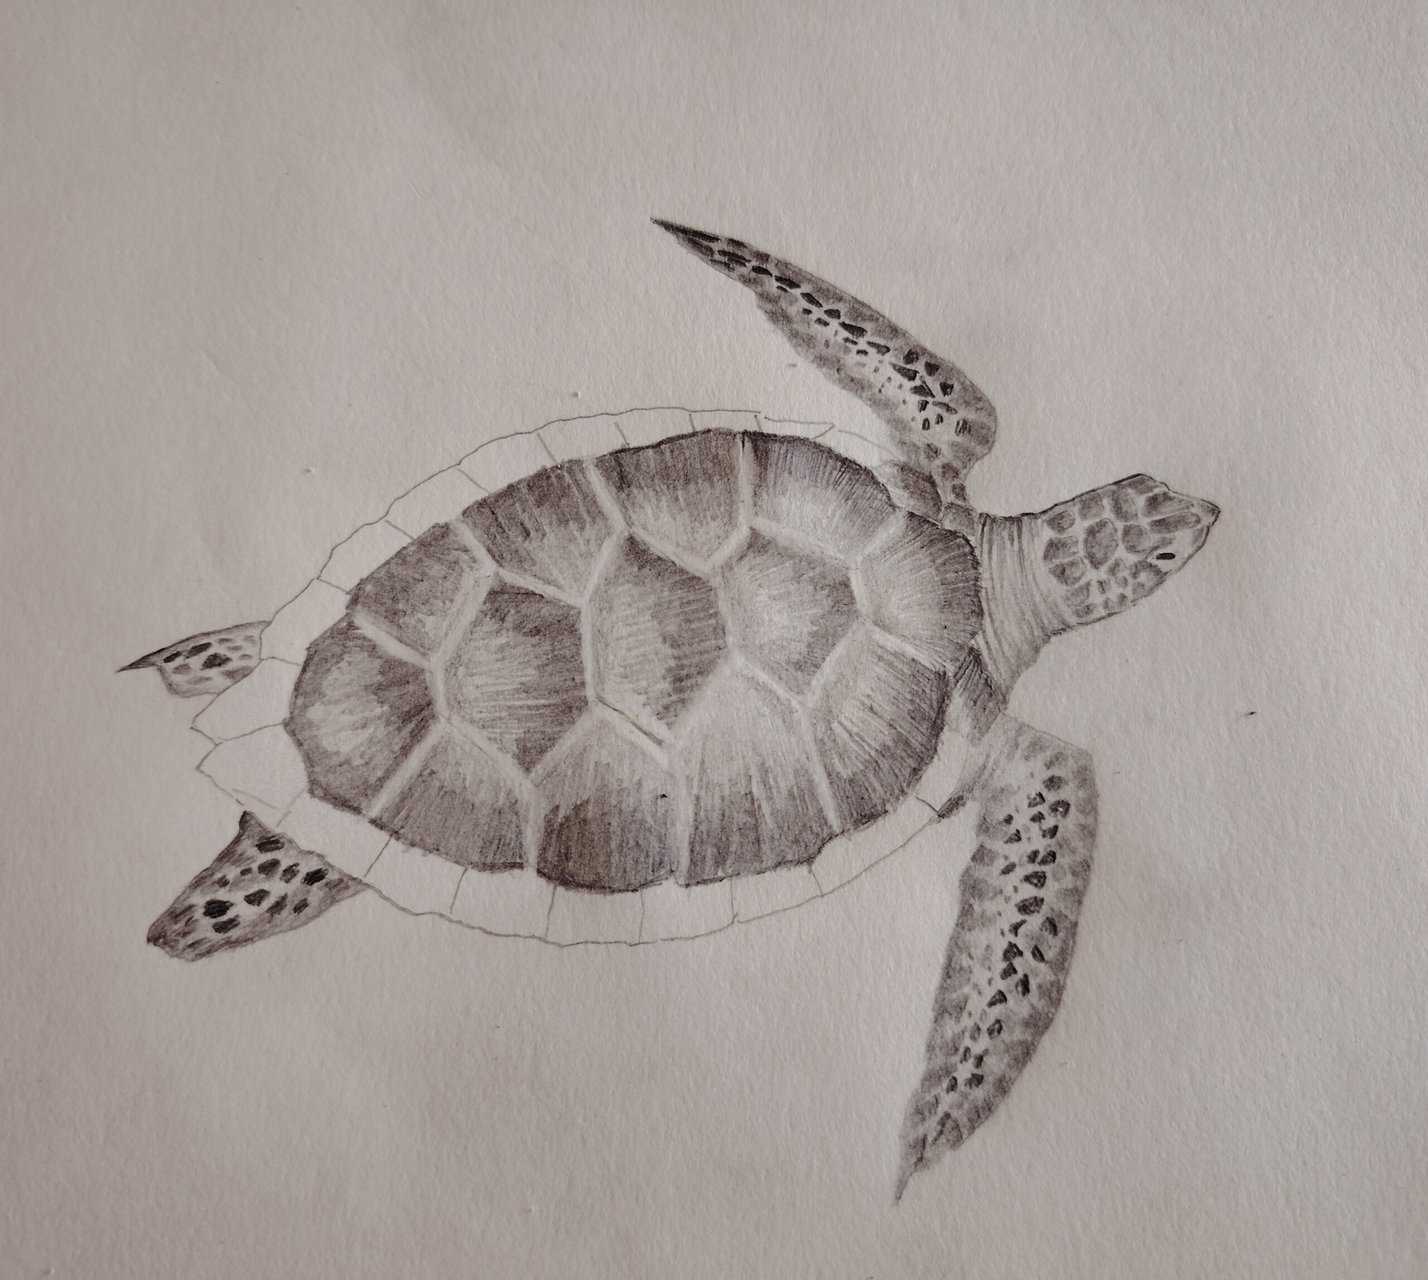
Step: 21
Shade the top layer of flipper scales lightly.
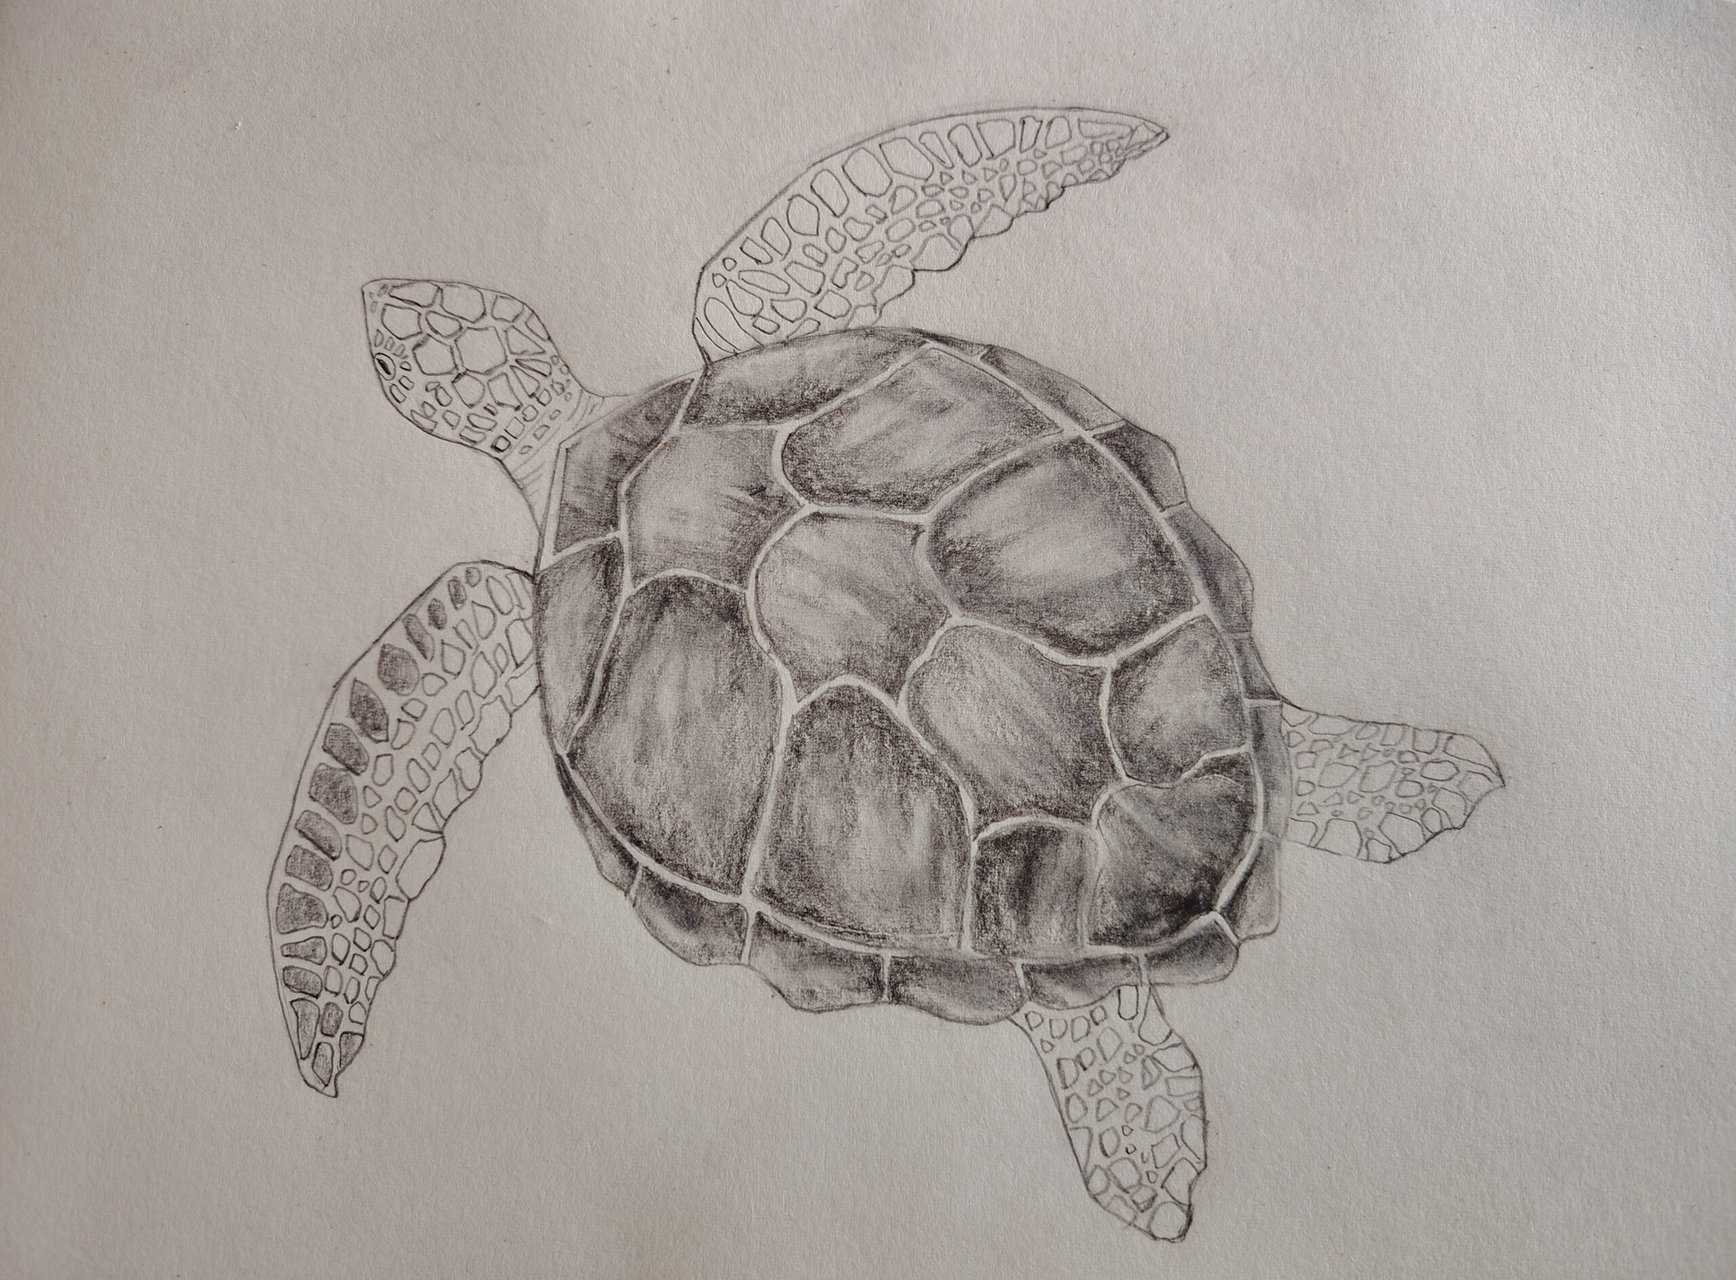
Step: 22
Darken the remaining scales on the flippers for contrast.
Step: 23
Add subtle shadows around the edges of the flippers for depth.
Step: 24
Repeat the shading process for all flippers, maintaining a consistent tone.
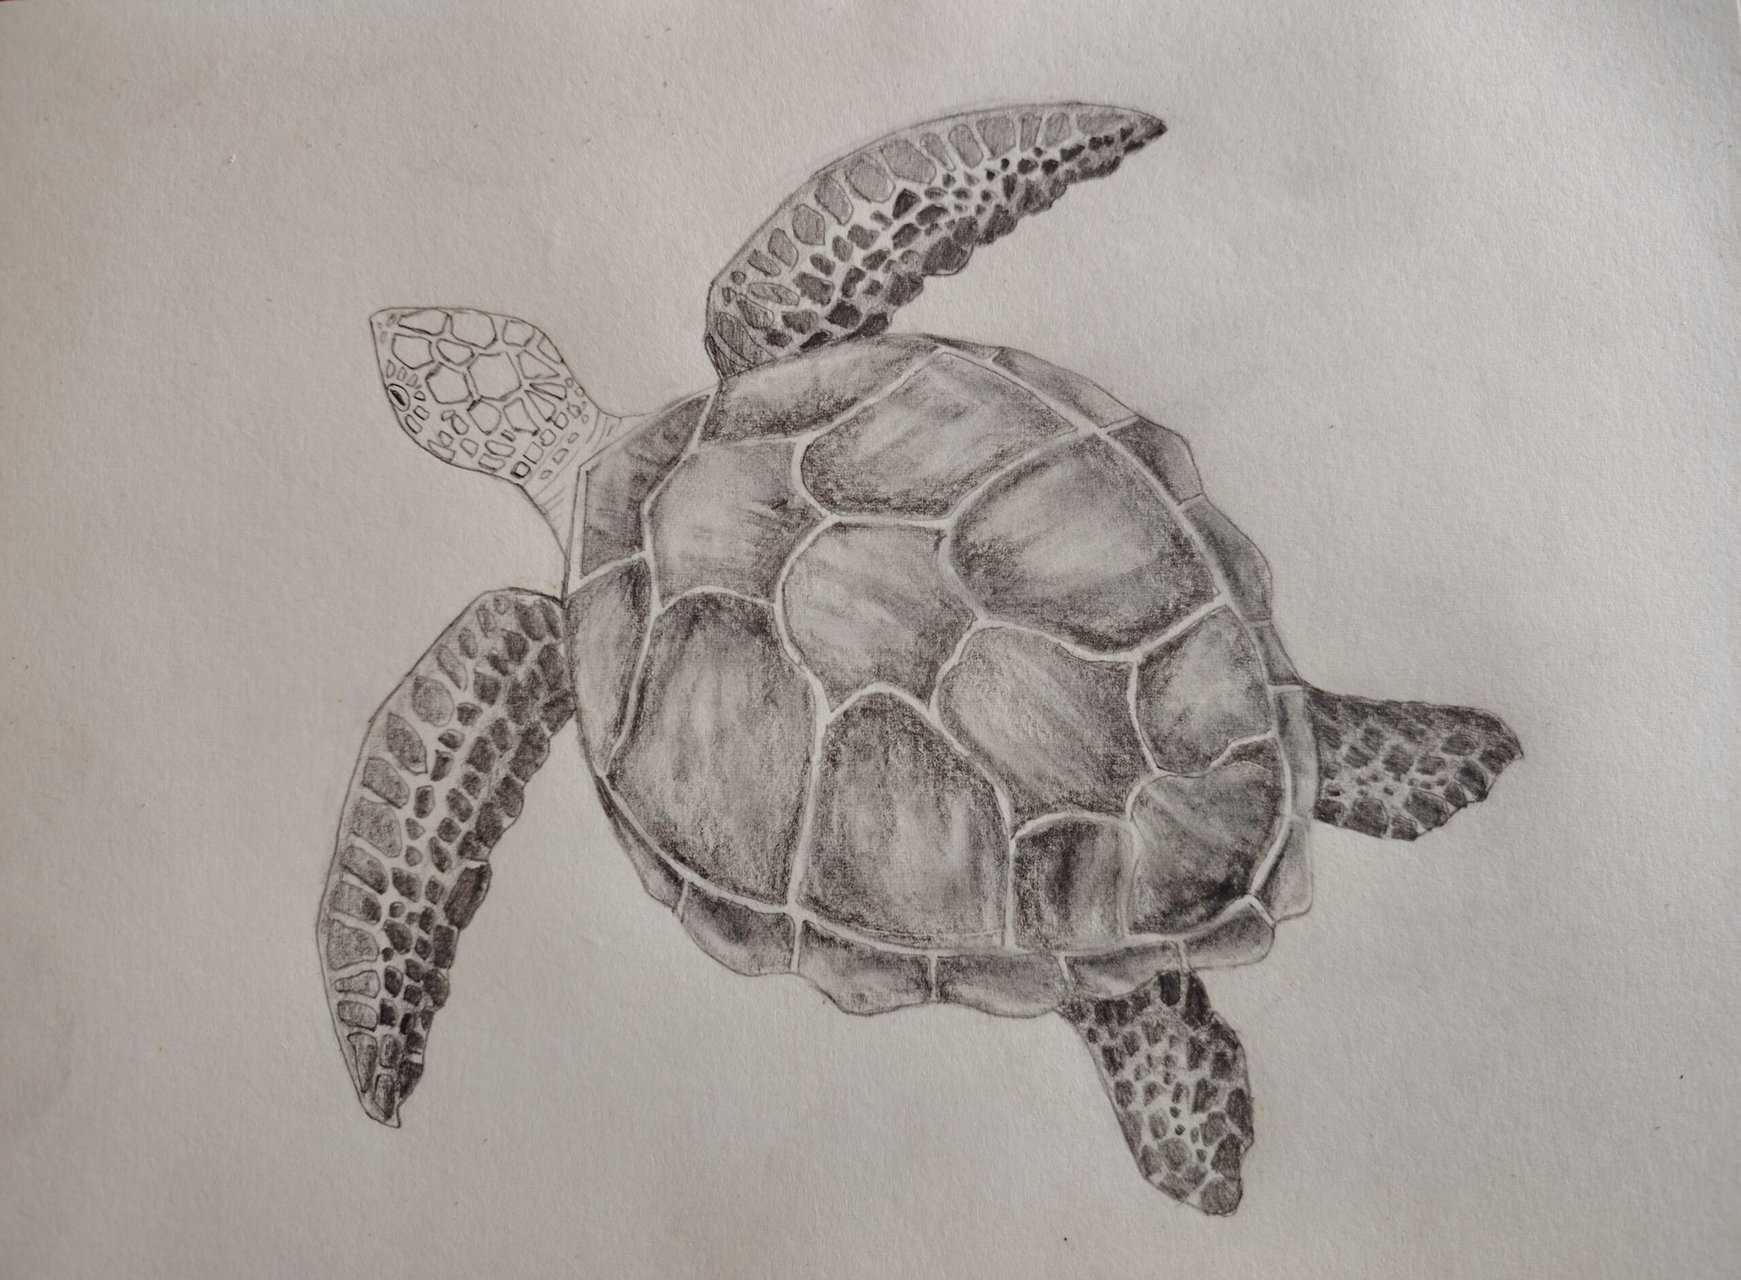
Step: 25
Darken the larger scales on the head for contrast.
Step: 26
Apply a light layer of graphite to the remaining head scales for gradual shading.
Step: 27
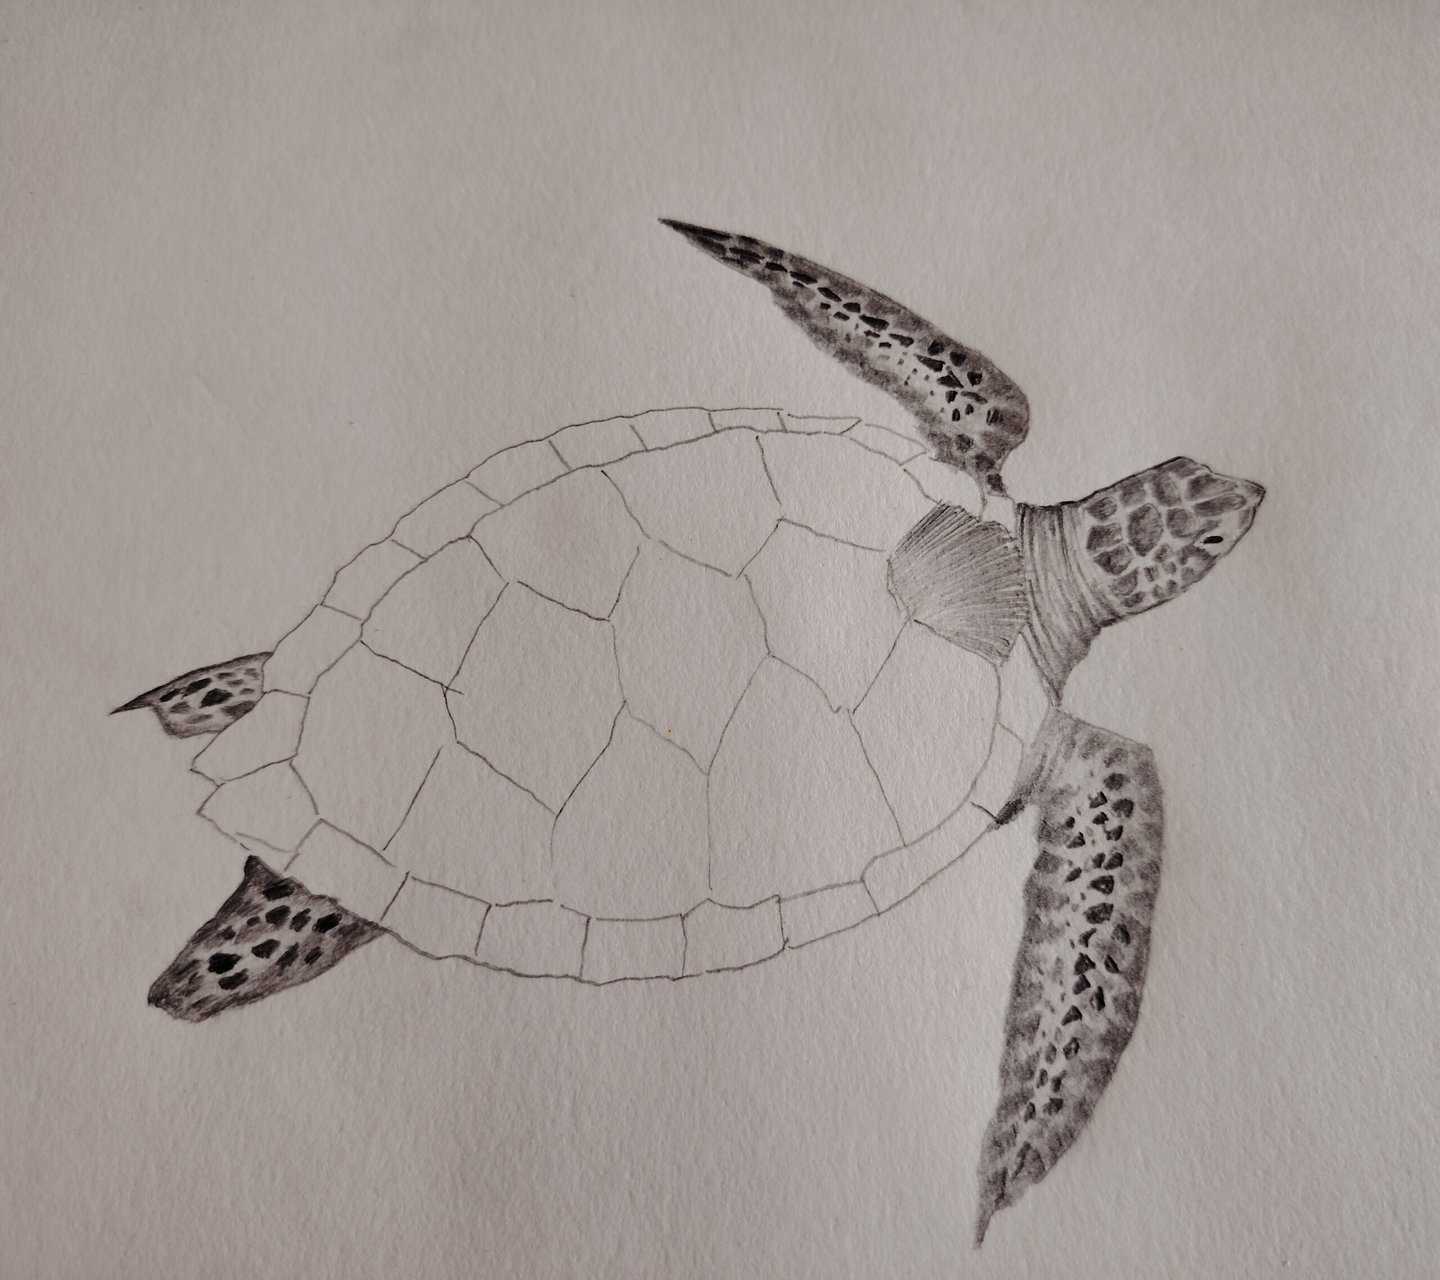
Define the lines of the neck and add shadows for structure.
Step: 28
Define the eyes further and add subtle shadows around the head edges.
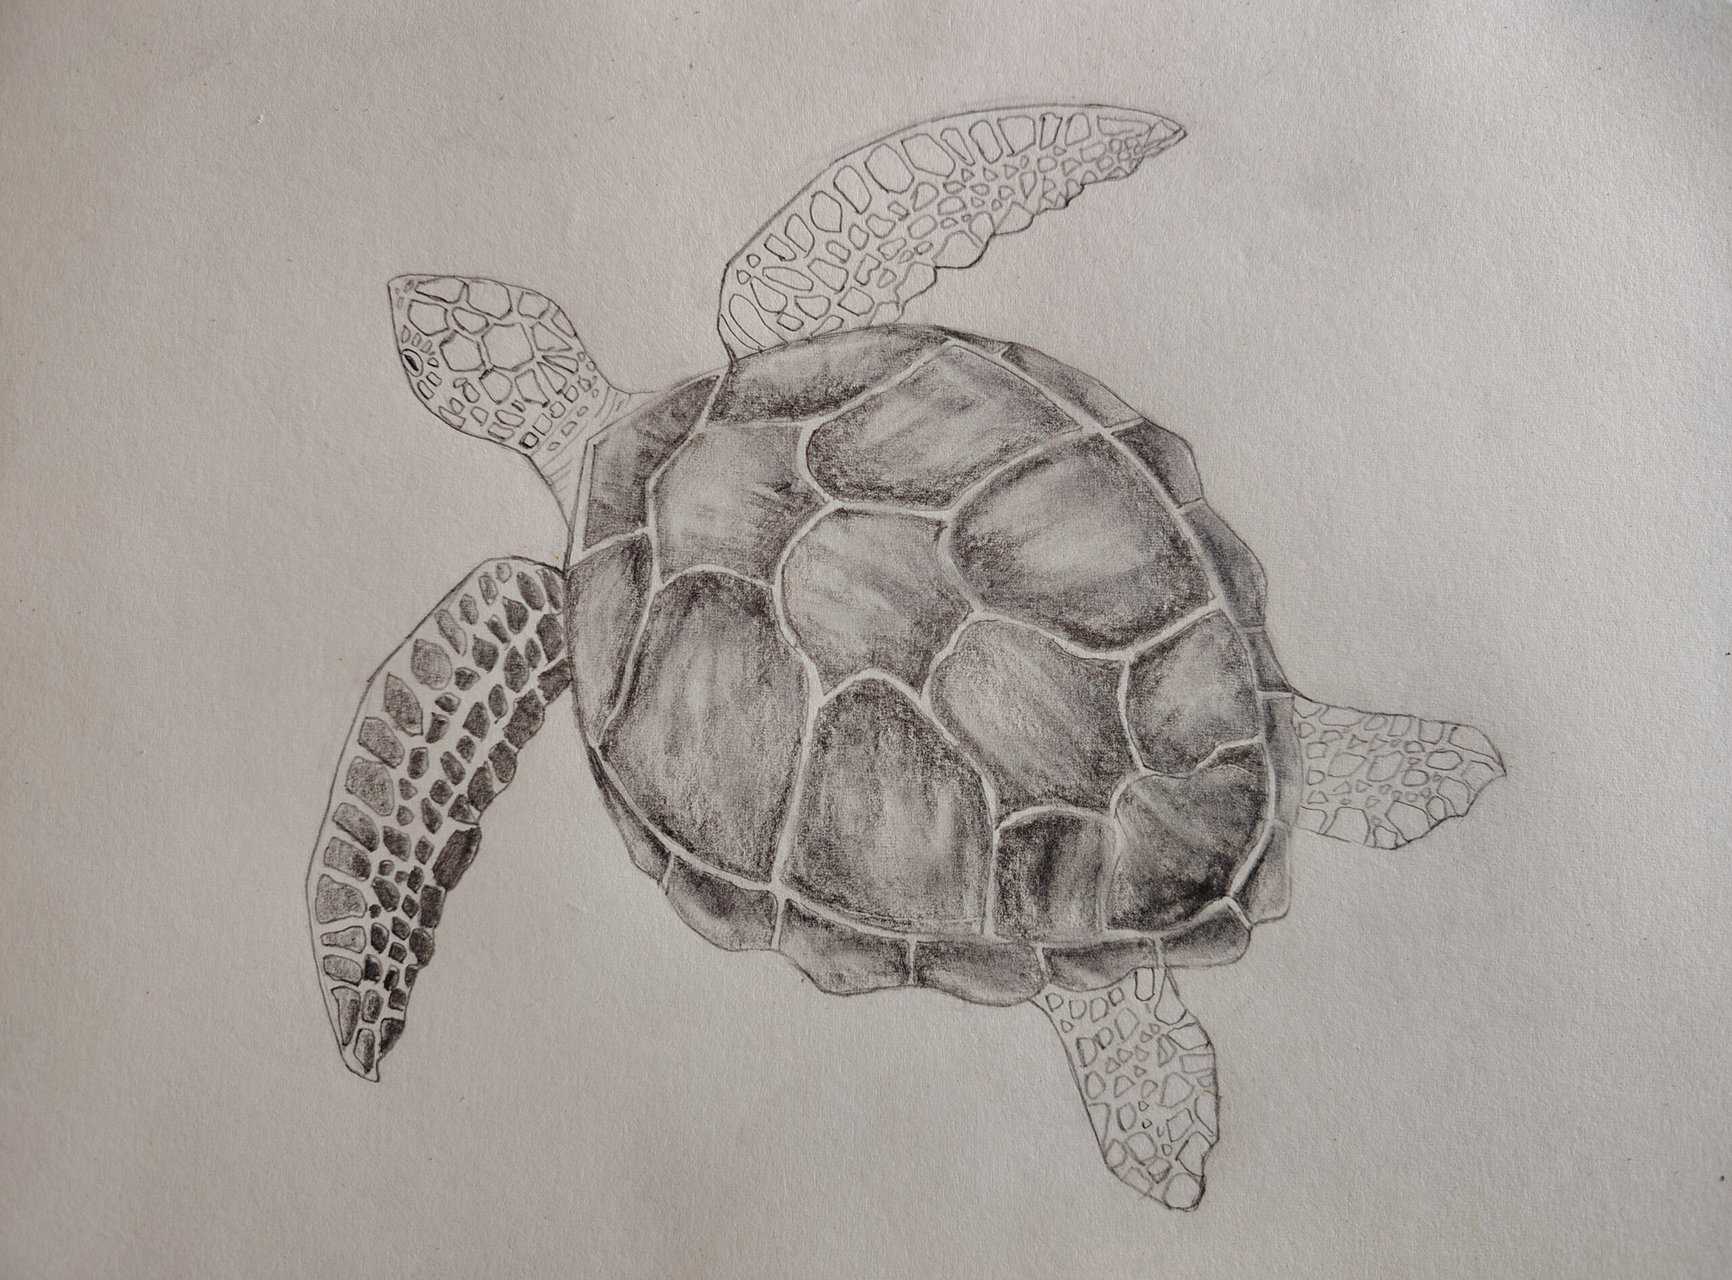
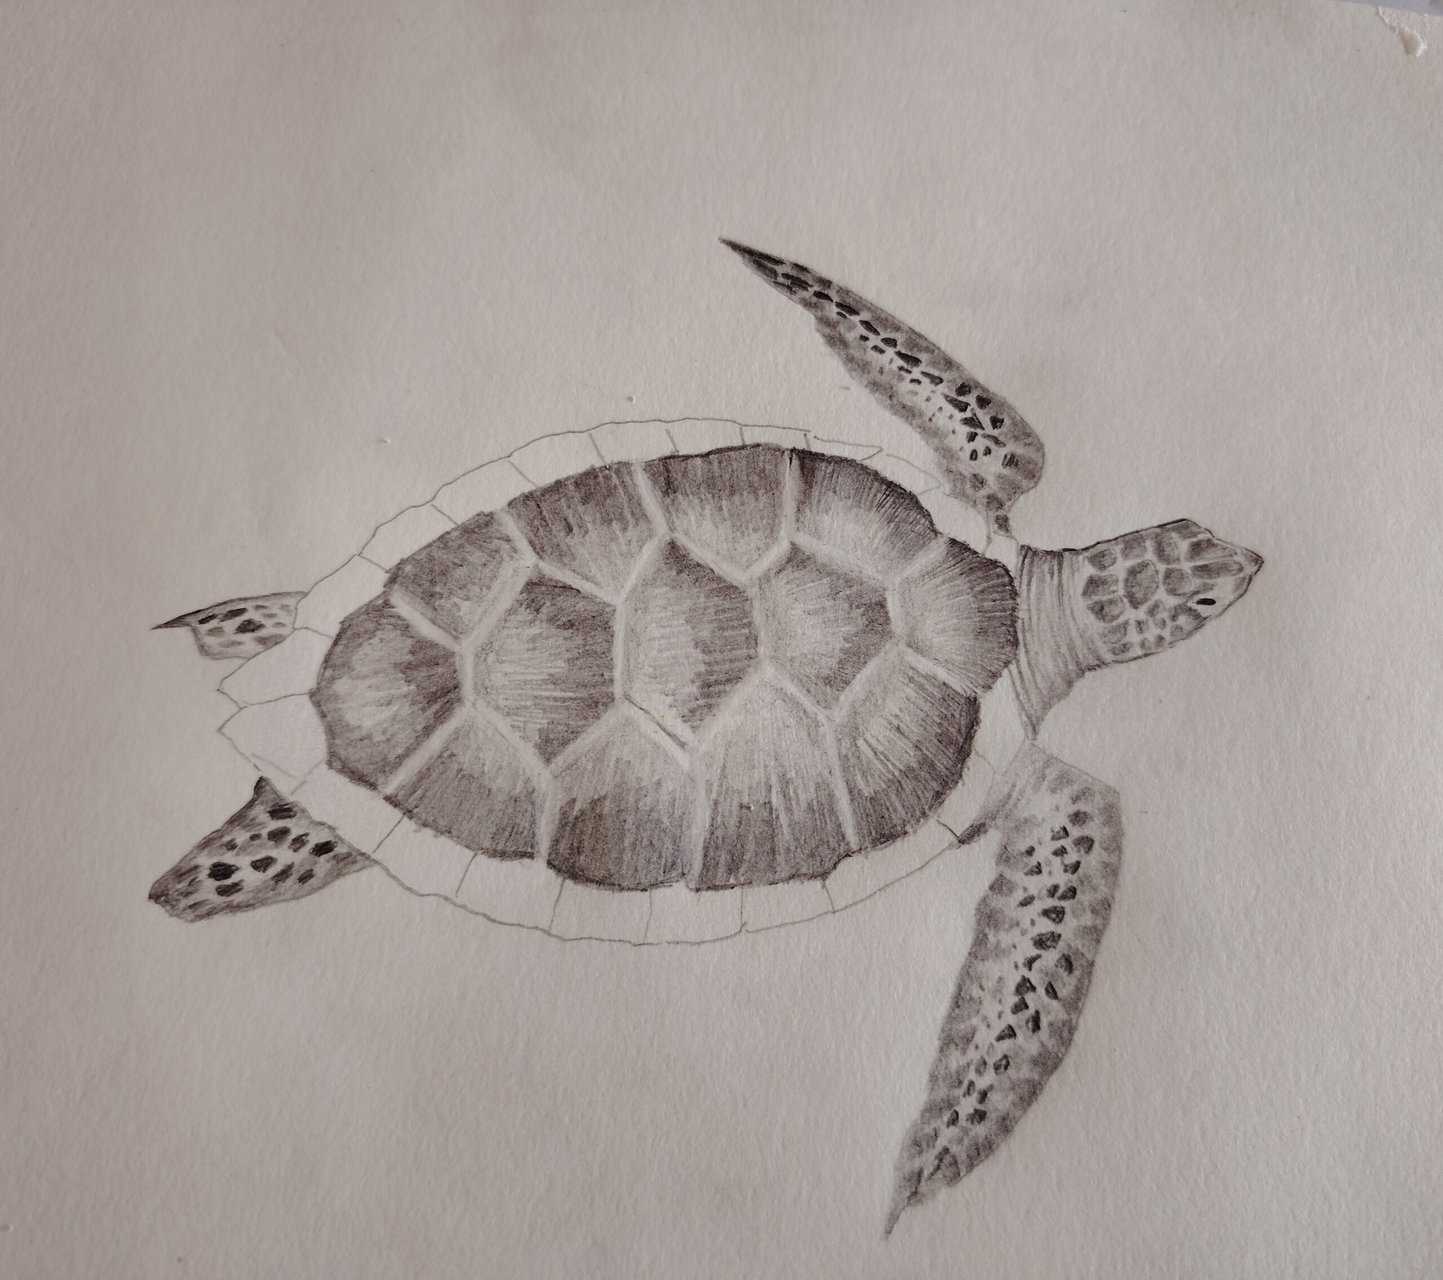
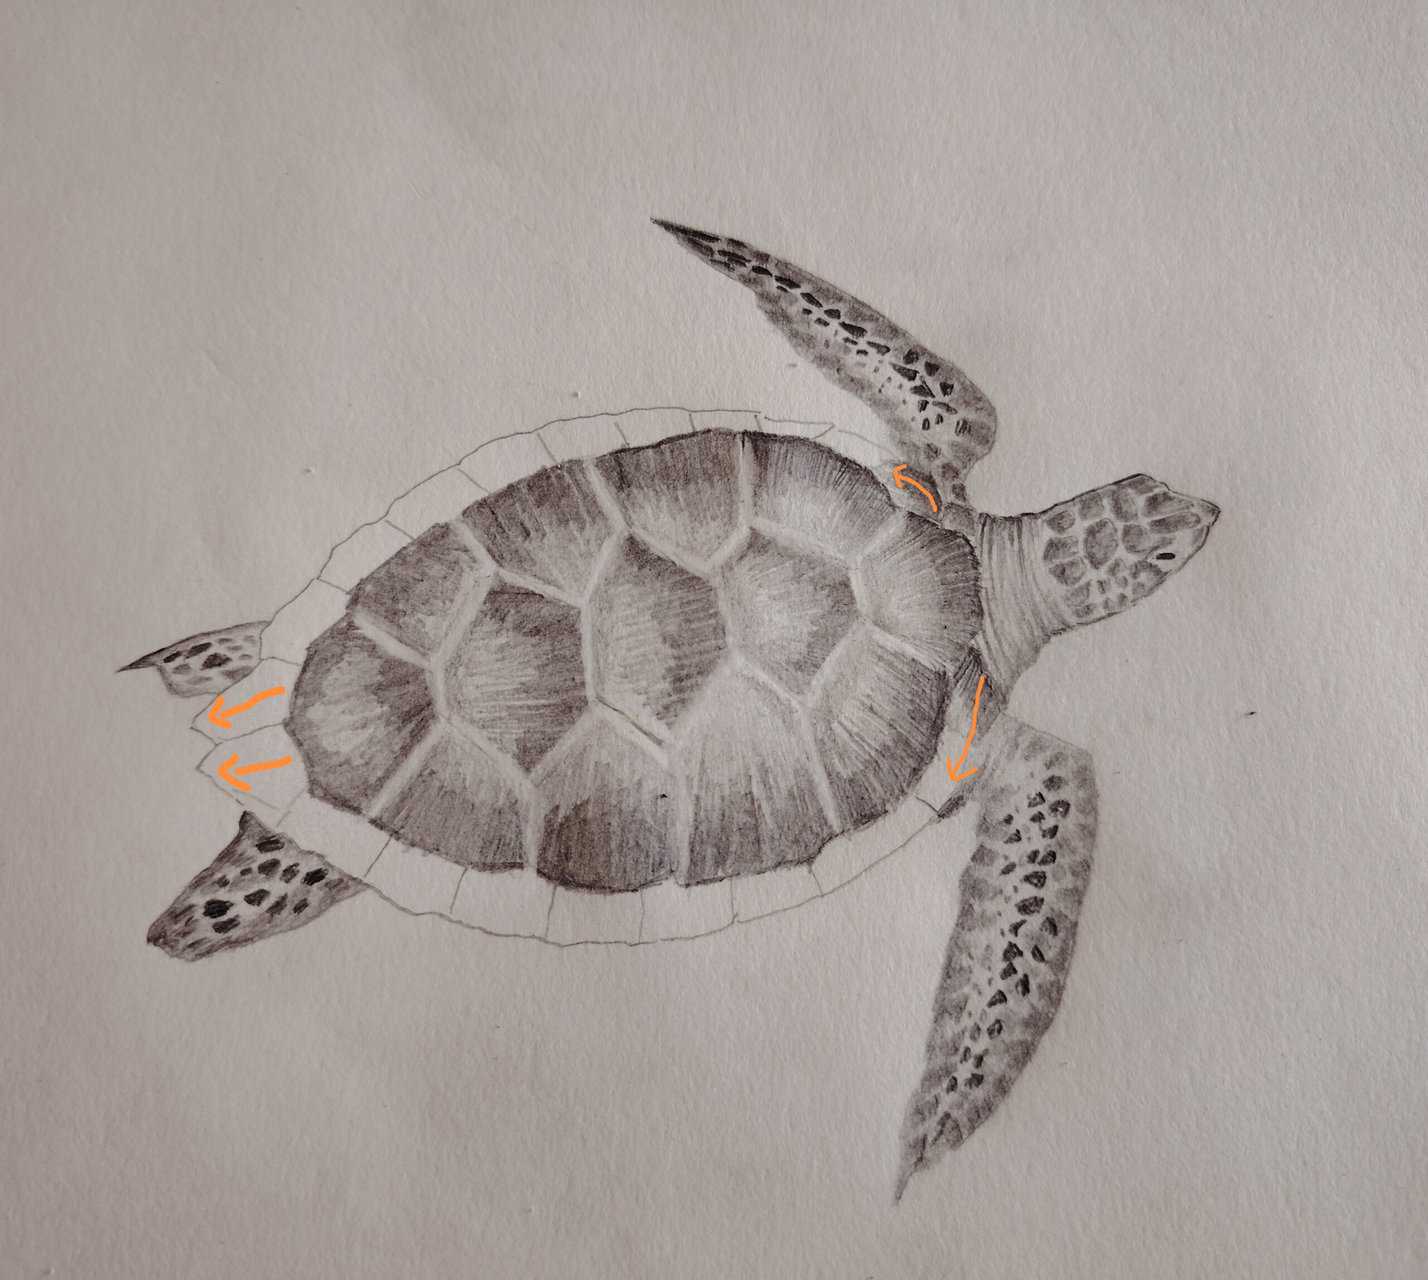
Step: 29
Refine the illustration by erasing and adjusting sections of the head, shell, and flippers for a polished look.
This Hilarious Turtle Book Might Know Your Pet Better Than You Do

Let’s be real—most turtle care guides feel like reading a textbook written by a sleep-deprived zookeeper.
This one’s not that.
Told from the snarky point of view of a grumpy, judgmental turtle, 21 Turtle Truths You’ll Never Read in a Care Guide is packed with sarcasm, sass, and surprisingly useful insights.
And hey—you don’t have to commit to the whole thing just yet.
Grab 2 free truths from the ebook and get a taste of what your turtle really thinks about your setup, your food choices, and that weird plastic palm tree.
It’s funny, it’s honest, and if you’ve ever owned a turtle who glares at you like you’re the problem—you’ll feel seen.
method 2
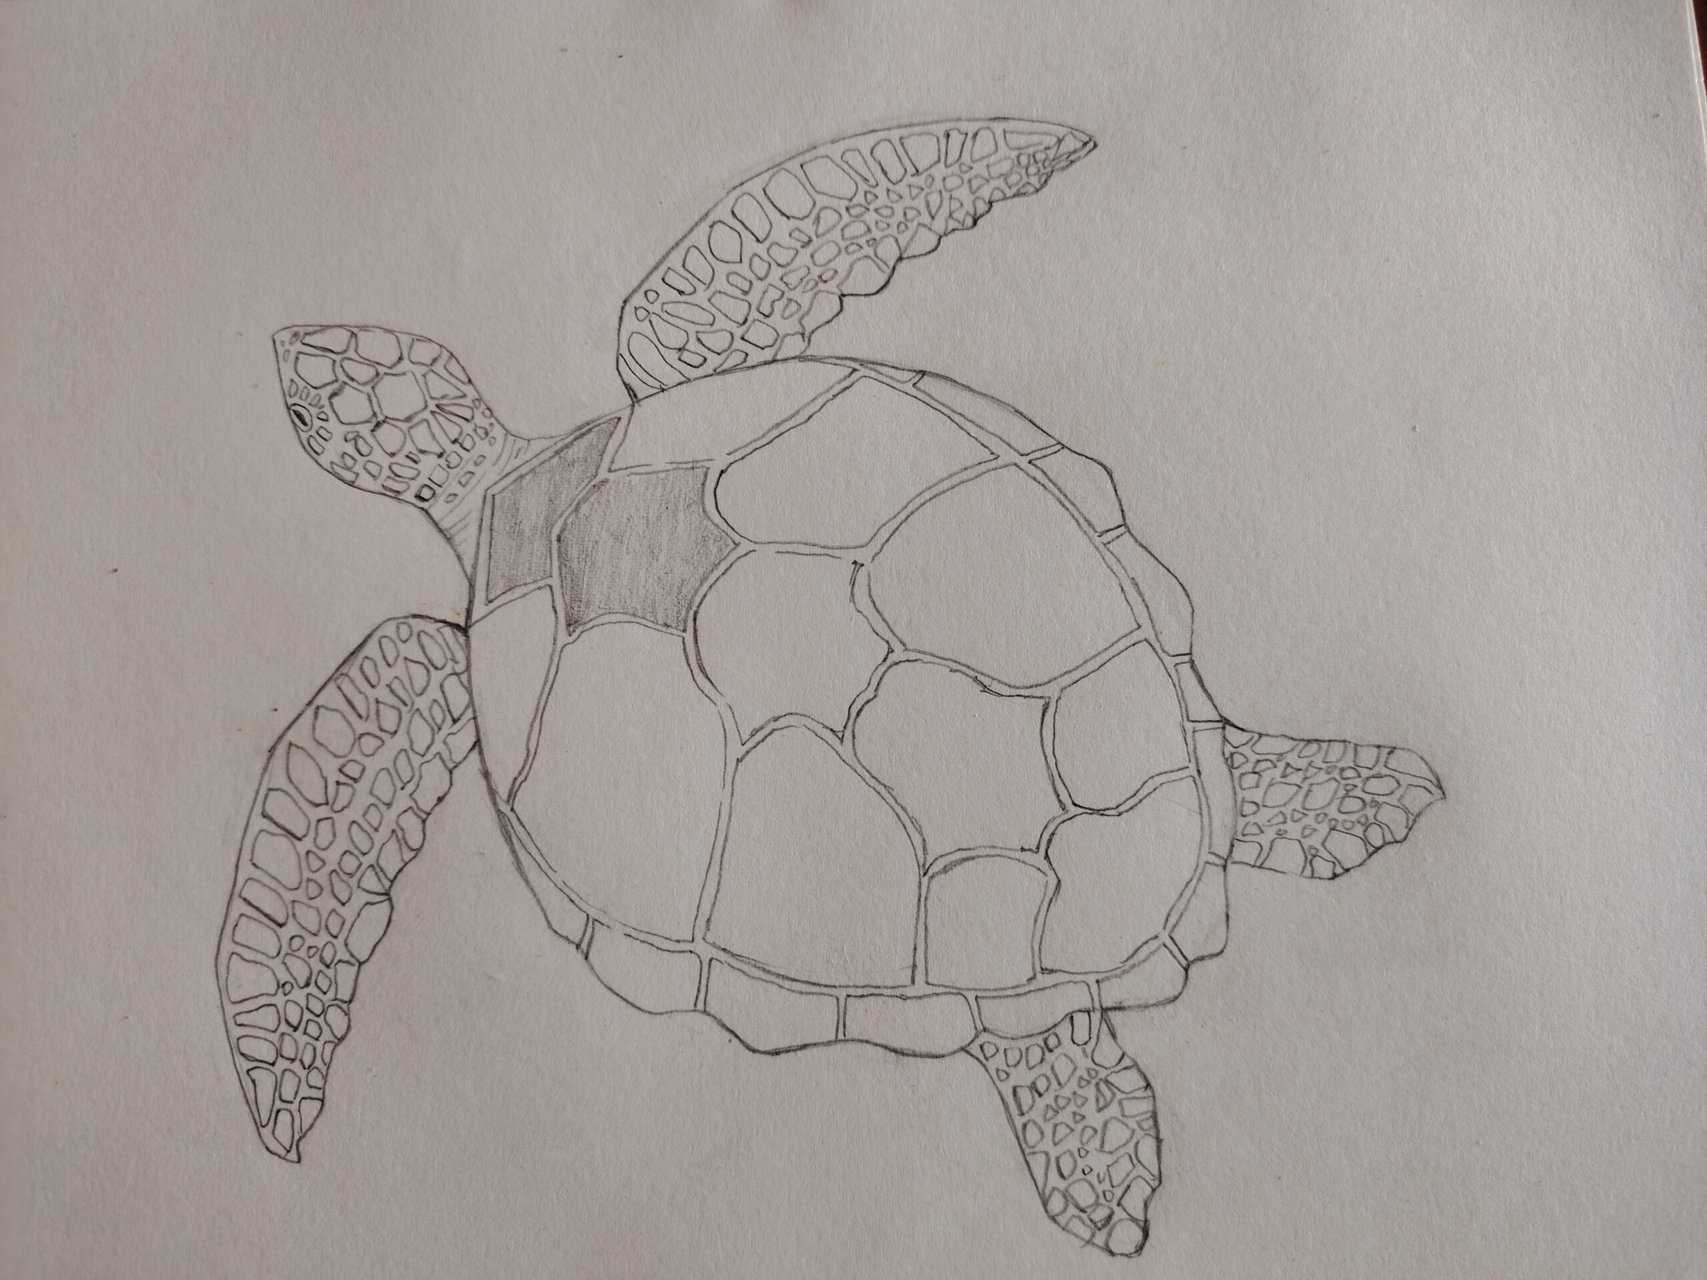
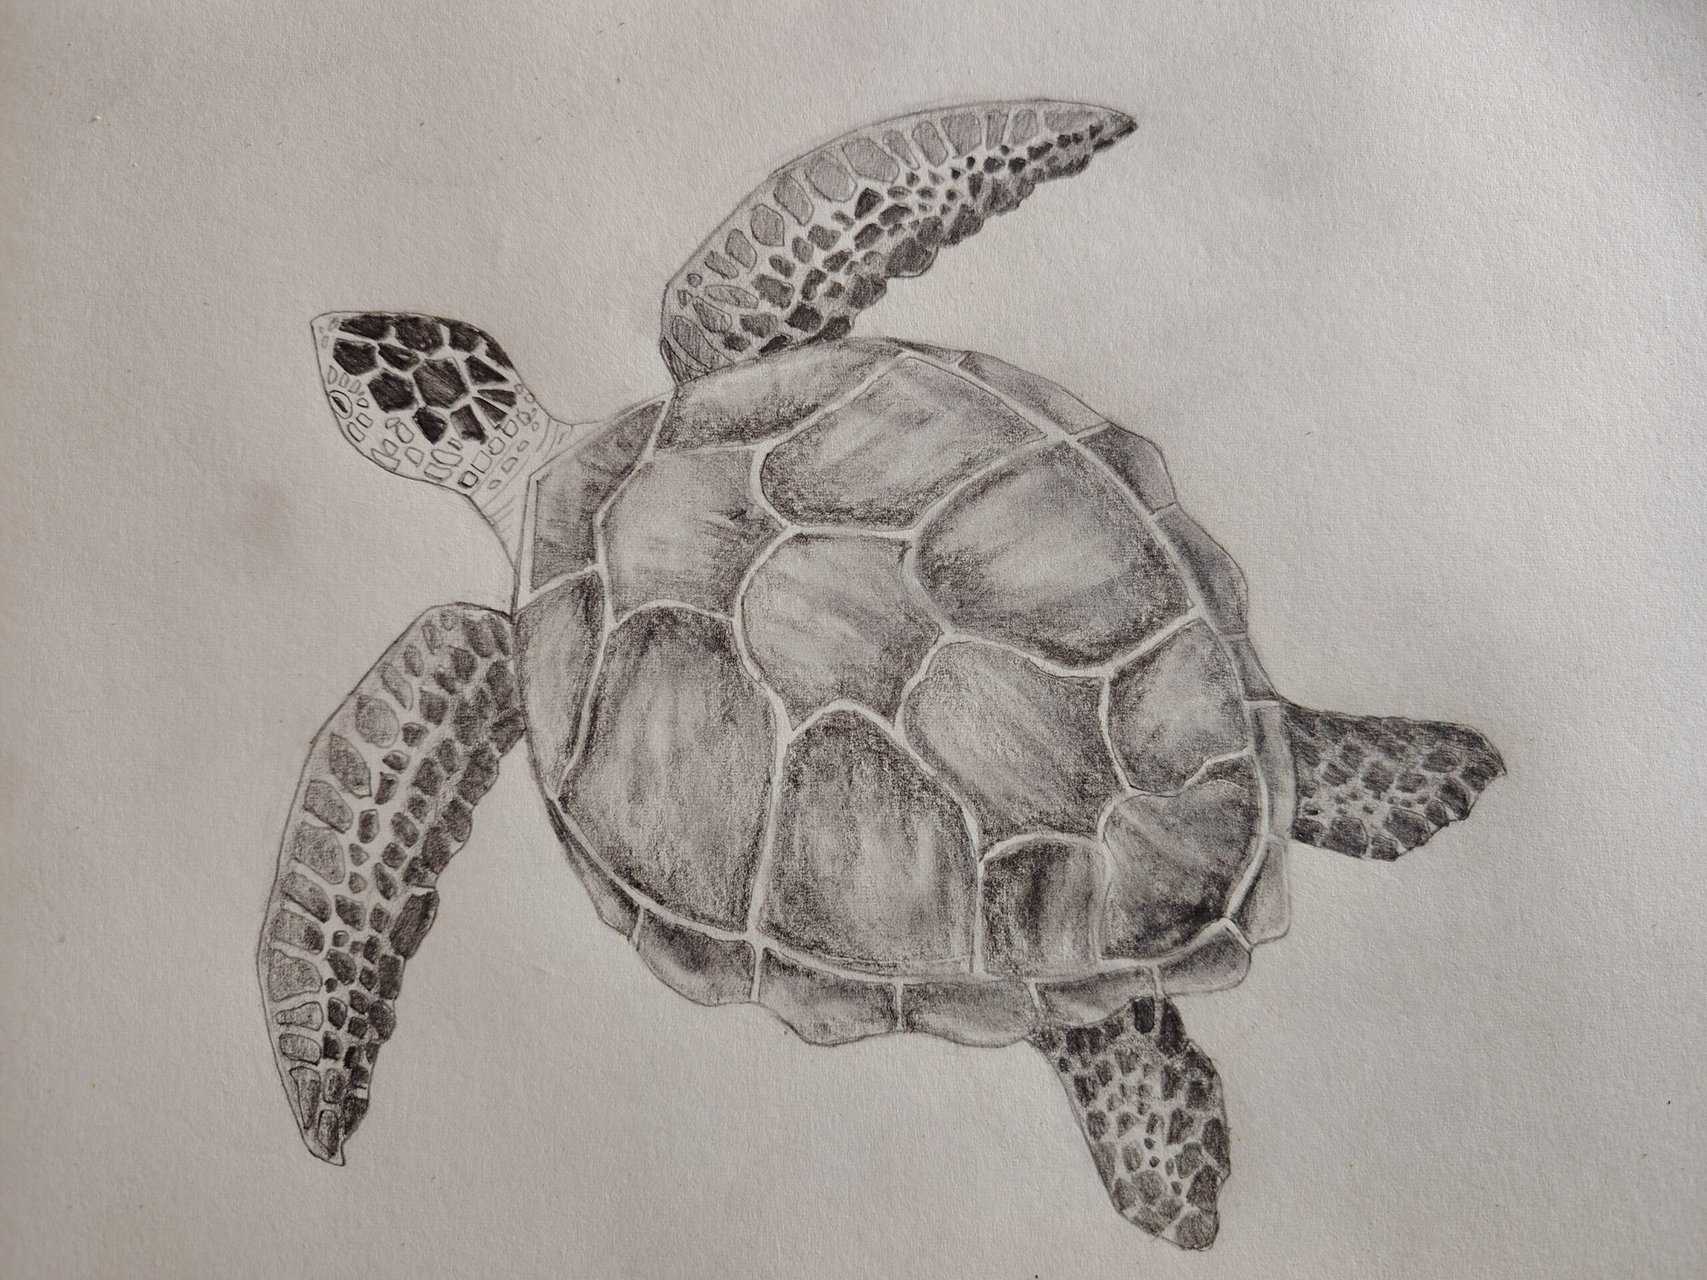
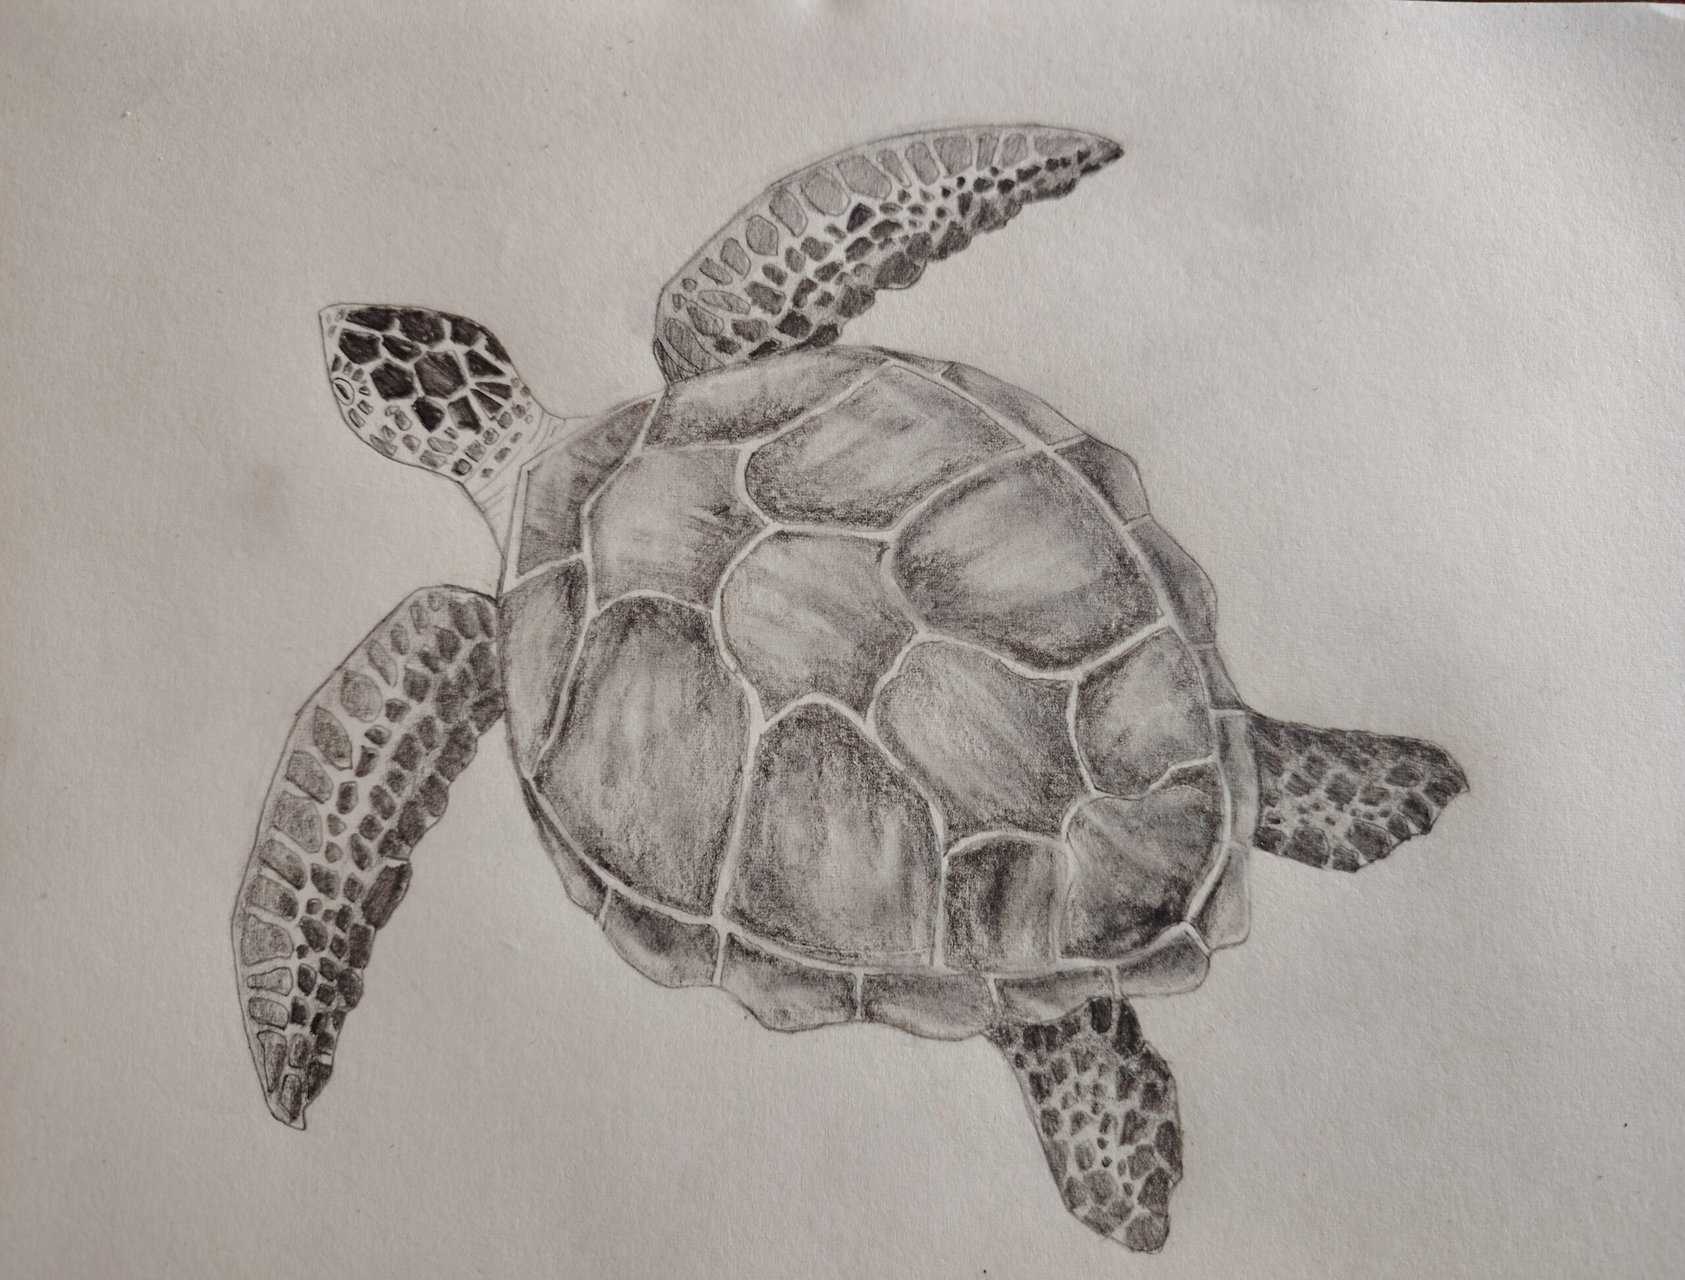
Step: 1
First, we would need to select a reference. We can collect our turtle references from Google, Pinterest, or from any other platform. I took my reference from Pinterest.

Step: 2
Then, to trace our sample, we will need to put paper over the display of the device we are using.
Step: 3
Lightly trace the turtle reference on the paper with an HB pencil.
Step: 4
Next is shading the turtle. For shading the flippers, first, we would use an HB pencil to lay out a light layer of graphite.
Step: 5
Around the edges of the flippers, we would put darker shadows with a 2B pencil.
Step: 6
For the scale-looking part of the turtle’s soft body, let’s put some small irregular shapes with a 2B pencil focusing around the edges.
Step: 7
Now let’s put some darker spots with a 4B pencil focusing on the center of the flippers.

Step: 8
For shadowing the head, first, let’s put a light layer of graphite with an HB pencil.

Step: 9
Let’s put some lines to replicate the folded skin of the neck.

Step: 10
Then let’s outline some shapes onto the rest of the head making them small around the eye.

Step: 11
Fill the shapes lightly with a 2B pencil.
Step: 12
Make the shapes darker around the edges and also darken the eyes with a 4B pencil, and our head portion is complete.
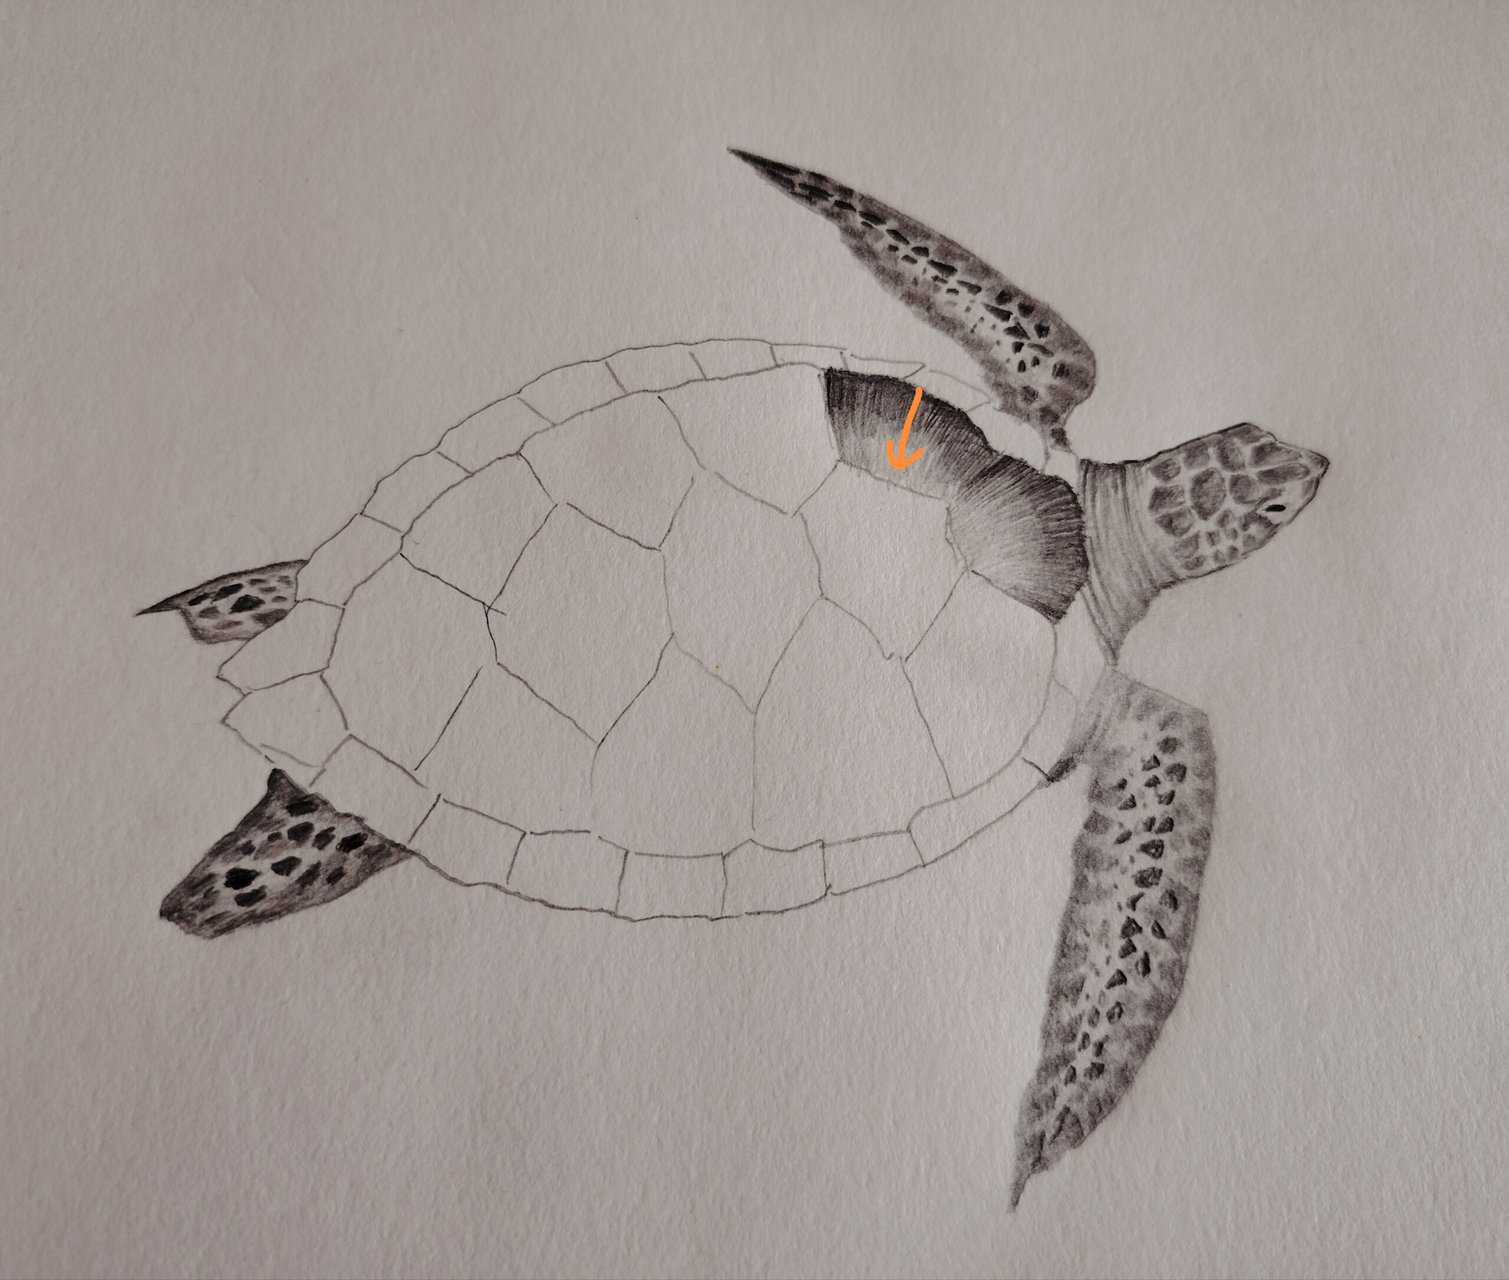
Step: 13
For the shell, first, let’s use an HB pencil to lay out a light layer of graphite.
Step: 14
Let’s use a 2B pencil and put lines from the outer to inner portion of the shell, leaving the inner portion relatively free from graphite.
Step: 15
With a 4B pencil darken the outer edge of the shell.

Step: 16
Follow the above steps and color the left section of the shell.
Step: 17
Now the right section
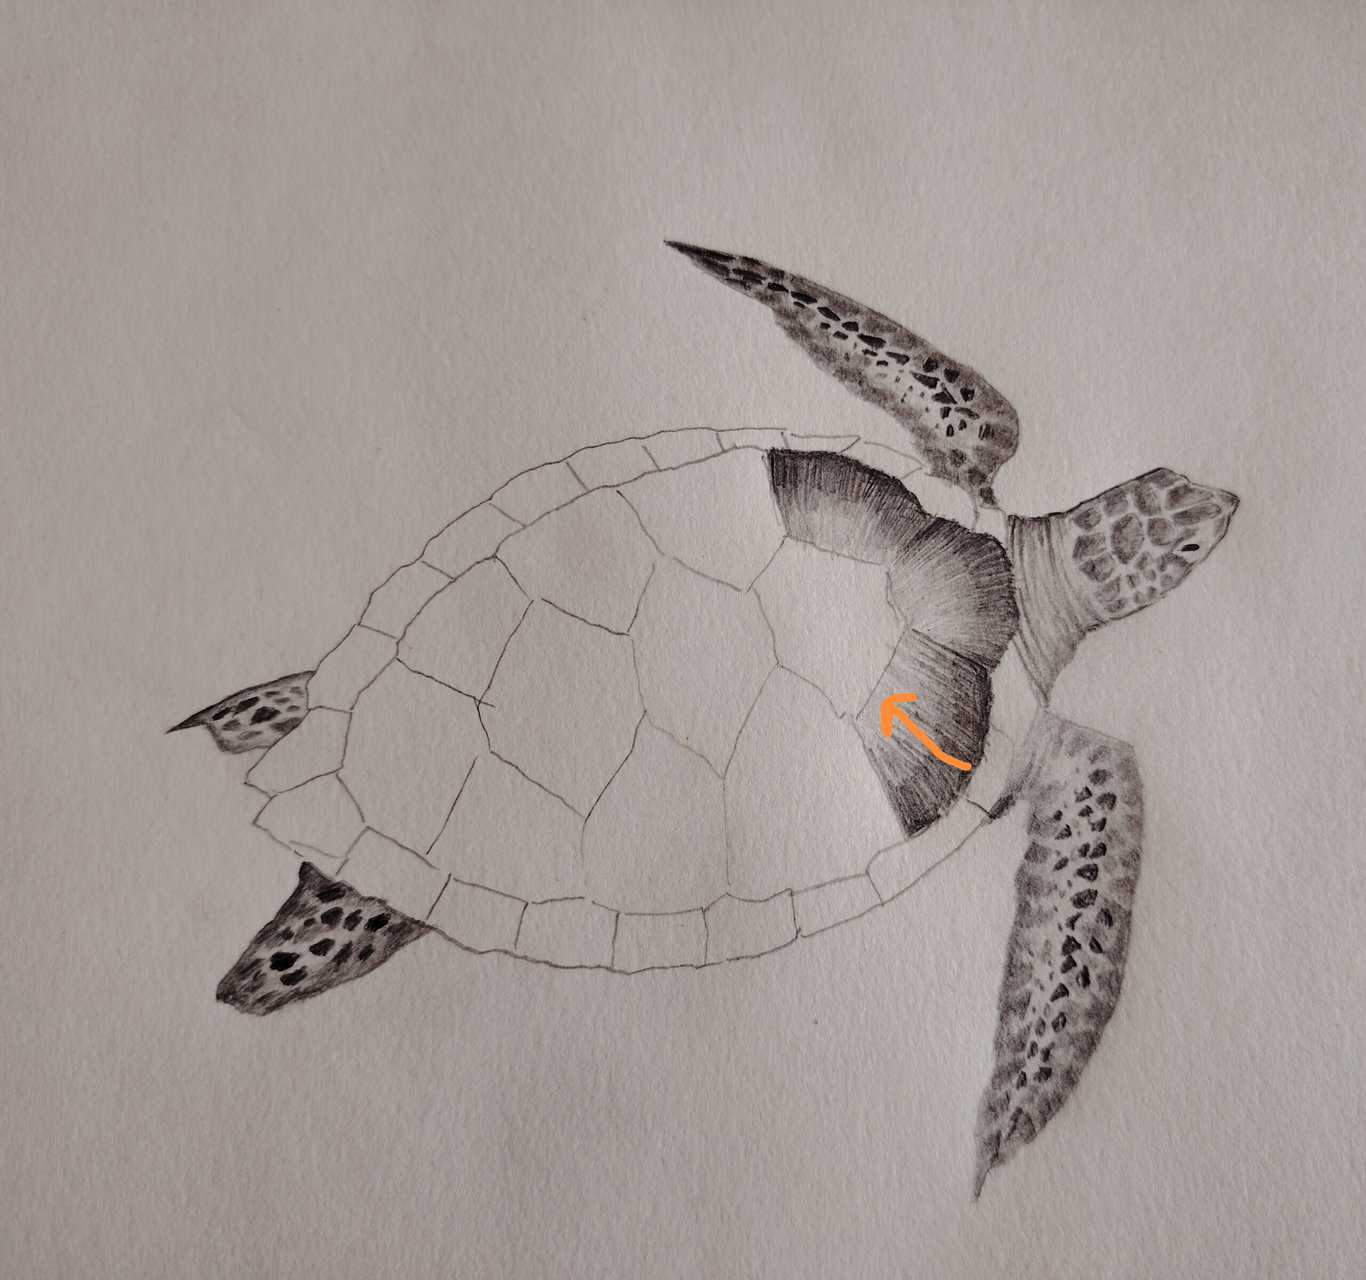
Step: 18
Continue the process and complete the whole shell.
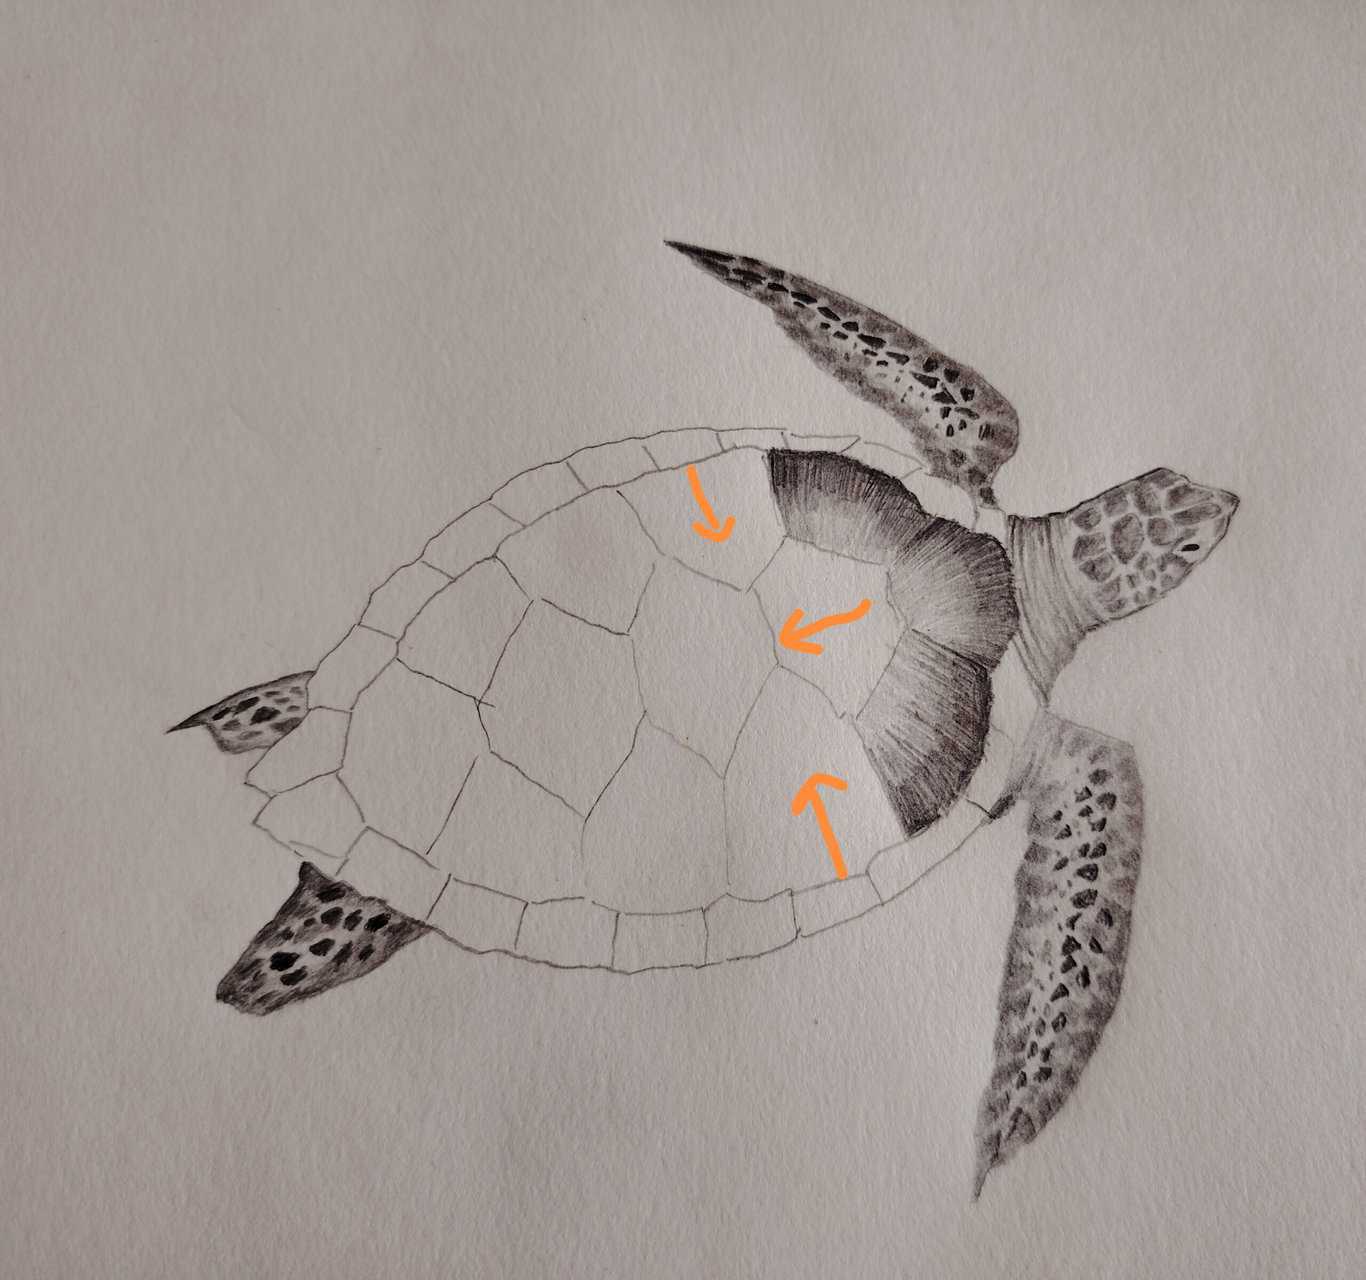
Step: 19
Once the shell is filled, refine the edges.
Step: 20
With a mono eraser, separate the connected parts with thin lines.

Step: 21
Refine the erased part with a 2B pencil.
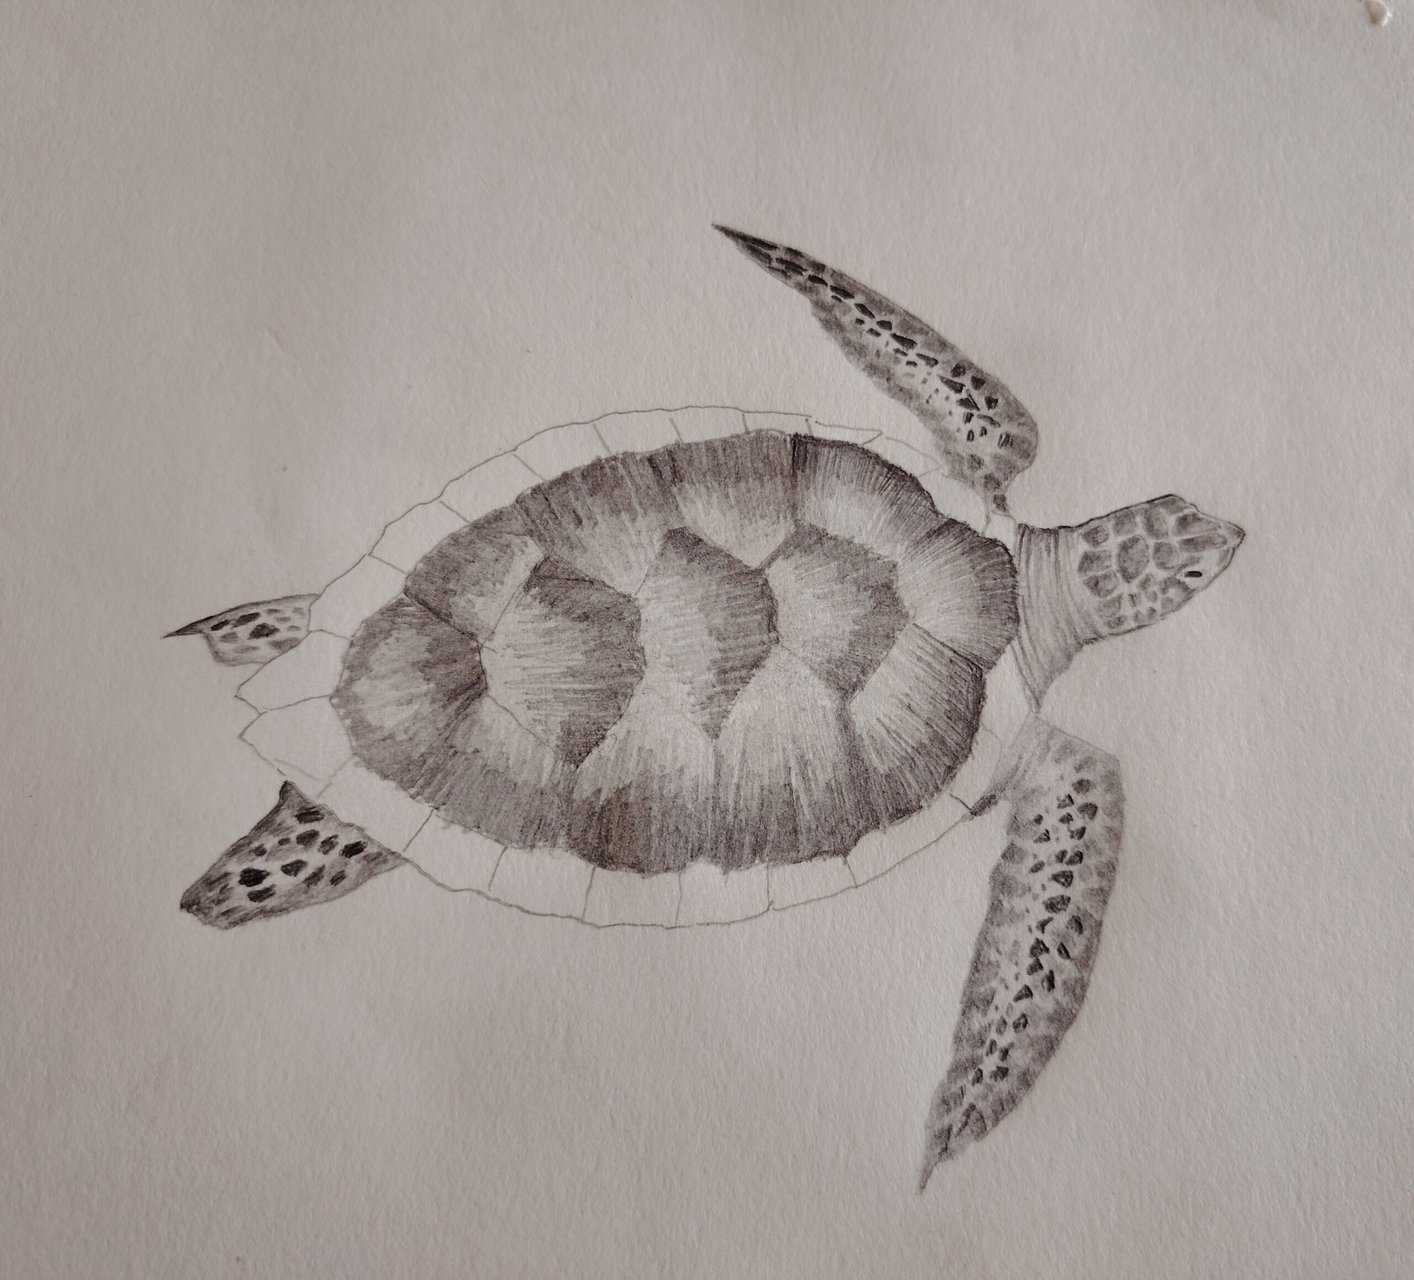
Step: 22
For the remaining outer part of the shell, first, let’s use an HB pencil to lay out a light layer of graphite.
Step: 23
Darken the outer edges with a 2B pencil.
Step: 24
Follow this process for the remainder of the shell.
Step: 25
Once complete, refine the edges.
Step: 26
Erase with a mono eraser and create thin lines, separating the connected part of the shell.
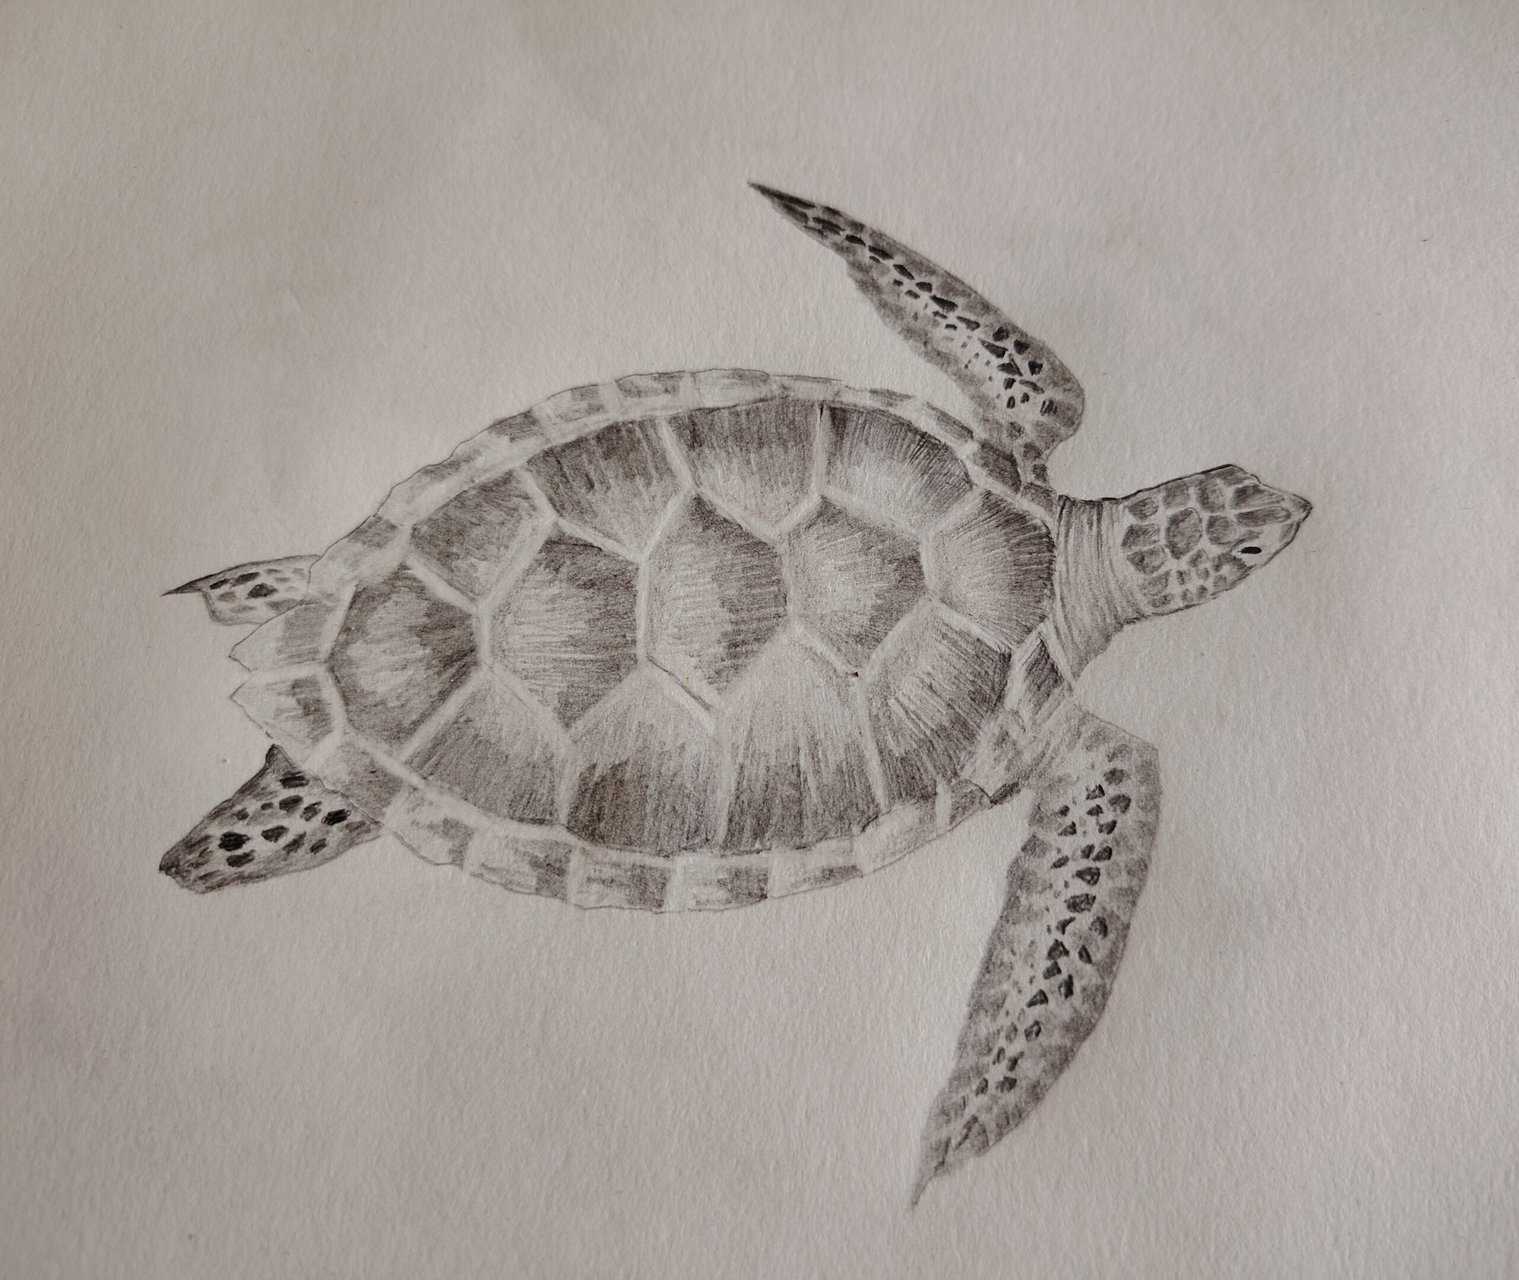
Step: 27
Complete the sketch by refining the edges of the connected parts.

About Author
Muntaseer Rahman started keeping pet turtles back in 2013. He also owns the largest Turtle & Tortoise Facebook community in Bangladesh. These days he is mostly active on Facebook.