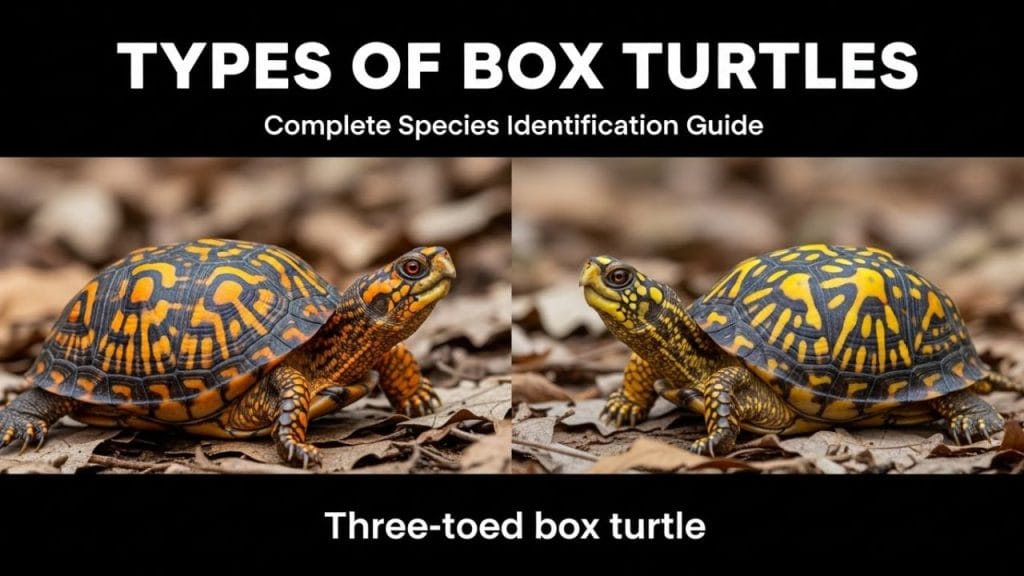
26 DIY Turtle Basking Area Ideas For A Perfect Sunning Spot

This post was created with help from AI tools and carefully reviewed by a human (Muntaseer Rahman). For more on how we use AI on this site, check out our Editorial Policy.
Looking to create the perfect sunning spot for your turtle? These 26 DIY turtle basking area ideas are just what you need.
They’re easy to make and budget-friendly. Your turtle will love having a cozy place to bask and soak up the warmth.
Dive in and find the perfect basking area idea to keep your turtle happy and healthy!
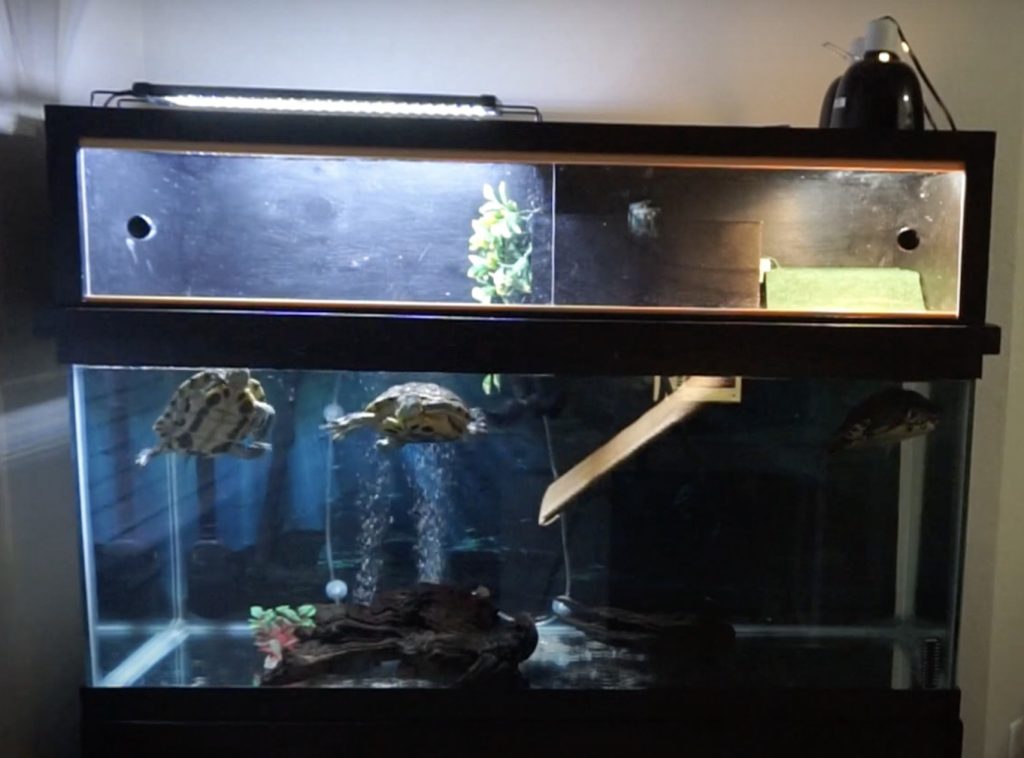
Important Equipment Note:
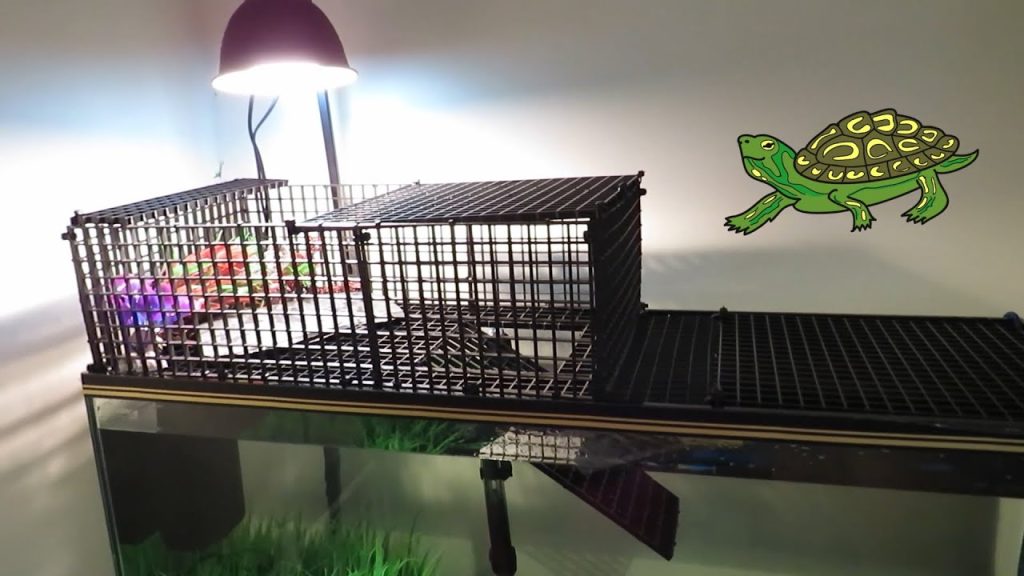
These DIY basking platforms (my pick: floating basking platform) are great for creating the physical platform, but remember that every basking area needs proper heating and UVB (my pick: Zoo Med ReptiSun 10.0) lighting to be functional. Your turtle requires:
- A heat lamp (my pick: heat lamp) (75-100W basking bulb (my pick: Zoo Med PowerSun)) positioned 8-10 inches above the platform to create a basking temperature of 88-92°F
- A UVB bulb (ReptiSun 10.0 T5 HO) for calcium metabolism – this is non-negotiable for turtle health
- Temperature monitoring with thermometers to ensure proper basking conditions
These DIY platforms give your turtle a place to bask, but without proper lighting, they won’t fulfill their purpose. Check our complete basking equipment guide for detailed recommendations on heat lamps, UVB lighting, and proper setup.
26 DIY Turtle Basking Area Ideas
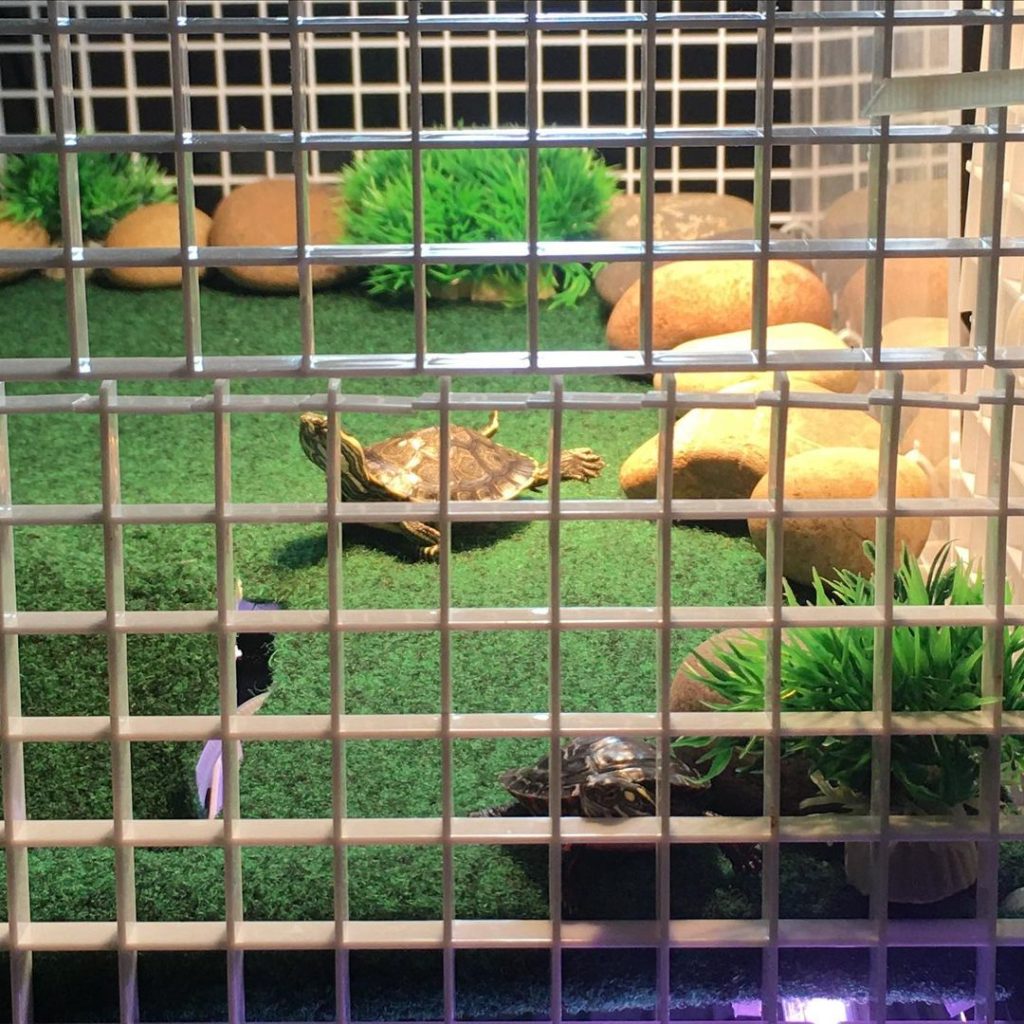
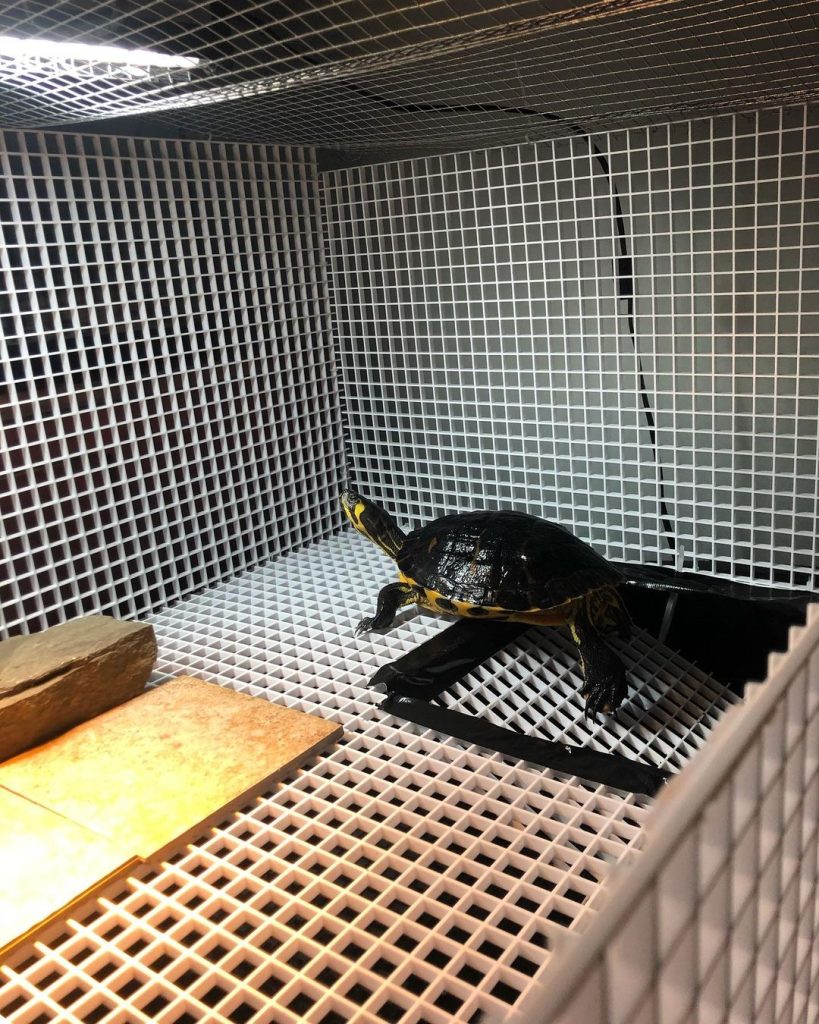
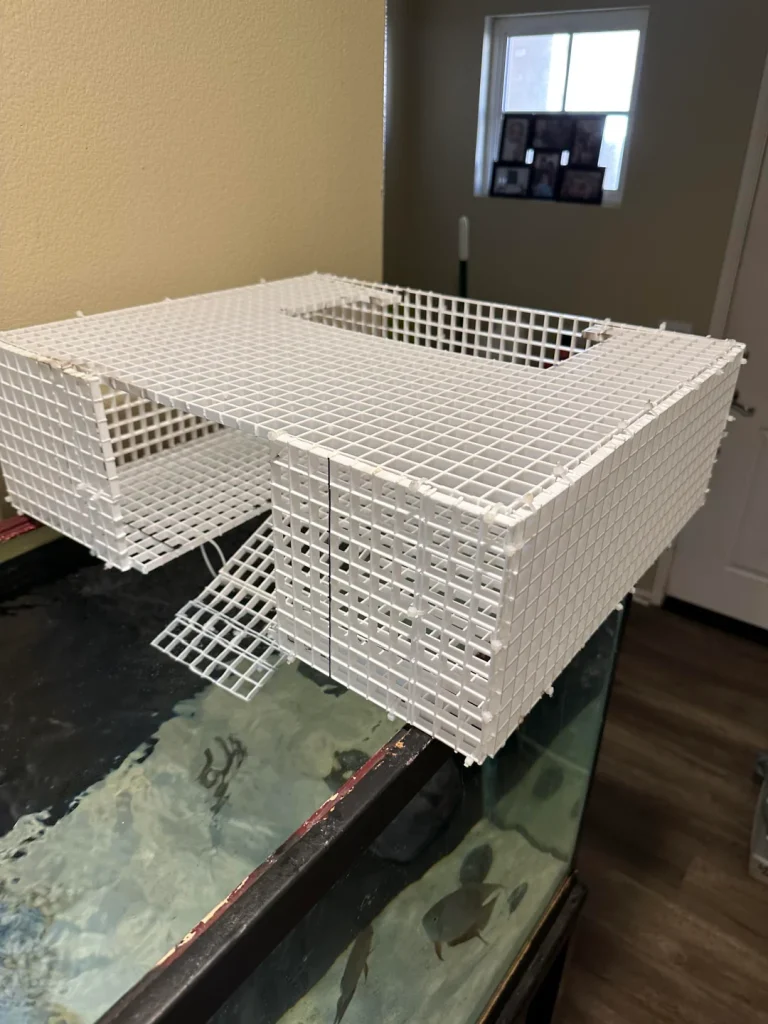
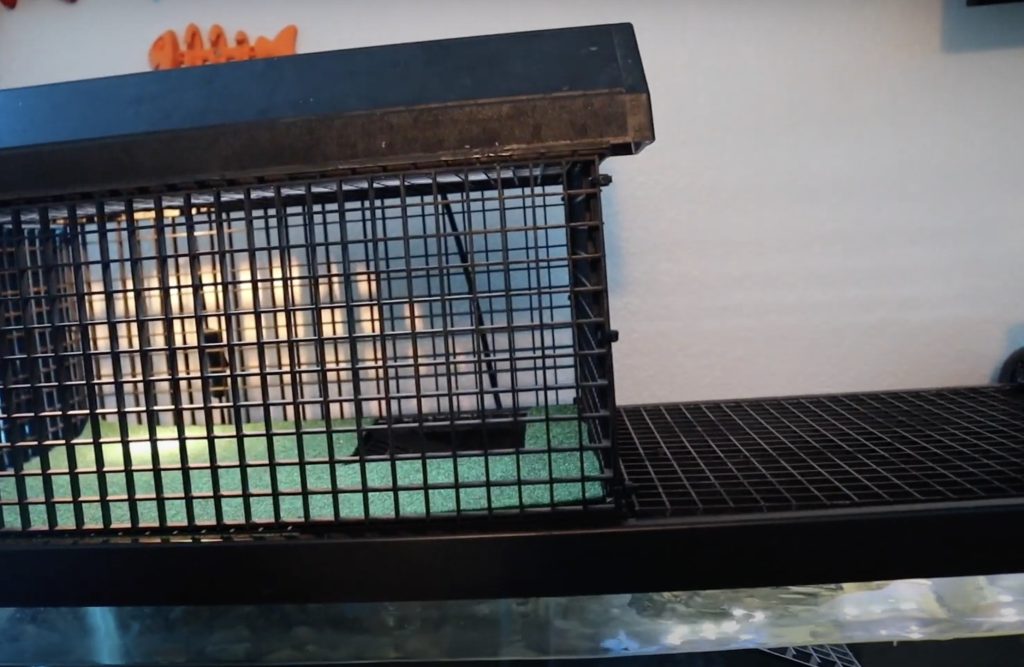
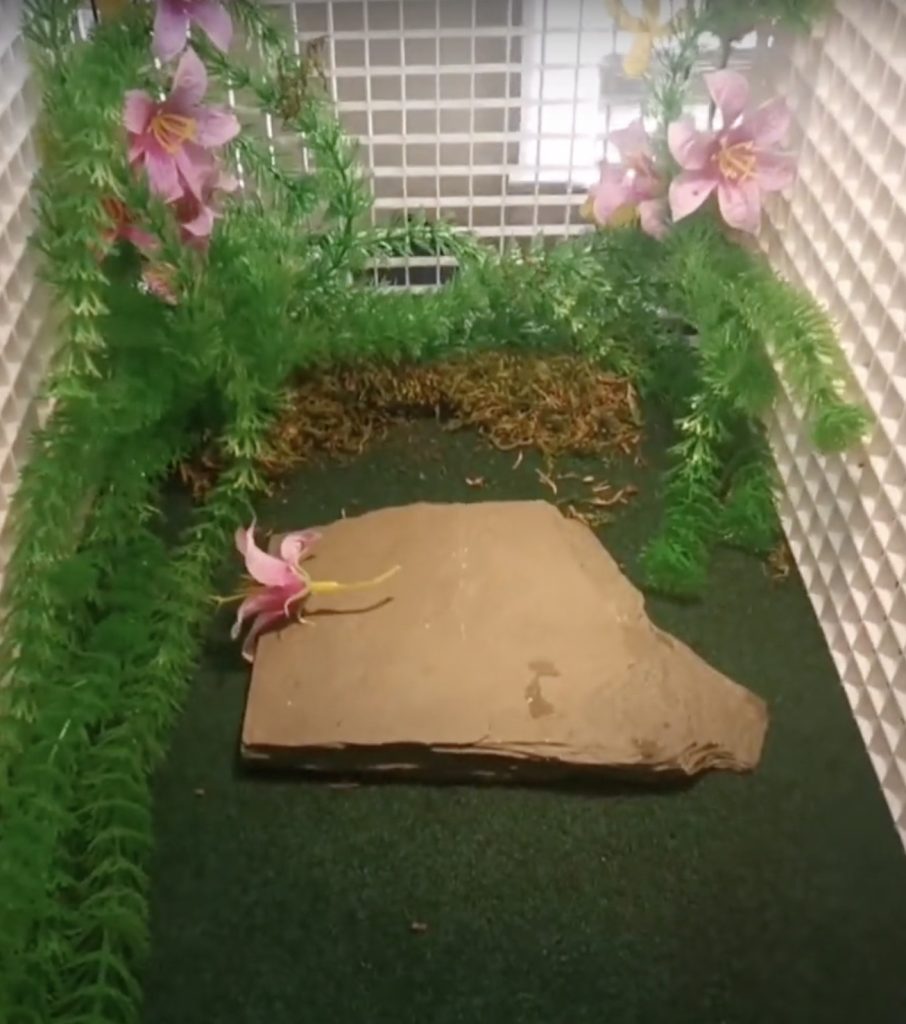
1. Above-Tank White Cage Turtle Basking Spot
| Materials | Cage, turf grass, pebble stones, grass plants, ramp. etc. |
| Difficulty level | Easy |
Build your turtle this very cozy basking spot with just a few items. The first thing you’ll need is a cage to put over the tank and make a ramp leading to the base of the platform from the water in the tank.
Cover the base with turf grass and surround the edges with medium-sized pebble stones and put some plants in pots in between the stones.
Make sure the lamp is directly above the cage for proper basking. (Not sure which heat lamp and UVB bulb to use? Our equipment guide covers the best options.)
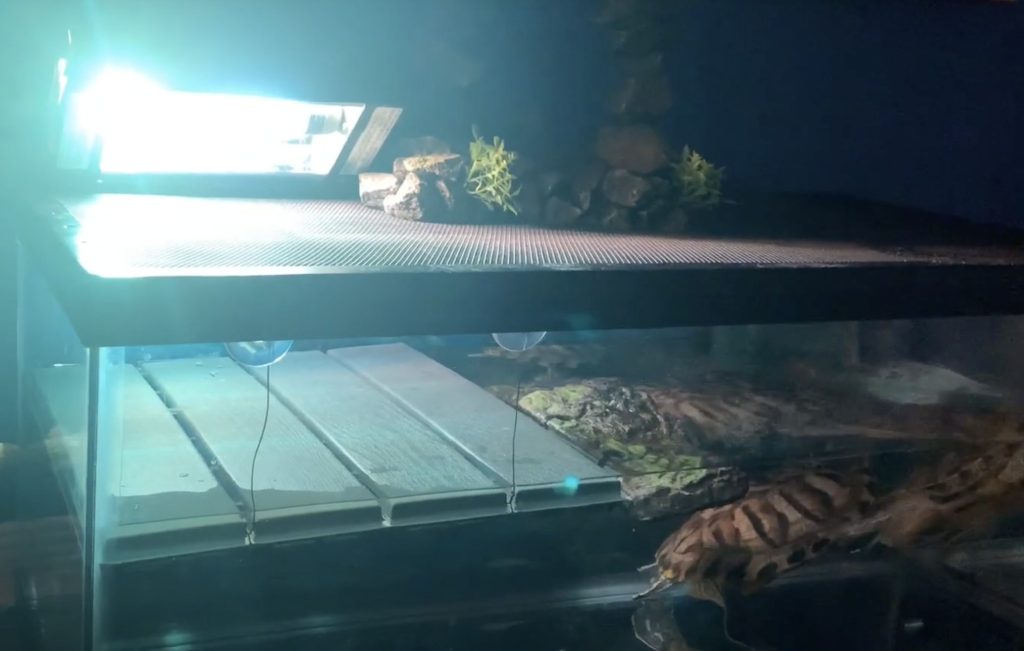
2. Egg Crate Sheet Turtle Basking Platform
| Materials | Egg crate sheet platform, ramp, hooks. Etc. |
| Difficulty level | Easy |
This would be the easiest one-step basking platform to build on your own. You will just need an egg crate sheet placed at the height of your tank with hooks adjusted to the walls of the tank.
Make a ramp out of the same material for climbing up from the water to the tank. Carefully place the lamp over the platform and you are done!
3. Simplistic Turtle Basking Area
| Materials | Egg crate sheets, resting stone, ramp, etc |
| Difficulty level | Easy |
Here is another easy-to-build, simplistic-looking egg crate above-the-tank basking platform idea for you. You can easily build by joining the egg crate sheets together to form a cage.
And since this is an above tank basking area you need to provide a sturdy ramp with good grip from the water to climb up. Lastly, put the finishing touch by placing resting stoles or tiles right below the lamp to make your turtles basking cozier
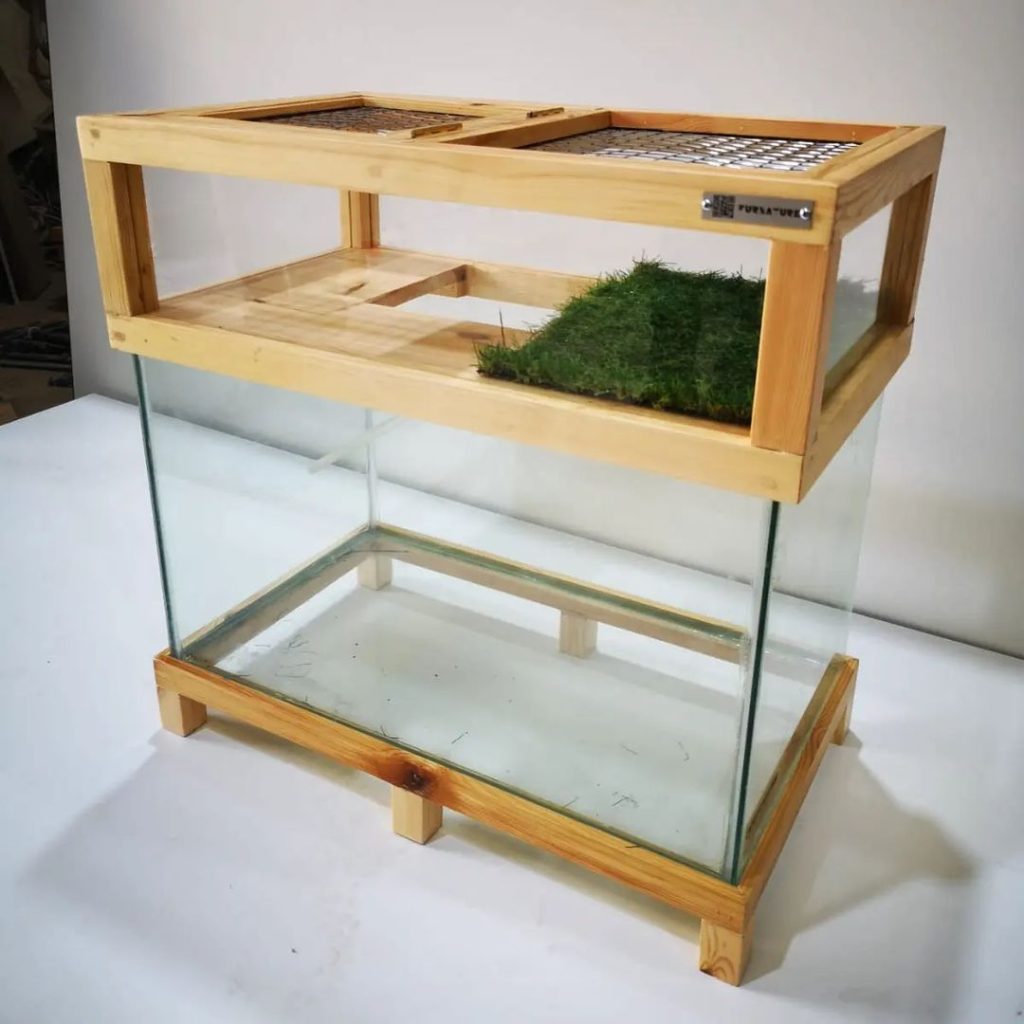
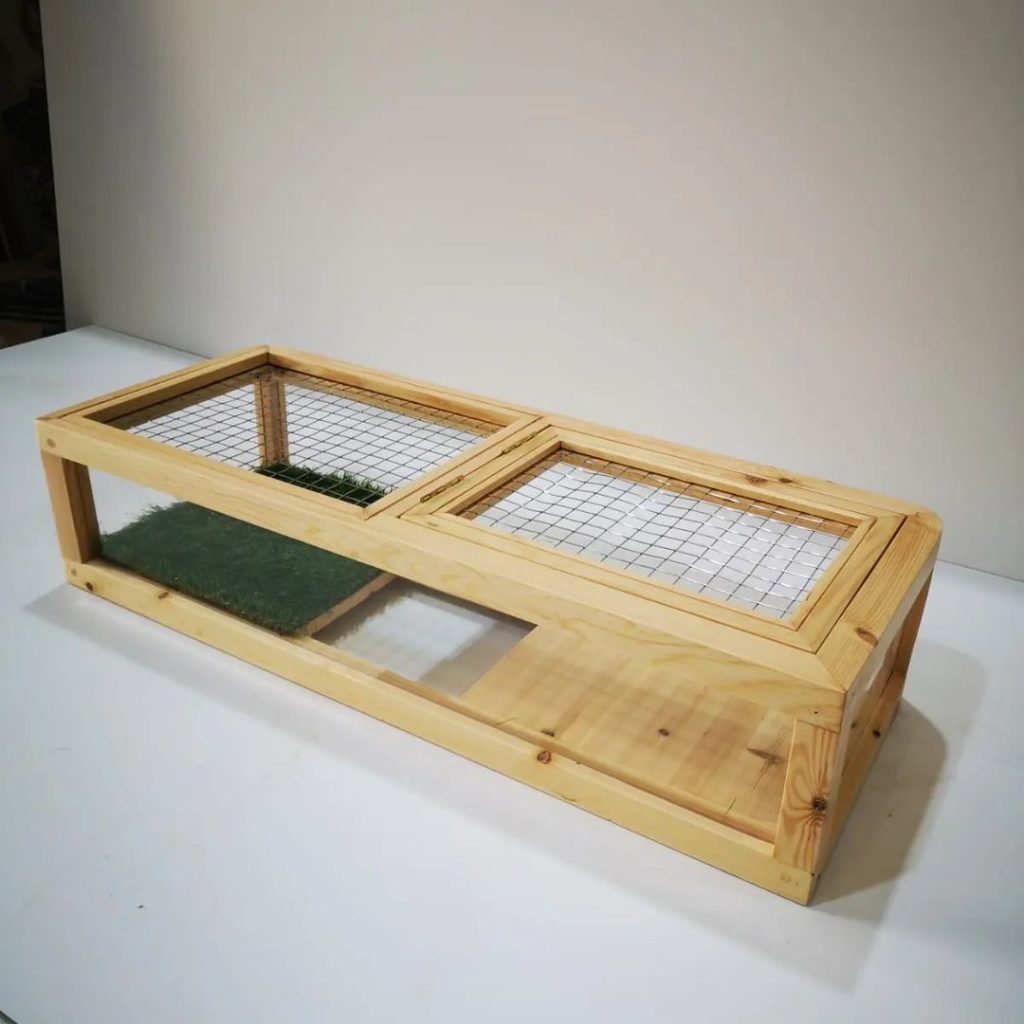
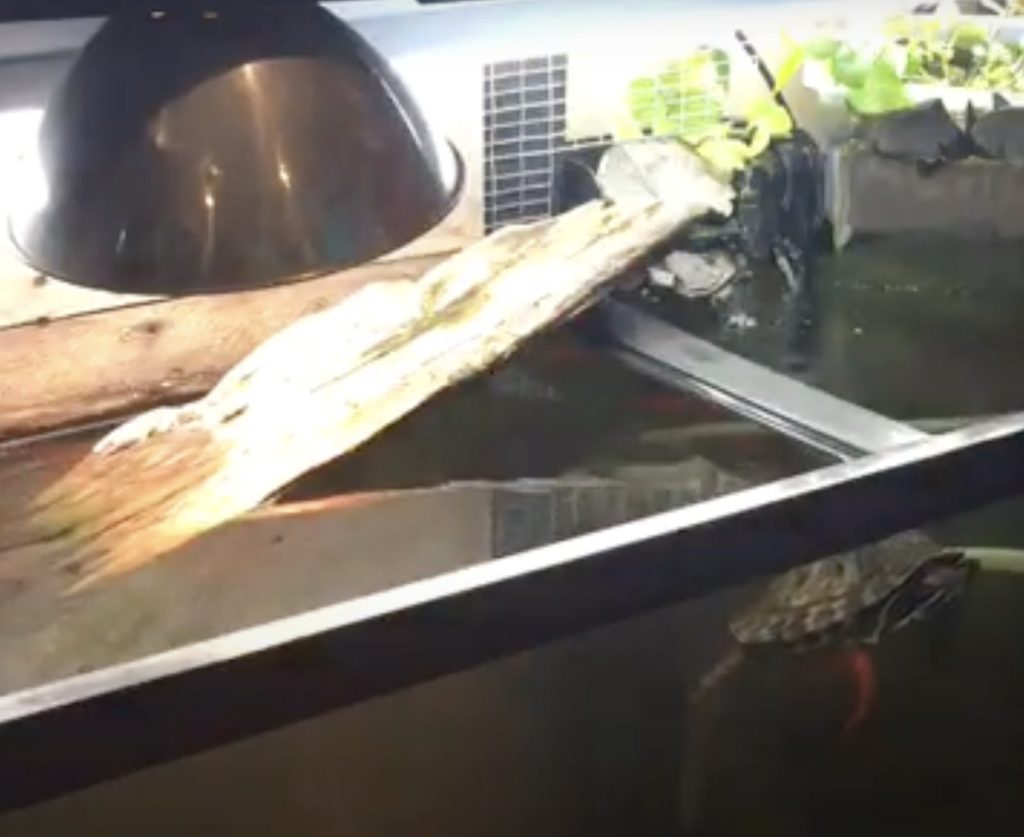
4. Wooden Turtle Basking Area
| Materials | Wood, screw, wire net, lamp, stapler, etc |
| Difficulty level | Moderate |
This DIY wooden above-tank basking spot sits just perfectly over your tank. To do that you need to cut out woods according to the measurements of your tank and screw them up to form a cube structure.
Staple wire nets to the wooden structure except for on one side. Secure it above your tank and place a lamp right on top of it.
Remember, you’ll need both a heat lamp AND a separate UVB bulb – see our lighting recommendations for proper setup.
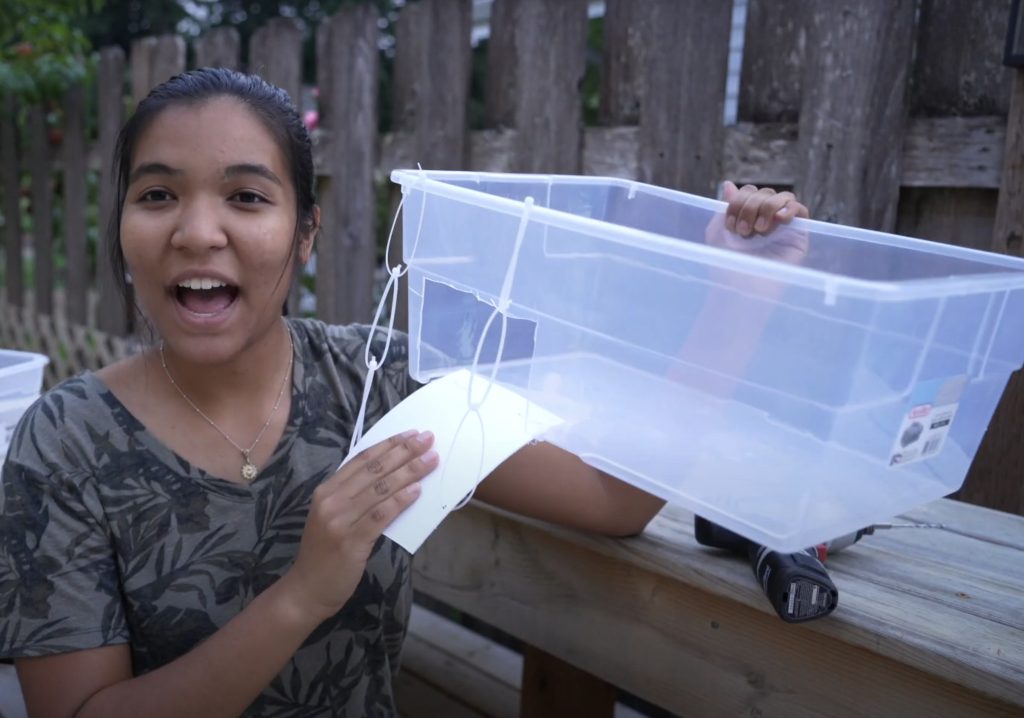
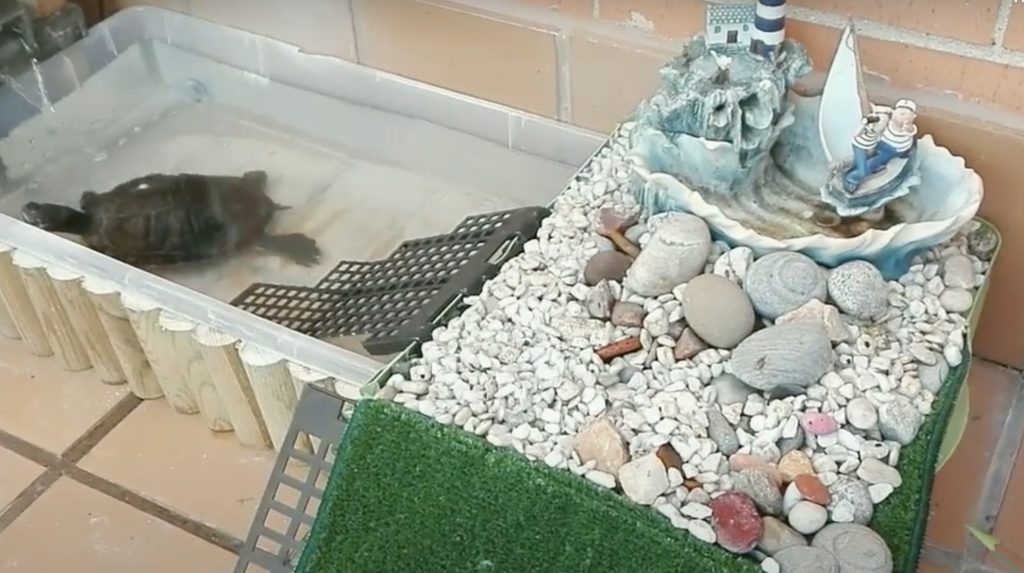
5. Plastic Bin Turtle Basking Area
| Materials | Plastic bin, ramp, zip locks, etc. |
| Difficulty level | Easy |
A basking area with a plastic bin is a very efficient way to ensure your turtle’s most important time of the day. To make it first you need to buy a plastic bin and cut out a rectangular piece from the lid to make a ramp.
Make holes in the cutout and on the plastic bin and tie them together with zip locks. Use more zip ties to make the ramp sturdy for holding the turtle’s weight.

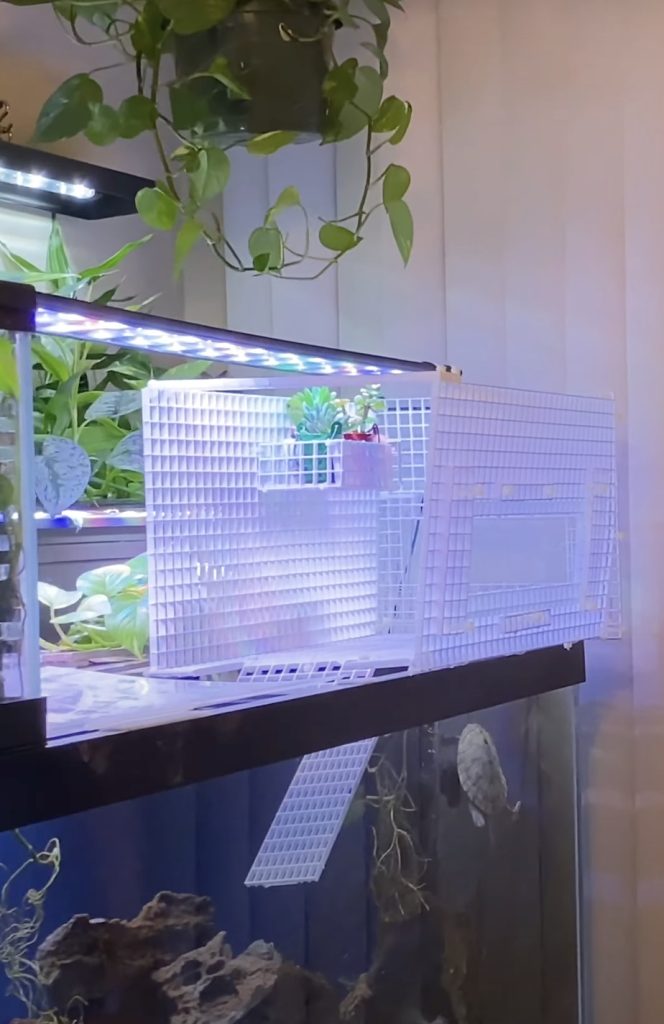
6. Egg-Crate Sun Lounge Turtle Basking Platform
| Materials | Egg crate, turf grass, lamp, zip ties, etc |
| Difficulty level | Moderate |
This DIY basking spot only going to make your turtles happy but also increase the aesthetics of your turtle’s tank. This white above-tank basking spot is made with egg crate and the turf grass base gives it a splash of green.
Put lots of stones and decorations of your choice. Carefully put the lamp above the baking area. Place a light under the turf grass for keeping the tank lit. This above tank basking spot is just amazing!
7. Slick Egg Crate Turtle Basking Area
| Materials | E600o plastic glue, acrylic sheet, black egg crate, vinyl tile, light bracket, reptile carpet, zip ties, sandpaper, tape measure, scissors, etc. |
| Difficulty level | Moderate |
Start by measuring your tank to cut out the egg crates, make a ramp and secure it with the base with zip ties. After that cut out on the side of the cage and glue the acrylic cage on top for easy passage of light.
Add reptile carpet on the ramp and stick vinyl tiles on the base. This gives a professional floor look to the basking area.
Use a light bracket to install the most important lamp for basking. (Learn about proper basking temperatures and lamp positioning in our equipment guide.)
8. DIY Egg Crate Sun Deck for Turtles
| Materials | Egg crate, measuring tape, zip ties, wire cutter, etc. |
| Difficulty level | Easy |
Cut the egg crate according to the measurement of your tank and zip tie all the pieces with zip ties. There must be a ramp cutout for easy climbing to the basking area.
Place the egg crate cage that you just made on the top of your tank and you are good to go! How easy was that!

9. Bamboo Raft Turtle Basking Platform
| Materials | Thin bamboo sticks, ropes, glue, suction cups, |
| Difficulty level | Easy. |
This super easy natural-looking bamboo stick raft is going to enhance the beauty of your turtle’s tank and add to the natural theme of the tank. Most importantly the turtles are going to love it. First, take bamboo sticks and lock them together with rope and glue.
The best part of this ramp is that it will float on the water surface and you won’t have to worry about your turtle jumping off. With the addition of a suction cup, you can also secure it to the glass walls of your tank!
If you want to know more about how to make this specific turtle basking platform, check out the detailed guideline here.
10. Glass Tank Turtle Basking Area
| Materials | A small glass tank, tiles, pebble tiles, floating log ramp |
| Difficulty level | Challenging |
The glass tank basking area gives the illusion that it’s an extension of the glass tank that you already have for your turtle. To make it you will need to break the bottom of your glass tank which is the most challenging part. After that, you will install ceramic tile and pebble tile on the bottom halfway as the base.
Next, you are going to add a floating log as a ramp to the basking area and place the basking tank above the tank. Maintain extra precaution while breaking the glass base for your safe and your precious turtles.
11. Hanging Wooden Dock Turtle Basking Platform
| Materials | Wood, sticks, measuring tape, cutter, glue, etc. |
| Difficulty level | Easy |
To create this basking dock, you will need to cut wood slightly larger than the tank and make holes to put sticks through. On the other side of the sticks and a rectangular piece of wood is the dock.
Hang the dock with the larger wood part as support on the edges of the tank. The dock will float on the water and your turtle will be easily able to climb and bask!
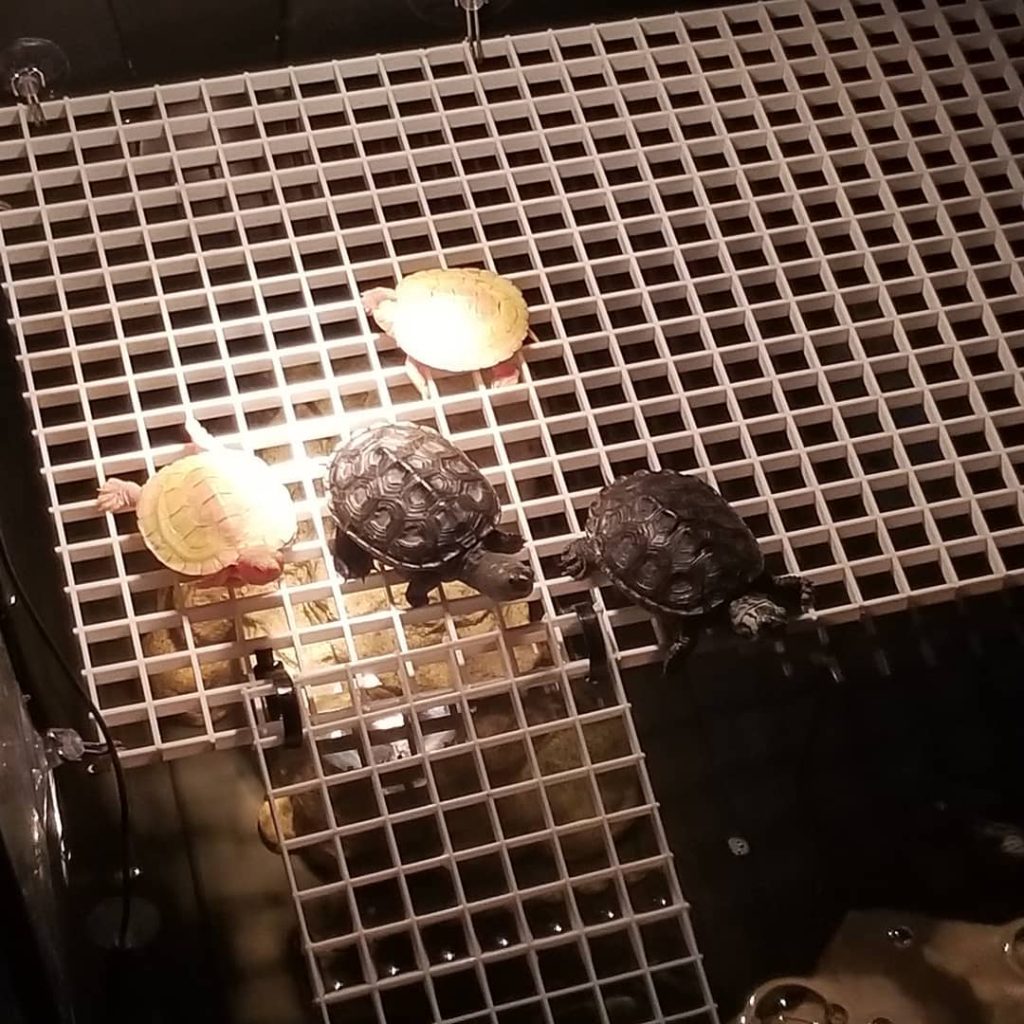
12. Wire Net Above Tank Turtle Basking Area
| Materials | Cable ties, wire nets of different sizes, plastic decor, scissors, |
| Difficulty level |
Create this super easy basking area above the tank by starting with making a cage with wire nets of white color by tying with cable ties. Place the green smaller hole wire nets as a base. Add another wire net mid-way through the cage height with cable ties.
Add another foldable piece of white and green wire net as the ramp. Lastly, Add plastic leaves as decoration. Place the wire net cage on top of the tank.
13. Turtle Basking Bliss Egg Crate Style
| Materials | Egg crate, black paint, reptile carpet, measuring table, scissors, etc. |
| Difficulty level | Easy, |
This is another egg crate above the tank basking area idea with some additional insights on the elements used. As usual start by measuring the tank and make an egg crate cage with a ramp. Next spray paint it in black to match with the theme of the tank.
This step just adds a whole new look to the basking area. Next, add an eco-reptile carpet on the base and ramp. It helps to prevent your turtle’s legs from getting stuck in the holes of the crate. Place a lamp over the top and you have a minimal yet class basking area!
Just make sure you’re using the right wattage heat bulb and have a separate UVB fixture – our basking equipment section explains exactly what you need.
14. Turtle Basking Area With Modern Twist
| Materials | Egg crate, measuring scale, wire cutter, succulents, acrylic sheets |
| Difficulty level | Moderate |
Transform your turtle’s basking area with mesmerizing beauty by following this step-by-step DIY basking area guide with a modern twist. To make this first cut out and join egg crates according to the measurements of your tank.
Make some rectangular cutouts on the walls and ad acrylic sheets to make it look like windows. Make a basket on one side to hold the succulent plants which is such a beautiful detail. Place a lamp above the cage and you’re done!
15. Plexiglass Turtle Basking Area
| Materials | Plexiglass, utility blade, scale, tank, aluminum support, background sticker, etc. |
| Difficulty level | challenging |
This is one quite challenging basking area that might take some crafting skills but it is worth all the hassles. To build this start by measuring your plexiglass and make a tank by joining the plexiglasses with aluminum support.
To make the platform cut out half the width of the tank along with your preferred size ramp and bend the ramp with a little pressure and heat. This will give your ramp a seamless finish. Add thin pieces of plexiglasses to make stairs on the ramp. Add natural background sticker and adjust it on the top of your tank.
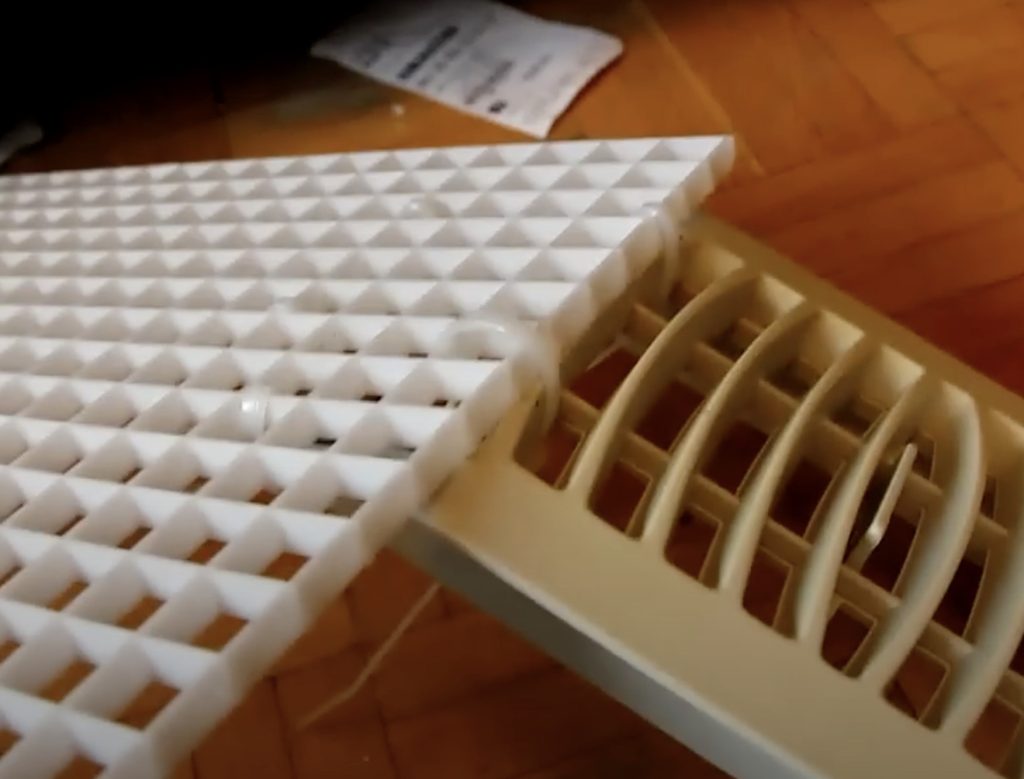
16. Sunspot Turtle Basking Paradise With Egg Crate
| Materials | Egg crate, plastic ventilation cover, zip ties, Pliers, tape measure, hacksaw, file |
| Difficulty level | Easy |
An egg crate is used to construct this three-step turtle dock, and the ramp is fashioned from a plastic ventilation cover.
This design is ideal for someone who has never completed a DIY project since it just requires a few simple tools. To cut the egg box, get some pliers. To estimate the size of the platform you need, use a tape measure or your tank. To cut the ventilation cover, use a hacksaw. Finally, use zip ties to hold everything together.
17. Turtle Basking Dock with Egg Crate
| Materials | Egg crate, aquarium plants, reptile carpet, heat lamp, slate, chicken wire |
| Difficulty level | Moderate |
For precise measuring, you’ll need a trustworthy tape measure and a permanent pen. To ensure that the basking area sits firmly on top, be sure to measure the inner lip of your turtle tank.
With this DIY project, you may practice your design talents. To create a wild yet natural basking area, use reptile rugs and plastic aquarium plants. Another lovely finishing touch is a slate for the turtles to sunbathe.
18. Plywood Sunbath Lounge for Turtles
| Materials | Wooden boards, plywood, acrylic sheets, vinyl adhesive tiles, aquarium silicone, glue, wood putty, small wood door knobs, plastic track set |
| Difficulty level | Challenging |
One of the most costly and time-consuming do-it-yourself projects on our list is the Above Tank Basking Shelter. Although it requires a lot of time and tool expertise to assemble, it comes with thorough instructions and a helpful video. This project is ideal if you want to put your DIY skills to the test.
If you are comfortable with carpentry and utilizing blueprints, you may modify the size for your requirements even though this design is meant for a 75-gallon aquarium.
19. Naturalistic Basking Area For Aquatic Turtles
| Materials | Driftwood, wood screws, 2×4 wood, wood boards, Drill, etc. |
| Difficulty level | easy |
The main criticism that DIY basking platforms get from turtle enthusiasts is that they don’t match the aesthetic of the tank. If you choose a piece of driftwood with an unusual form, it may require some effort to anchor this Natural Log Basking Area to the side of your tank. However, once it is securely fixed, it offers your turtle a safe and secure place to bask.
If you have larger turtles or more than one, you may need to alter it since it is smaller than many other designs. Create a big platform out of two pieces of driftwood or add a place for sunbathing by using them.
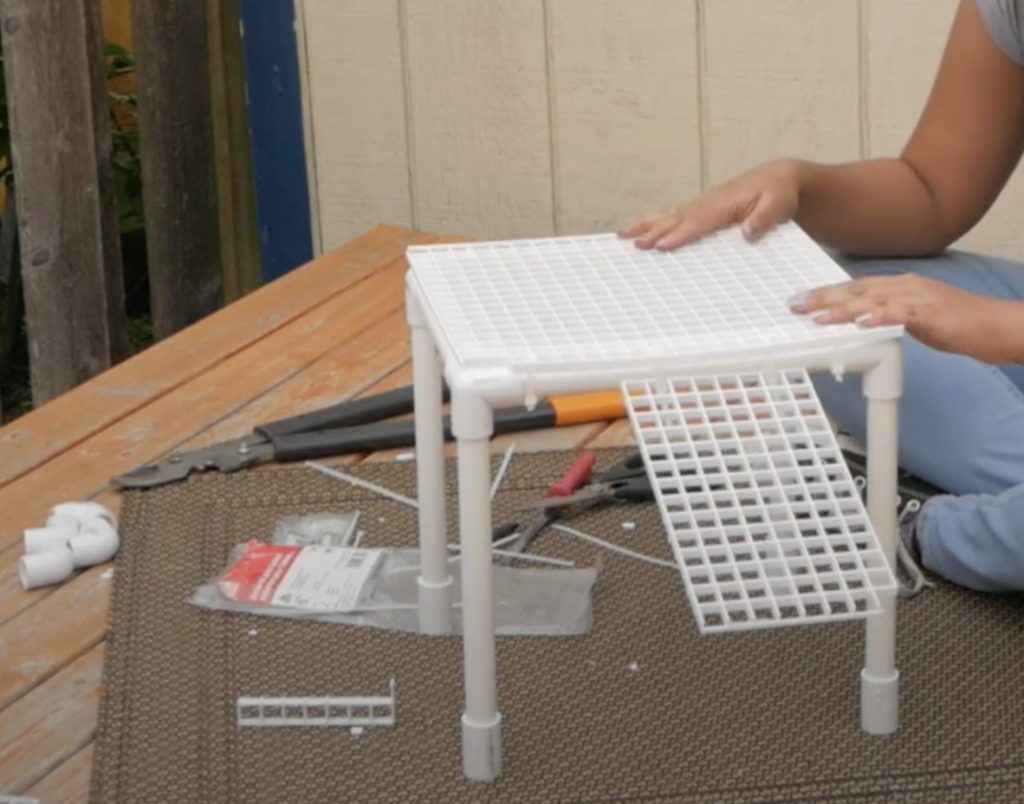
20. Egg Crate and PVC Turtle Basking Platform
| Materials | Egg crate, 2 ½-inch PVC pipes (5 foot), 4 ½-inch PVC couplers, 4 ½-inch PVC elbows, Pipe cutter or hacksaw, file or pliers, tape measure, pencil, scissors, zip ties |
| Difficulty level | Moderate |
One of the cheapest DIY materials you can use to create a turtle basking platform is an egg crate. This egg crate and PVC basking platform design is very simple to construct. Cut the egg crate to the appropriate size first, then measure the pipes accordingly.
After constructing the framework and ensuring that every component fits snugly together, attach the egg crate to the structure using zip ties. Fill the pipe with water before putting it inside your tank to prevent floating.
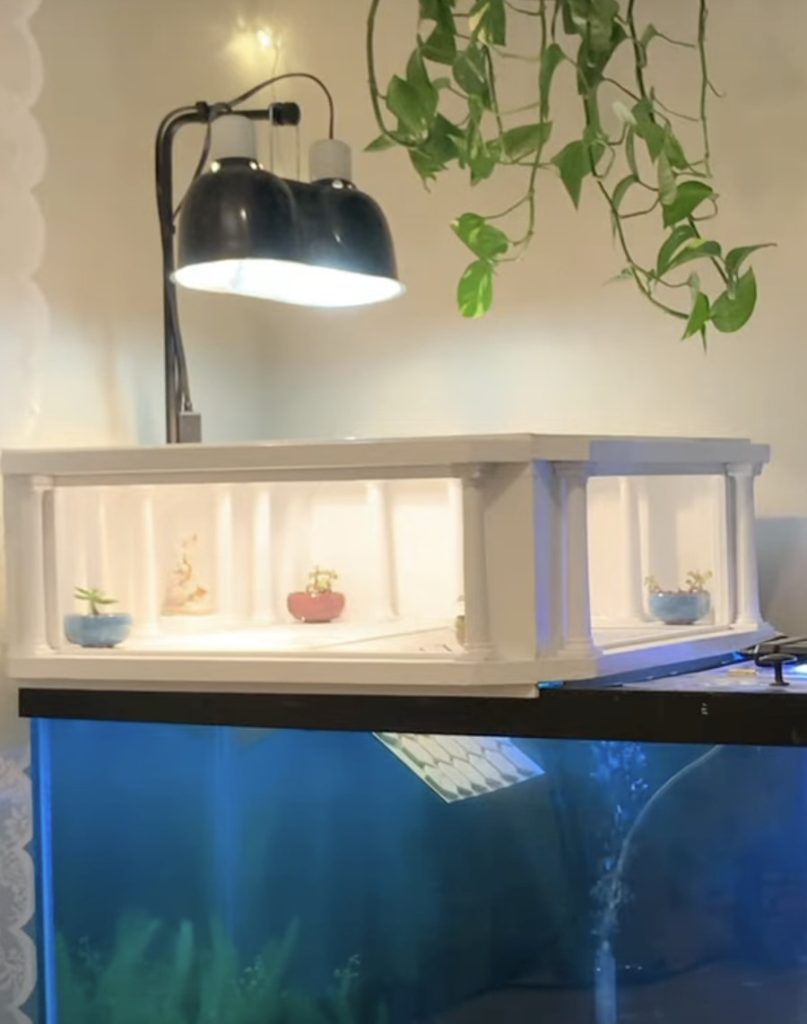
21. Turtle Basking Oasis With Plywood
| Materials | Plywood, poplar boards, pine wood, LED strip light and connectors, acrylic sheet, vinyl tiles, wood glue, silicone, epoxy, paint, 12 Grecian columns |
| Difficulty level | Challenging |
Simple designs are often functional but scarcely striking. Anyone who visits you and your turtle is likely to notice the chic Grecian theme of this basking area. It isn’t simple to create, however, so you’ll need a lot of free time, as well as tool and blueprint reading knowledge.
Fortunately, the tutorial is broken up into sections and comes with an easy-to-follow guide. If you’re a newbie, it’s not the simplest or most affordable turtle-basking habitat you can build. If you want to try something new and push yourself, it’s an enjoyable and fulfilling task.

22. Turtle Plastic Tote Sunning Station
| Materials | Two plastic totes (different sizes), plastic sheet or plexiglass, Stanley knife, aquarium silicon, file, plastic mesh, aquarium stones |
| Difficulty level | Easy |
If you can’t afford a huge aquarium, you can still provide a safe environment for your turtles by providing them with a tank and a basking platform. A solid basking platform and a do-it-yourself tank with room for decorating and swimming may be fashioned from two plastic bags of varying sizes.
For the basking platform, you’ll need a sheet of plastic and a sharp knife to cut a ramp out of one side of the smaller bag. You may make a basking platform using plastic mesh, aquarium stones, and a file to smooth off any rough spots.
If you want to know more about how to make this specific turtle basking platform, check out the detailed guideline here.

23. Turtle Sunny Retreat Plastic Tote Edition
| Materials | Plastic tote, aquarium liner, Stanley knife, metal ruler, grinder, heater |
| Difficulty level | Easy |
When combined with a deep pool or a bigger tote arrangement, a tiny tote may provide a protected basking place. Even if you’ve never attempted a DIY project before, you can put together this faux lawn with only a tote and some optional embellishments.
Few materials are needed for this task. A hole may be cut in the side of the tote using a sharp knife and a ruler, and the ramp can be molded into place using a heater. Your turtle may relax in comfort with some green aquarium liners and ornaments.
24. Patio Tile Floating Turtle Dock
| Materials | Patio tile, floating aquarium dock, suction cups, wire, zip ties, Utility knife, hacksaw, pliers, tape measure |
| Difficulty level | Easy |
This Turtle Basking Platform is made out of repurposed materials including an old IKEA patio tile. An aquarium dock, available at pet stores or maybe already in your possession if you’re just replacing an old basking platform, is included as well. The original basking platform’s suction cups will also work with this one.
A few of the pieces may be a little tricky to deal with, but otherwise, this is a really easy do-it-yourself project. If patio tiles need to be replaced, you may use egg crates instead.
25. Elevated Egg Crate Turtle Basking Area
| Materials | Artificial grass, aquarium rocks, plastic tote, egg crate |
| Difficulty level | Easy |
This rocky outcropping serves as an efficient and easy-to-build sunbathing spot even if you don’t have any tools on hand. If you want to use an egg crate as a ramp, you’ll need to trim it so that it can sit on top of a plastic bin or aquarium. Aquarium ornaments may be used to adorn the stand.
With this layout, your turtle has no protection from the outside world. If you’re concerned about the safety of your pet while it’s sunbathing, you may surround the space with more egg cartons or plexiglass.
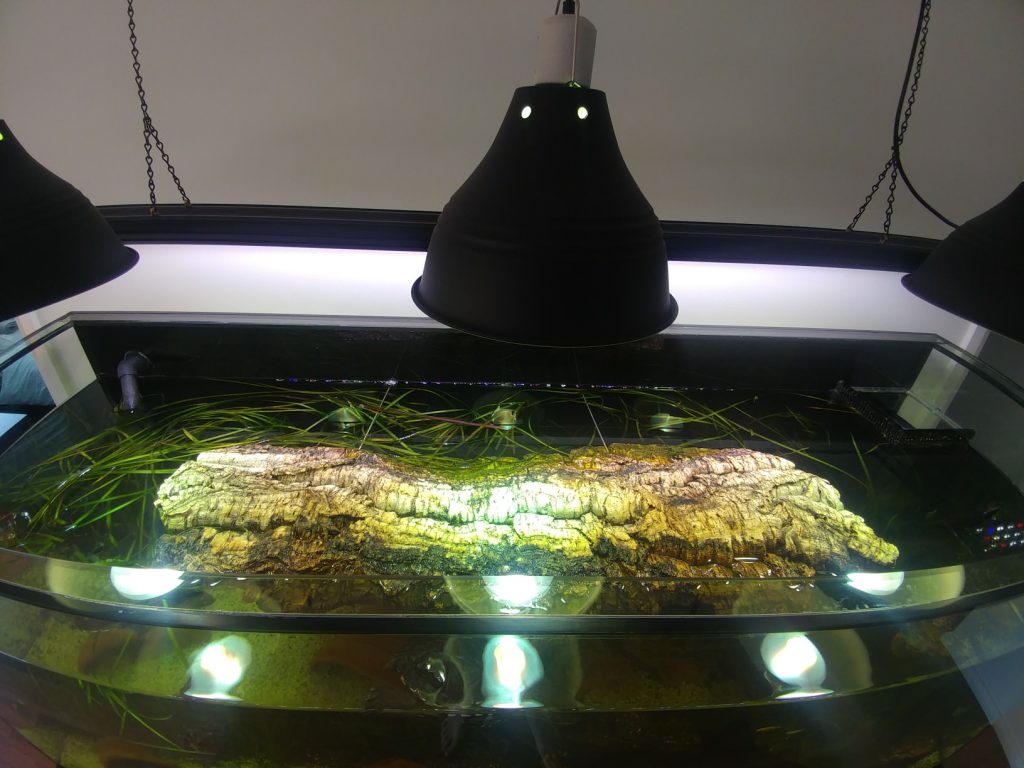
26. Cork Bark Turtle Basking Platform
| Materials | Cork bark, hacksaw, tape measure, etc. |
| Difficulty level | Easy |
This Cork Bark Basking Platform is a great example of a cork-made basking surface that mimics the appearance of real bark. This design is the simplest and fastest one you may attempt since it doesn’t need any complicated components.
To achieve a snug fit in your aquarium, just cut the cork bark to a size larger than the inside dimensions. you may trim it down to size afterward. Your turtle may use the ramp created by the cork bark’s natural curvature.
This Hilarious Turtle Book Might Know Your Pet Better Than You Do
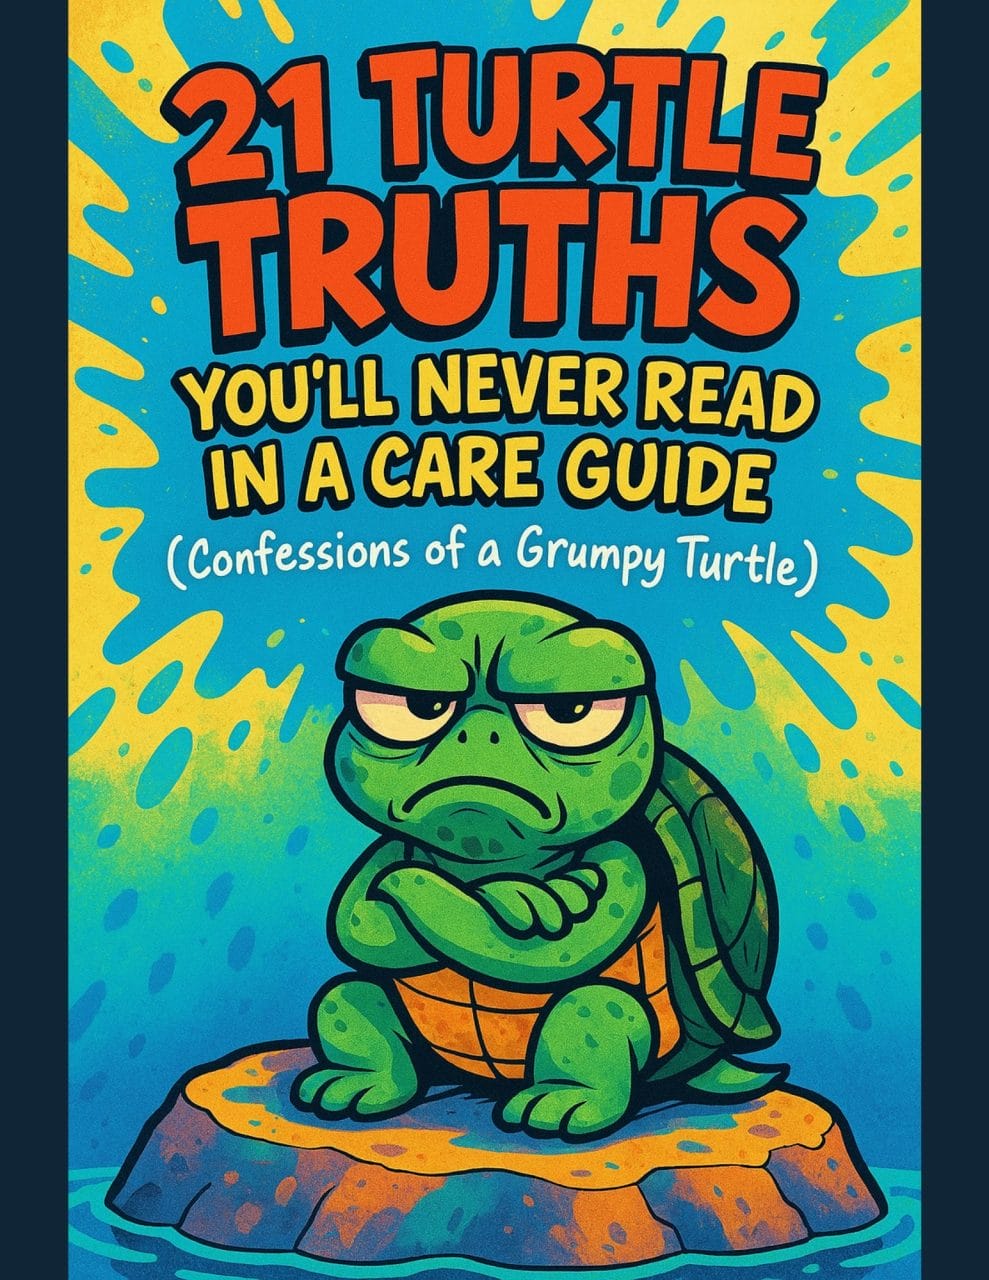
Let’s be real—most turtle care guides feel like reading a textbook written by a sleep-deprived zookeeper.
This one’s not that.
Told from the snarky point of view of a grumpy, judgmental turtle, 21 Turtle Truths You’ll Never Read in a Care Guide is packed with sarcasm, sass, and surprisingly useful insights.
And hey—you don’t have to commit to the whole thing just yet.
Grab 2 free truths from the ebook and get a taste of what your turtle really thinks about your setup, your food choices, and that weird plastic palm tree.
It’s funny, it’s honest, and if you’ve ever owned a turtle who glares at you like you’re the problem—you’ll feel seen.
Essential Equipment for Your DIY Basking Area
You’ve built the perfect platform – now let’s make sure it actually works for your turtle’s health:
Heat Lamp Setup: Your DIY platform needs a proper heat source. A 75-100W basking bulb positioned 8-10 inches above the platform creates the 88-92°F surface temperature red-eared sliders need. Use an infrared thermometer to verify the temperature.
UVB Lighting (Critical!): This is separate from your heat lamp. Turtles need UVB light to metabolize calcium – without it, they develop metabolic bone disease and soft shells. A Zoo Med ReptiSun 10.0 T5 HO bulb mounted 10-12 inches above the basking area is the gold standard.
Those bulbs fade months before they burn out, so instead of guessing, track when the bulb is due in a turtle care app.
Temperature Monitoring: You need two thermometers – one for water temperature (should be 75-80°F) and one for basking area surface temperature. Digital thermometers are more accurate than stick-on strips.
Complete Equipment List: Beyond the basking platform, your turtle needs proper filtration, water treatment, quality food, and calcium supplements (my pick: Rep-Cal Calcium with D3). Our Complete Turtle Owner Essentials guide covers everything in detail:
- Filtration systems (canister filters (my pick: Penn-Plax Cascade) rated for 2-3x your tank volume)
- UVB and heat lighting (specific bulbs and fixtures)
- Water heaters (if your room temperature is cool)
- Nutrition and supplements (proper pellets and calcium)
Pro Tip: Even the best DIY basking platform won’t help your turtle if the lighting and temperature aren’t correct. Invest in quality heat lamps and UVB bulbs – your turtle’s health depends on it.

About Author
Muntaseer Rahman started keeping pet turtles back in 2013. He also owns the largest Turtle & Tortoise Facebook community in Bangladesh. These days he is mostly active on Facebook.