10 Baby Tortoise Enclosure Ideas (Hatchling-Safe Setups That Actually Work)
This post was created with help from AI tools and carefully reviewed by a human (Muntaseer Rahman). For more on how we use AI on this site, check out our Editorial Policy.
So your hatchling tortoise is the size of a chicken nugget and you’re staring at an empty tank wondering what to do next. I get it.
Here’s the thing nobody tells you. A baby tortoise is NOT just a small adult tortoise. Their needs are basically the opposite of what most pet stores will sell you.
Hatchlings need higher humidity, smaller spaces, escape-proof walls, and zero deep water. Get any of those wrong and you’re looking at pyramiding, dehydration, or a tiny Houdini act ending under your couch.
I’ve pulled together 10 enclosure ideas that actually work for hatchlings. These are not “scaled-down adult setups.” These are built around how a baby tortoise actually lives in its first 12-18 months.
Why Hatchlings Need Their Own Type of Enclosure
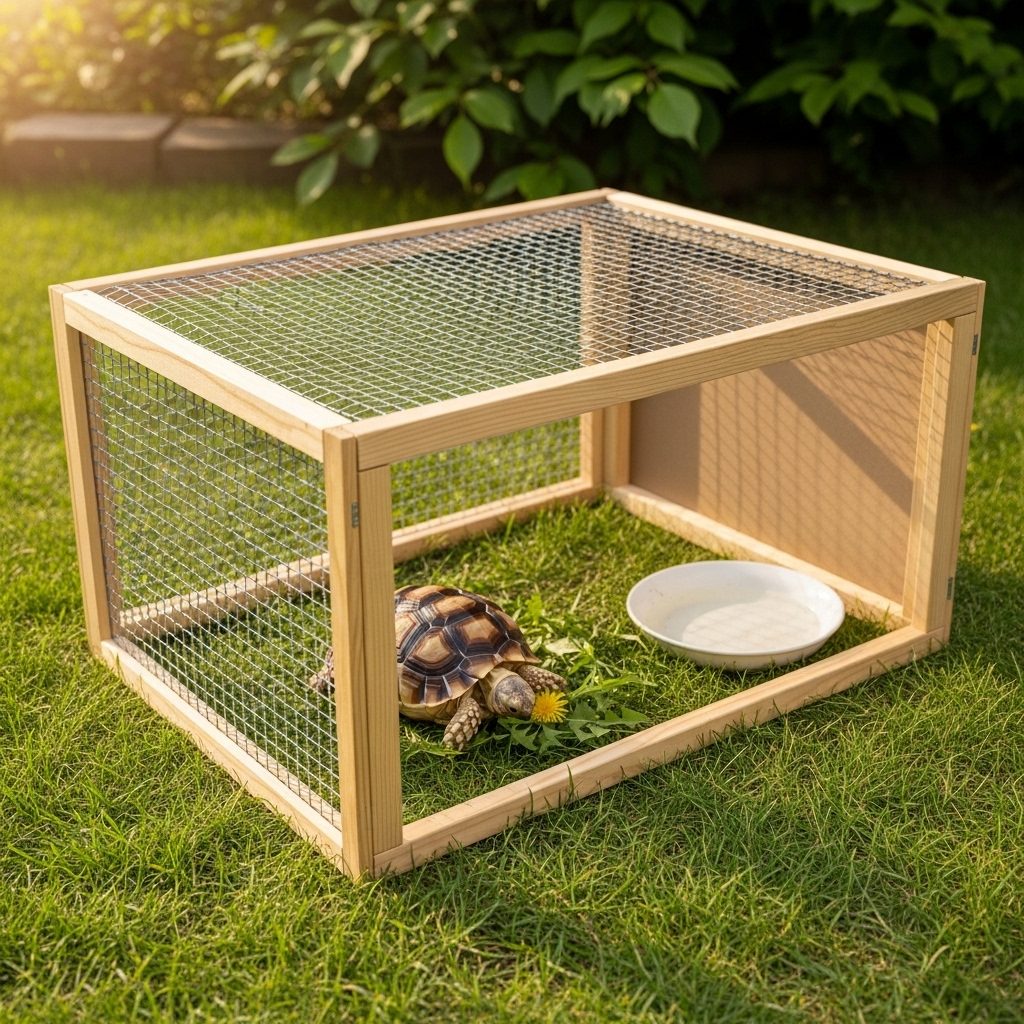
Before we get into builds, you need to understand why a normal tortoise table (my pick: Aivituvin Wooden Tortoise Habitat) is wrong for a hatchling.
Open-top enclosures cause a chimney effect.
Heat lamps (my pick: heat lamp) on top suck warm humid air straight out and pull dry room air in. Your hatchling sits in a desert.
Hatchlings need 70-80% humidity even if they’re desert species.
Sulcata babies kept dry will pyramid every time. The “desert species need dry conditions” thing is one of the most repeated lies in the hobby.
They are escape artists.
A 1.5-inch Russian hatchling can wedge through a gap smaller than a pencil. Walls need to be solid and at least 4-5 times the tortoise’s shell length.
Deep water = drowned hatchling.
Anything deeper than the height of their chin is a drowning risk. Soak dishes only, no water bowls with sides.
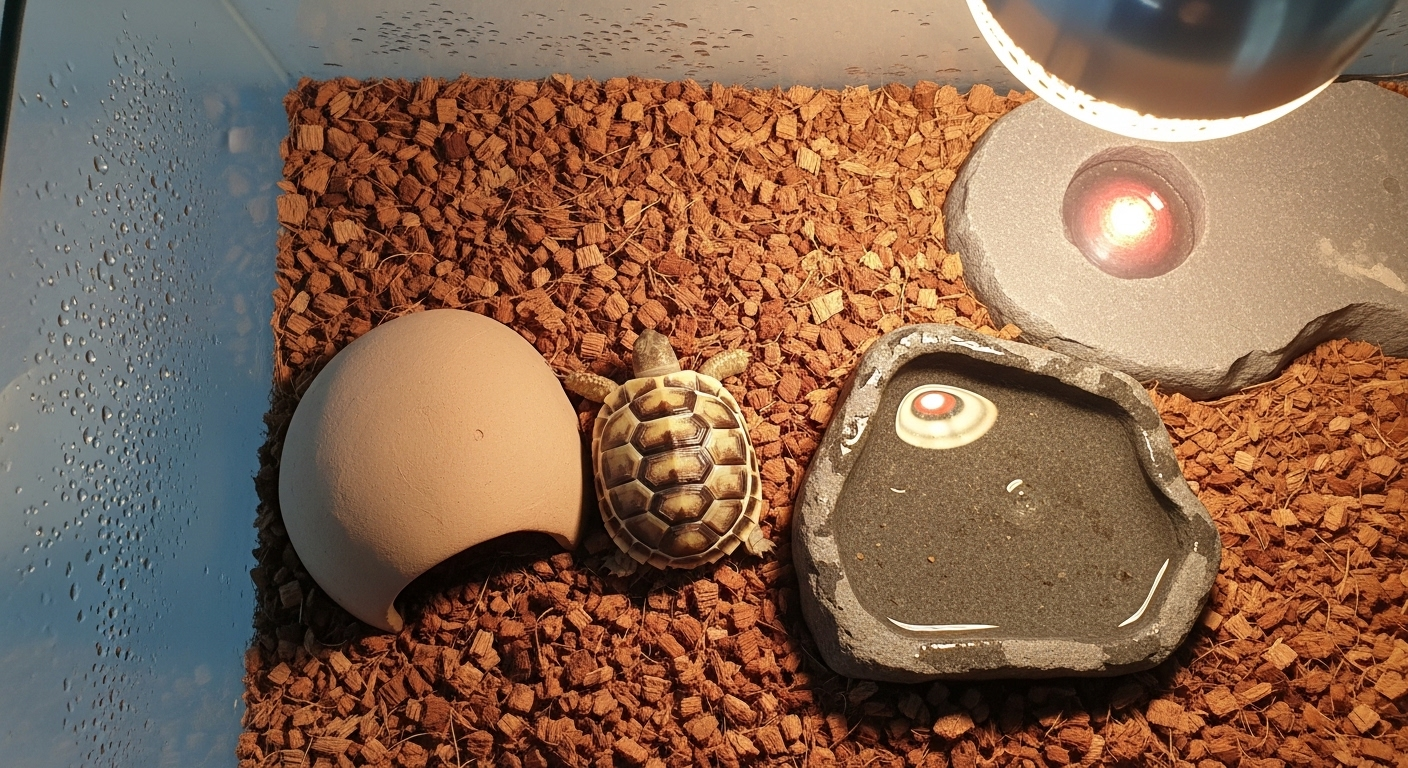
They grow fast.
A Sulcata can double or triple in size in 12 months. Your hatchling setup is a stepping stone, not a forever home.
Now the builds.
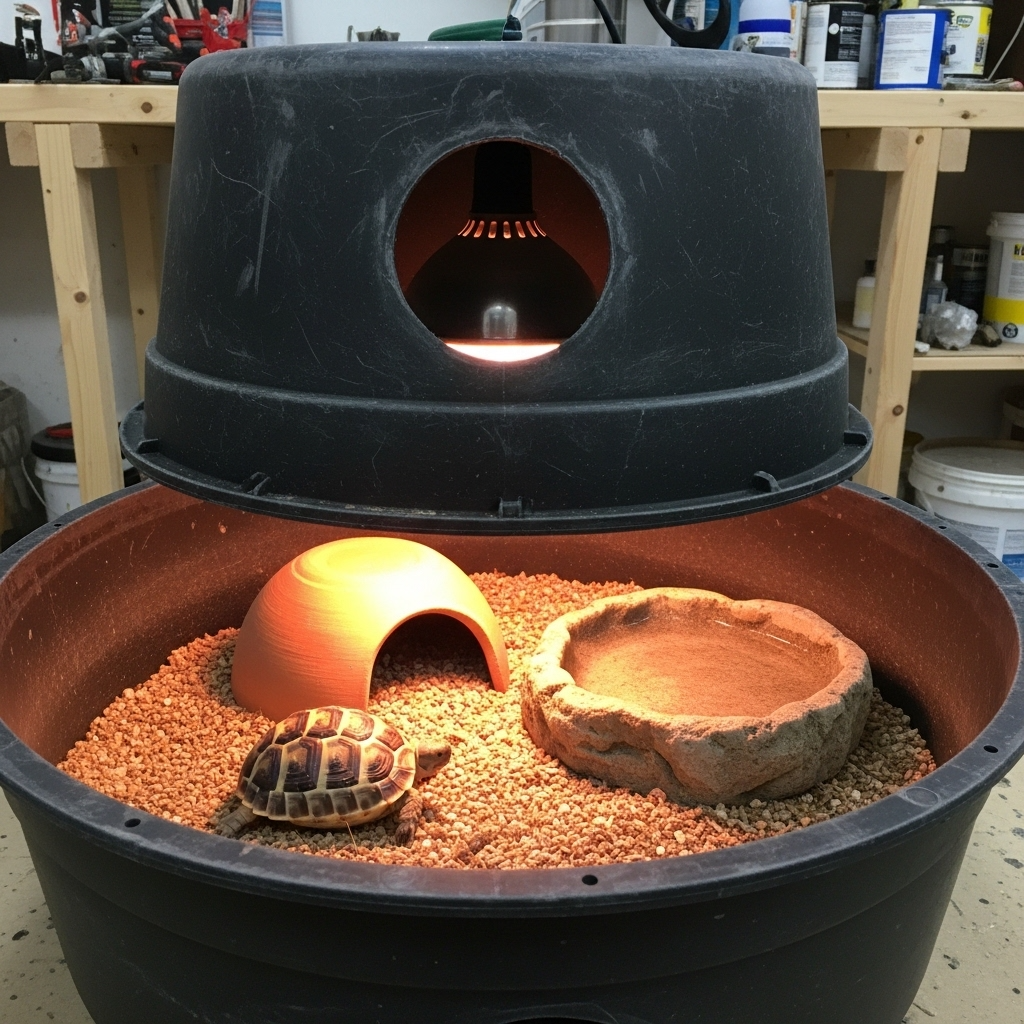
1. The Closed-Chamber Storage Tote (Gold Standard)
This is the setup most experienced keepers recommend for any hatchling, no matter the species. A 50-gallon Sterilite or HDX storage tote with the lid drilled for ventilation.
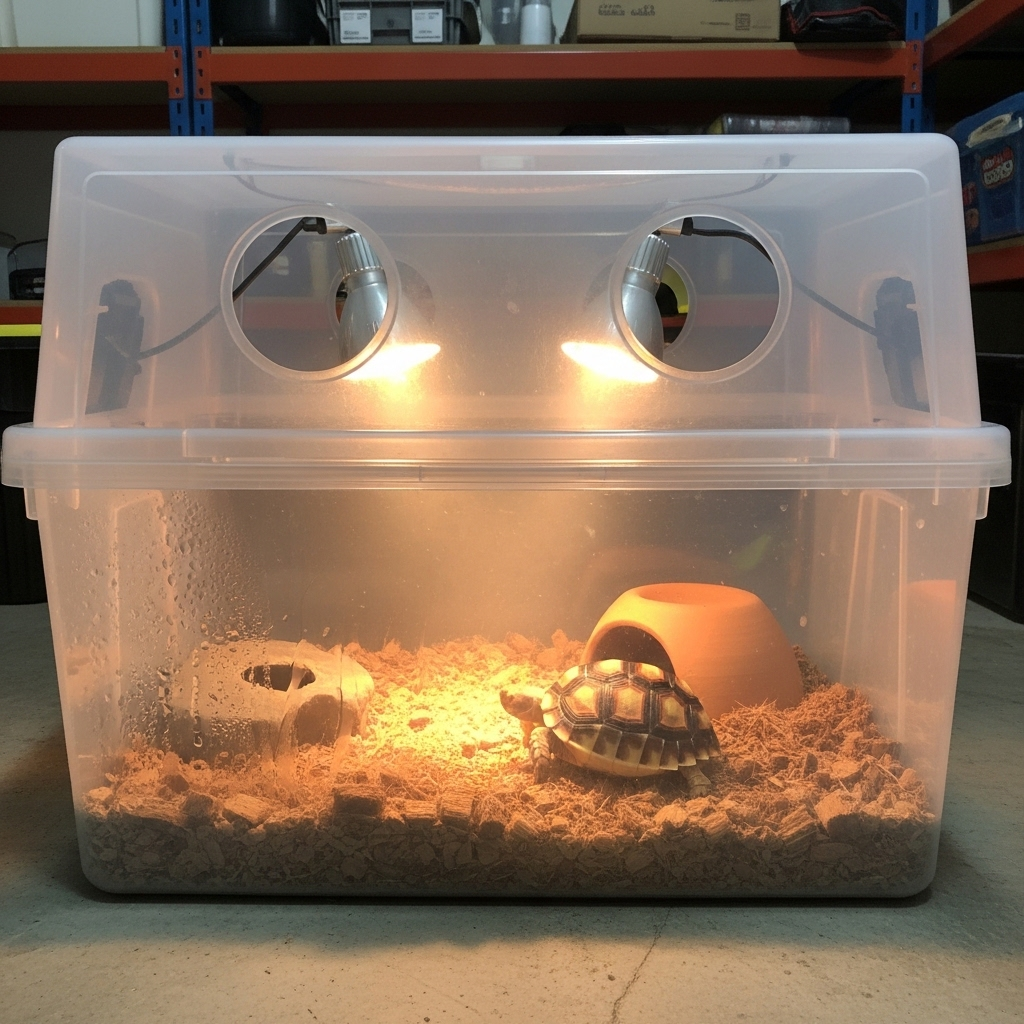
Why it works: The lid traps humidity exactly where you need it. The opaque sides reduce stress. The dimensions (around 36″ x 18″) are perfect for the first 6-9 months.
Cut a viewing window in one long side and replace it with clear acrylic if you want to watch your baby without lifting the lid. Add basking and UVB lights (my pick: Zoo Med ReptiSun 10.0) through holes drilled in the top.
Best for: Sulcata, Russian, Hermann’s, Greek, leopard, red-foot — basically every species in their first year.
This Hilarious Turtle Book Might Know Your Pet Better Than You Do
Let’s be real—most turtle care guides feel like reading a textbook written by a sleep-deprived zookeeper.
This one’s not that.
Told from the snarky point of view of a grumpy, judgmental turtle, 21 Turtle Truths You’ll Never Read in a Care Guide is packed with sarcasm, sass, and surprisingly useful insights.
And hey—you don’t have to commit to the whole thing just yet.
Grab 2 free truths from the ebook and get a taste of what your turtle really thinks about your setup, your food choices, and that weird plastic palm tree.
It’s funny, it’s honest, and if you’ve ever owned a turtle who glares at you like you’re the problem—you’ll feel seen.
2. Concrete-Mixing Tub Build
The black plastic concrete mixing tubs from any hardware store cost about $15 and measure roughly 36″ x 24″ x 8″. Cheap, indestructible, escape-proof.
Stack two and you have a closed chamber. Or top one with an acrylic lid and lighting fixture.
The shallow depth means no risk of a baby falling and landing on its back from a height. This matters more than people think. Hatchlings on their back in a tall enclosure can flip-die in under an hour if the temperature is right.
Build cost: Under $60 with lighting hardware.
Perfect Wooden Tortoise House For Outdoor & Indoor!

This tortoise house isn’t cheap — but that’s because it’s not your average wooden box.
Built with durable wood, a waterproof liner, and smart design features like a sunbathing area and a hideout zone, the Aivituvin Large Wooden Habitat is made to last.
It’s perfect for tortoises or box turtles, indoors or out. And yep, it even has detachable legs.
If you’re serious about giving your tortoise a safe, comfy home without building one from scratch, this is the one.
👉 Grab the Aivituvin Tortoise House here — it’s currently $10 off.
3. Hatchling-Sized Wooden Vivarium with Lid
If you want furniture-grade looks, build or buy a small wooden vivarium with a glass front and ventilated lid. The Aivituvin brand makes a closed-chamber version sized for hatchlings.
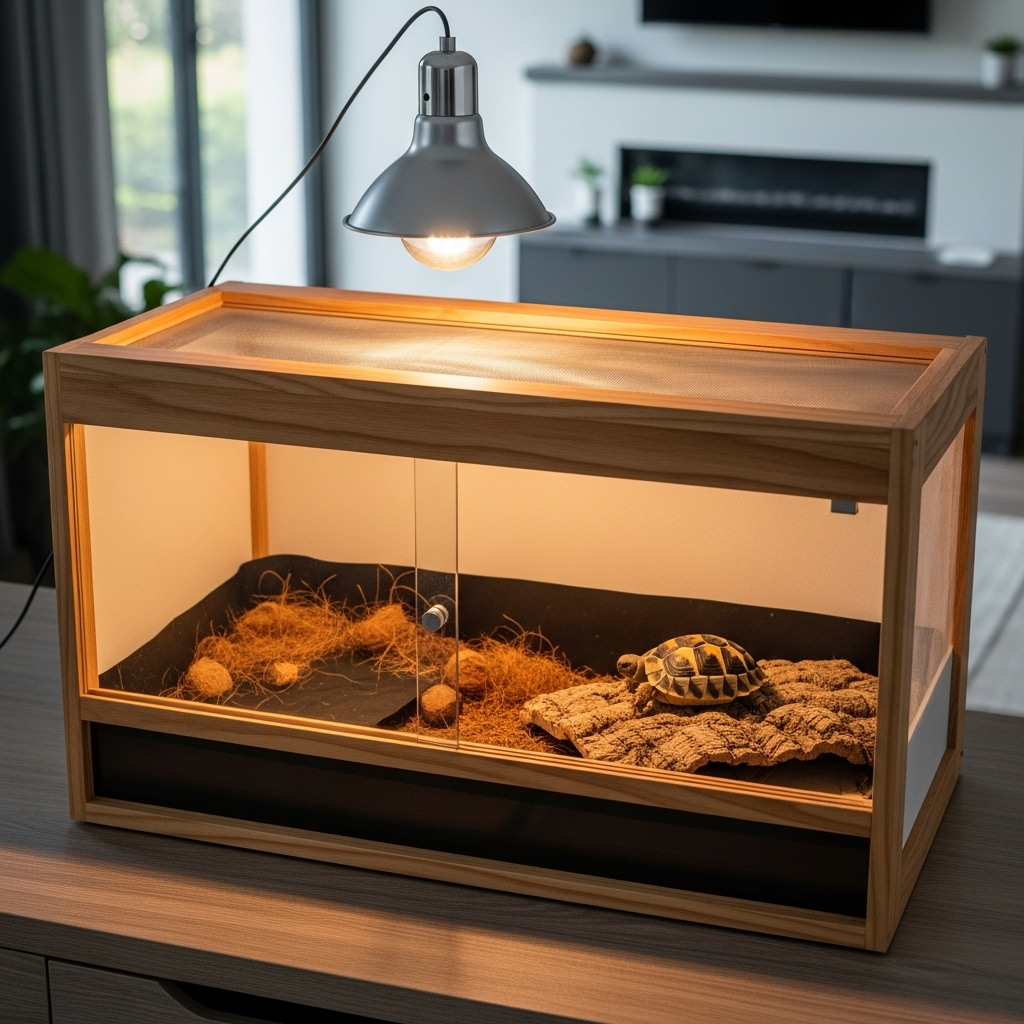
Key spec: the lid is not optional. An open-top wooden tortoise table looks great but evaporates humidity within minutes.
Line the inside with pond liner (my pick: 10x15 FT 20 Mil HDPE pond liner) or marine-grade plastic to handle the daily misting without warping the wood.
4. The Long-and-Shallow Christmas Tree Bin
Sterilite makes long, shallow under-bed storage bins originally designed for fake Christmas trees. They run around 41″ long, 14″ wide, 6″ tall.
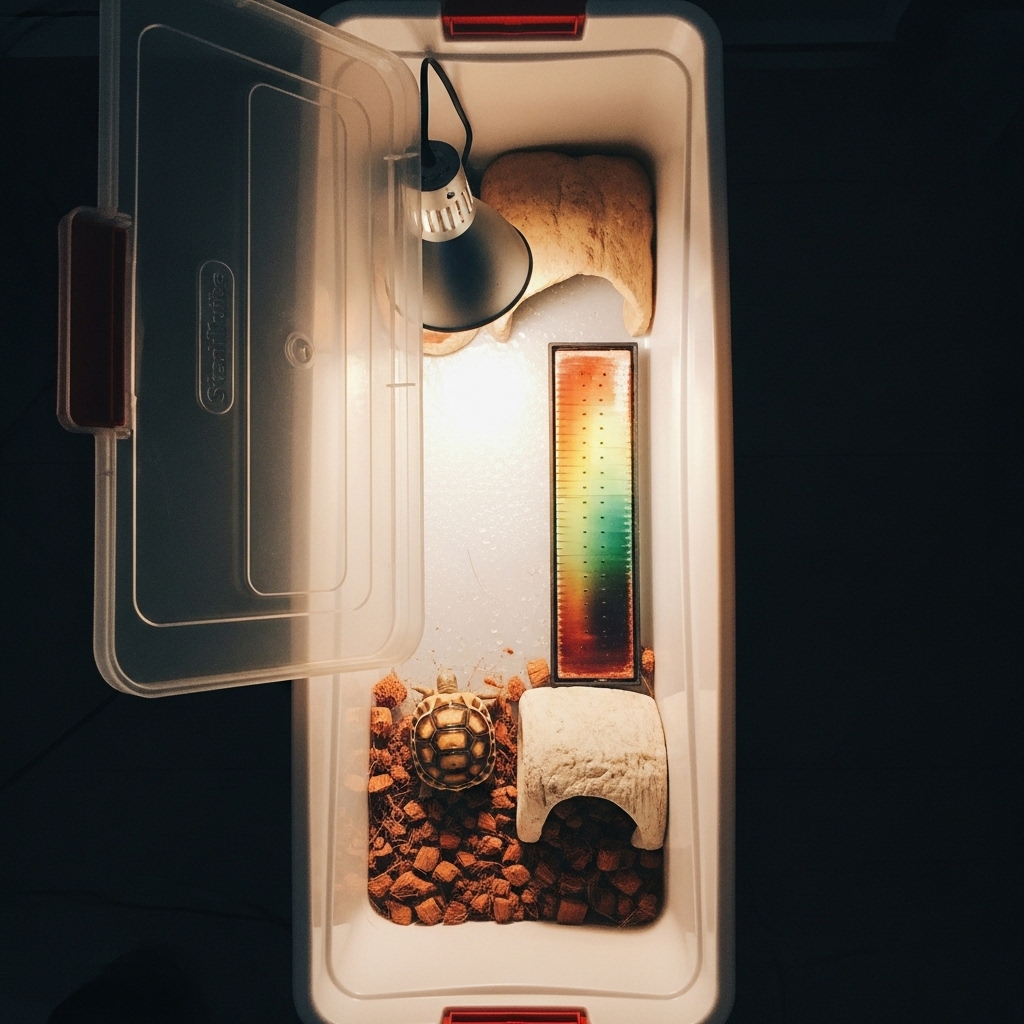
That long and narrow shape is gold for hatchlings. It gives you a clear temperature gradient — basking on one end, cool hide on the other — without wasting floor space.
The low walls keep you within “won’t injure if flipped” territory but are still 3-4 times your hatchling’s height. Add a clear plastic lid and you have a humid chamber for under $40.
5. Glass Aquarium with Three Opaque Sides
Standard glass aquariums get a bad rap and for good reason. Hatchlings see their reflection in clear glass on all four sides and stress-pace the perimeter for hours.
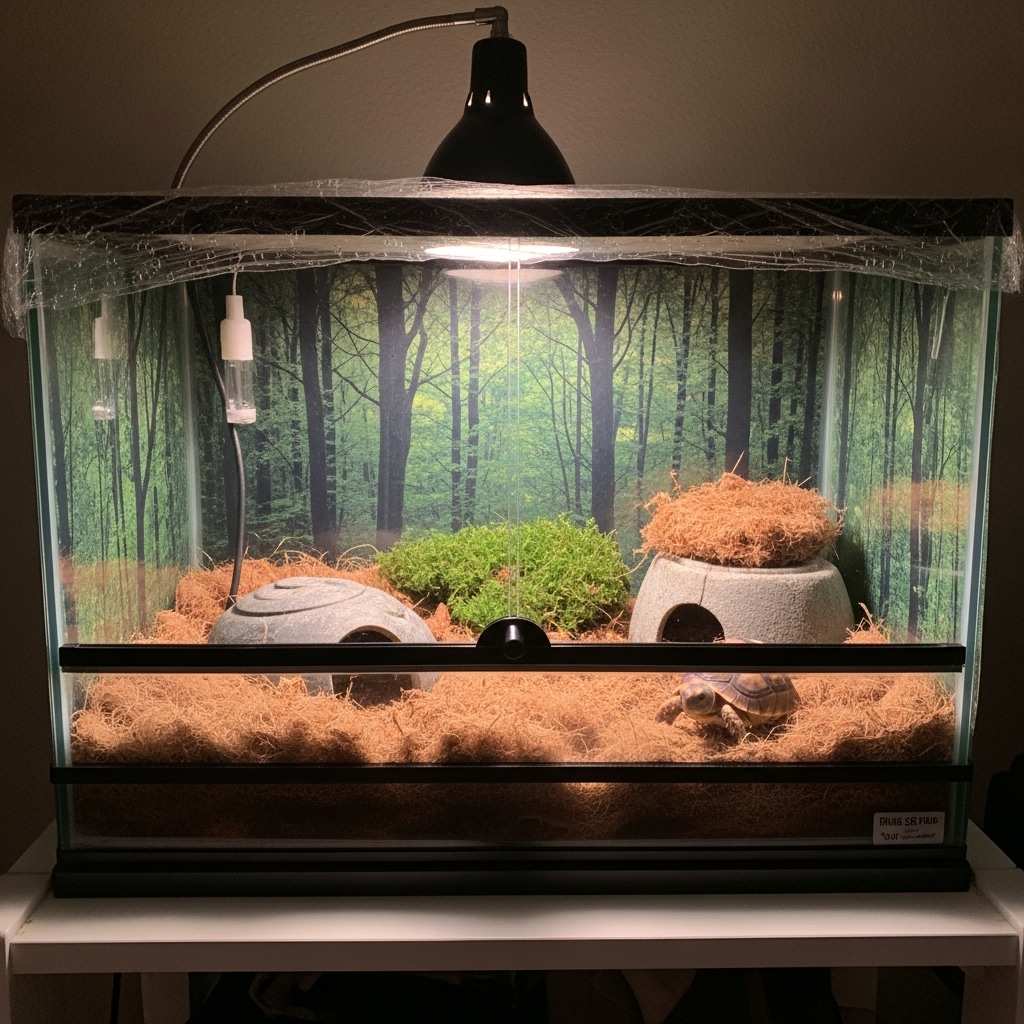
Fix this by covering three sides with black contact paper or aquarium background. Now you have a closed visual environment with one clear viewing side.
A 40-gallon breeder tank (36″ x 18″ x 16″) with a screen-and-plastic-wrap covered top works well for tropical hatchlings like red-foots and stars that need extra humidity.
6. Greenhouse-Style Tropical Enclosure
For tropical species (red-footed, yellow-footed, star, elongated), you can build a mini-greenhouse using a clear plastic indoor seed-starting tent.
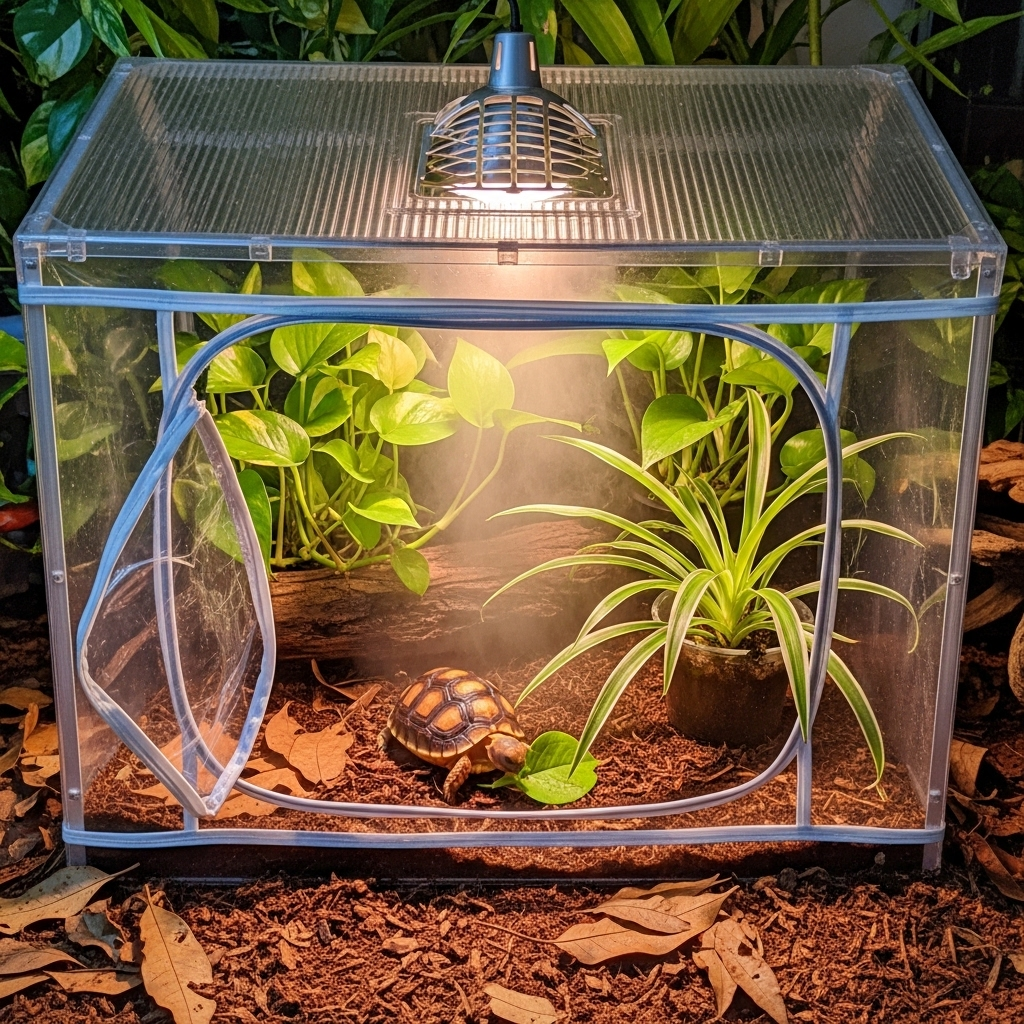
These run about $40-80 and come with adjustable vents, shelving racks, and zippered doors. Drop a shallow enclosure inside, add a basking spot through the top vent, and you have a humid jungle that mimics their natural habitat.
Live plants like pothos and spider plants thrive in there and your baby will graze them.
7. Repurposed Bookshelf Laid Sideways
If you have an old IKEA Kallax or similar shelf unit gathering dust, lay it on its back. Each cube becomes a roughly 13″ x 13″ hatchling chamber.
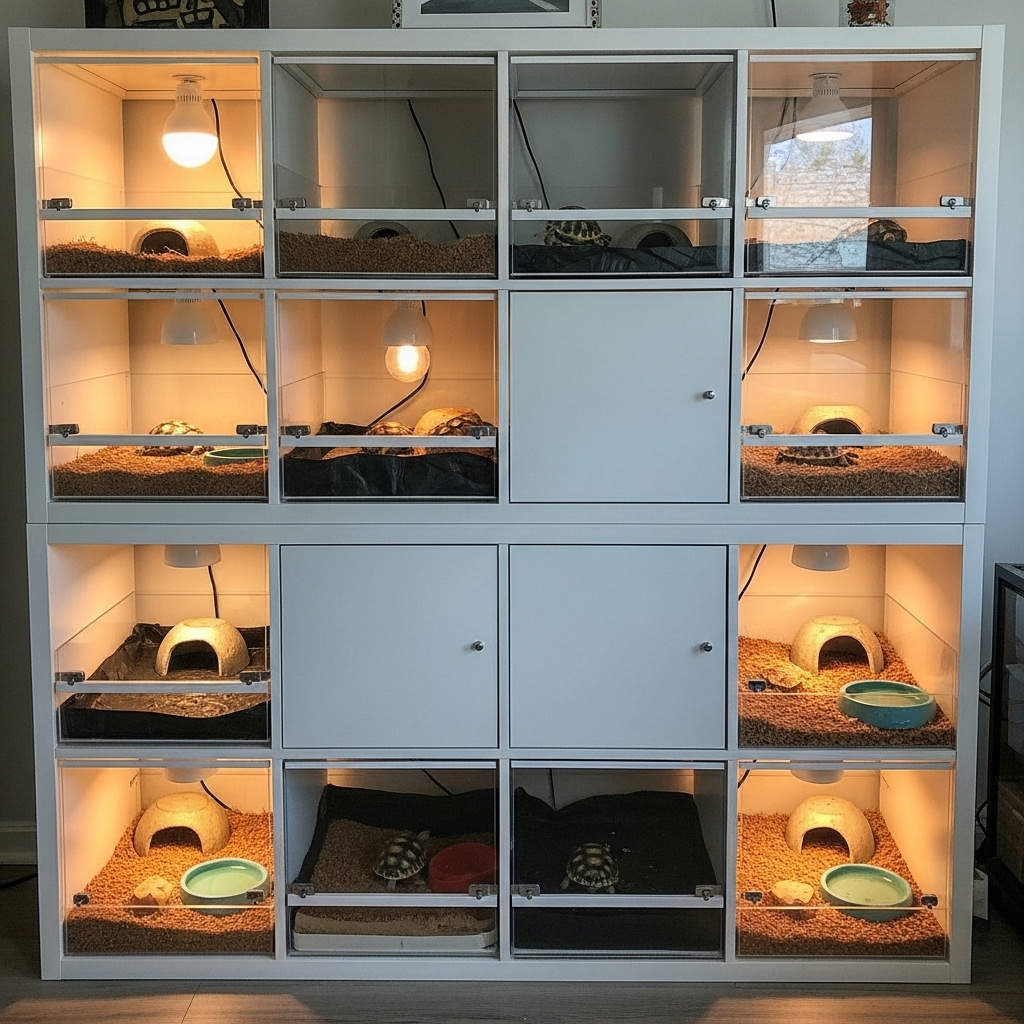
Line each cube with pond liner, add a glass or acrylic front (sliding closet door tracks work perfectly), and you have a stacked nursery setup that doubles as furniture.
This is the budget keeper’s secret weapon. Total build cost is whatever you spend on liner and acrylic — often under $50 for a 4-cube setup.
8. PVC Frame and Plastic Sheet Chamber
The full DIY route. Build a frame with 1/2-inch PVC pipe, stretch heavy plastic sheeting (the 6-mil stuff from the painting aisle) around it, and seal the seams with aquarium-safe silicone.
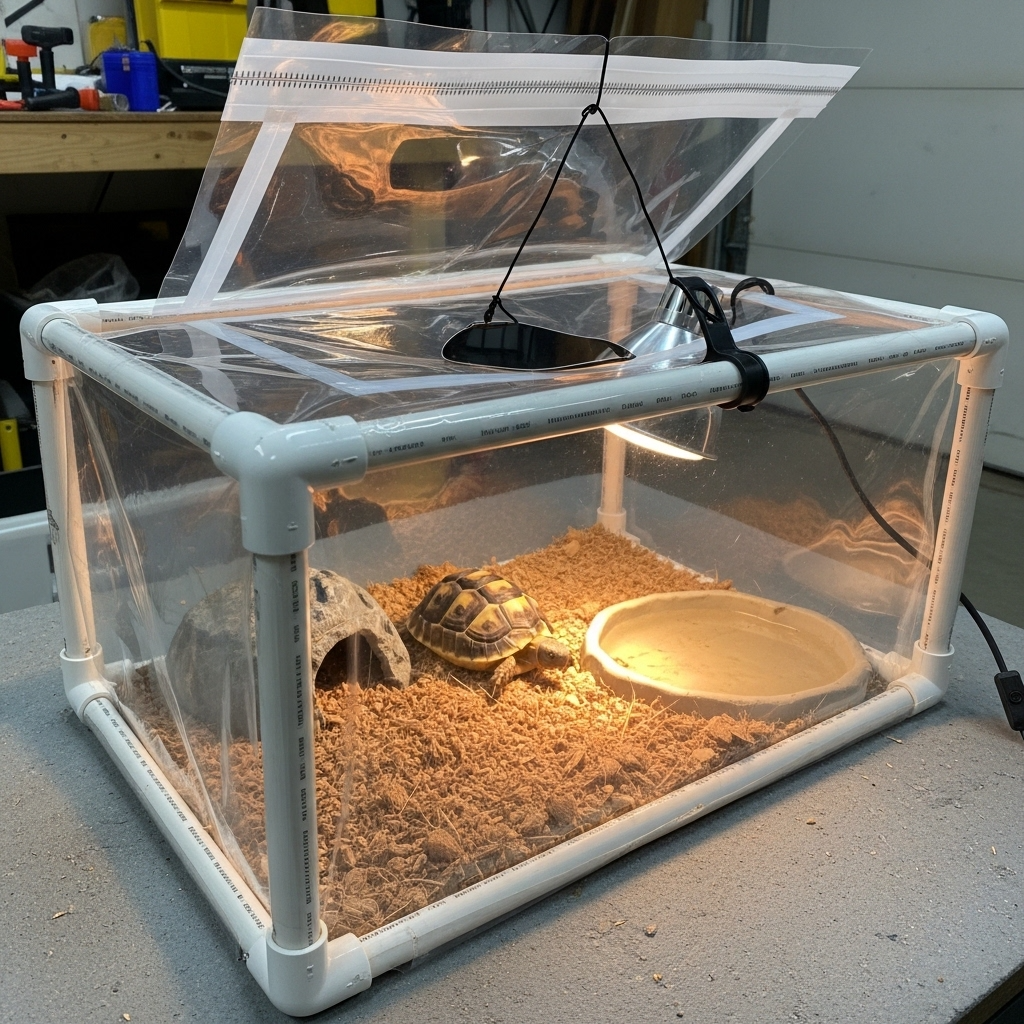
You get total control over dimensions, you can build it to fit any odd corner of your home, and the whole thing comes apart for cleaning.
Total cost: about $30 in PVC and another $15 in sheeting. Add zip-tie hinges for an access flap on top.
9. Hatchling Outdoor Day Pen (Supervised Only)
Hatchlings benefit massively from natural UVB. But you cannot leave a baby tortoise outside unsupervised — ever. Birds, rats, raccoons, neighborhood cats, and even large lizards will kill a hatchling in minutes.
Build a small outdoor pen for daytime supervised grazing. A 24″ x 36″ wooden frame with hardware cloth on the bottom AND a fully mesh top is the minimum.
Key specs:
- Bottom mesh prevents the baby from digging out
- Top mesh prevents bird strikes
- A solid corner hide blocks direct sun
- A shallow water tray (chin-depth max)
This is a supplement, not a primary enclosure. Bring them in before dusk.
10. The Multi-Hatchling Nursery Rack
Breeders and people raising multiple hatchlings from the same clutch can build a rack system using a wire shelf and stacked plastic tubs.
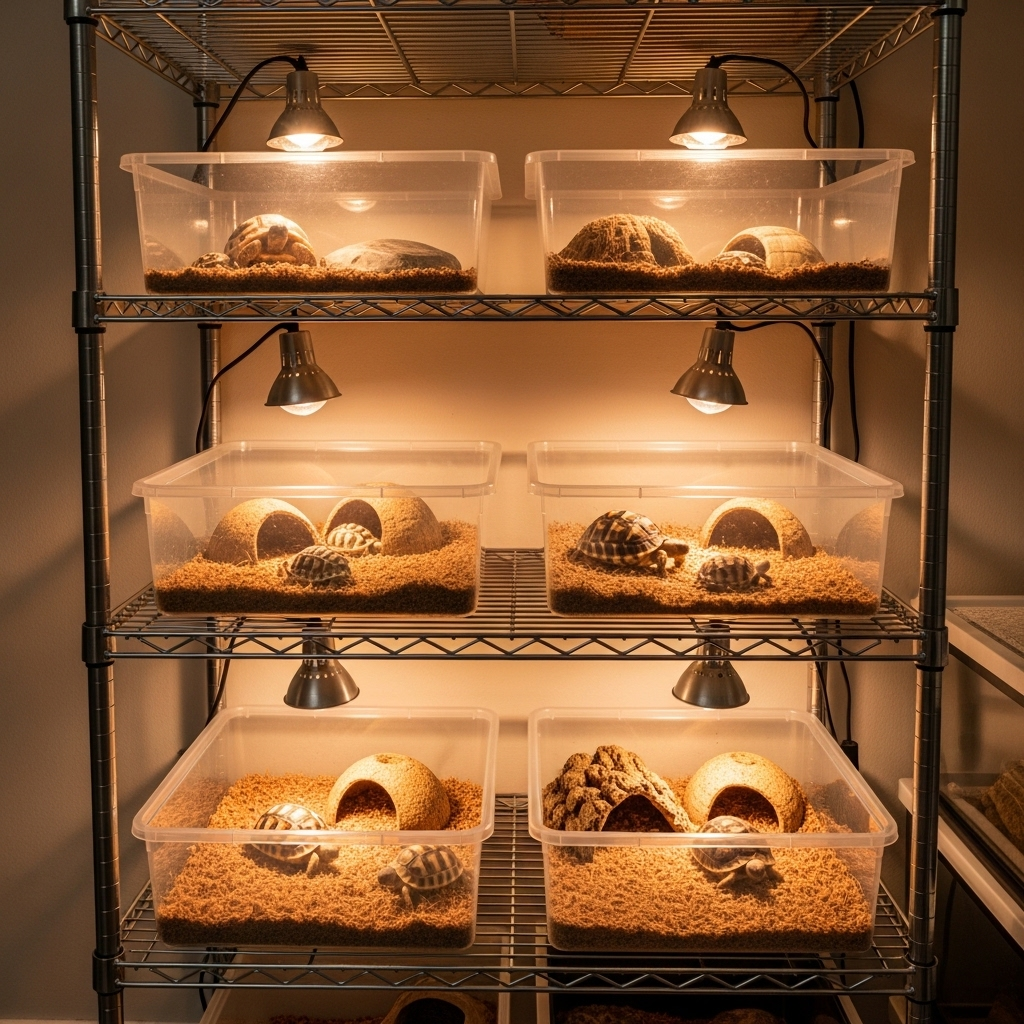
Each tub gets its own basking light, UVB tube, hide, and substrate. The rack design lets you keep 4-8 hatchlings separately (which prevents bullying and lets you monitor individual eating habits) in the footprint of a single shelf unit.
Hatchlings should be housed individually whenever possible. Cohabitation leads to dominance issues, food theft, and slow growth in the bullied baby.
Quick Sizing Reference by Species
Here’s roughly what your hatchling needs in floor space during the first year. Bigger is always better, but these are minimums.
| Species | Hatchling Size | First-Year Min Enclosure |
|---|---|---|
| Sulcata | 1.5-2.5″ | 36″ x 24″ (upgrade quarterly) |
| Russian | 1-1.5″ | 36″ x 18″ |
| Hermann’s | 1-2″ | 36″ x 18″ |
| Greek | 1-2″ | 36″ x 18″ |
| Red-footed | 1.5-2″ | 36″ x 24″ (tropical humidity) |
| Leopard | 1.5-2″ | 36″ x 24″ |
| Star | 1-1.5″ | 36″ x 18″ (tropical humidity) |
Sulcatas in particular grow shockingly fast. A 2-inch hatchling can be 6 inches by its first birthday. Plan for the upgrade now, not later.
Critical Mistakes to Avoid
Before you go build something, here are the five mistakes I see new hatchling owners make every single week.
Using soil as substrate.
Garden soil compacts, harbors mold, and is often treated with fertilizer. Use coconut coir, fine orchid bark, or a coir-and-cypress-mulch blend instead.
Using incandescent basking bulbs.
They desiccate the carapace and cause pyramiding. Use a halogen flood or a proper ceramic-coated reptile basking bulb (my pick: Zoo Med PowerSun).
Skipping daily soaks.
Every hatchling, every species, every day. 85-95°F water deep enough to cover the bottom of the shell, for 20-30 minutes. This is non-negotiable.
Open-top setups.
Already covered. Don’t do it. Lid or closed chamber, always.
Buying an adult-sized table too early.
A hatchling in a 4’x8′ table will hide in one corner and never bask properly. Match the enclosure to the tortoise’s size, not its species’ eventual adult size.
When to Upgrade
Most hatchling enclosures last 6-12 months before they need to be replaced or expanded. Watch for these signs:
- Your tortoise can turn around but can’t take more than 3-4 steps in any direction
- The basking spot and cool side are too close together (no real gradient)
- You can’t fit a proper hide, water dish, and food dish without overlap
- The tortoise is climbing or pacing more than usual
When you outgrow the hatchling setup, the next stop is usually a proper tortoise table or a species-appropriate adult enclosure. Plan for that day from the beginning so you’re not scrambling.
Your baby tortoise has 50-150 years ahead of it depending on species. The first year of good husbandry sets the tone for all of them. Get the enclosure right and you’ve already won most of the battle.

About Author
Muntaseer Rahman started keeping pet turtles back in 2013. He also owns the largest Turtle & Tortoise Facebook community in Bangladesh. These days he is mostly active on Facebook.